Comparing Snapshots and Viewing Data Differences
Skyvia supports comparing snapshots and viewing and undoing the data differences between them. If a backup contains more than one snapshot, when you view details of a snapshot or view data of one of the backed up objects, you can see the All and Changed buttons above the grid. The snapshot must not be the oldest snapshot of this backup. The All view displays the backed up data. The Changed view allows you to compare data in different snapshots and see changes between them.
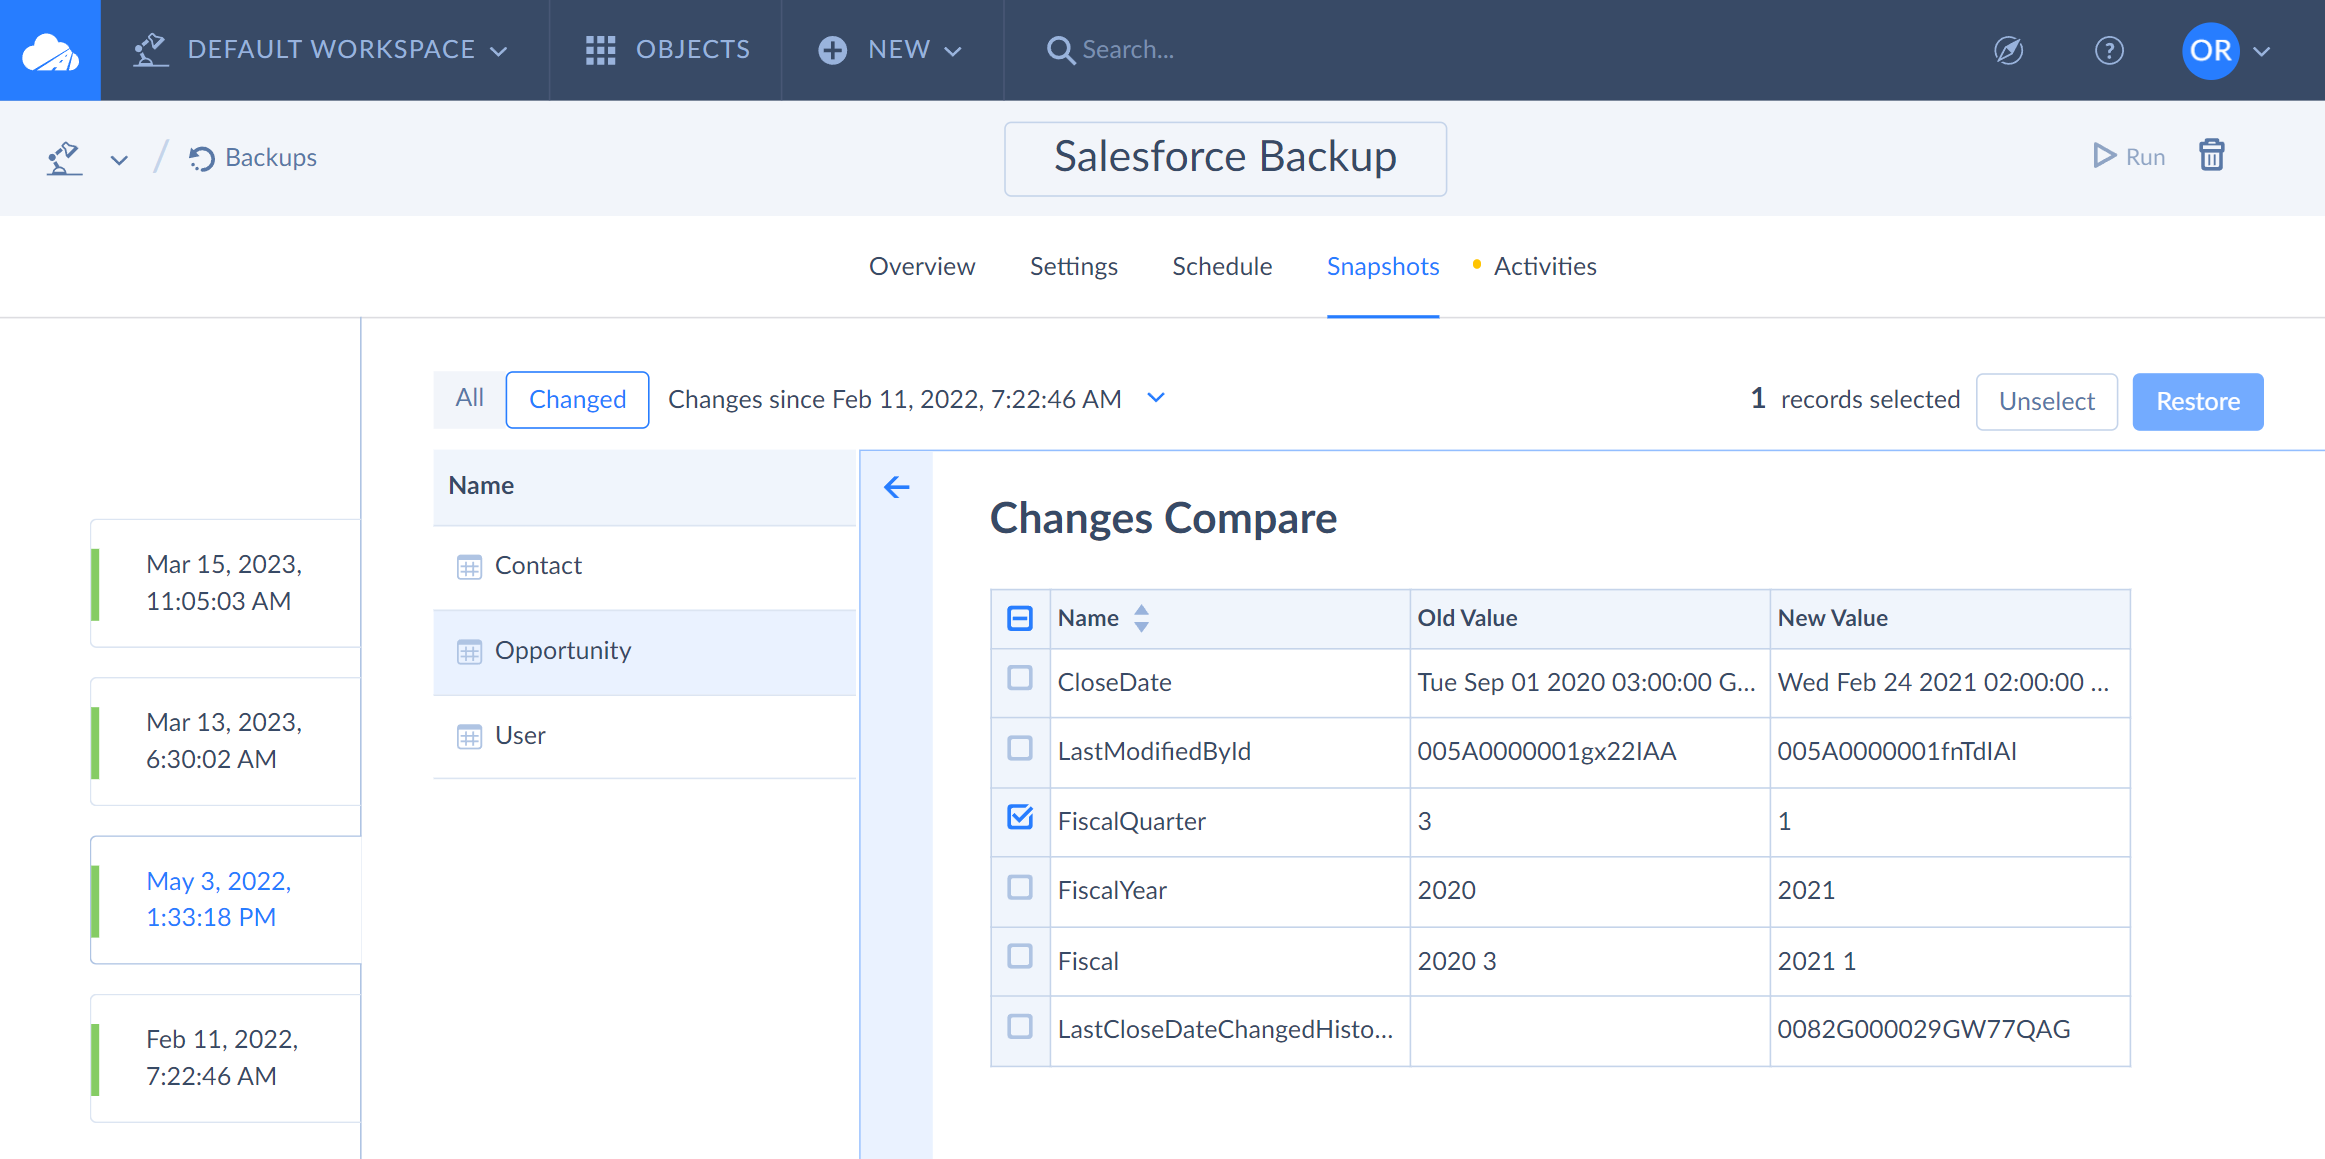
The Changed view displays the numbers of changed (inserted, updated, and deleted) rows per backed up object when viewing snapshot details, and it displays the data changes between the compared snapshots in the current object when viewing object data.

Selecting Snapshots to Compare
By default, the Changed view displays data changes from the previous snapshot. Next to the Changed button, you can see the date and time of the snapshot with which the current snapshot is compared. Click the down arrow to the right of this date and time to select another, older snapshot if necessary.
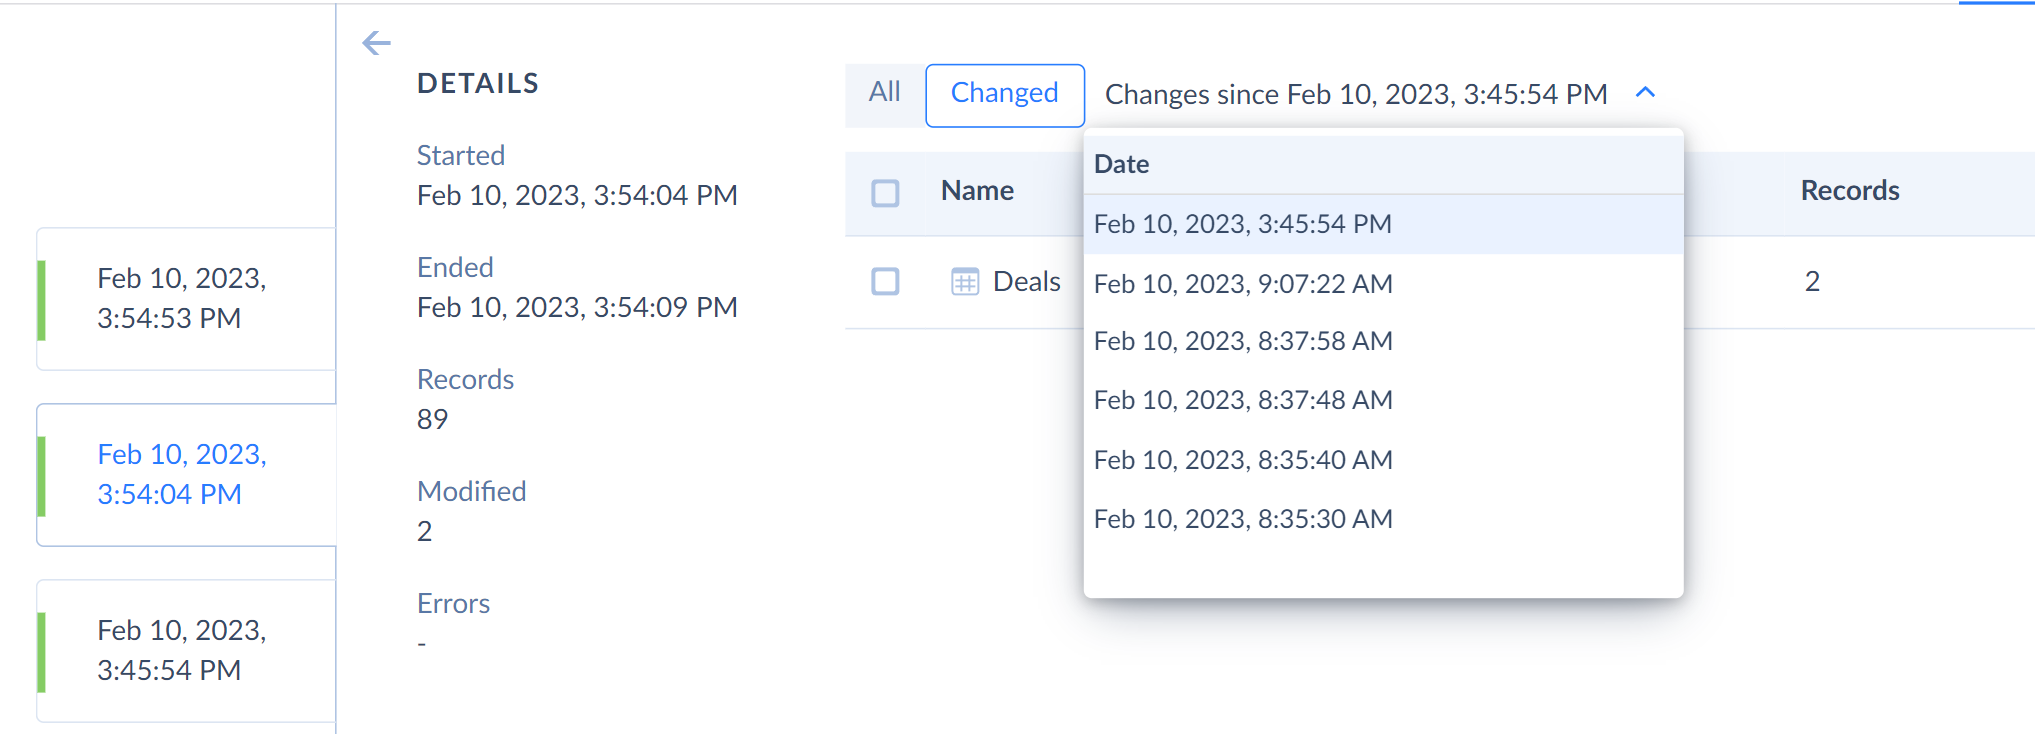
This list only displays snapshots on the Snapshot tab before switching to the Changed view.
If you want to compare a snapshot with a very old one, ensure both snapshots are present in the selected period on the Snapshots tab. Then scroll down till you see the older snapshot, open the newer snapshot, and click the Changed button.
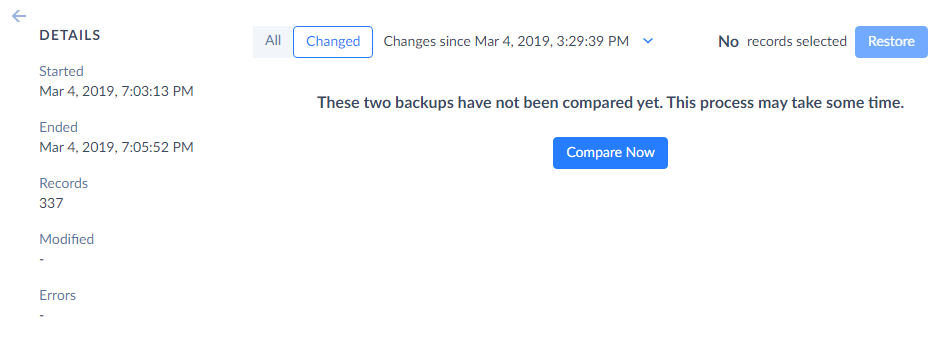
If you have never compared this snapshot pair, the corresponding message will be displayed. Click the Compare Now button to compare snapshots. It can take some time if a lot of data is backed up.
If source column names have changed between snapshots, the Compare operation will not run. You will see a 'No changed objects' message
Record States
When you view the changed records since the second compared snapshot, the State column displays the record's status — whether it was added, deleted, or updated between snapshots. It can have the following states:
 — The record is not present in the older snapshot but is present in the newer one.
 — the record is present in the older snapshot and not present in the newer one.
 — the record is present in both snapshots, but some of its fields were changed.
For updated records () you can see the changed fields on the Record Preview Page. To do this, open the record details.
Undoing Data Changes
When comparing snapshots, you can select checkboxes for the data changes and then click Restore to undo them. Thus, you can compare two snapshots and then select and undo changes between them. The operation to apply is selected automatically.
For added rows (marked with
For deleted rows (marked with
For updated rows (marked with
For updated records () you can select and undo the separate field changes. To do this, click the Select Fields link in the Action column and select the fields to restore.
Thus, for example, to undo the recent changes you can create a fresh snapshot, compare it with one of the previous snapshots, select the changes you want to undo and click Restore. This can be useful when you want to revert data in some or all of your cloud objects to some previous state. In order to do it, you will need to make a new snapshot of the current state of the data, compare this snapshot with the snapshot for the point in time you want to restore the cloud data to, select the changes you want to undo (or all the changes, if you want to restore the cloud application to the previous state completely), and click the Restore button. More details are available in the Restoring Data topic.
You can also use this functionality when you need to perform a mass data update or import to your cloud application and want to ensure that this operation won't break anything. In this case, create snapshots before and after the operation, compare them, and analyze the data changes. If you don't like them, you can select and undo them.