User Interface Basics
Skyvia interface offers an easy object creation, its fast execution and convenient location. The advanced navigation and various filtering options are also an advantage. You can easily switch between objects, filter objects by categories, display objects in different views, make changes to objects, delete and restore them (if necessary). In this topic, we briefly describe the basic interface functionality of Skyvia.
Login to Skyvia
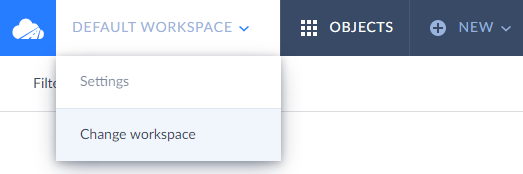
When you sign in to Skyvia, you are automatically dropped into your Skyvia default workspace, which you receive during your registration in our platform. If later you create another workspace or you are invited to the account and workspace of another user or company, you can select one of the available workspaces to set it to default. When next time you log in to Skyvia, you will be dropped into this workspace automatically. After you finish working with one workspace, you can anytime change the current workspace for another one. For this, click the Workspace drop-down list and select Change workspace from it.
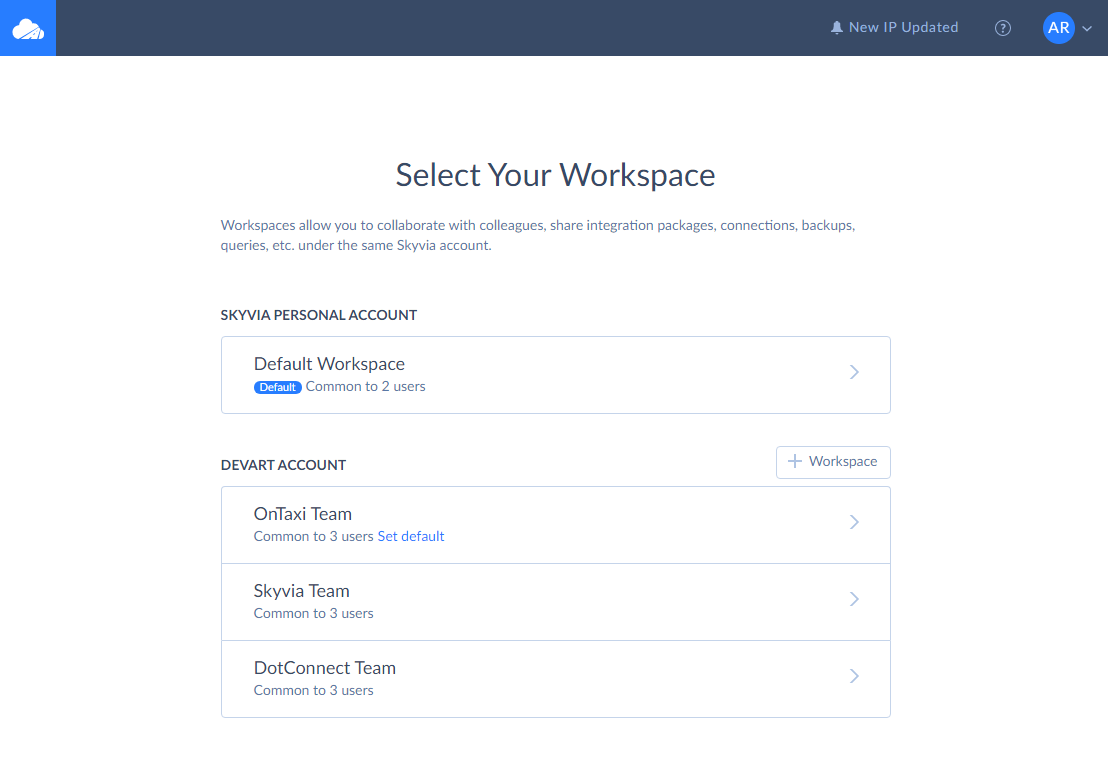
You will appear on the Select Your Workspace page, which contains your default account and accounts you were invited to as well as your default workspace and other workspaces you were assigned roles in. Select a workspace you want to work with from the list.
New Objects in Skyvia
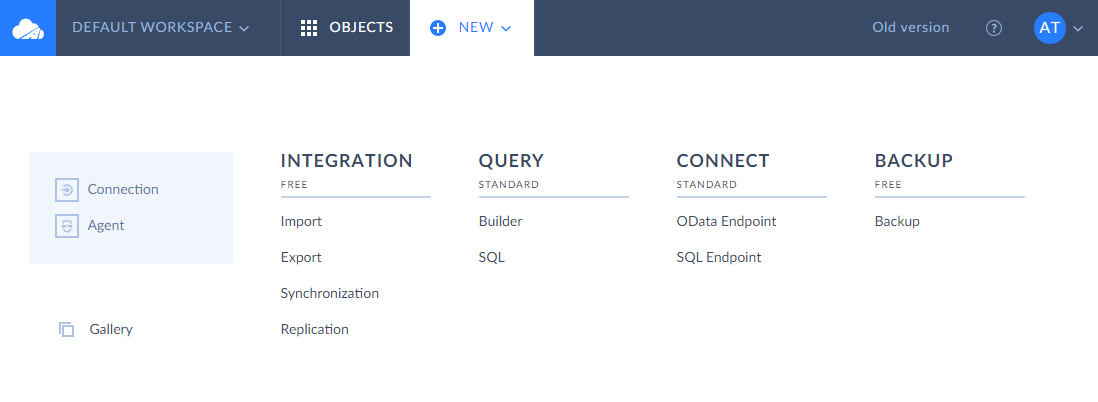
You can create any new object in Skyvia via the +NEW menu. The Skyvia Gallery with common use cases is also accessible via the +NEW menu. A number of new objects, you create in Skyvia, can be unlimited, mostly it depends on the pricing plan you or your company subscribed to. More info about subscriptions you can find in the Subscriptions, Payment and Trials topic.
To create a new object, click +NEW in the top menu and select product options in the columns.
Please note that there are two different approaches of creating a new object in Skyvia — through Wizard or through Editor. Find examples of these approaches below. Please also note that after you have created a new object, you can rename and make changes to it.
Creating Objects in the Convenient Wizard
Backups and Endpoints in Skyvia are created in Wizard through a series of well-defined steps. The steps slightly differ for backups and endpoints. In the Skyvia documentation, we will consider creating an OData Endpoint as an example.
After you have selected an OData Endpoint in the +NEW menu and the mode you would like to use — Simple or Advanced, you are transferred to the OData Endpoint Wizard page, which looks like below.
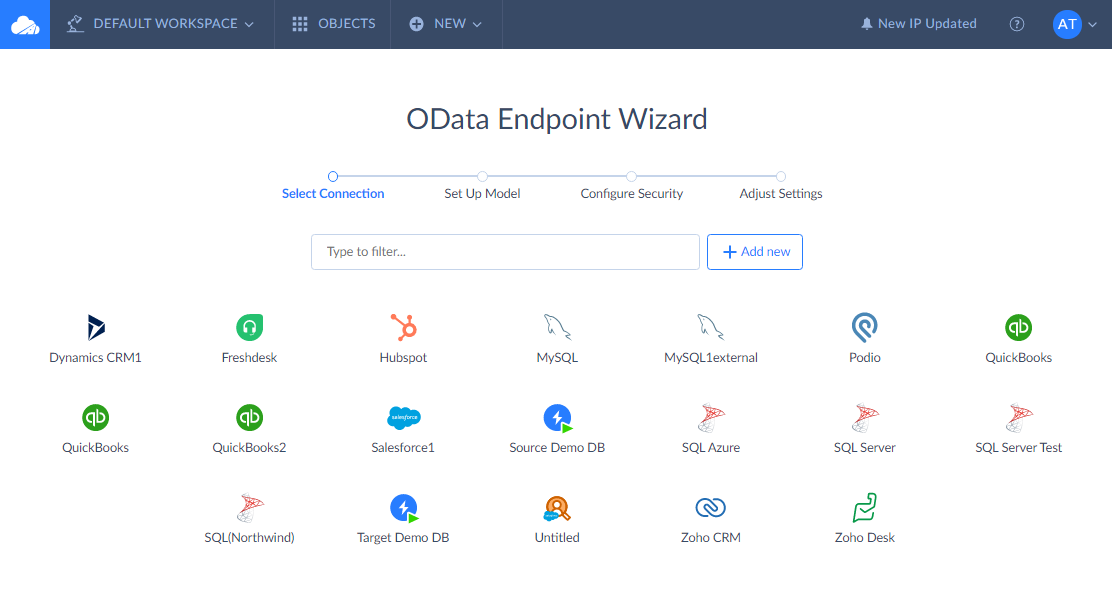
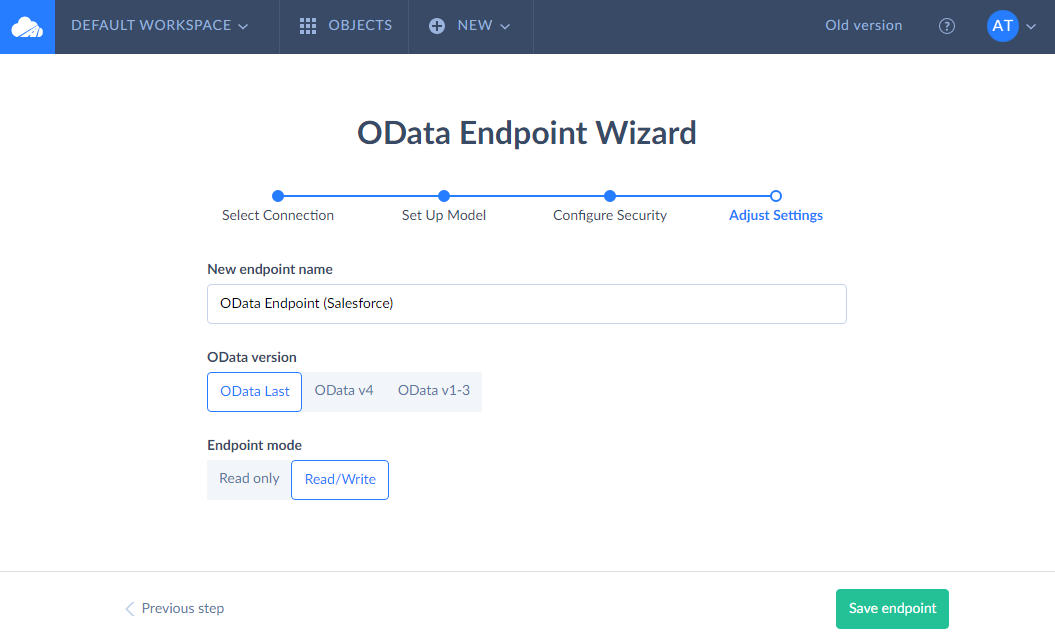
The Wizard’s four steps include selecting connection, setting up model, configuring security and adjusting settings. On the first step, you select an existing connection or create a new one by clicking +Add new button. Then you define the endpoint model by selecting the objects to publish. When configuring endpoint security settings, you can optionally allow only authenticated users to access endpoint data and optionally limit IP addresses, from which the endpoint data can be accessed. On the last step, you specify the endpoint name and adjust other settings. After you have completed all four steps, the OData Endpoint is created. You can read more about endpoints in the Connect product.
Creating Objects in the Convenient Editor
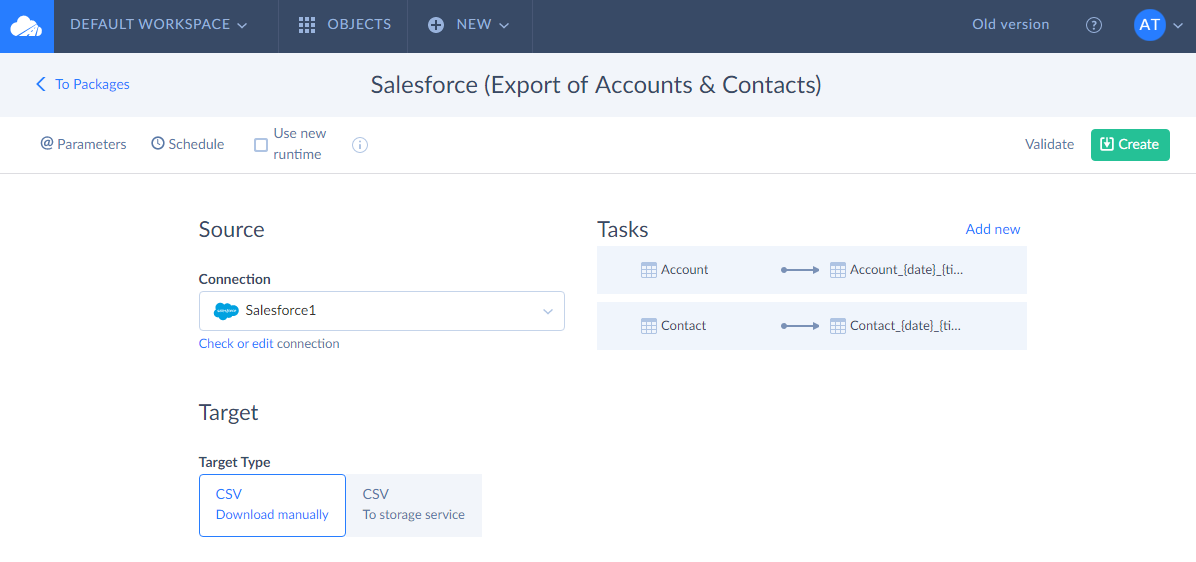
Integration Packages and Queries in Skyvia are created in the convenient Editor. The procedure of creating a new object in the Editor is more or less standard. In the Skyvia documentation, we will consider creating an Export Package as an example.
First, in the package editor, you should specify a source connection you load data from and a target connection you load data to. Second, you create task(s) with objects you want to export. In our example, we have selected Account and Contact objects to be exported as CSV files. Please note that the procedure for creating tasks within the package is different for each package type. Read more about it in the Data Integration section in the corresponding topic. Third, you can optionally schedule your package for automatic execution. After you have specified all the data, you can create a package.
Viewing or Editing Newly Created Objects
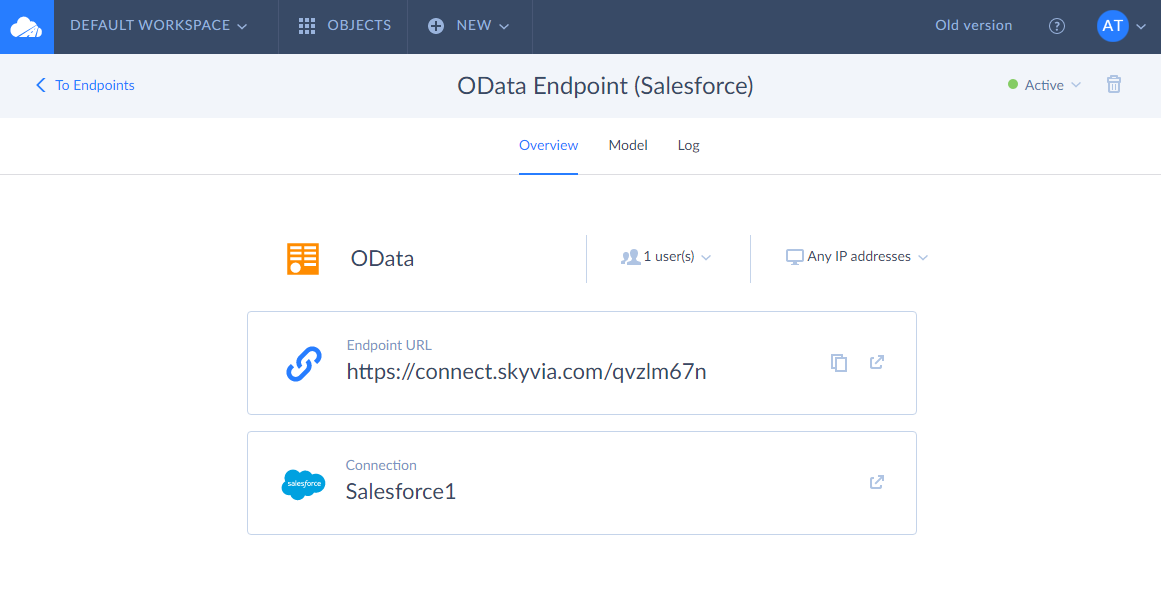
Let us consider an OData endpoint as an example of newly created object. After you have created it, the page with endpoint details opens automatically. The page consists of three tabs: Overview, Model, and Log. You can immediately copy the endpoint URL and use it in your OData consumer applications.
On the Overview tab, you can view and edit the created connection, modify endpoint security by clicking the down arrow buttons near the information about users and IP addresses.
On the Model tab, you can add or remove entities, configure them, edit associations between them (if the endpoint was created in Advanced mode), change the default OData version and endpoint access mode from the toolbar. The changes are immediately applied when you click the Save button on the toolbar.
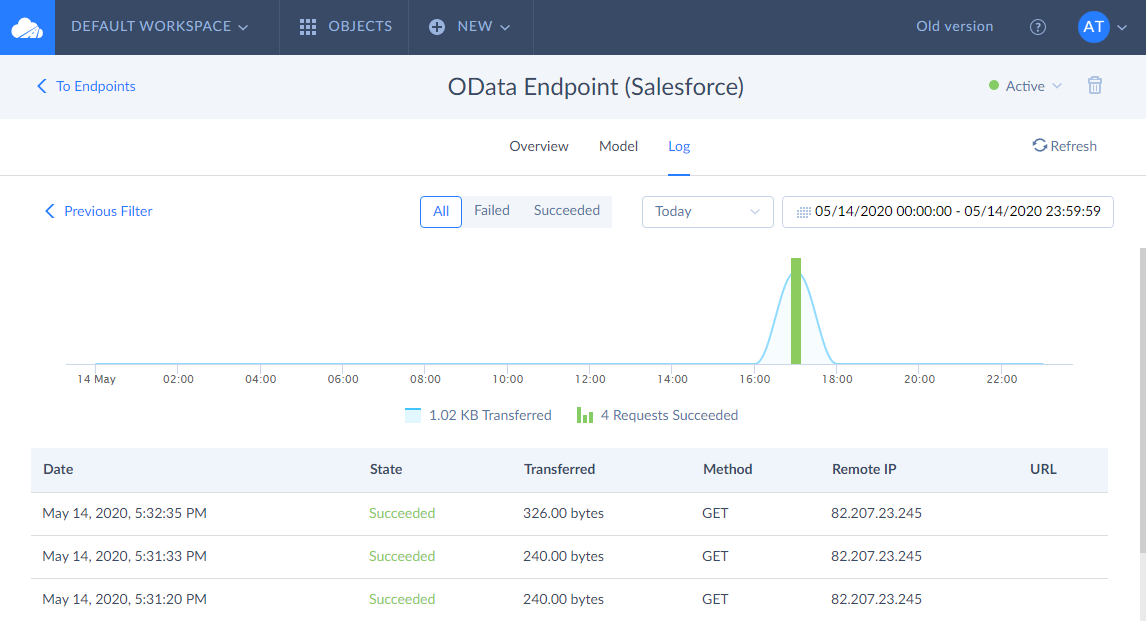
On the Log tab, you can monitor all the endpoint requests. Read more information about logs below.
All Objects in Skyvia
On the OBJECTS page, you can find everything that you created in Skyvia — agents, connections, data integration packages, backups, endpoints, queries, etc. The All tab displays all objects together on the page. By clicking other tabs in a row, you сan group objects by certain products, by connections and agents.

Skyvia objects can be displayed differently on the page depending on the selected view. To select a certain view, click  on the toolbar on the right. You can select Grid view or List view, with or without grouping.
When you select Grid view or List view, the objects are displayed all together as grid or as list in an alphabetic order by their names.
When you select Grid view with grouping or List view with grouping, all objects are grouped by categories — agents in the Agents group, connections in the Connections group.
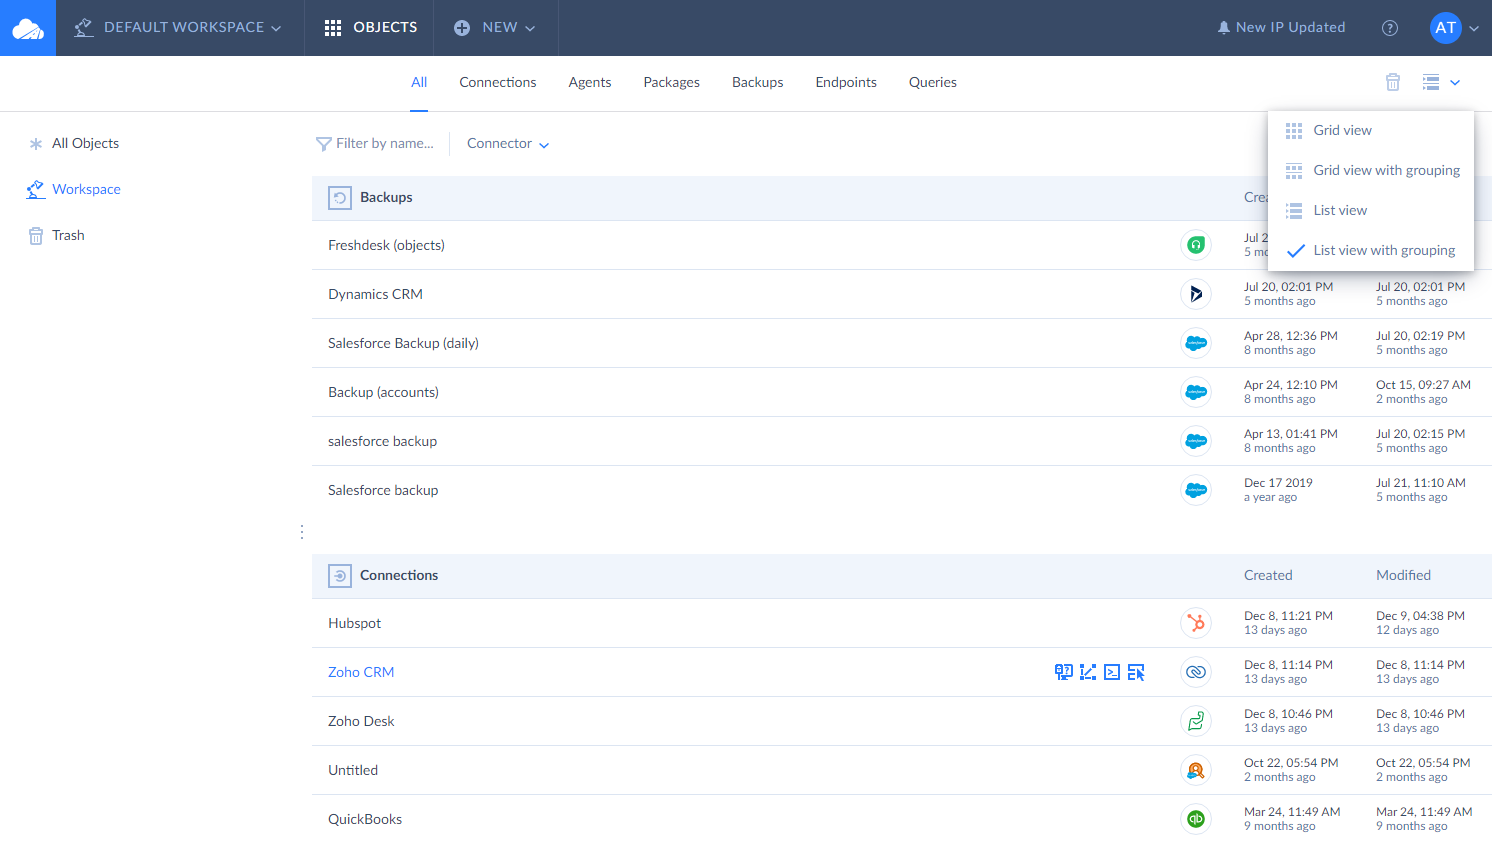
Whether in the Grid view or in the List view, the displayed objects share common interface elements such as object names, object kinds, connectors used, creation and modification dates.
Managing Object List
When you hover over a certain object in the list, Skyvia displays Quick Action buttons of this object. The quick action buttons are different for different object kinds. The quick action buttons allow you to work with objects immediately, for example to test a connection or open an integration package log. Besides that each Skyvia object has common interface elements such as object name, object kind, connector used, creation and modification dates.
When you click on the name of a certain object (backup, query or any other) in the object list, Skyvia displays its details, allowing you to edit this object or view its additional information. Object details are different for different kinds of objects.
Sorting and Filtering Objects
Skyvia offers several ways to help you quickly find the necessary objects in the object list. You can add various filters or sort objects by a number of parameters. Please note that this advanced filtering and sorting functionality is available when you display only a specific object kind: only packages or only backups, etc. It is not available when you view all the objects on the All tab.
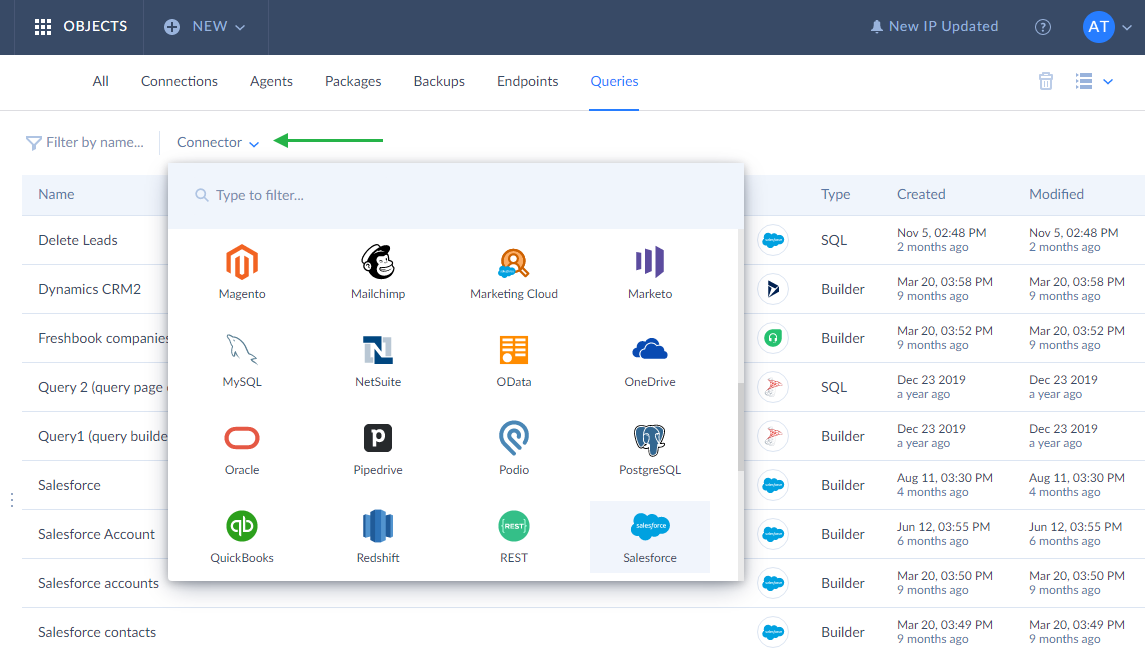
Connections, Queries
You can filter both connections and queries by their names, using the Filer by name box, or by the used connector, selecting it in the Connector drop-down list. Sorting functionality is not foreseen for connections and queries.
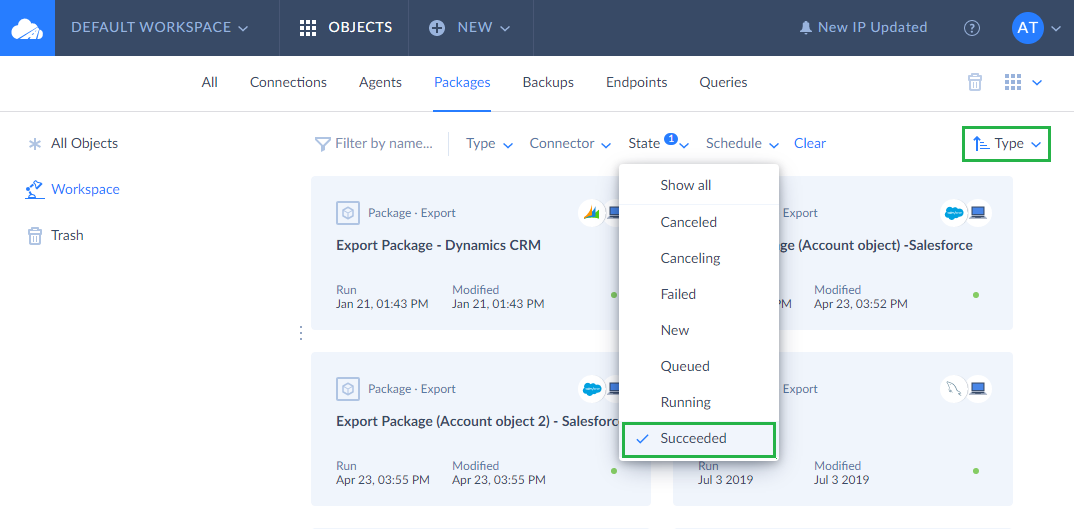
Data Integration Packages
You can filter and sort packages by a number of parameters. Skyvia interface allows filtering packages by package type (import, export, synсhronization, etc.), by connector (Salesforce, Dynamics, Podio, etc) and package state (new, succeeded, failed, etc.). You can also distinguish which packages scheduled for automatic execution and which are not by applying the Schedule filter.
We have also added the ability to sort a package list by the newly added parameters: package name, type, state, latest package run and modification date.
Endpoints
Endpoints can be filtered by their types (OData/SQL), state (active/inactive) and connectors used. On the Endpoints tab, you can view endpoint token, status, and information on endpoint security both in the grid and list views. Security icons show what kind of access each endpoint has — private or public (with or without authentication/IP restrictions). You can also sort endpoints by a number of parameters by clicking the Unsorted drop-down list on the right.
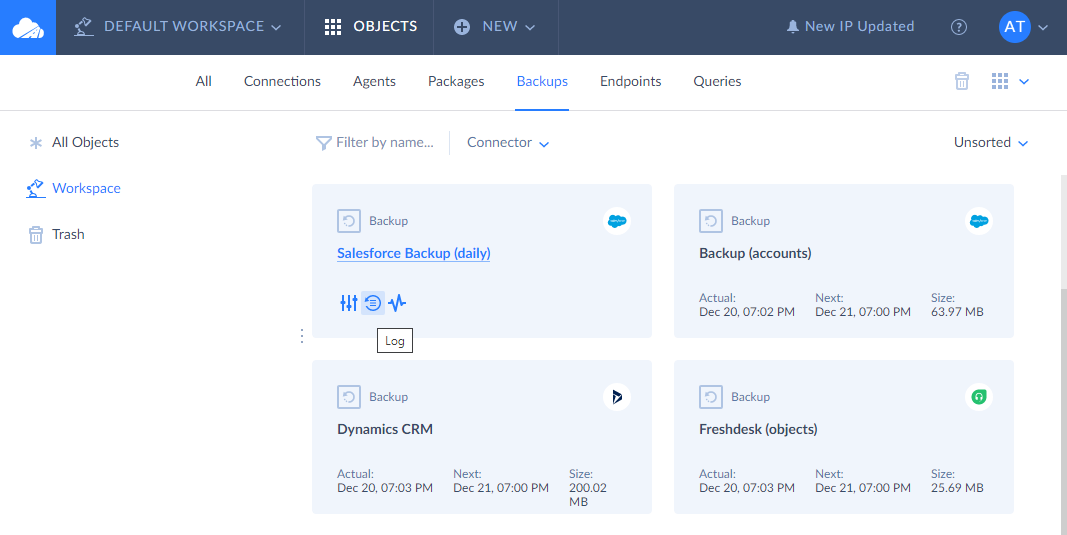
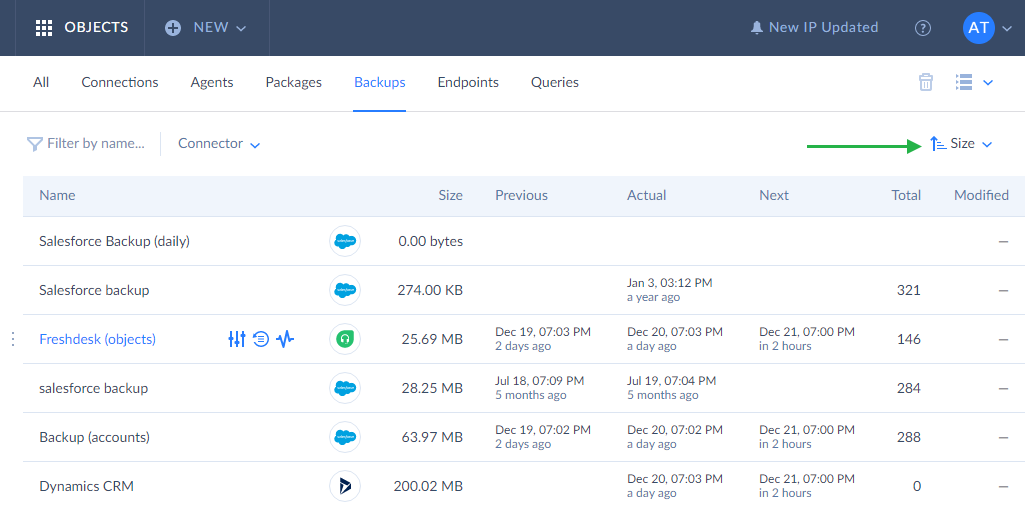
Backups
Backups can be filtered either by their names or by the used connectors. You can also sort backups by a number of parameters including their size. When viewing a list of backups, you can immediately see how much space each backup consumes, determine which backup takes the most space and clean it if necessary. You can also check when the most recent snapshot was made, and when the next snapshot is scheduled.
In the list view, Skyvia additionally displays the number of totally backed up records and the number of records modified since the previous snapshot.
Organizing Objects in Folders
Folders allow you to organize Skyvia objects. Create folders and drag Skyvia objects to them to get quick access to specific object categories. For example, you may create separate folders for Skyvia objects related to each of your customers, or create folders that group objects related to specific tasks.
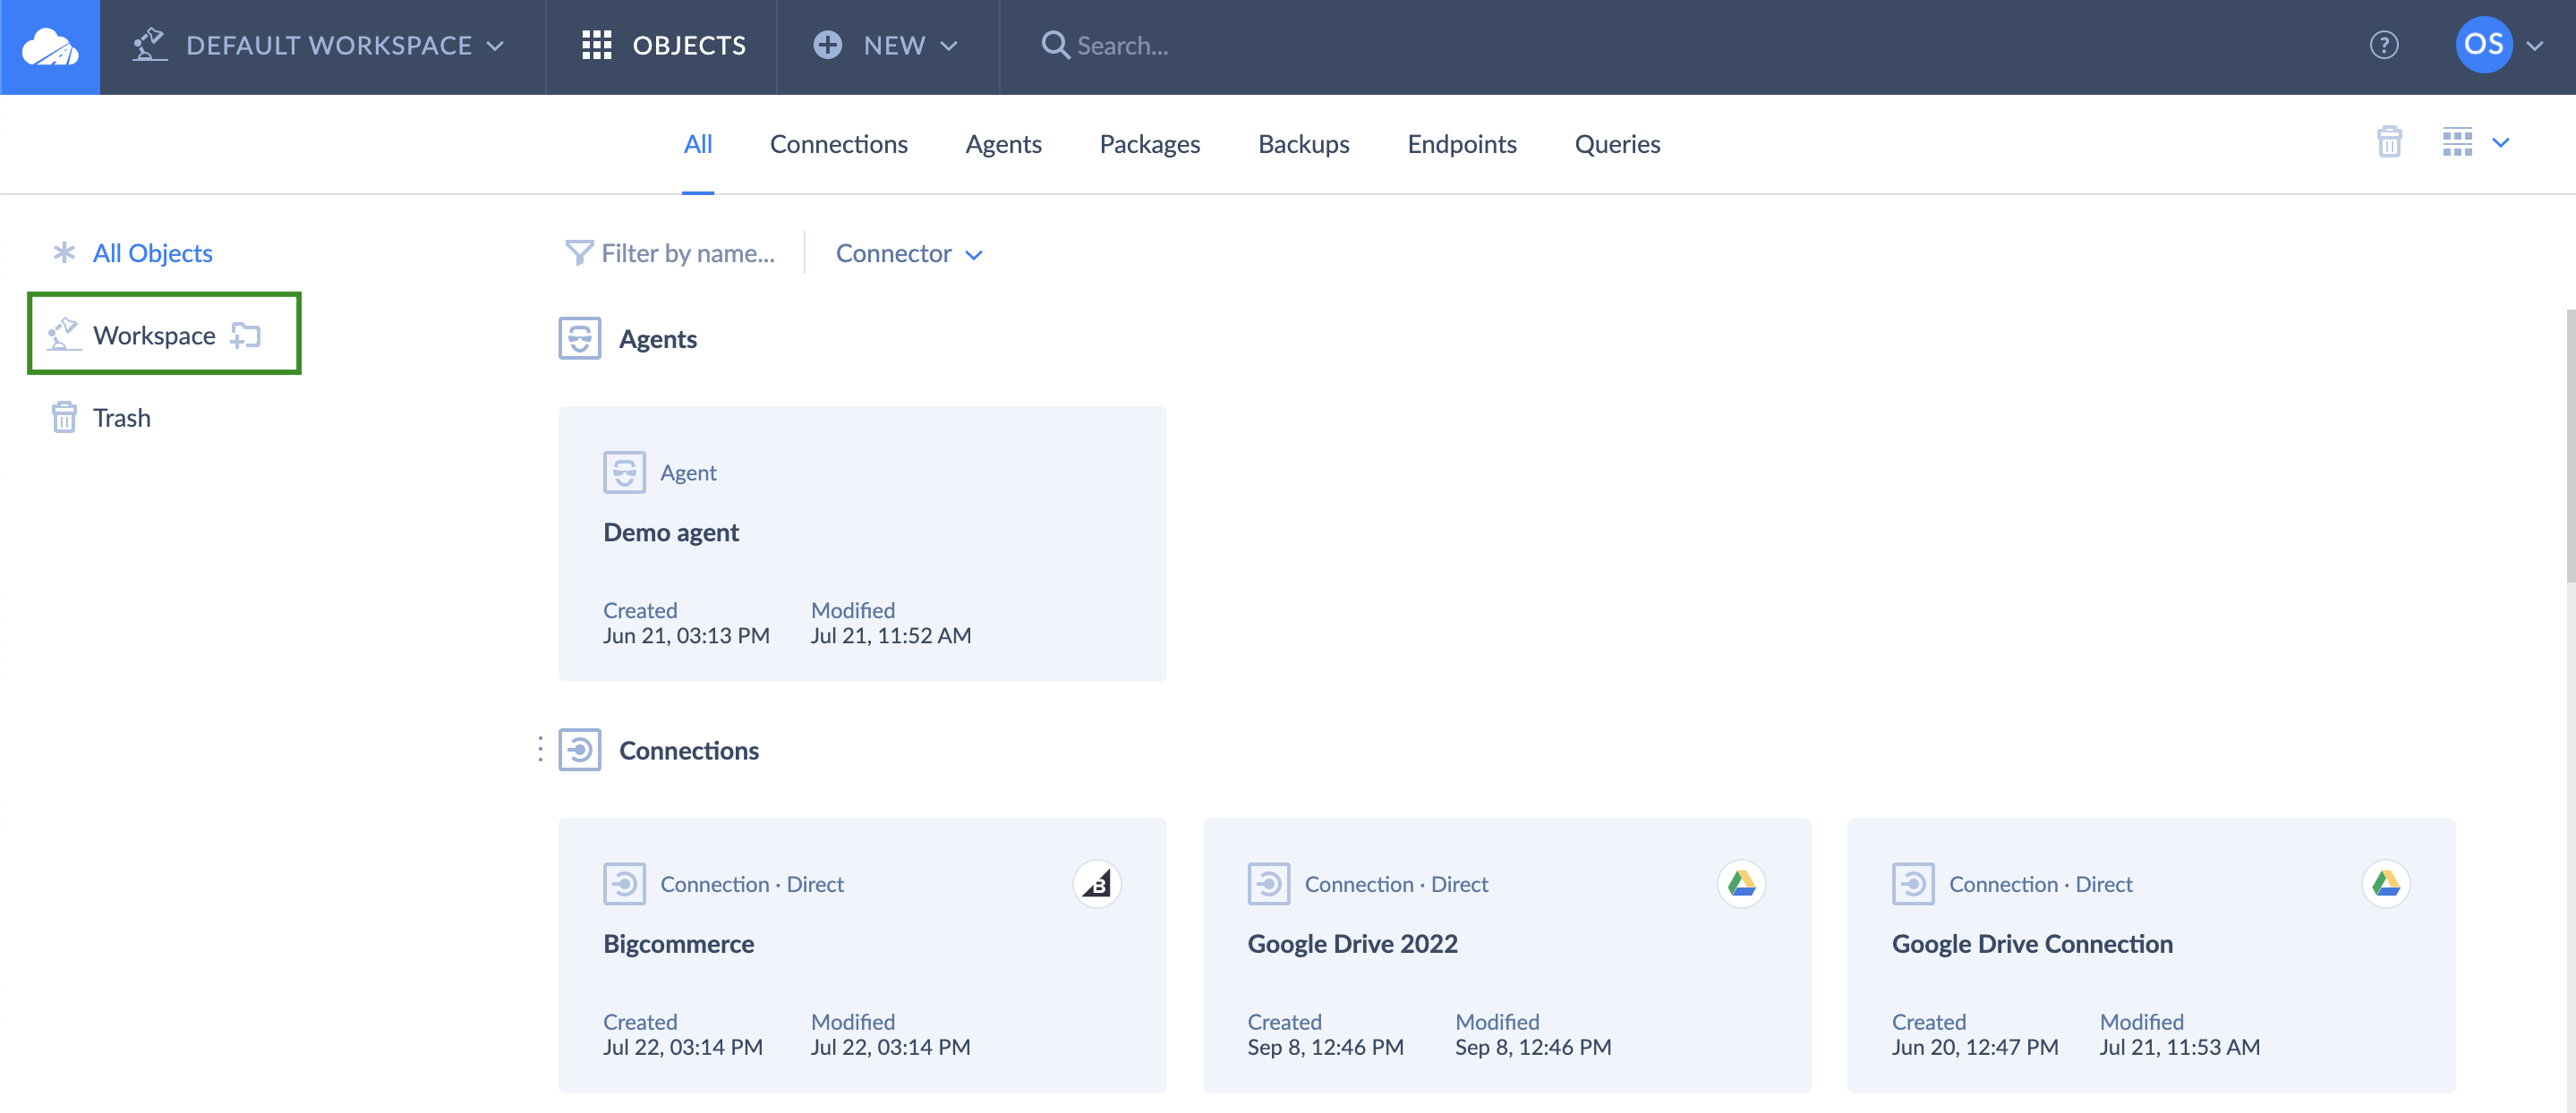
By default all objects are created in a workspace root folder. To create a new folder, hover your cursor over Workspace on the left and click ![]() icon. You can create subfloders, by clicking
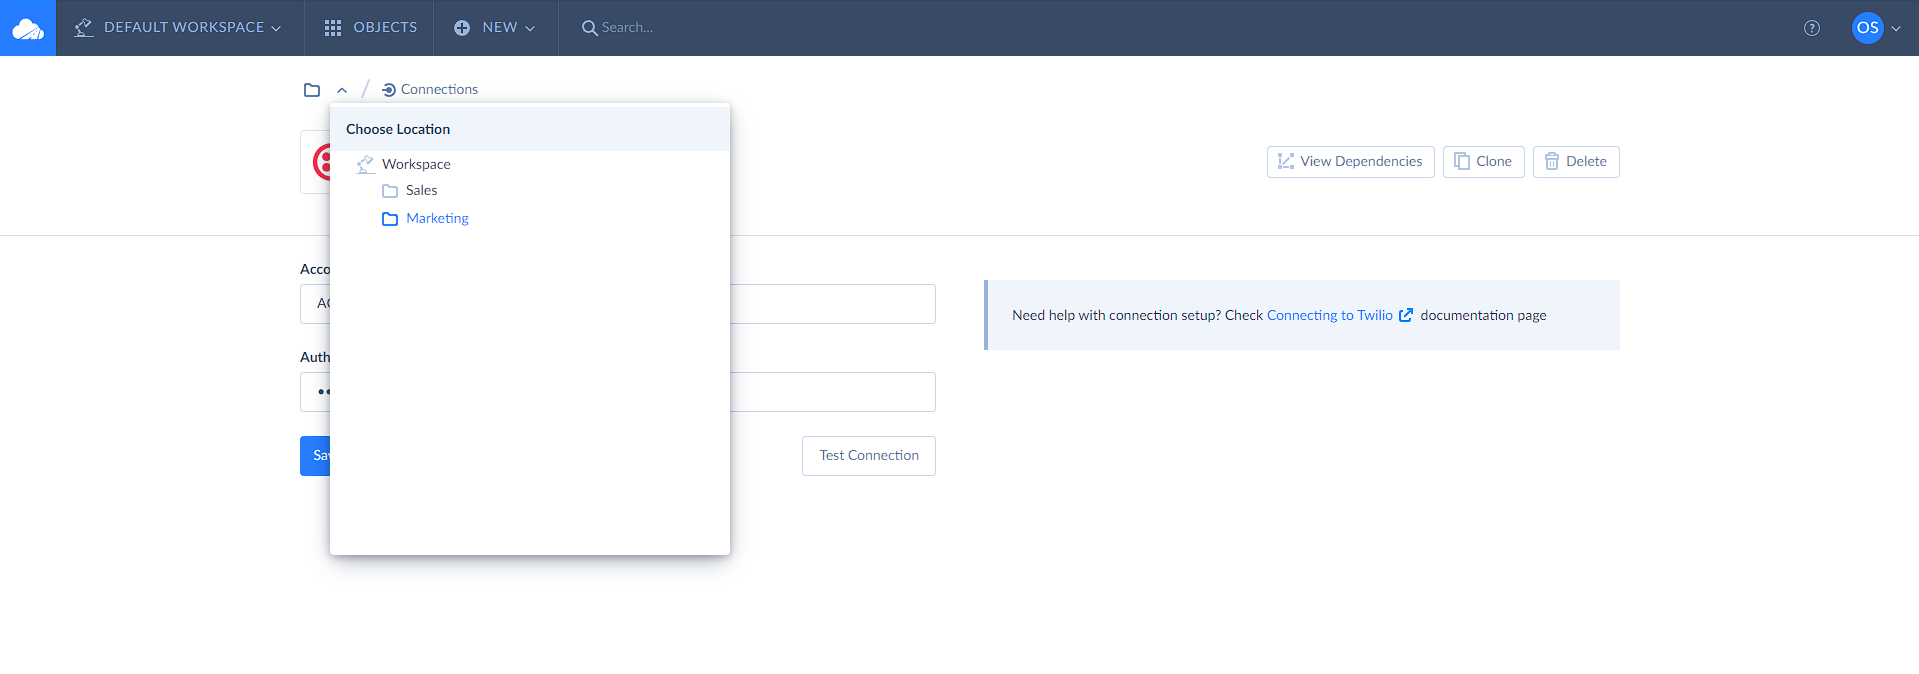
icon. You can create subfloders, by clicking ![]() next to parent folder name. Use drag and drop to move objects between folders. Additionally, you can manage the object’s location from inside the object:
next to parent folder name. Use drag and drop to move objects between folders. Additionally, you can manage the object’s location from inside the object:
- Click on the arrow icon on the upper left.
-
Choose the folder to move the object to.
To select an object, click on its tile. If you click on the name of the object Skyvia will open it instead of selecting. To select multiple objects, hold SHIFT or CTRL key while selecting. To view all the workspace objects, regardless of the folders, click the All Objects link above the folder tree.
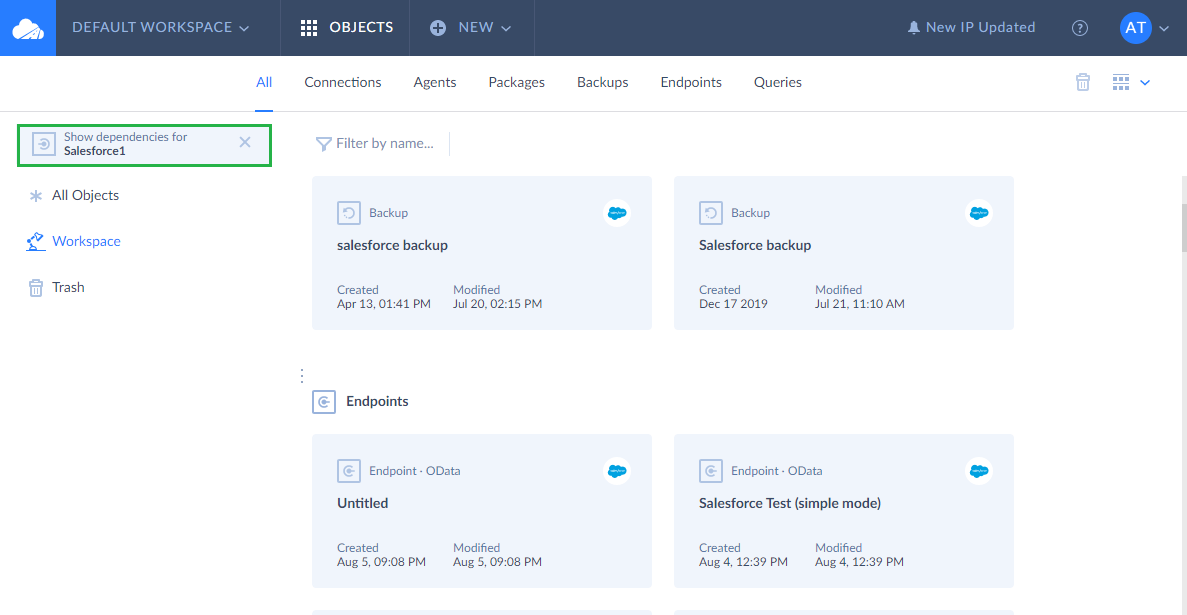
Viewing Object Dependencies
Skyvia objects may depend on other objects. For example, packages, backups, endpoints depend on their connections, so if a connection is modified, it affects all the objects. Connections in their turn depend on the agents (if applicable).
It is important to know dependencies between objects, because if a connection becomes invalid, all the packages, backups, endpoints, and queries that depend on it stop working. Dependencies also affect deleting objects — if you delete a connection, you automatically delete all the objects that depend on it. You can view objects that depend on a connection or agent, simply by pointing it and clicking the View Dependencies quick action button.
If you try to delete a connection or agent, and there are other objects, depending on this connection or agent, Skyvia offers to delete the dependent objects together with this connection or agent. If this doesn’t suit you, you may cancel the deletion.
When you restore an object from Trash, and if this object depends on other objects in Trash, Skyvia offers restoring all of them together. If you do not agree, the object won’t be restored.
Deleting and Restoring Objects
Any object in Skyvia can be deleted in several ways. You can use drag-n-drop to send selected objects directly to the Trash  on the left. You can select an object in the object list and click the Delete to trash button on the toolbar on the right or you can go to the details page of certain object, connection, agent and click icon there.
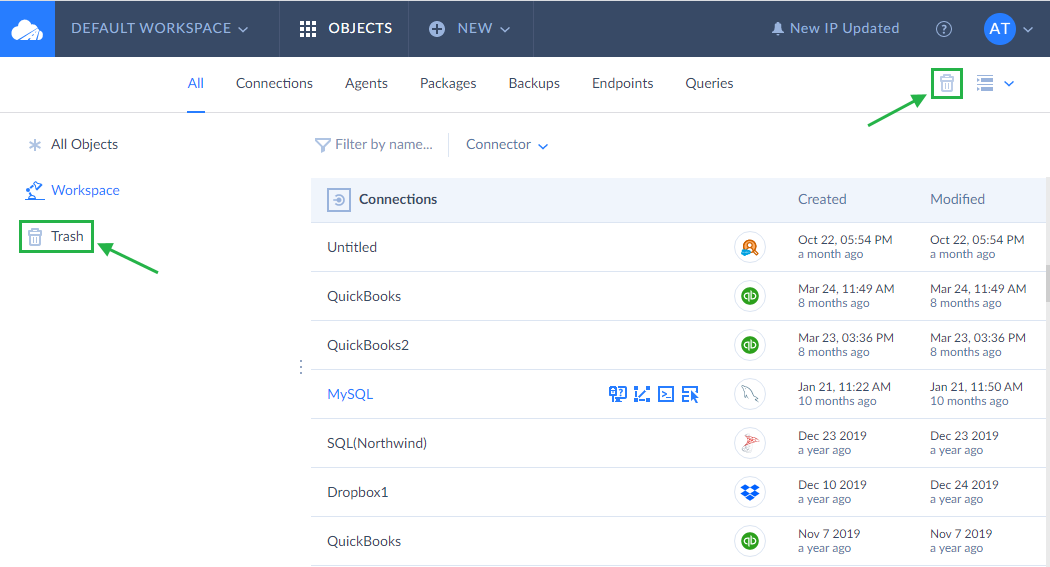
The bulk delete of objects is also available. You can select either all or only specific objects for deletion as shown on the screen above. Objects are removed from the object list, but they are not immediately deleted. For 2 weeks after their deletion they are available in Trash, and can be safely restored from there. Simply click the Trash link on the left, below the folders. This displays the list of recently deleted object. Here you can select objects and restore them.
To restore object, select it and click the ![]() Restore from trash button on the toolbar. You can also delete an object completely, by selecting it and clicking the
Restore from trash button on the toolbar. You can also delete an object completely, by selecting it and clicking the ![]() Delete from trash button.
Delete from trash button.
Viewing Log of Objects
Skyvia allows you to view the activity of some objects, which have the Log functionality. These objects are integration packages, backups and endpoints. You can view their activity, i.e. package runs, backup snapshots, endpoint requests when clicking the Log tab on the toolbar of the object details page or  quick action button.
For endpoints, you can check all your data access and manipulation operations as well as view all users, their operations and from which IPs these operations are performed. You can select different time periods to display your endpoint requests and filter requests depending on their final result — failed, succeeded or all requests.
User Profile
User Profile contains Profile and Account tabs, which you can see when clicking the User icon in the top right corner of the Skyvia page.

Profile
On the Profile page, you can view and edit your personal information such as first name, last name, company, phone number and job title. You can subscribe/unsubscribe to Skyvia’s newsletters, change your password to a new one, configure email notifications and two-factor notification.
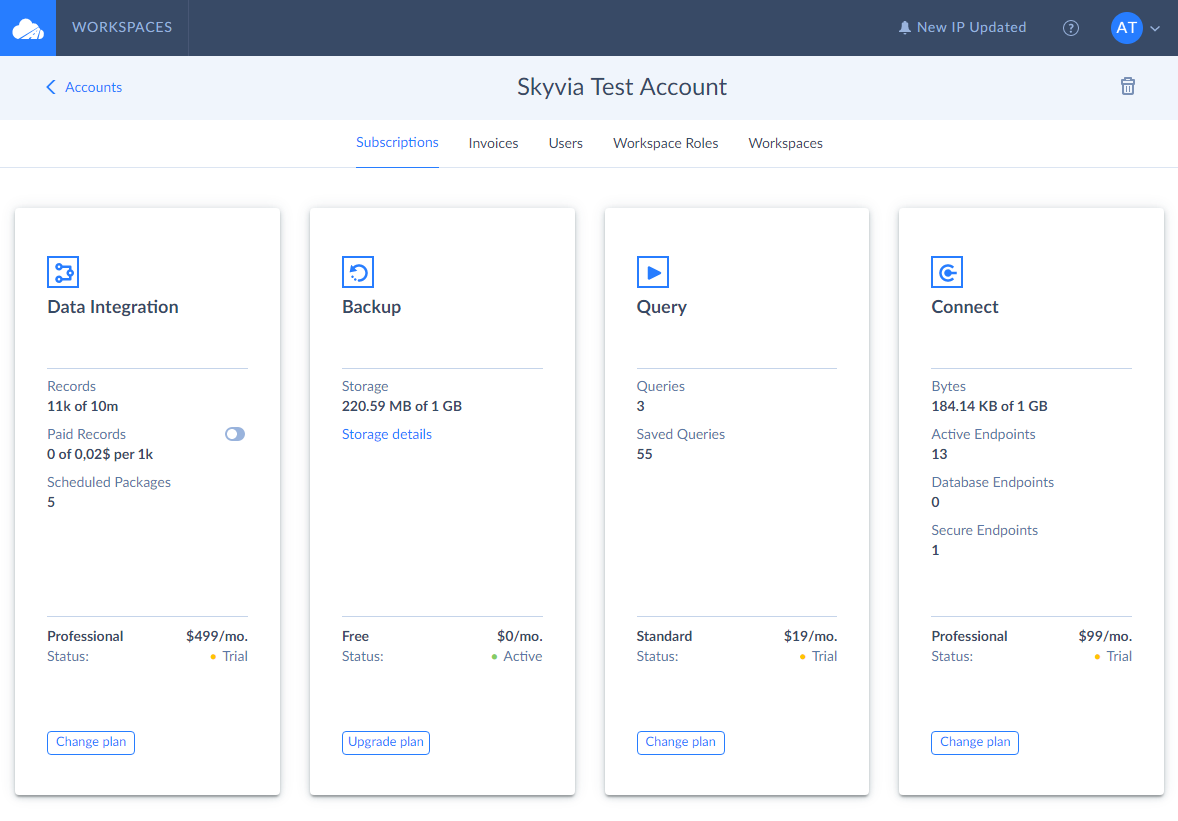
Account
On the Account page, you can view, manage and upgrade your subscriptions, check used Skyvia resources, such as processed records, scheduled packages, etc., view and print out invoices, and manage account users if any invited.
You can invite other users to your account. Users join your account as account members. Being account members, they cannot manage (upgrade, downgrade or anyhow change) your subscriptions or view any payment details, but they can use your Skyvia subscriptions and resource limitations.
You can also add users to your workspace(s) and assign roles to them. They can use connections, packages, queries, etc. in the workspaces only to the extent allowed by their roles. For example, a user with the workspace admin role will have full rights in the workspace, while the developer will be able to manage workspace objects (create, run, delete them), but not manage workspace settings, etc. Read Account Management for more information.
Skyvia Help Center
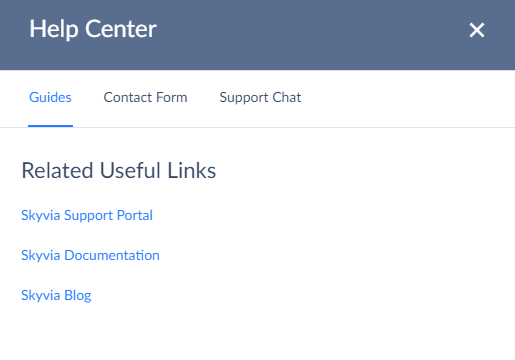
When you click ![]() icon in the top right corner of the Skyvia page, the Help Center window opens up. Here you can find links to useful resources such as Skyvia documentation, Skyvia blog with latest news and Support portal with FAQs.
icon in the top right corner of the Skyvia page, the Help Center window opens up. Here you can find links to useful resources such as Skyvia documentation, Skyvia blog with latest news and Support portal with FAQs.
If you have any technical questions and cannot find them in the Skyvia documentation, you can contact Skyvia support team by filling out the Contact form or writing directly to the Support chat.