NetSuite (SOAP)
NetSuite is a unified cloud business management solution, including ERP/financials, CRM, and ecommerce.
This connector uses SOAP API to work with NetSuite. It does not support NetSuite fields, storing array data, but supports backup of some NetSuite data. This connector is considered deprecated, and it is left for compatibility reasons. We recommend using NetSuite v2 (REST) connector for new integrations and other use cases.
Data integration: Skyvia supports importing data to and from NetSuite, exporting NetSuite data to CSV files, replicating NetSuite data to relational databases, and synchronizing NetSuite data with other cloud apps and relational databases.
Backup: Skyvia Backup supports NetSuite backup.
Query: Skyvia Query supports NetSuite.
Establishing Connection
Skyvia supports two kinds of authentication in this connector: basic and token-based authentication. Basic authentication assumes storing your NetSuite credentials on Skyvia, while token-based authentication uses automatically generated token, which can easily be revoked.
2-factor authentication is required for NetSuite users with highly privileged roles. This means that such NetSuite user account cannot be used for basic authentication.
Getting Credentials
For Basic authentication, you only need to create an integration in NetSuite and obtain the Application Id.
To obtain credentials for connecting Skyvia to NetSuite using token-based authentication, you need to sign in to NetSuite and perform the following actions:
Obtain Account ID
You can get the account id value in NetSuite SOAP Web Services Preferences. Point to Setup, then to Integrations, and then click SOAP Web Services Preferences. On the opened page, copy your Account ID under Primary Information.

Enable Token-based Authentication in NetSuite
Perform the following actions (if you plan to use token-based authentication):
-
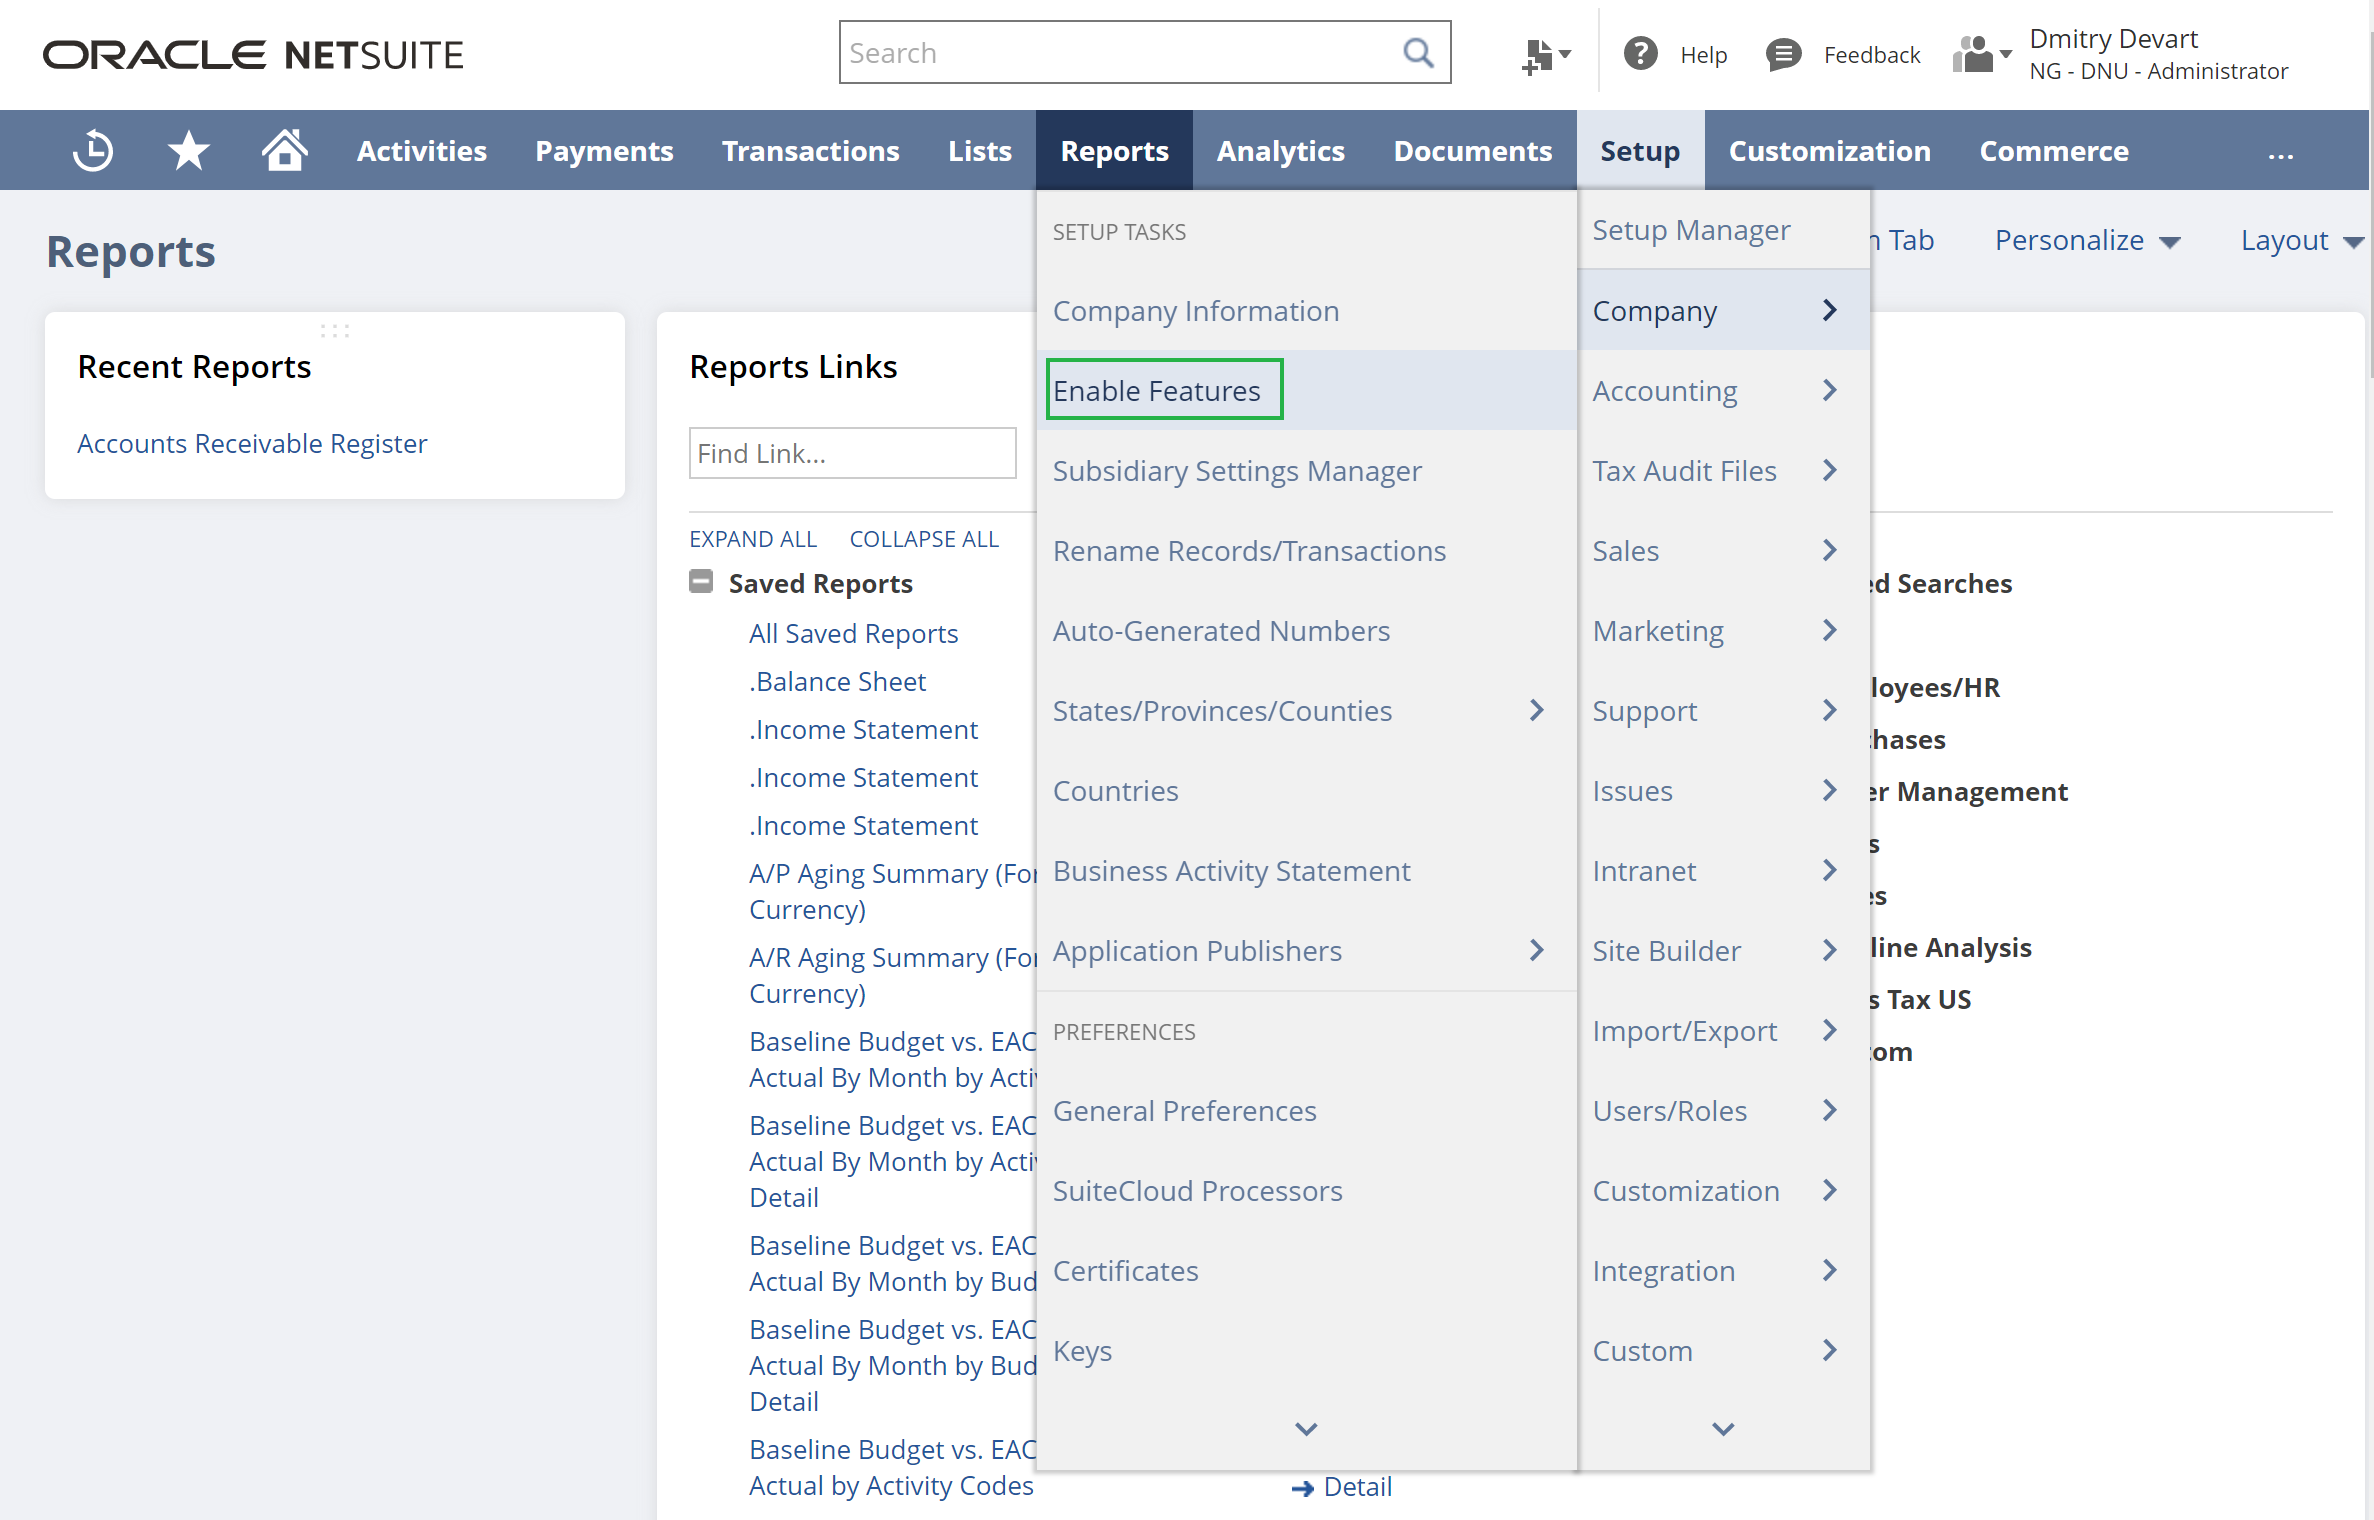
Point to Setup, then to Company, then click Enable Features.
-
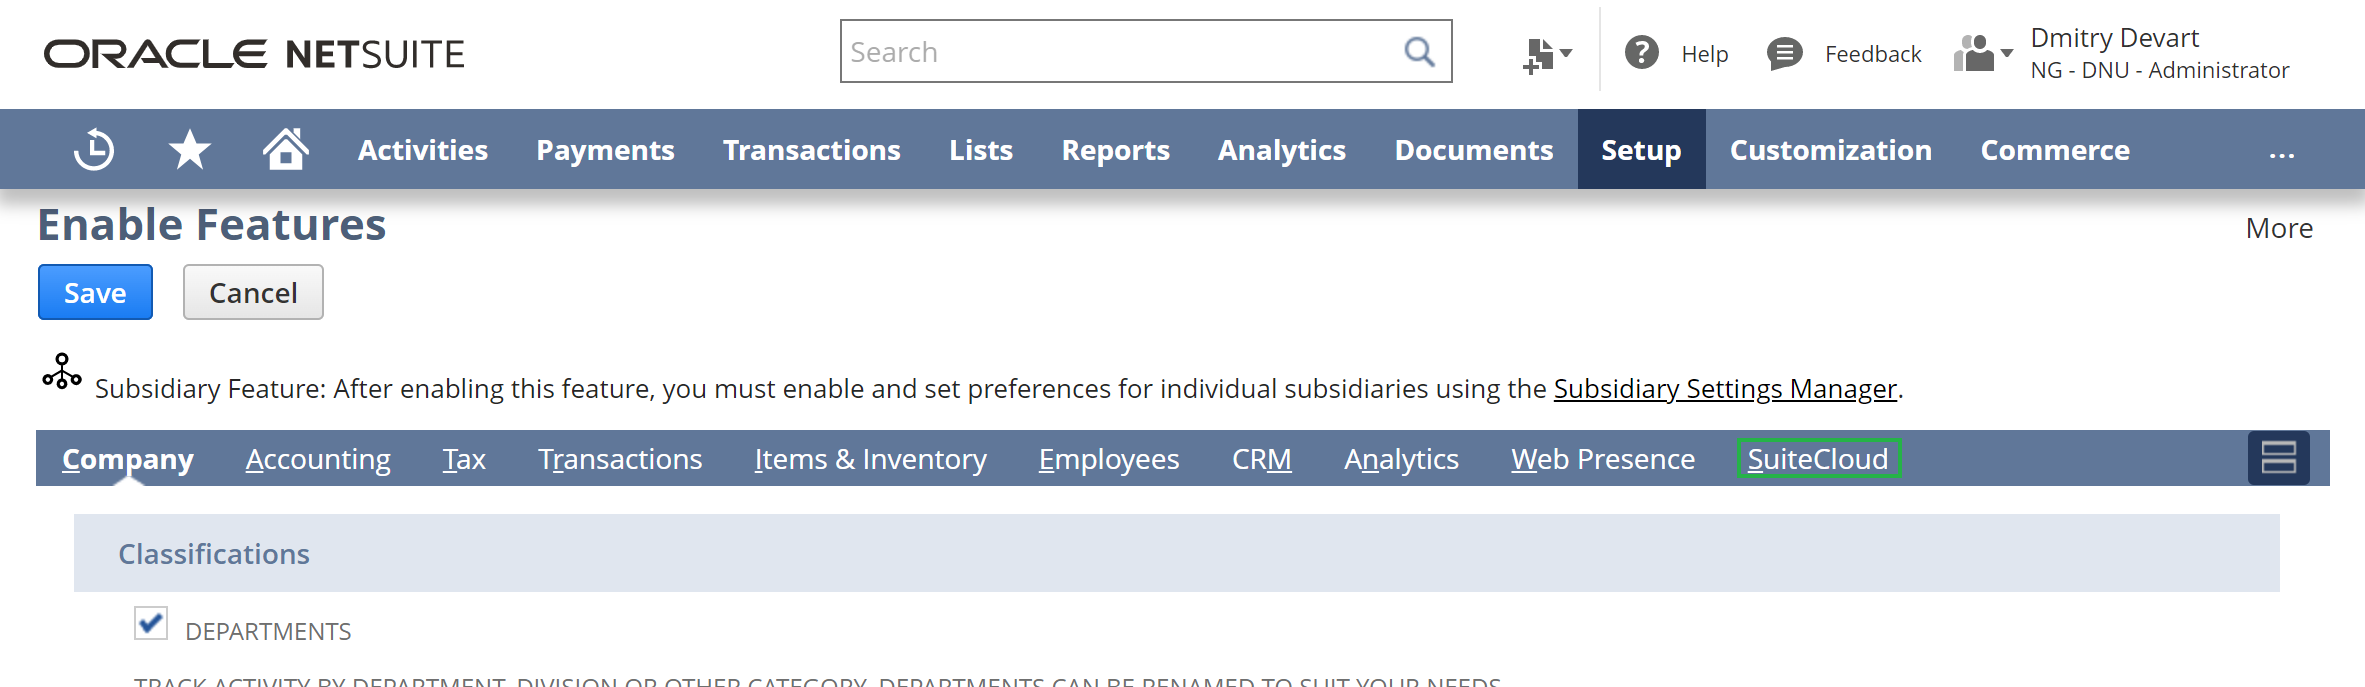
Then click Suite Cloud.
-
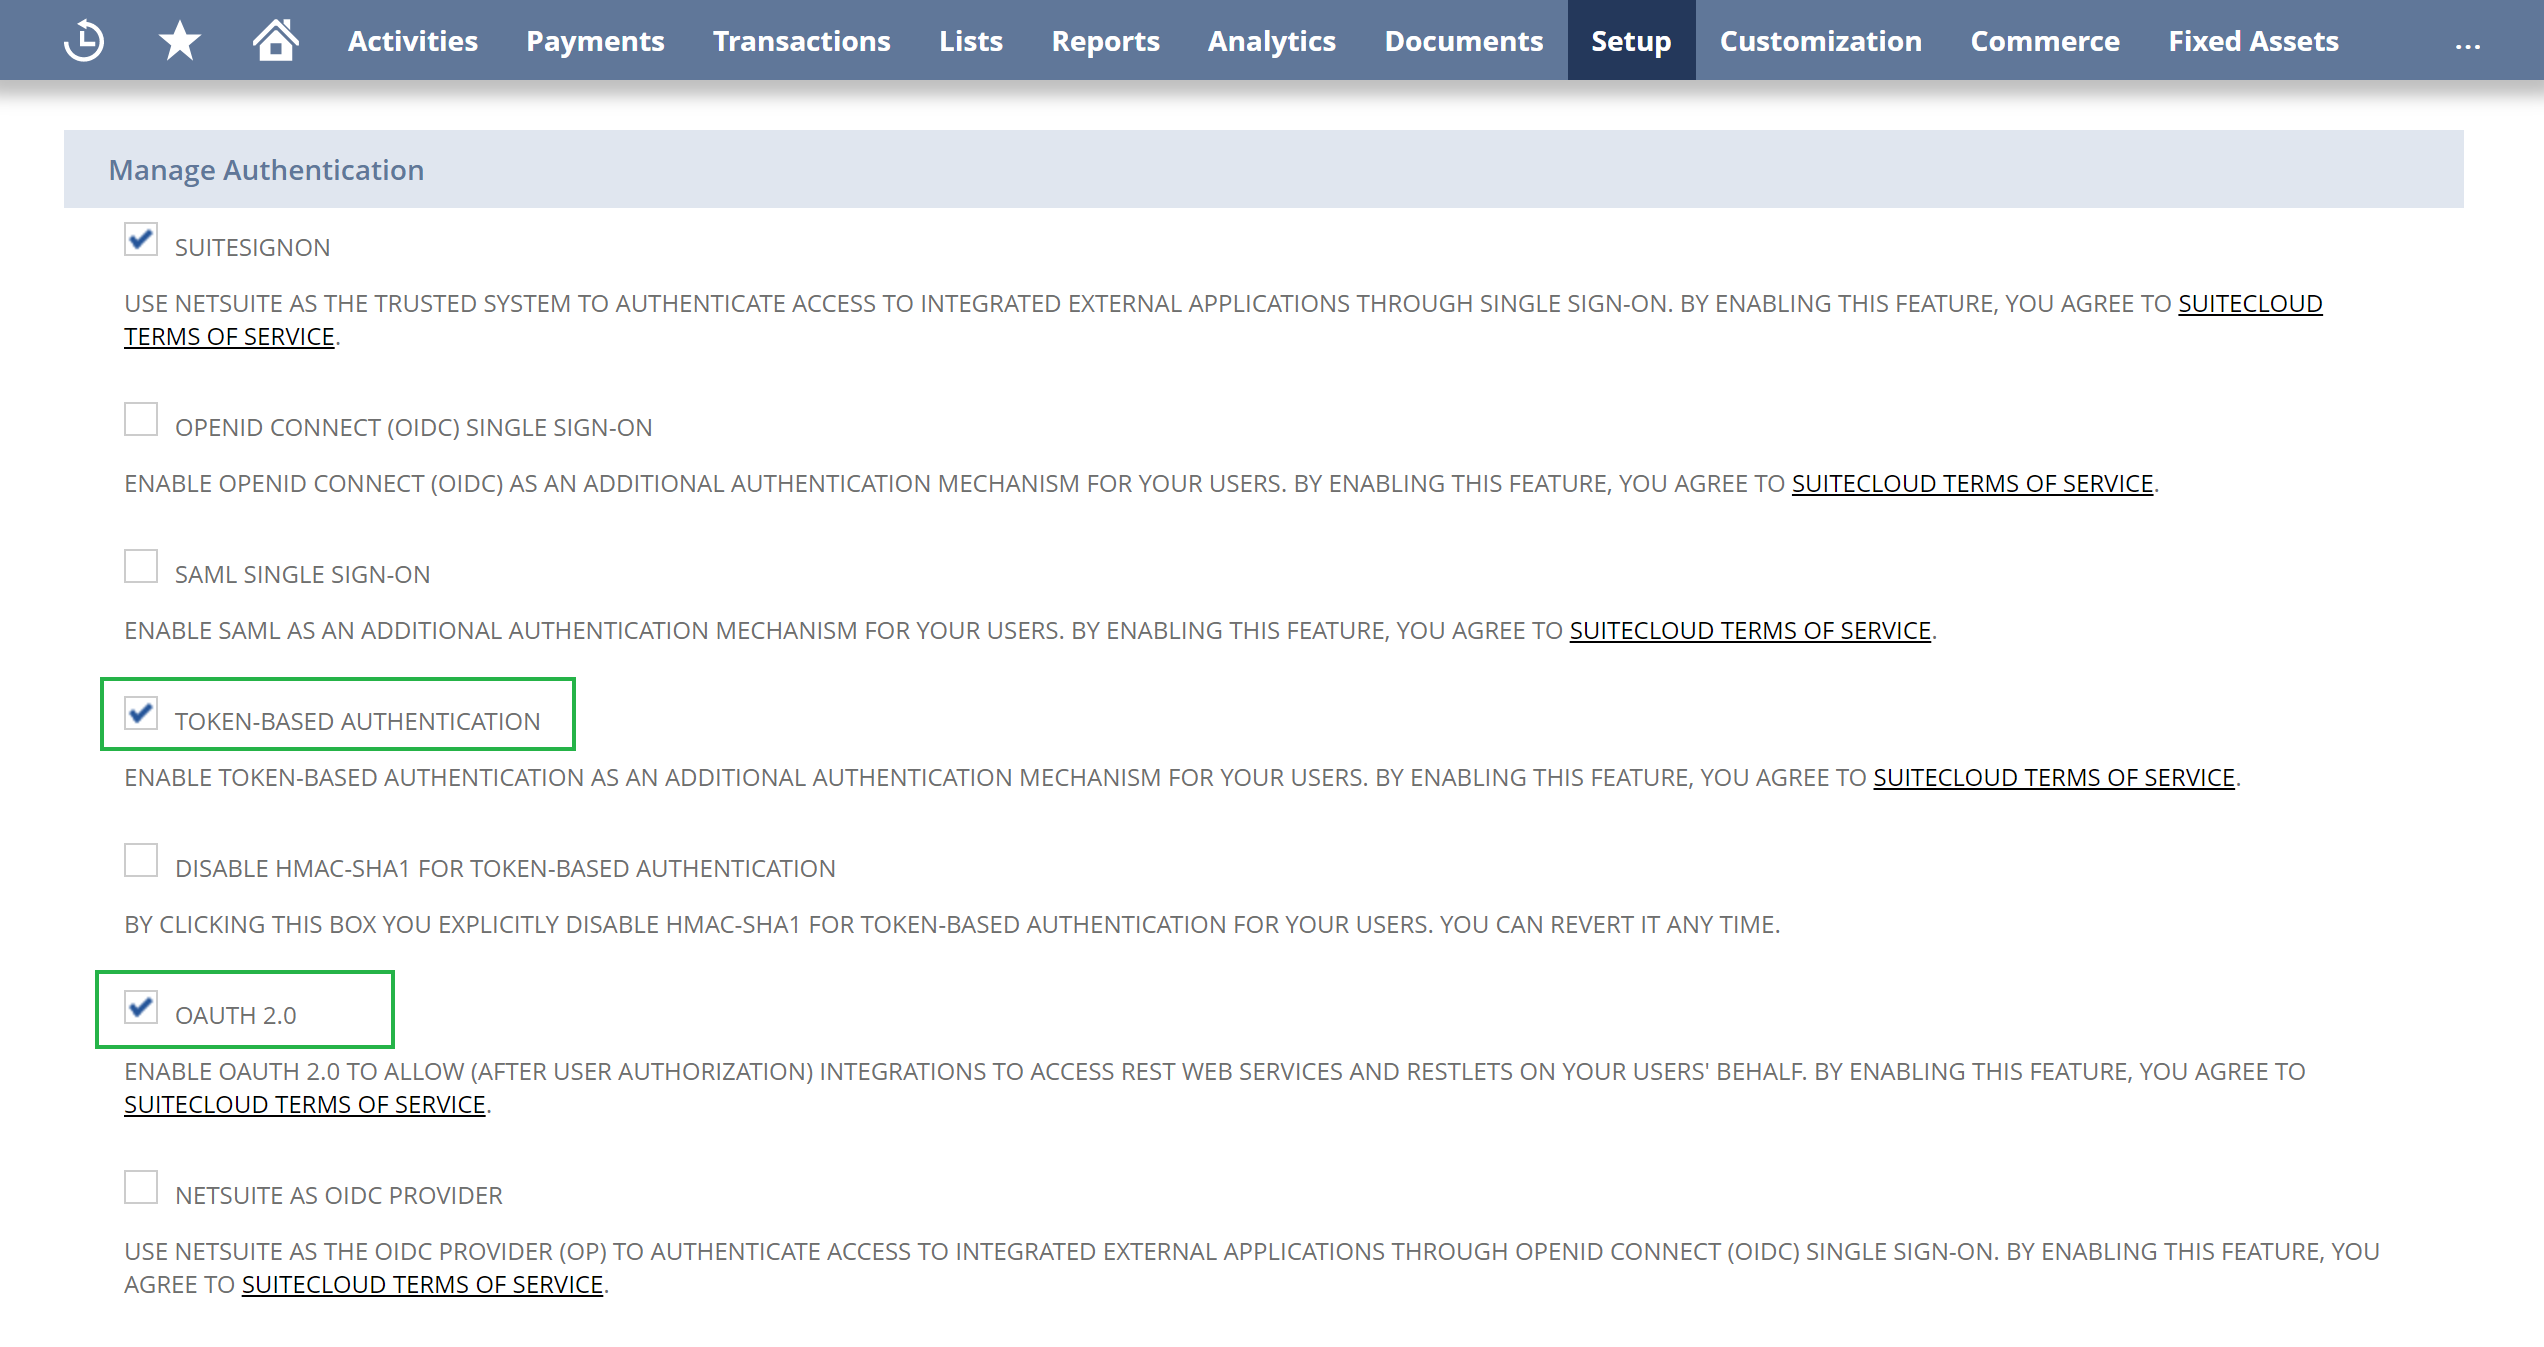
In the Manage Authentication group, select the Token-based Authentication checkbox.
Create Role
Create a role with the necessary privileges for token-based authentication and access to the necessary objects and assign it to the user that will be used for authentication. You need to assign at least the “Web Services” and “User Access Tokens” privileges.
Create Integration Record
To create an integration record, perform the following:
-
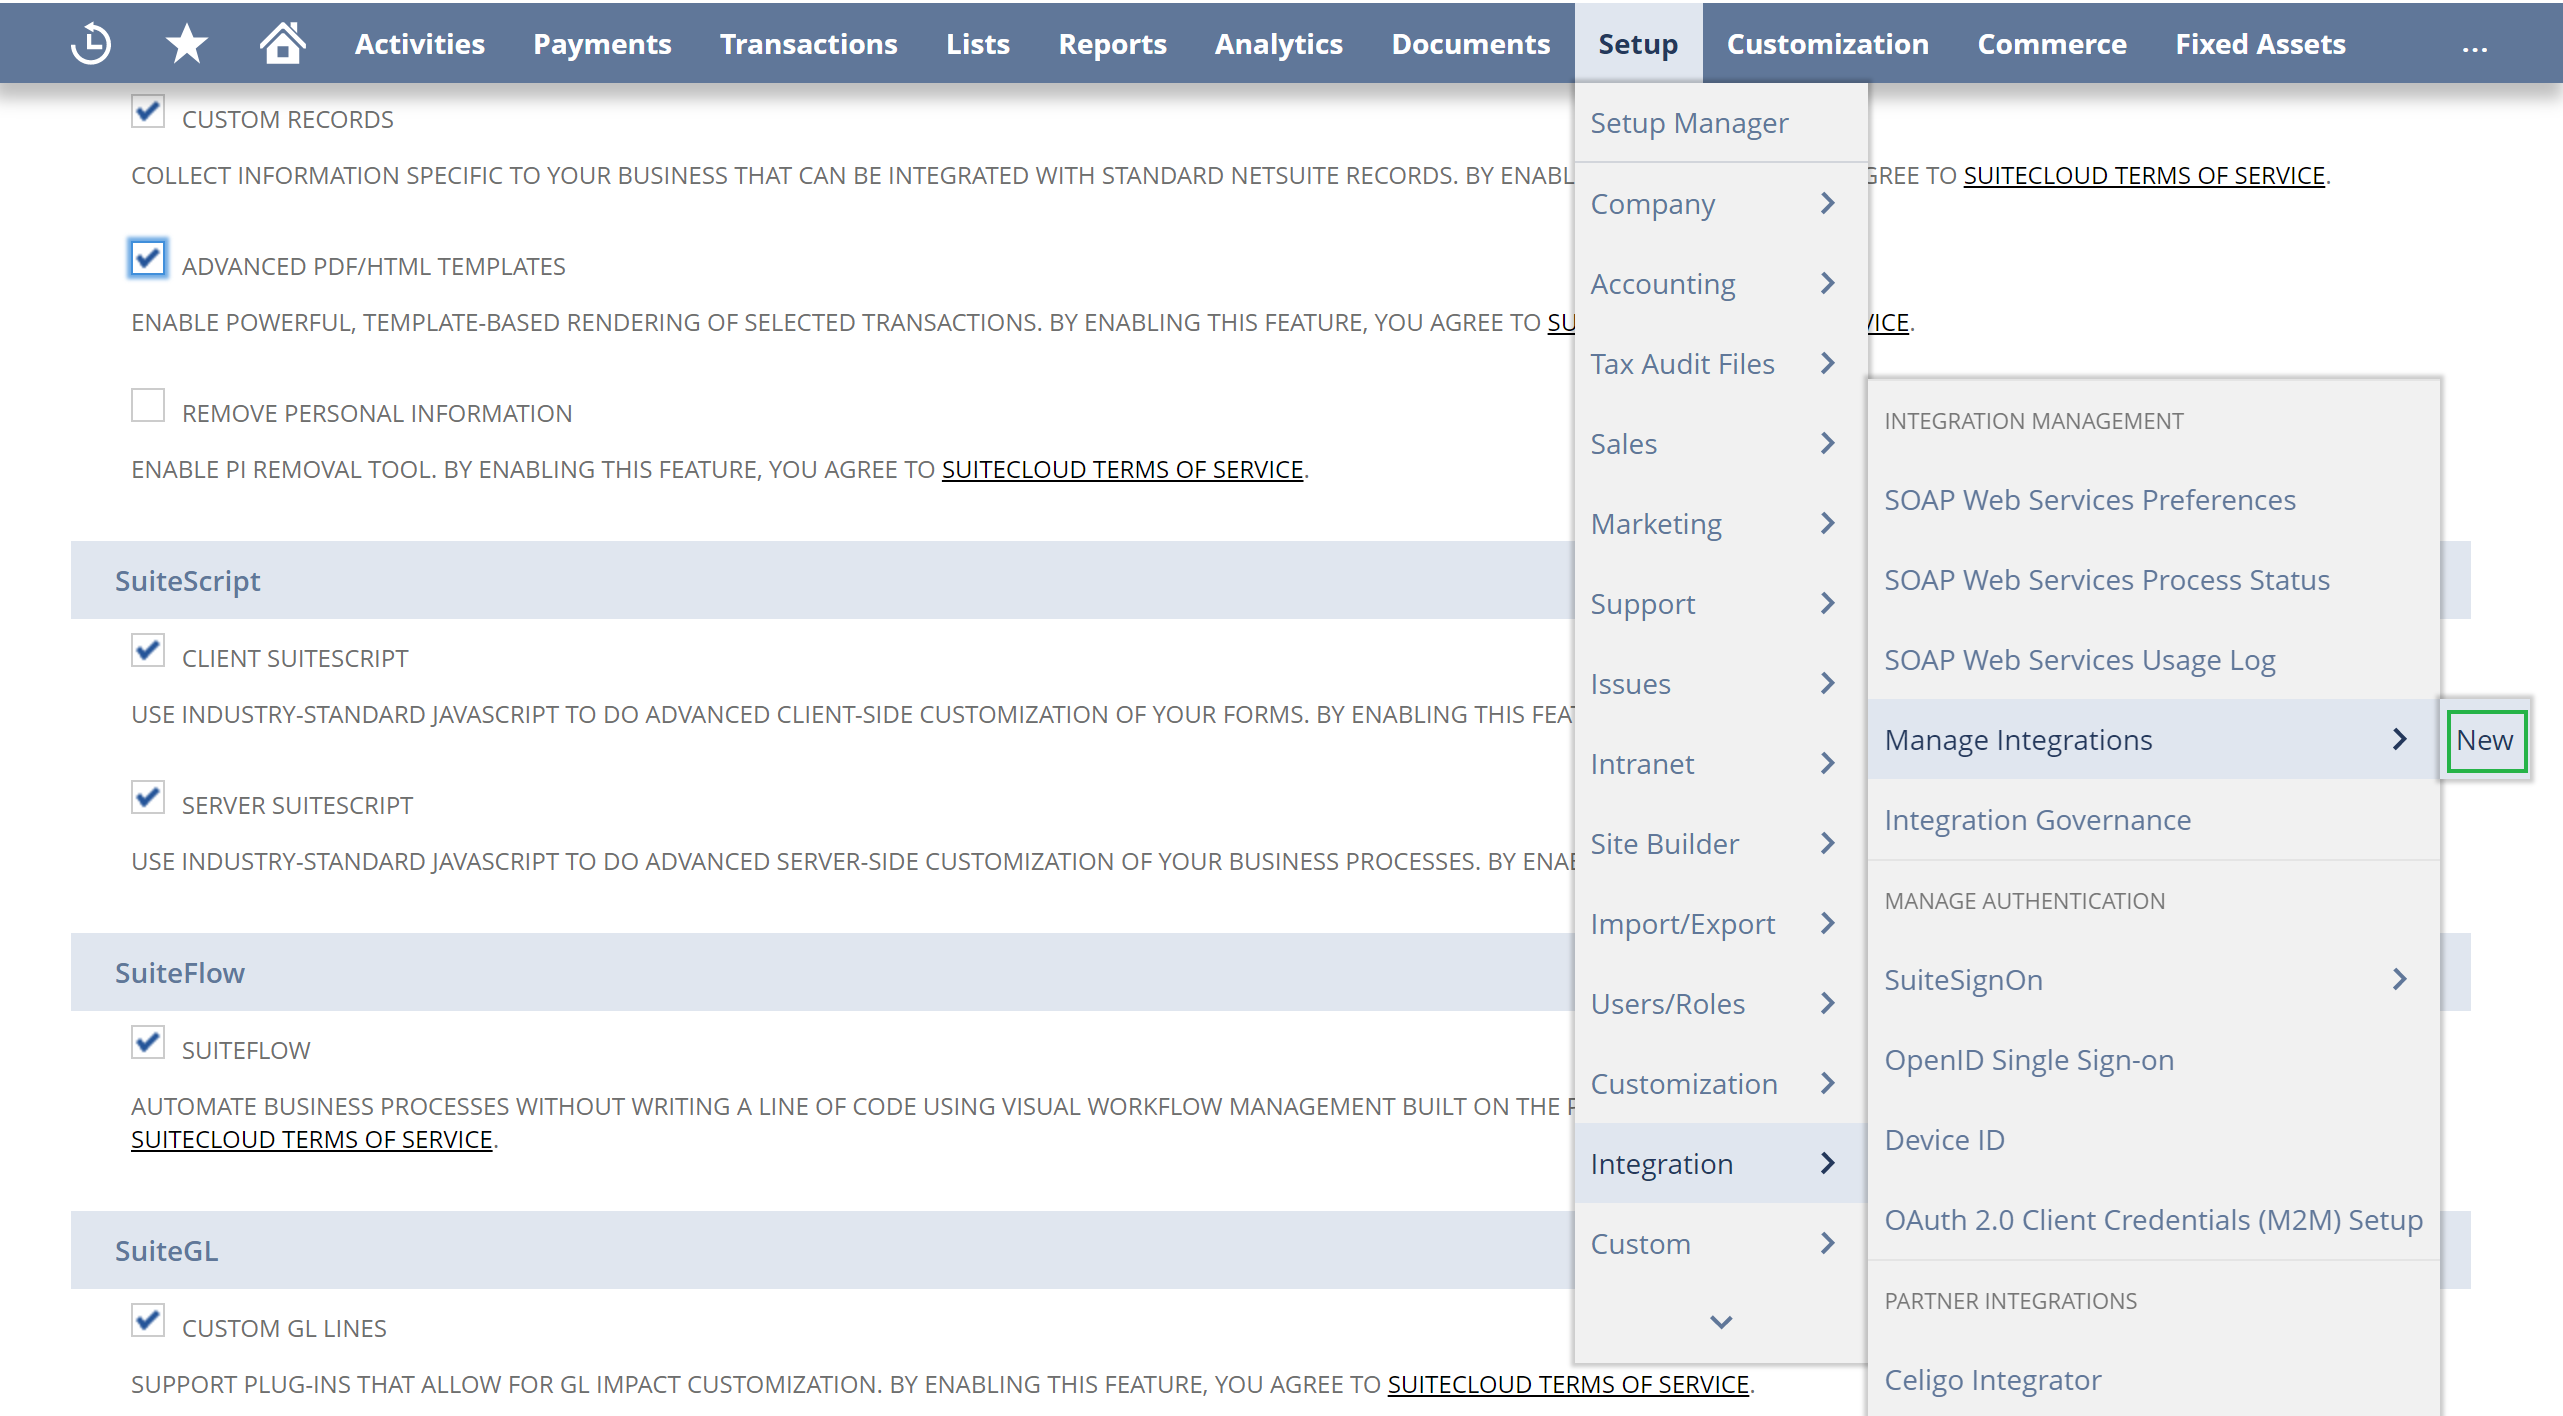
Point to Setup, then to Integrations, then Manage Integrations, and then click New.
-
In the opened page, enter Name for the application, for example, Skyvia.
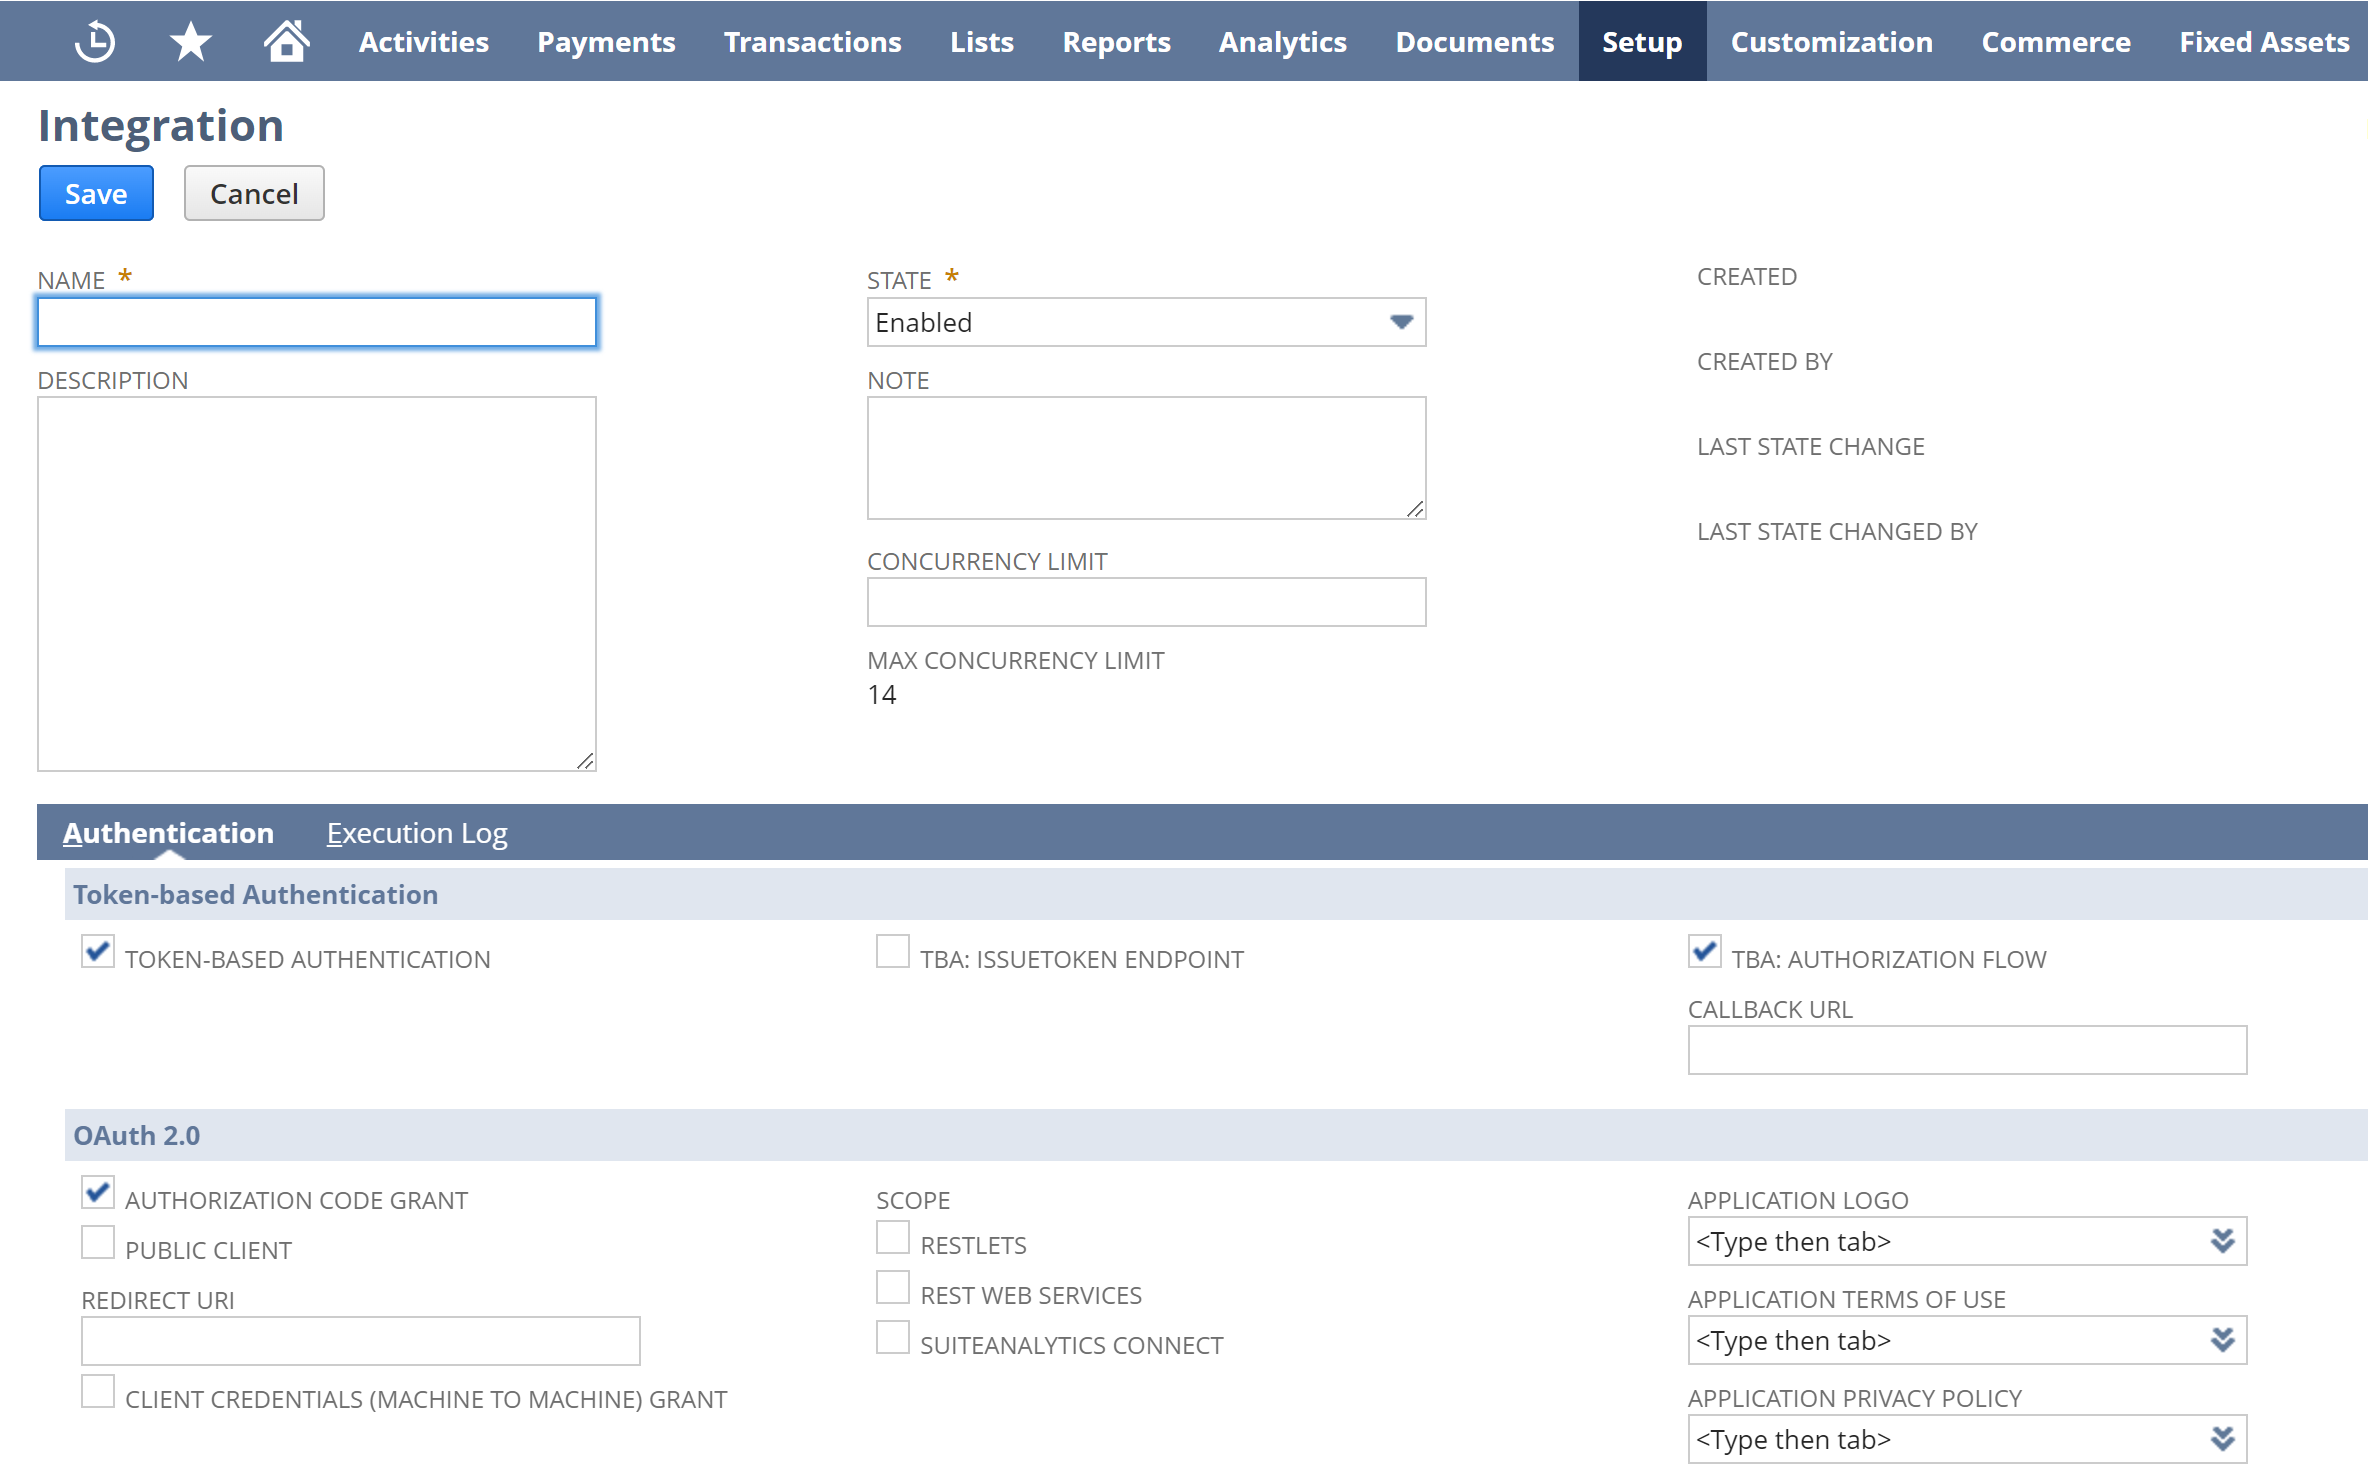
- If you plan to use token-based authentication, make sure that under Token-based Authentication:
- The Token Based Authentication checkbox is selected.
- The TBA: Authorization Flow checkbox is not selected.
-
If you plan to use basic authentication, select the User Credentials check box at the bottom of the page.
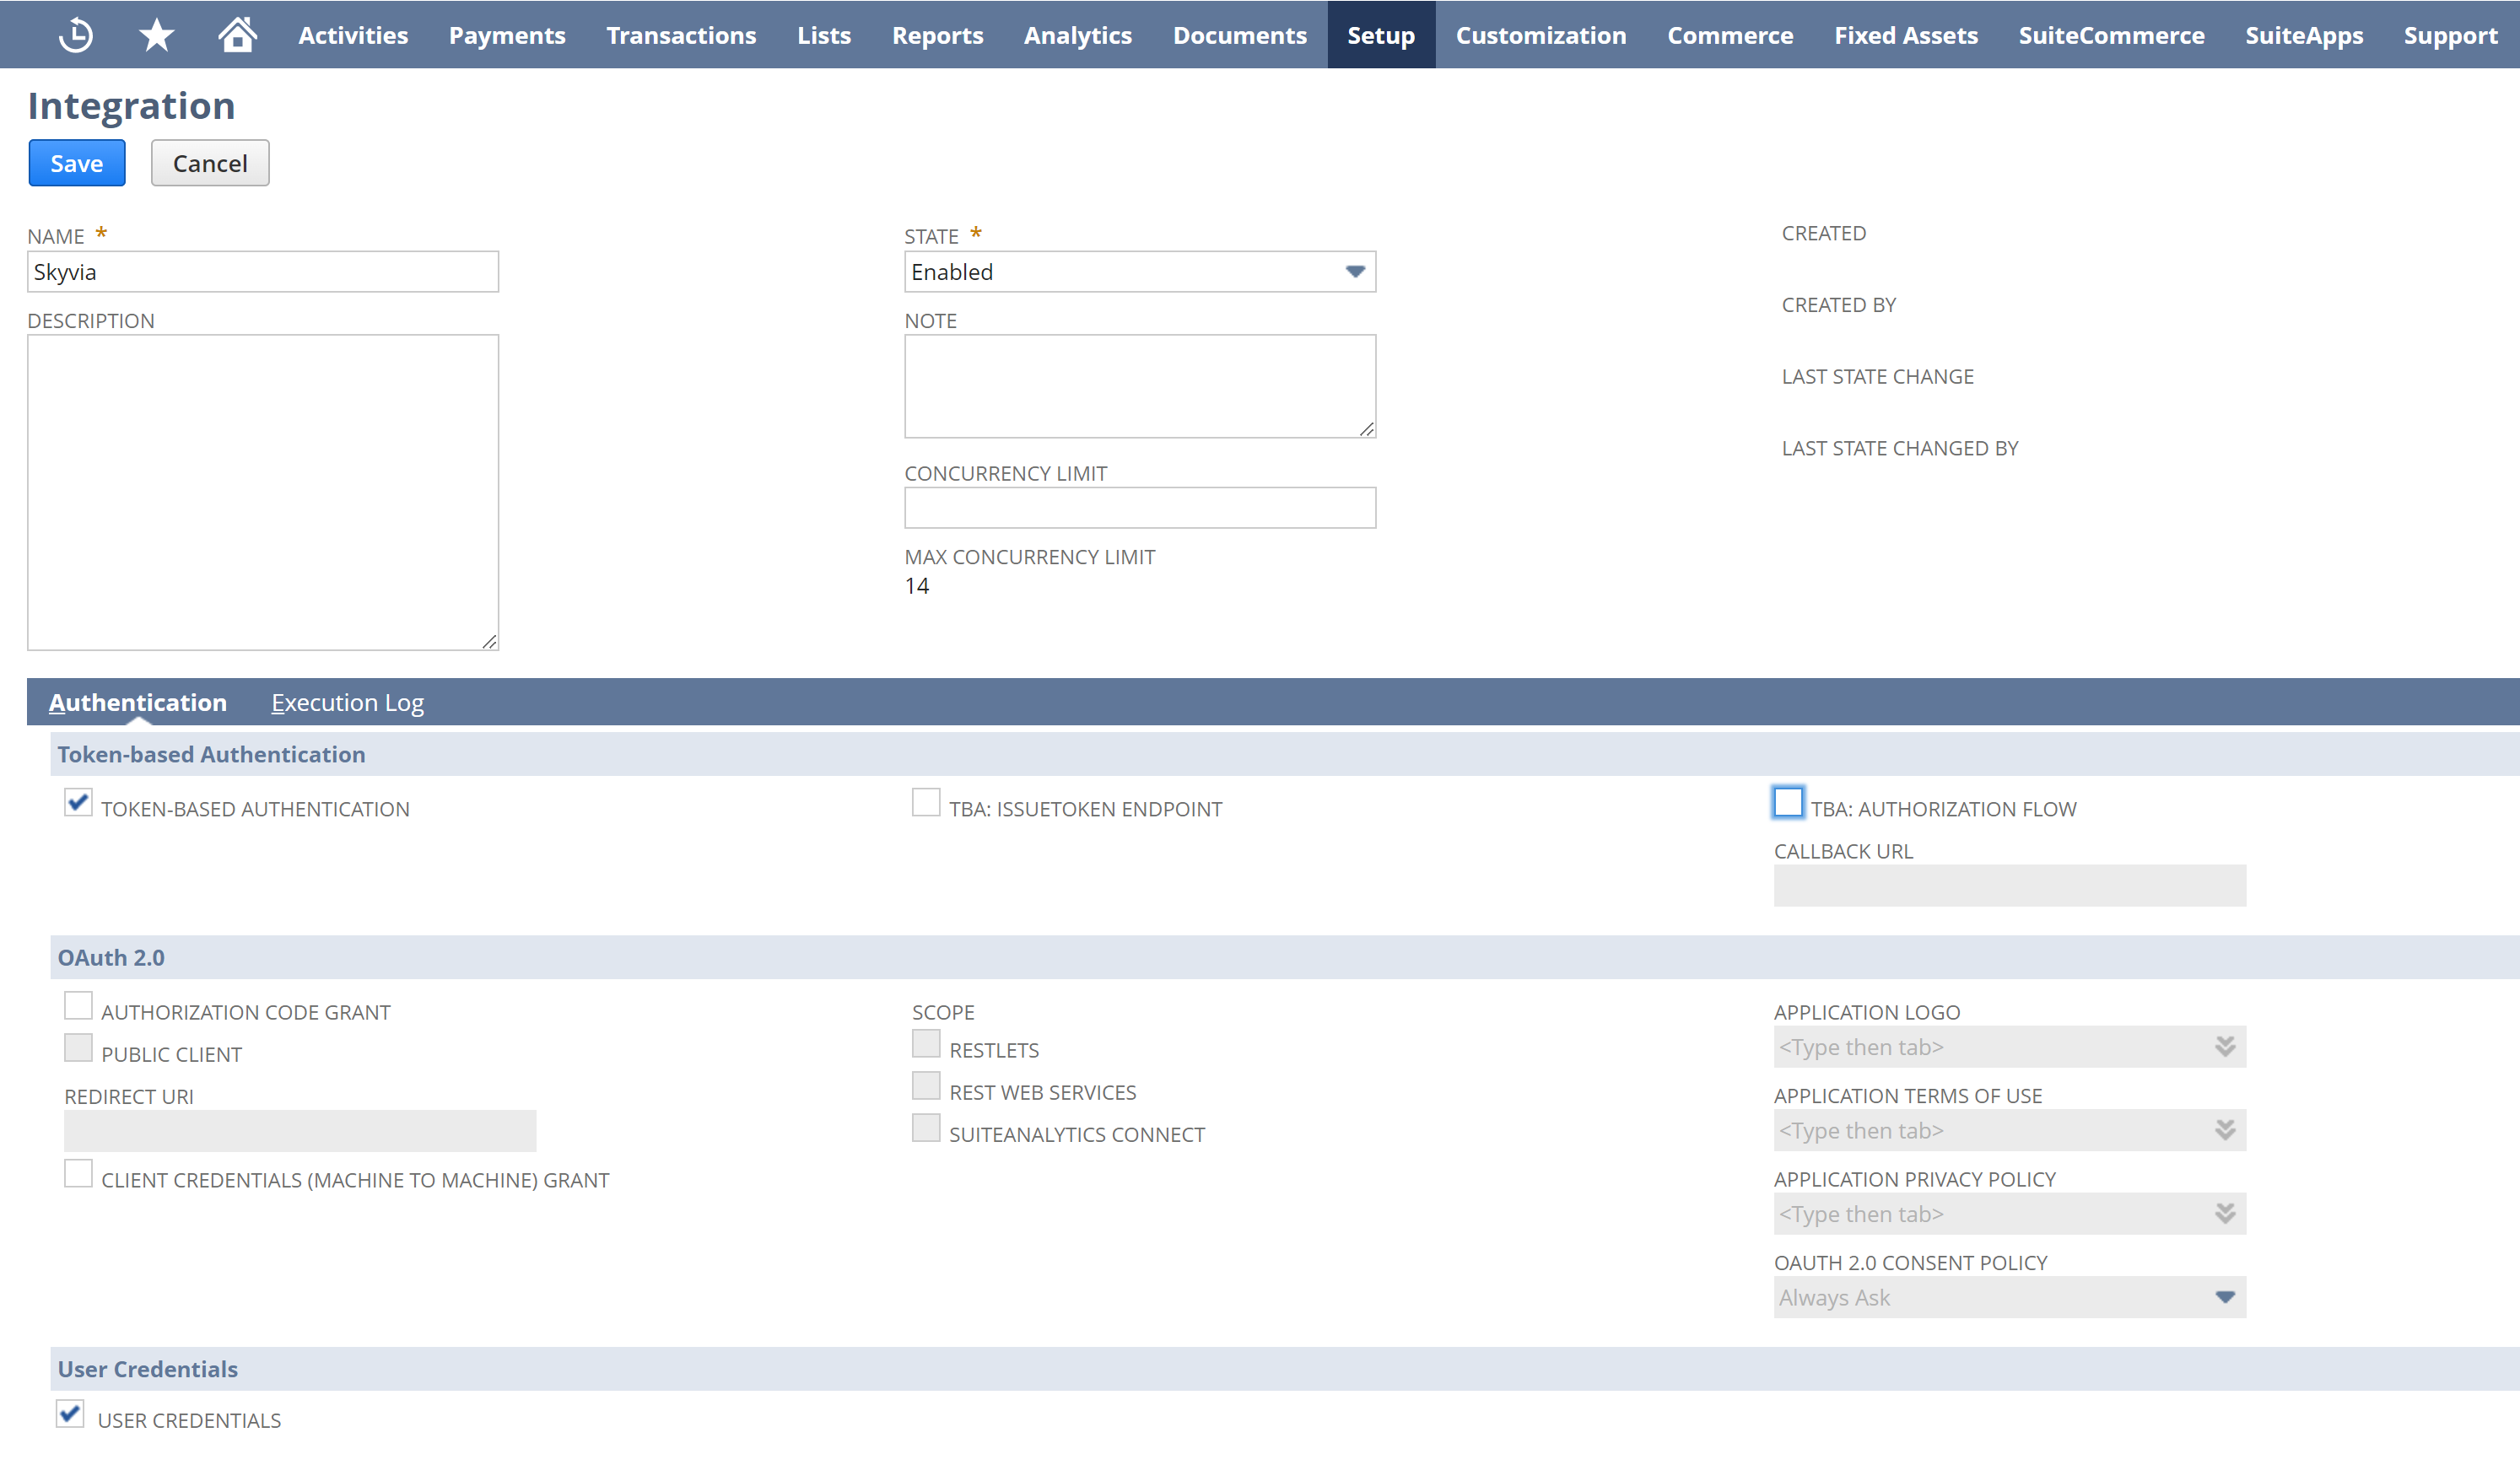
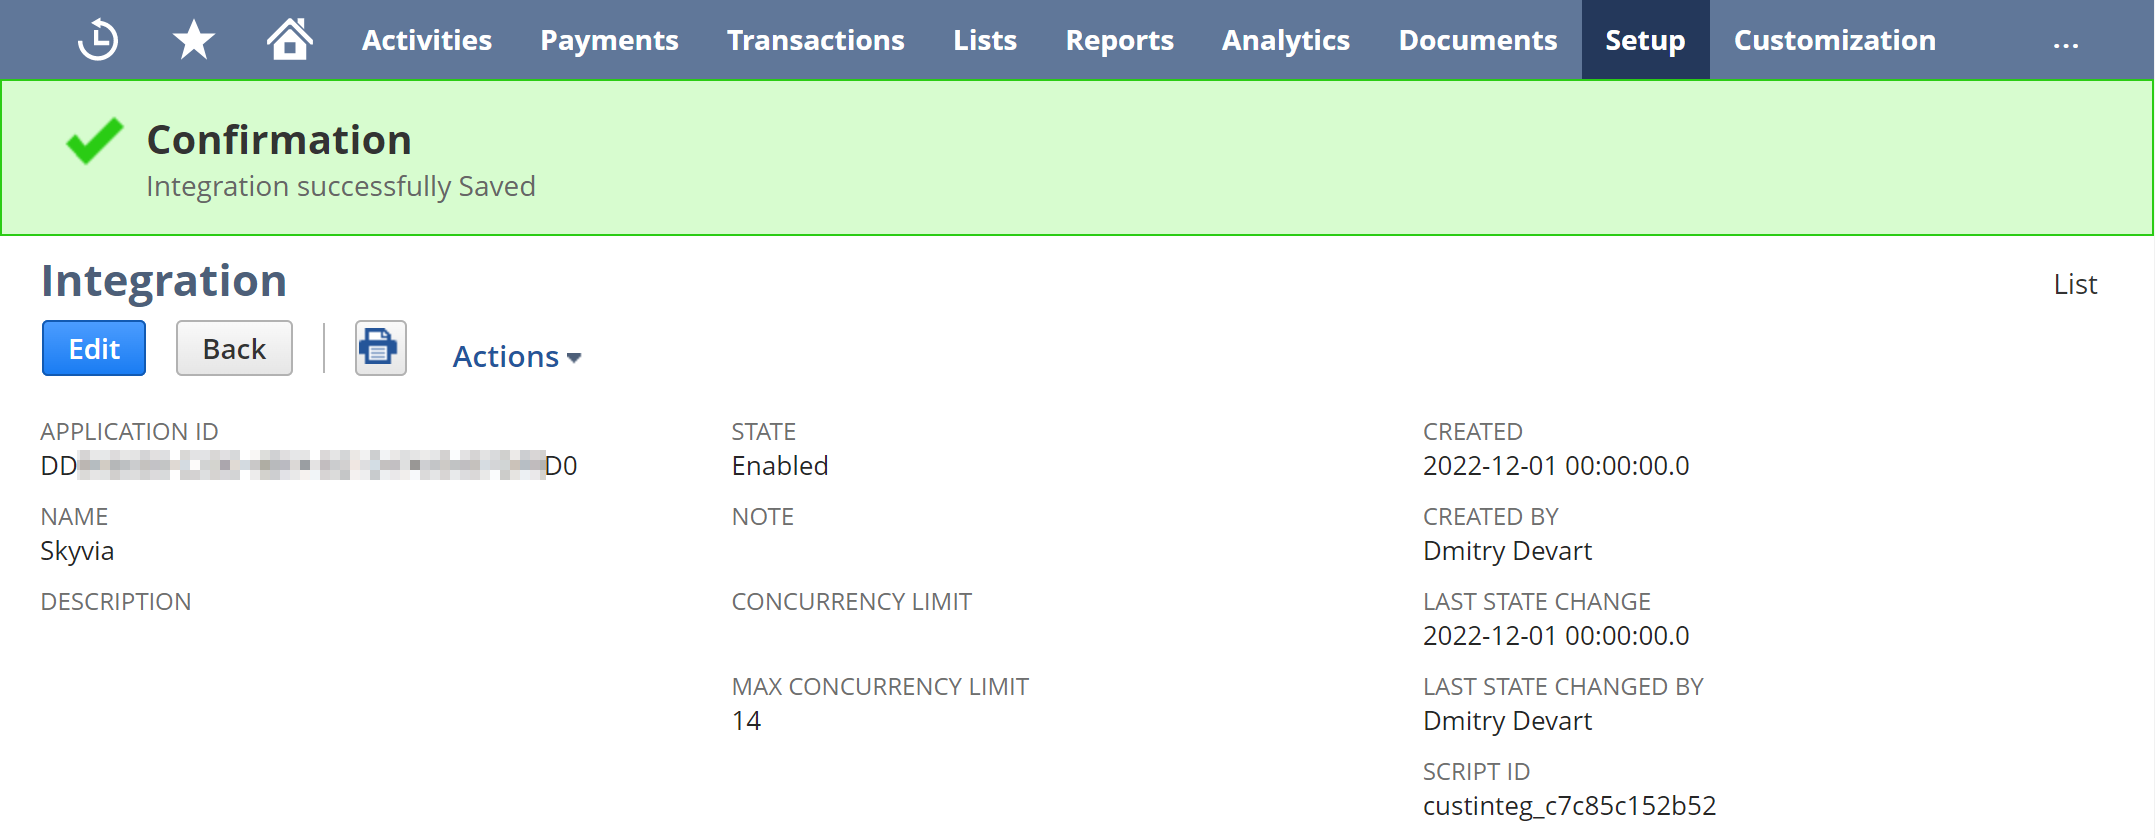
- Click Save.
-
From the top of the page, copy Application Id.
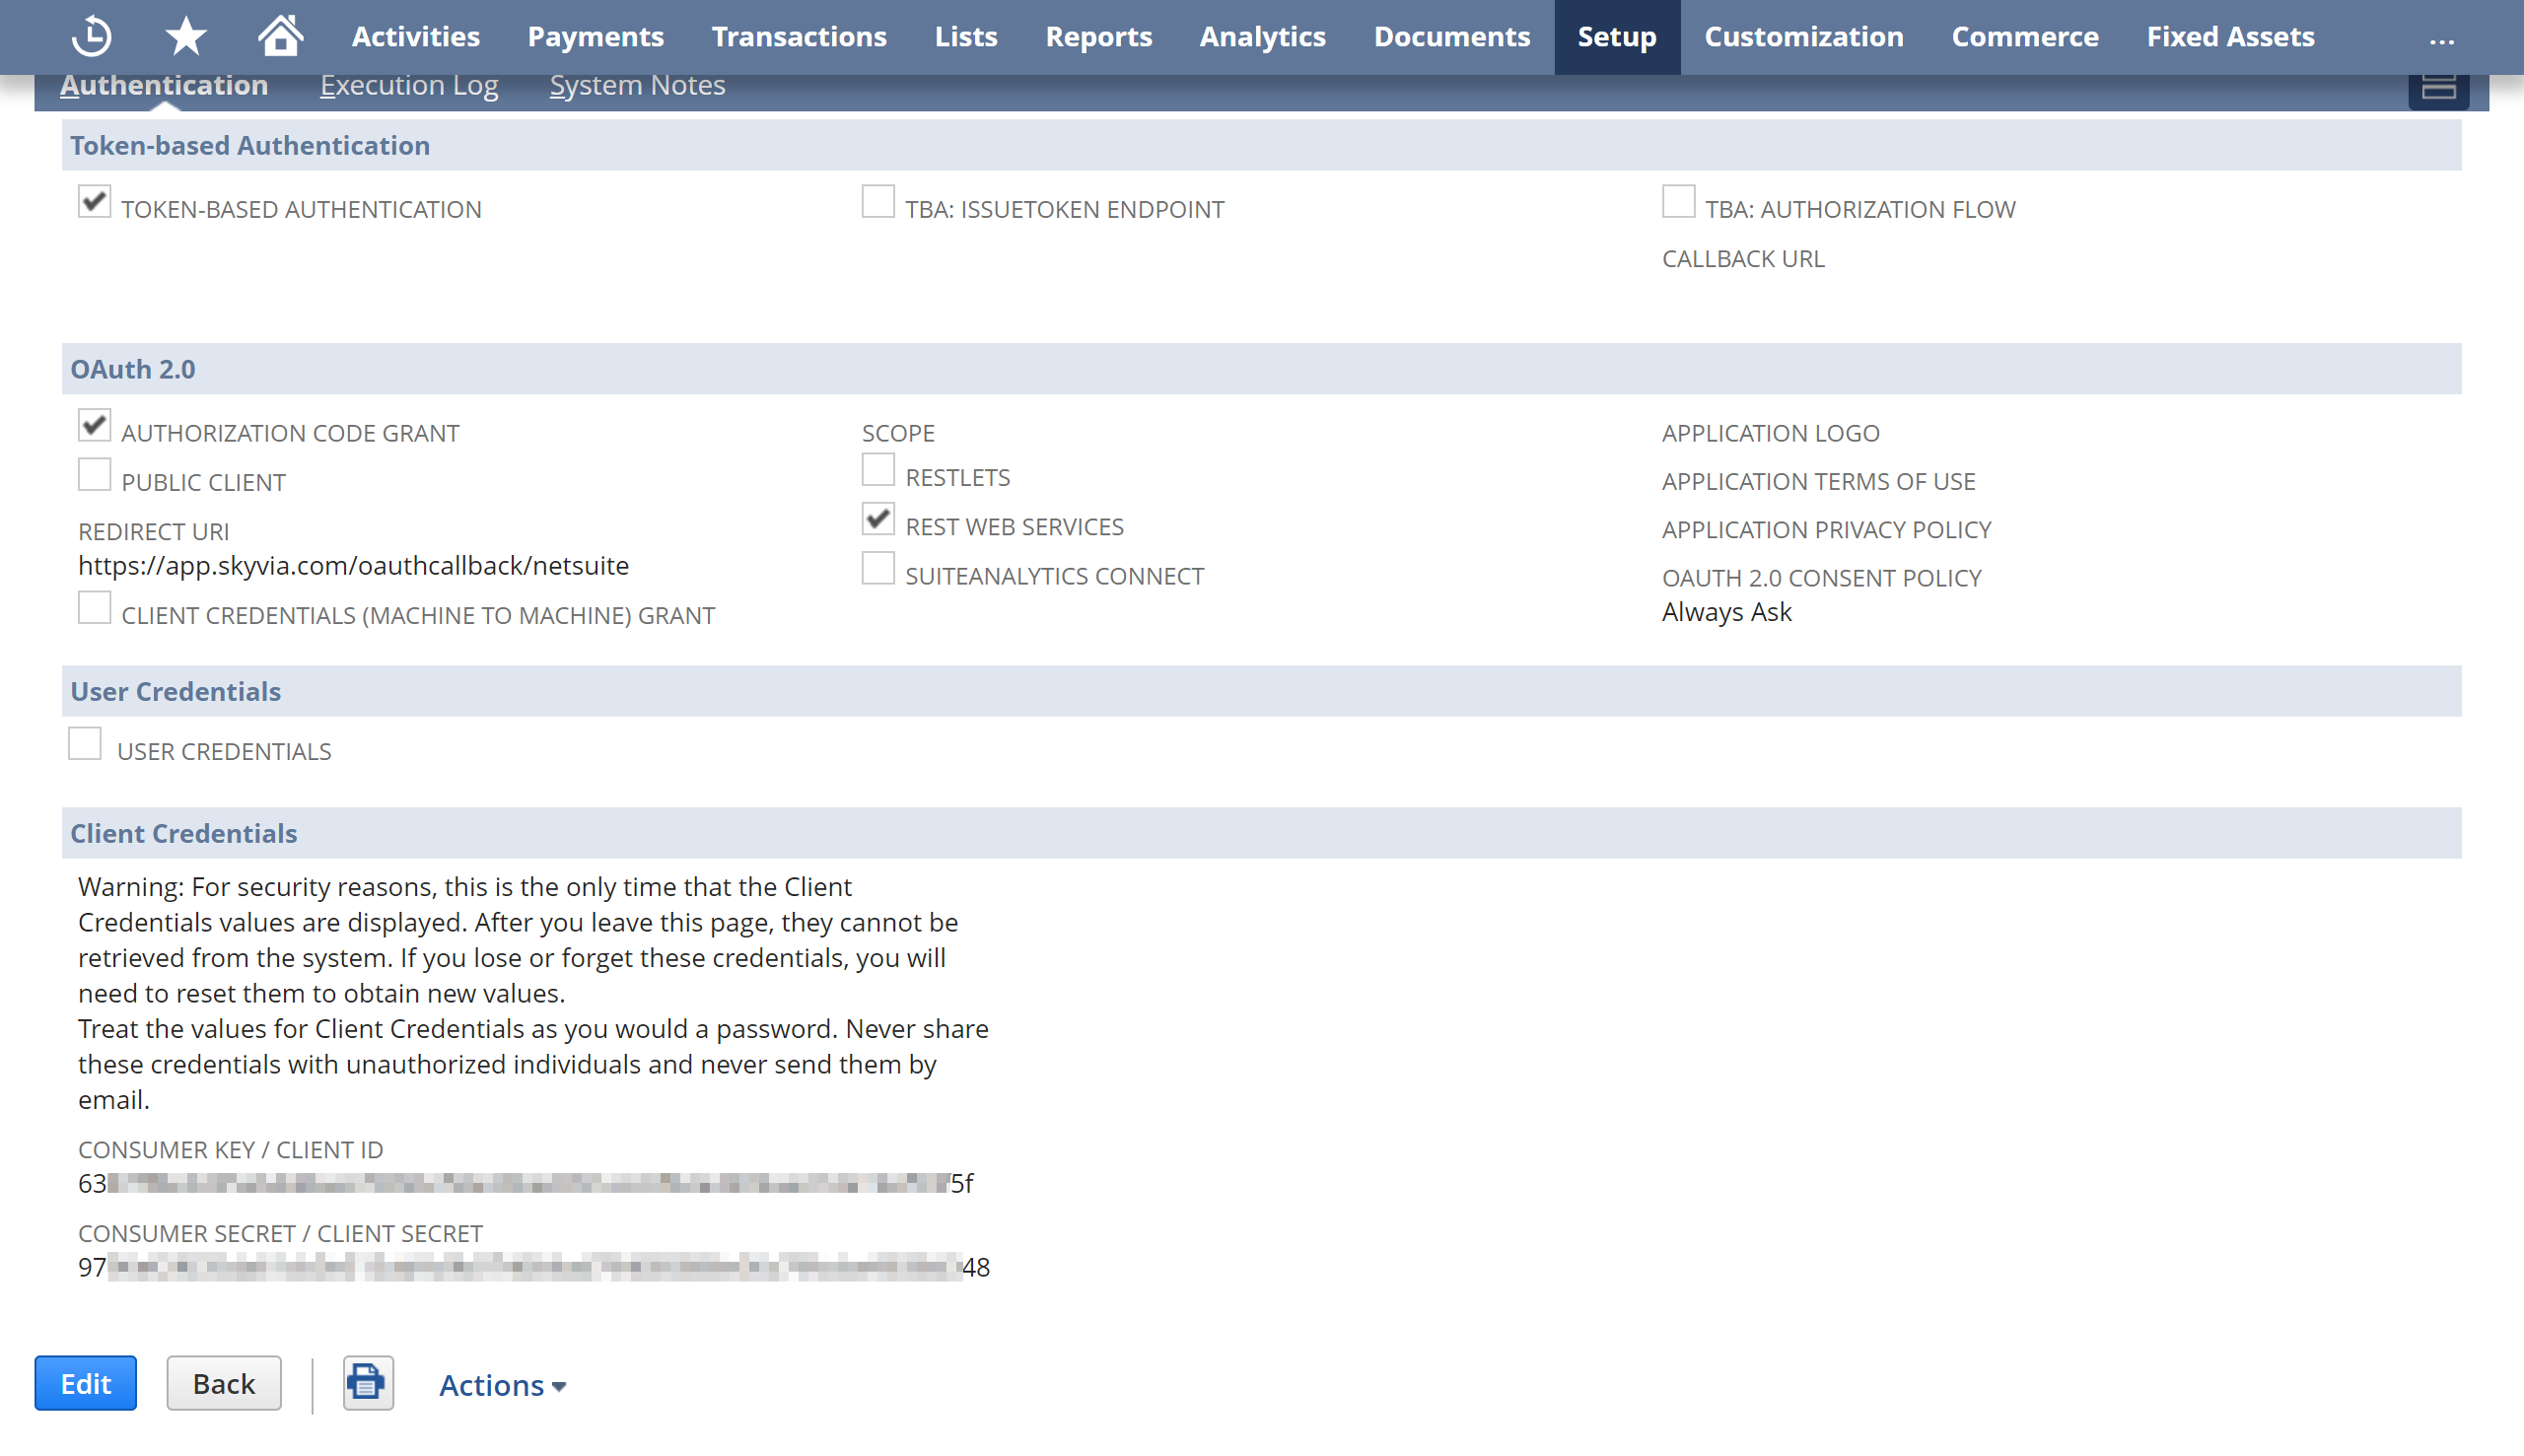
-
For Token-based authentication, copy the generated Consumer Key / Client ID, and Consumer Secret / Client Secret from the bottom of the page. Note that they are displayed only once on this page. If you need them again, you will have to re-generate them, which make the old ones to stop working. You may reuse these values if you need multiple Skyvia connections to this NetSuite account.
Create Access Token.
Perform the following actions to create an access token and obtain TokenID and Token Secret:
-
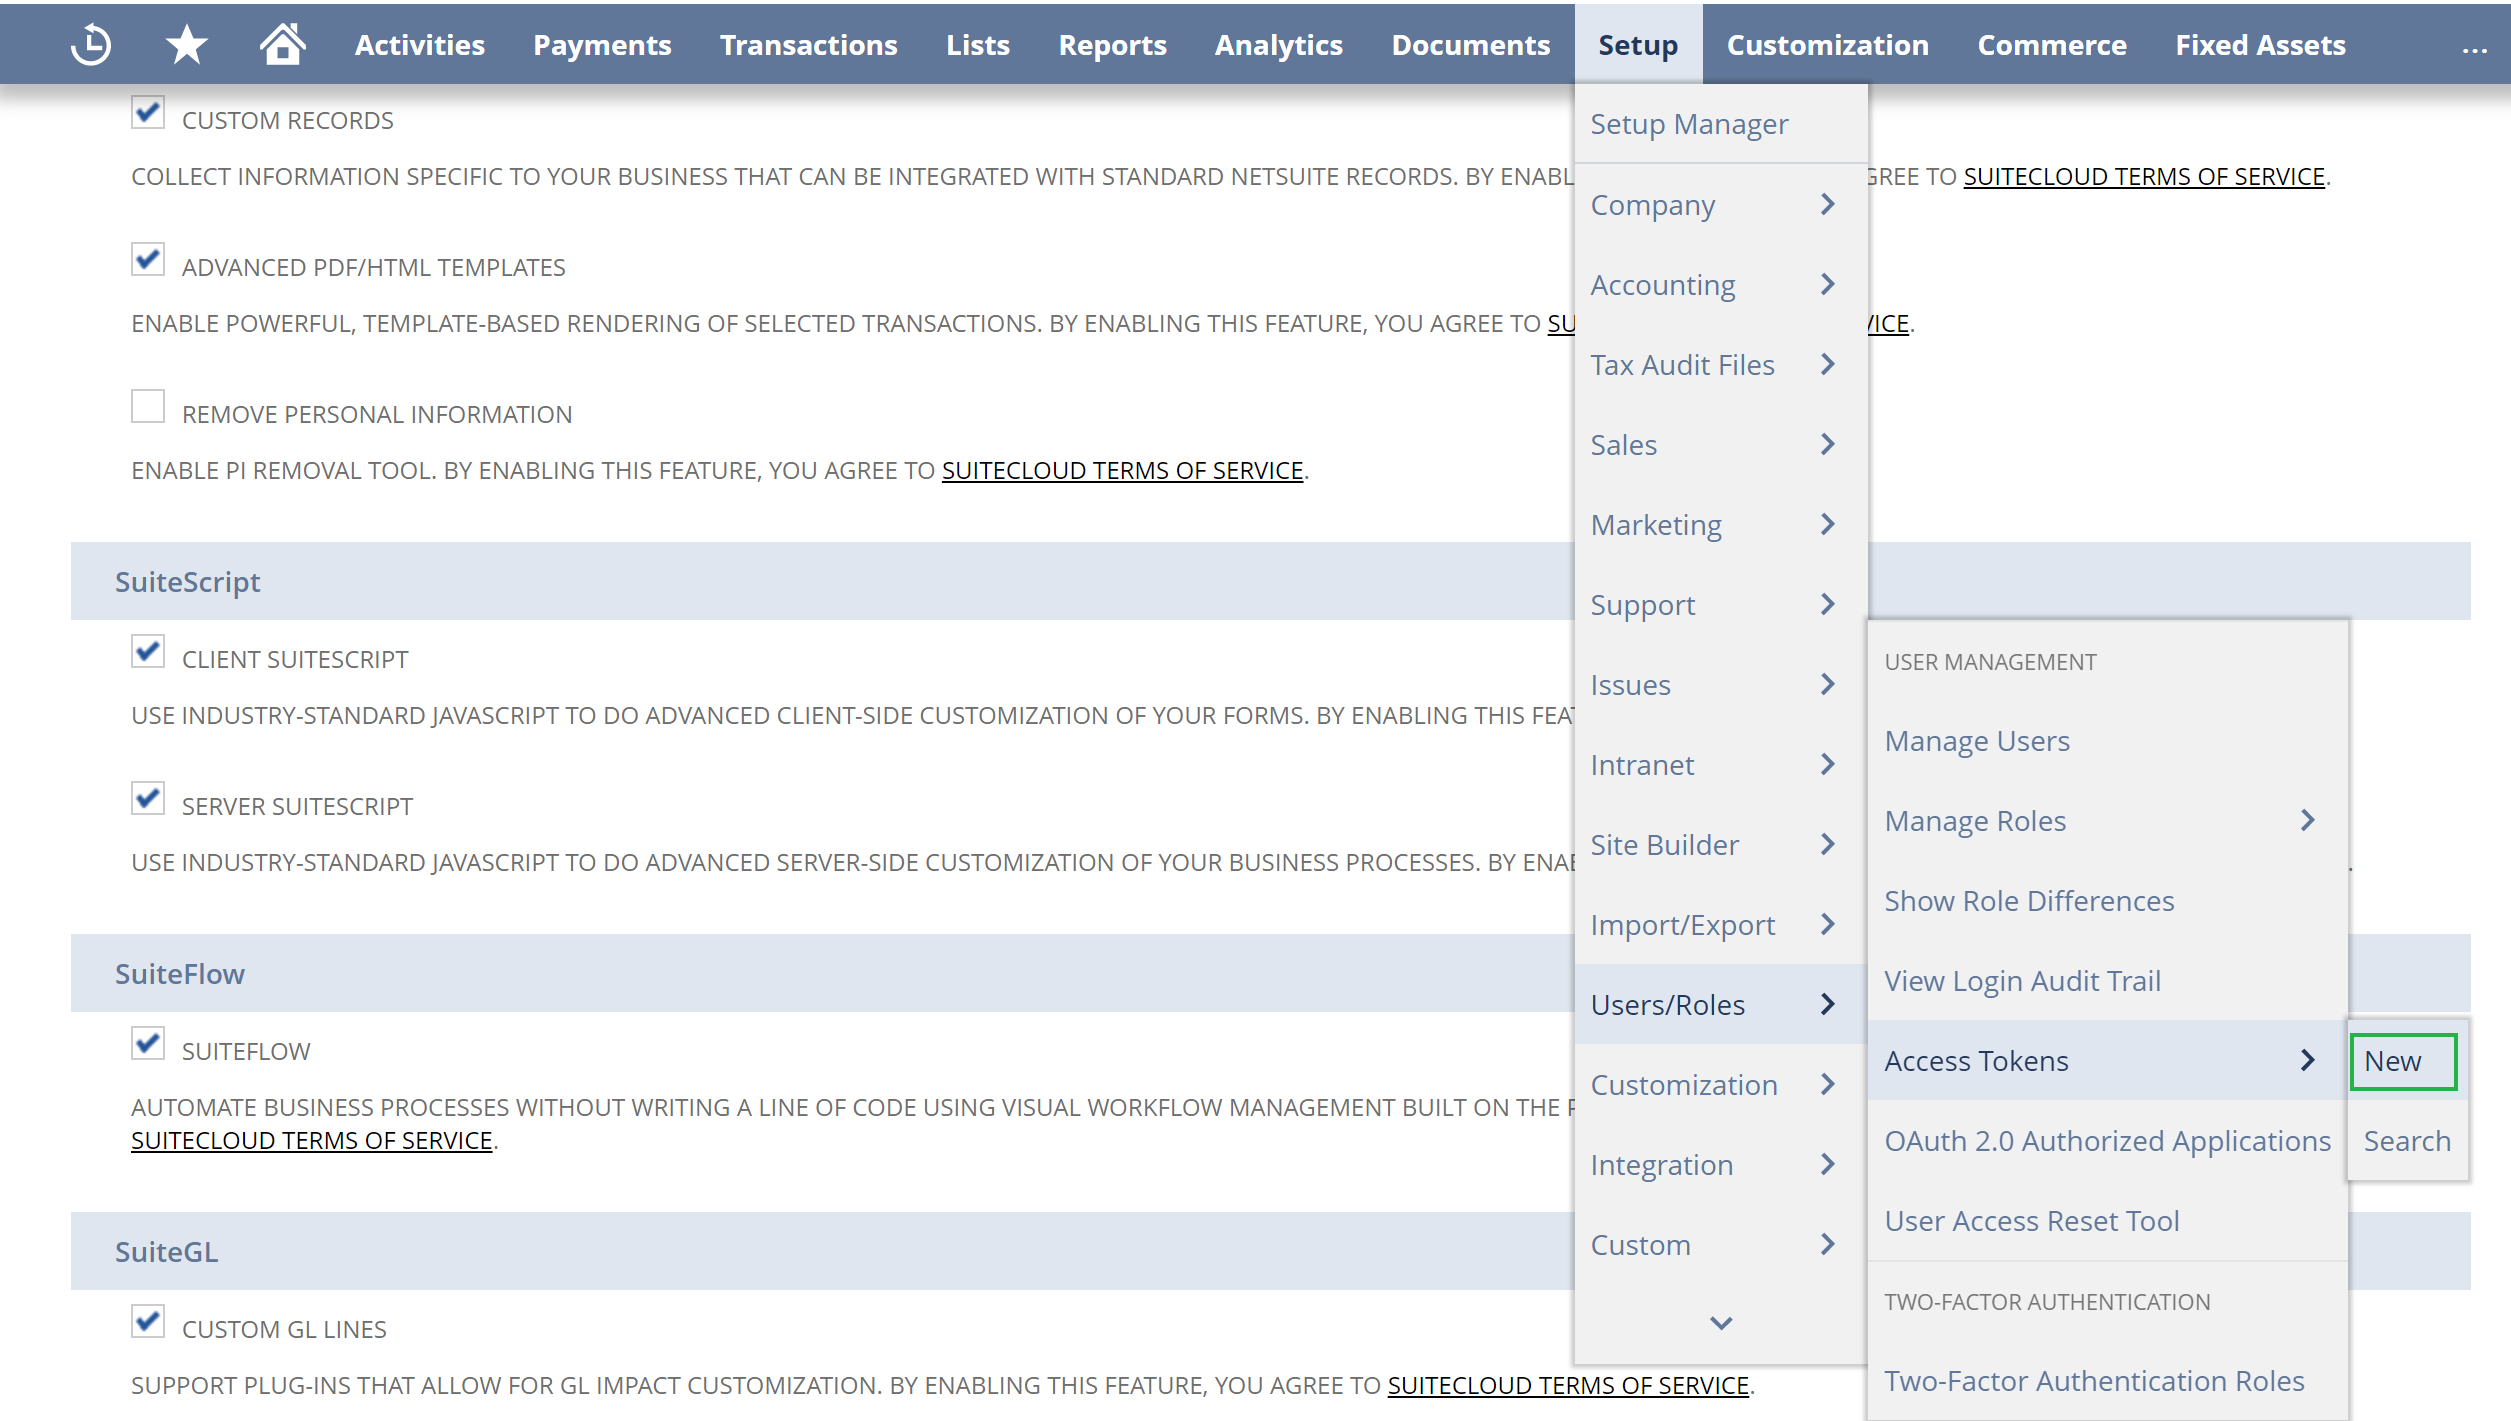
Point to Setup, then to Users/Roles, then Access Tokens, and then click New.
-
Select the Integration record, User, and Role created on the previous steps.
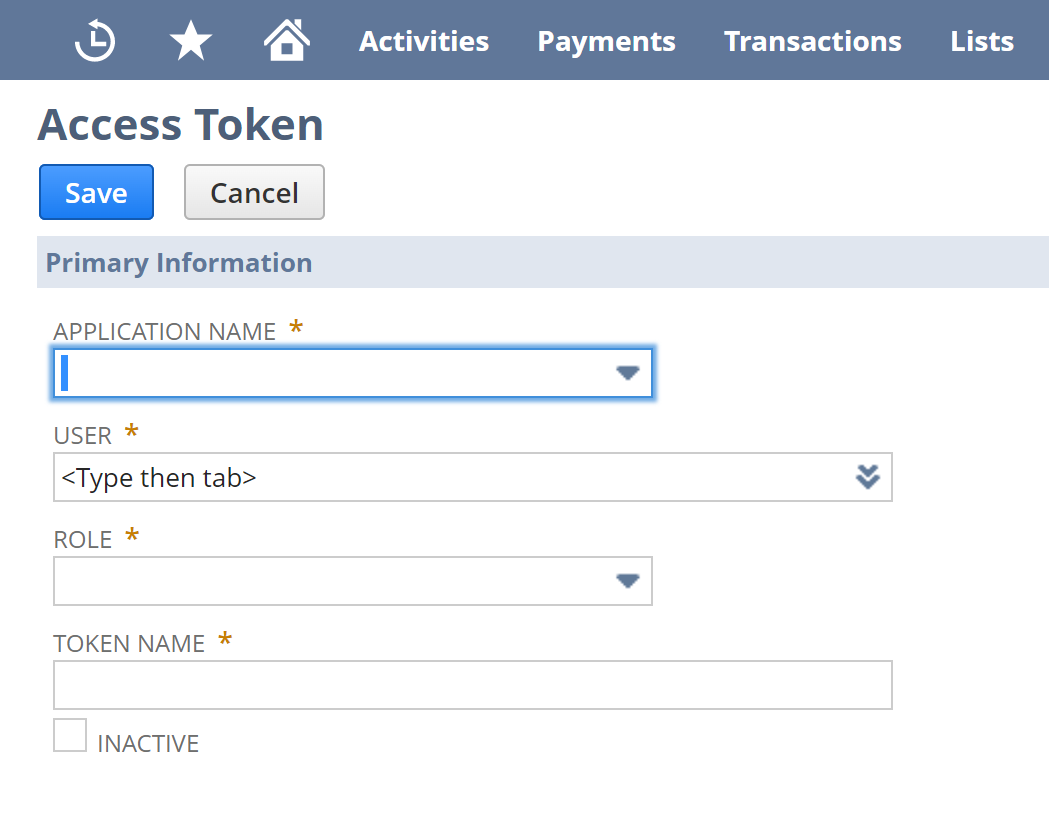
- Click Save.
-
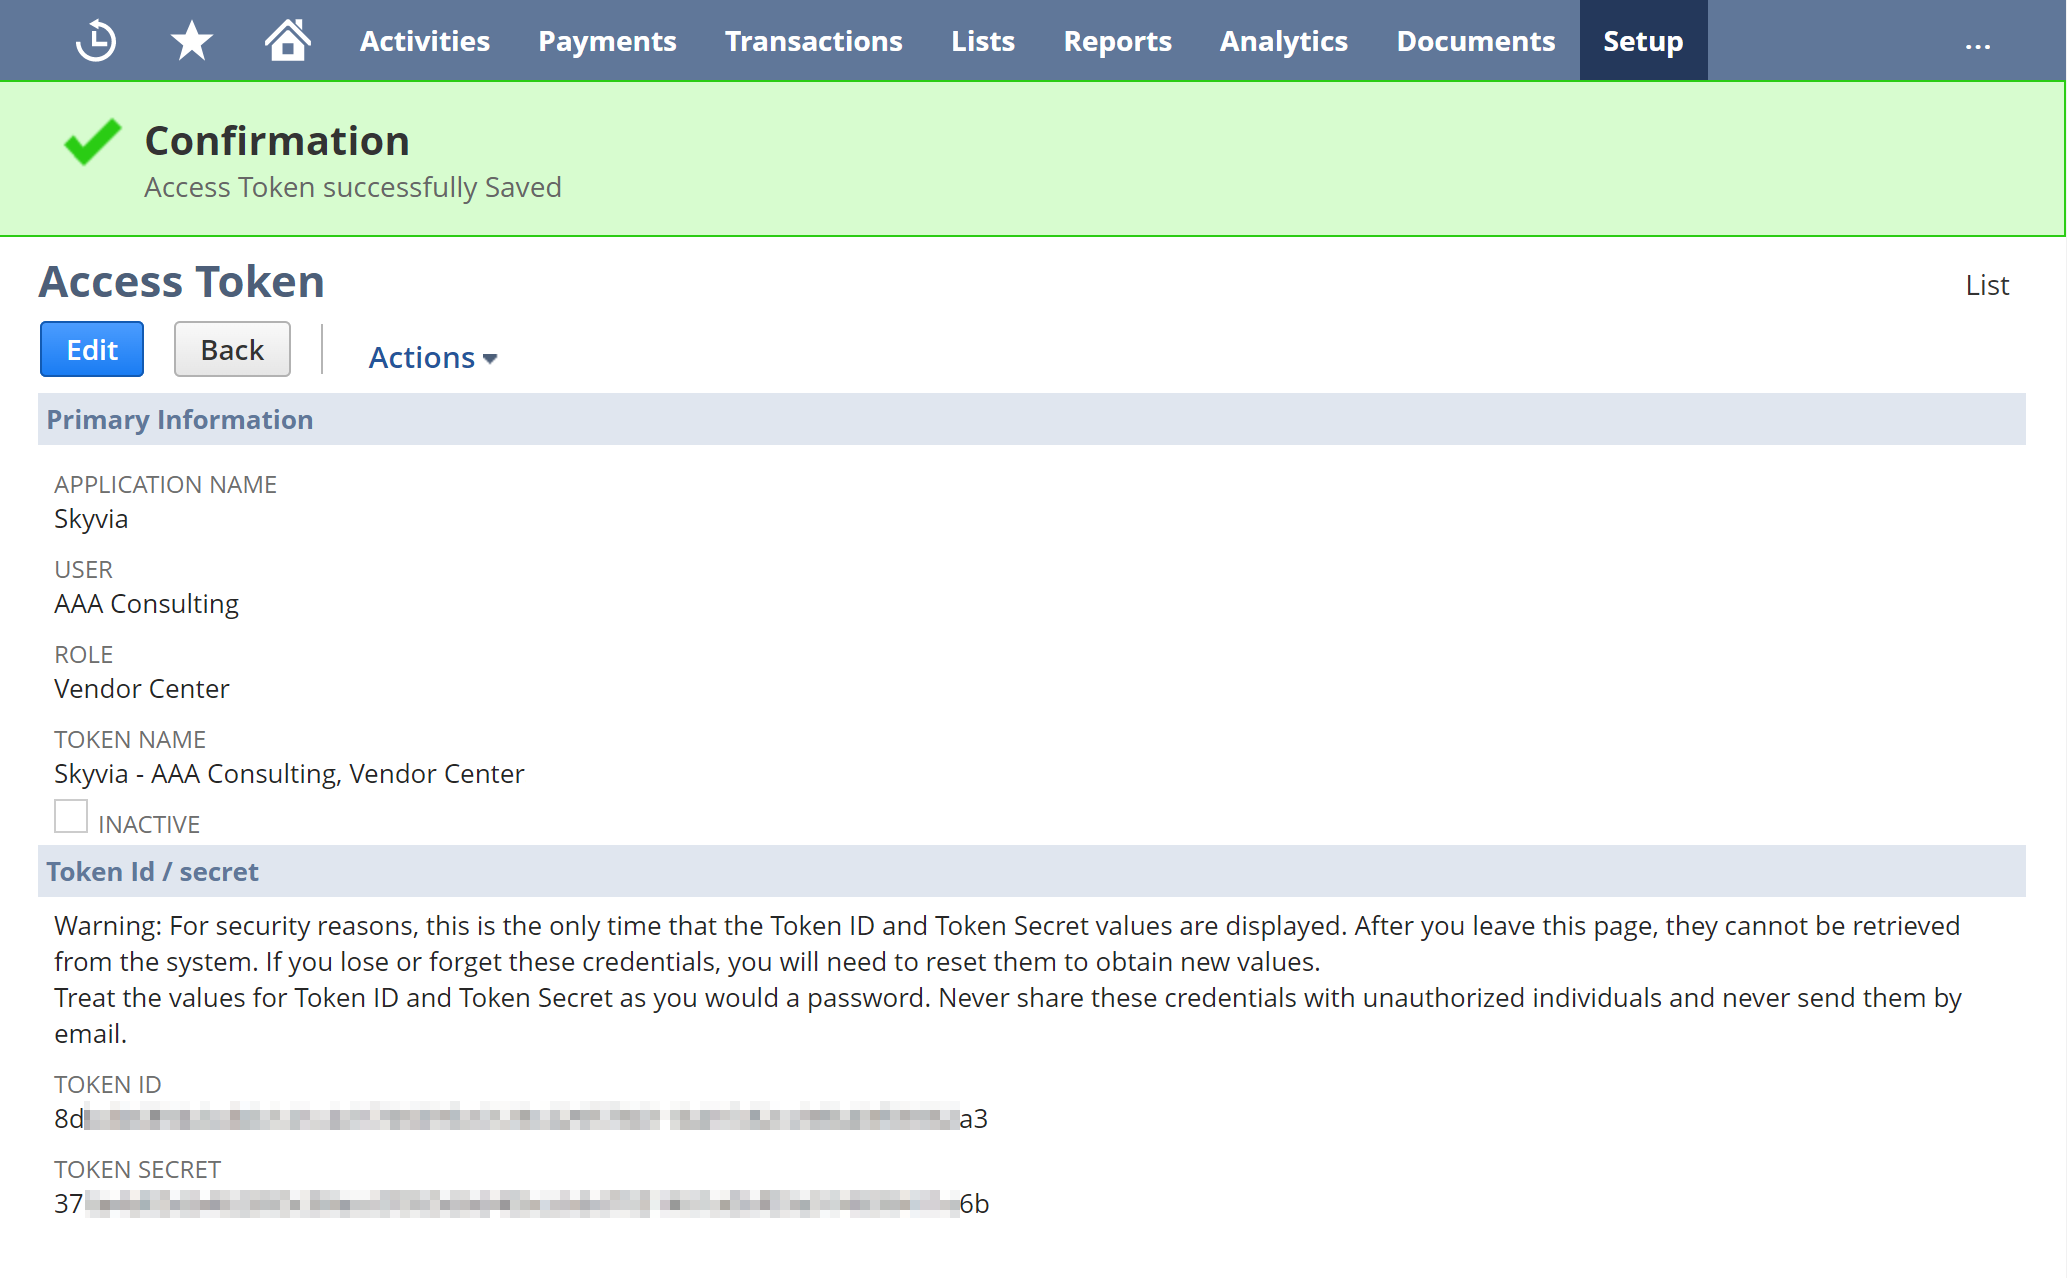
From the confirmation screen, copy the generated Token ID and Token Secret. Note that Token ID and Token Secret are displayed only once on this page. If you need them again, you will have to re-generate them, which make the old ones to stop working.
Creating Connection
When creating a NetSuite connection, you need to specify different connection parameters depending on the authentication kind you select.
Basic Authentication
To create a NetSuite connection using basic authentication, perform the following steps:
-
In the Authentication list, select Basic.
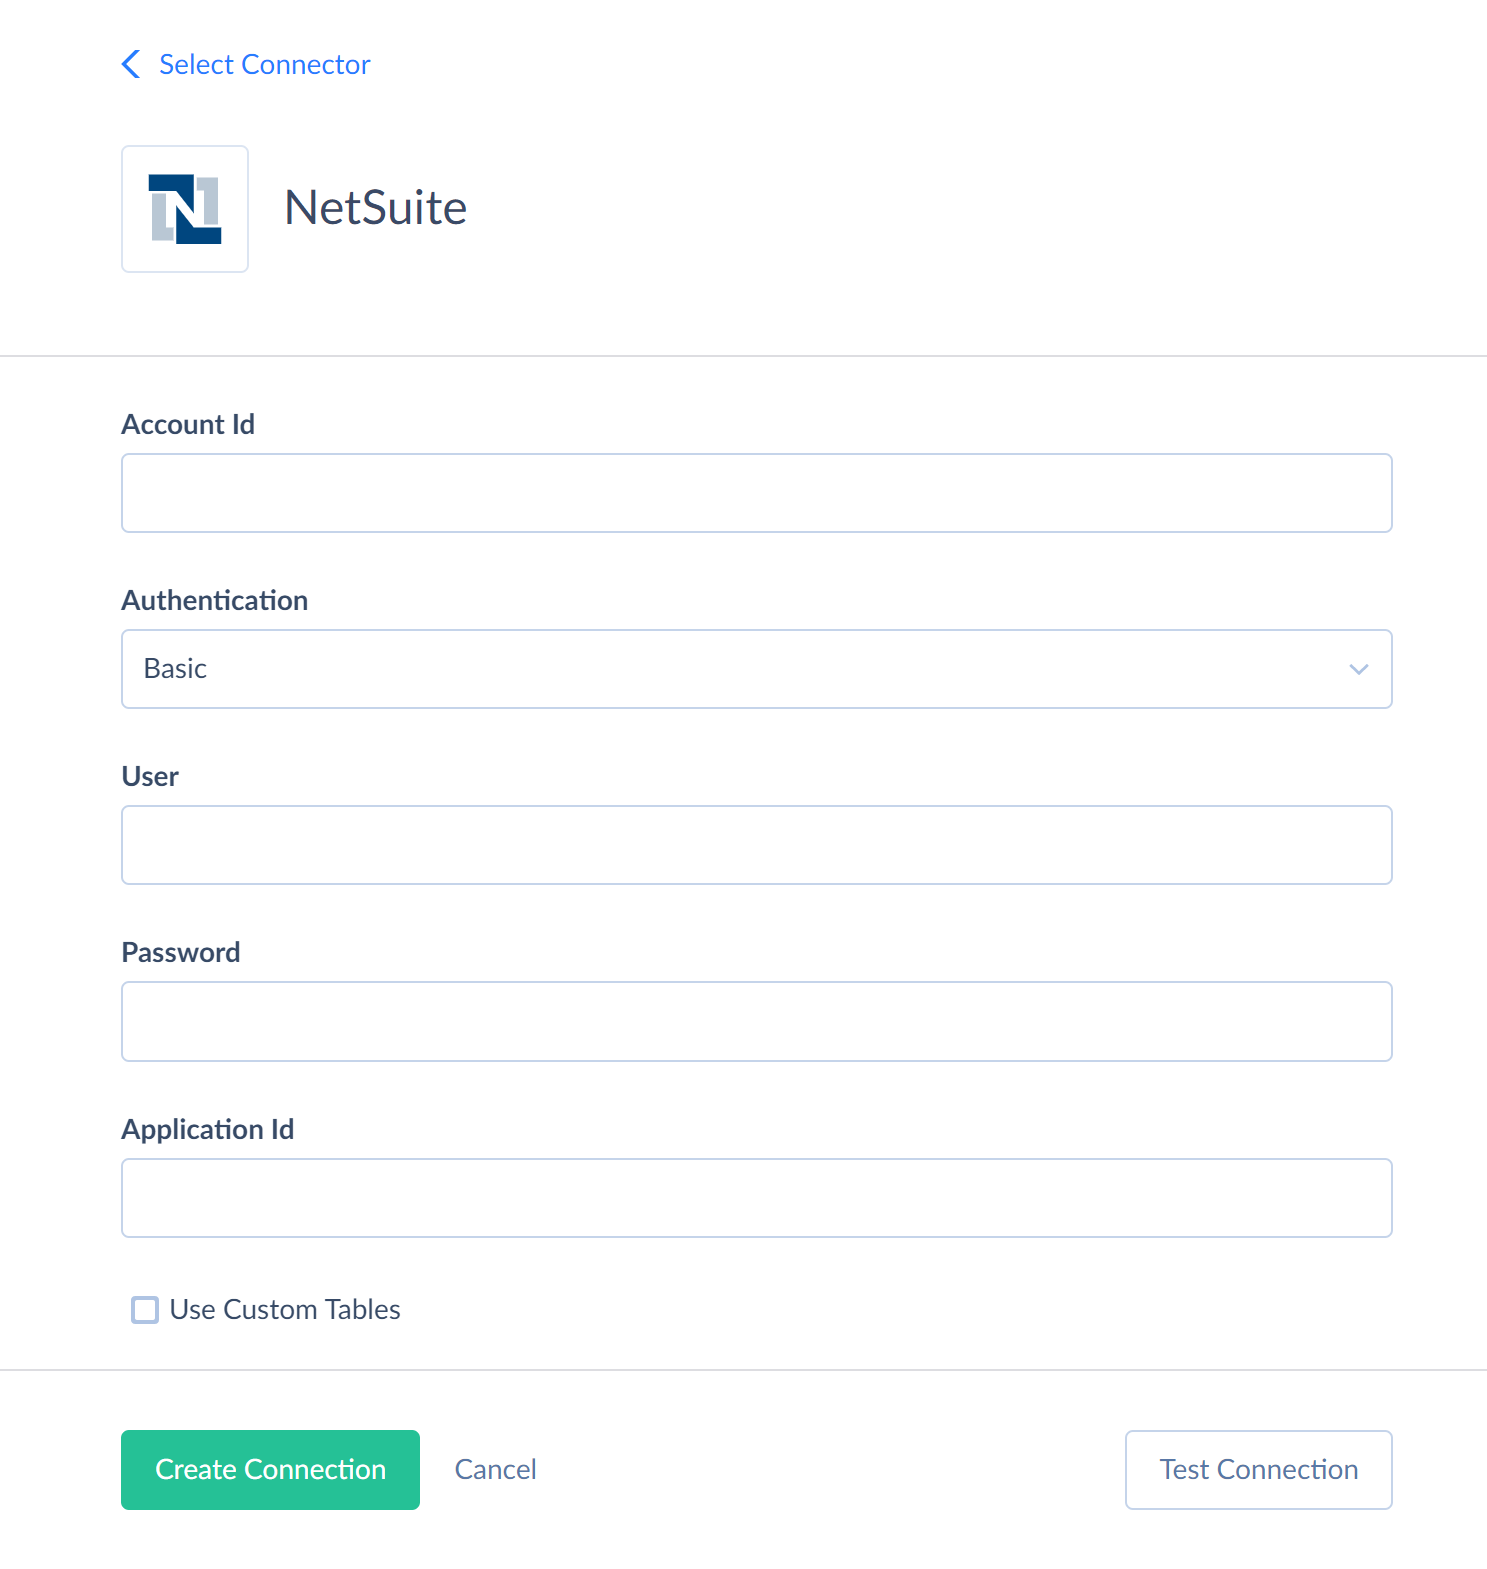
- Enter the obtained NetSuite Account ID.
- Enter your NetSuite account email to the User box.
- Enter your Password.
Token-based Authentication
To create a NetSuite connection using token-based authentication, perform the following steps:
-
In the Authentication list, select Token-Based.
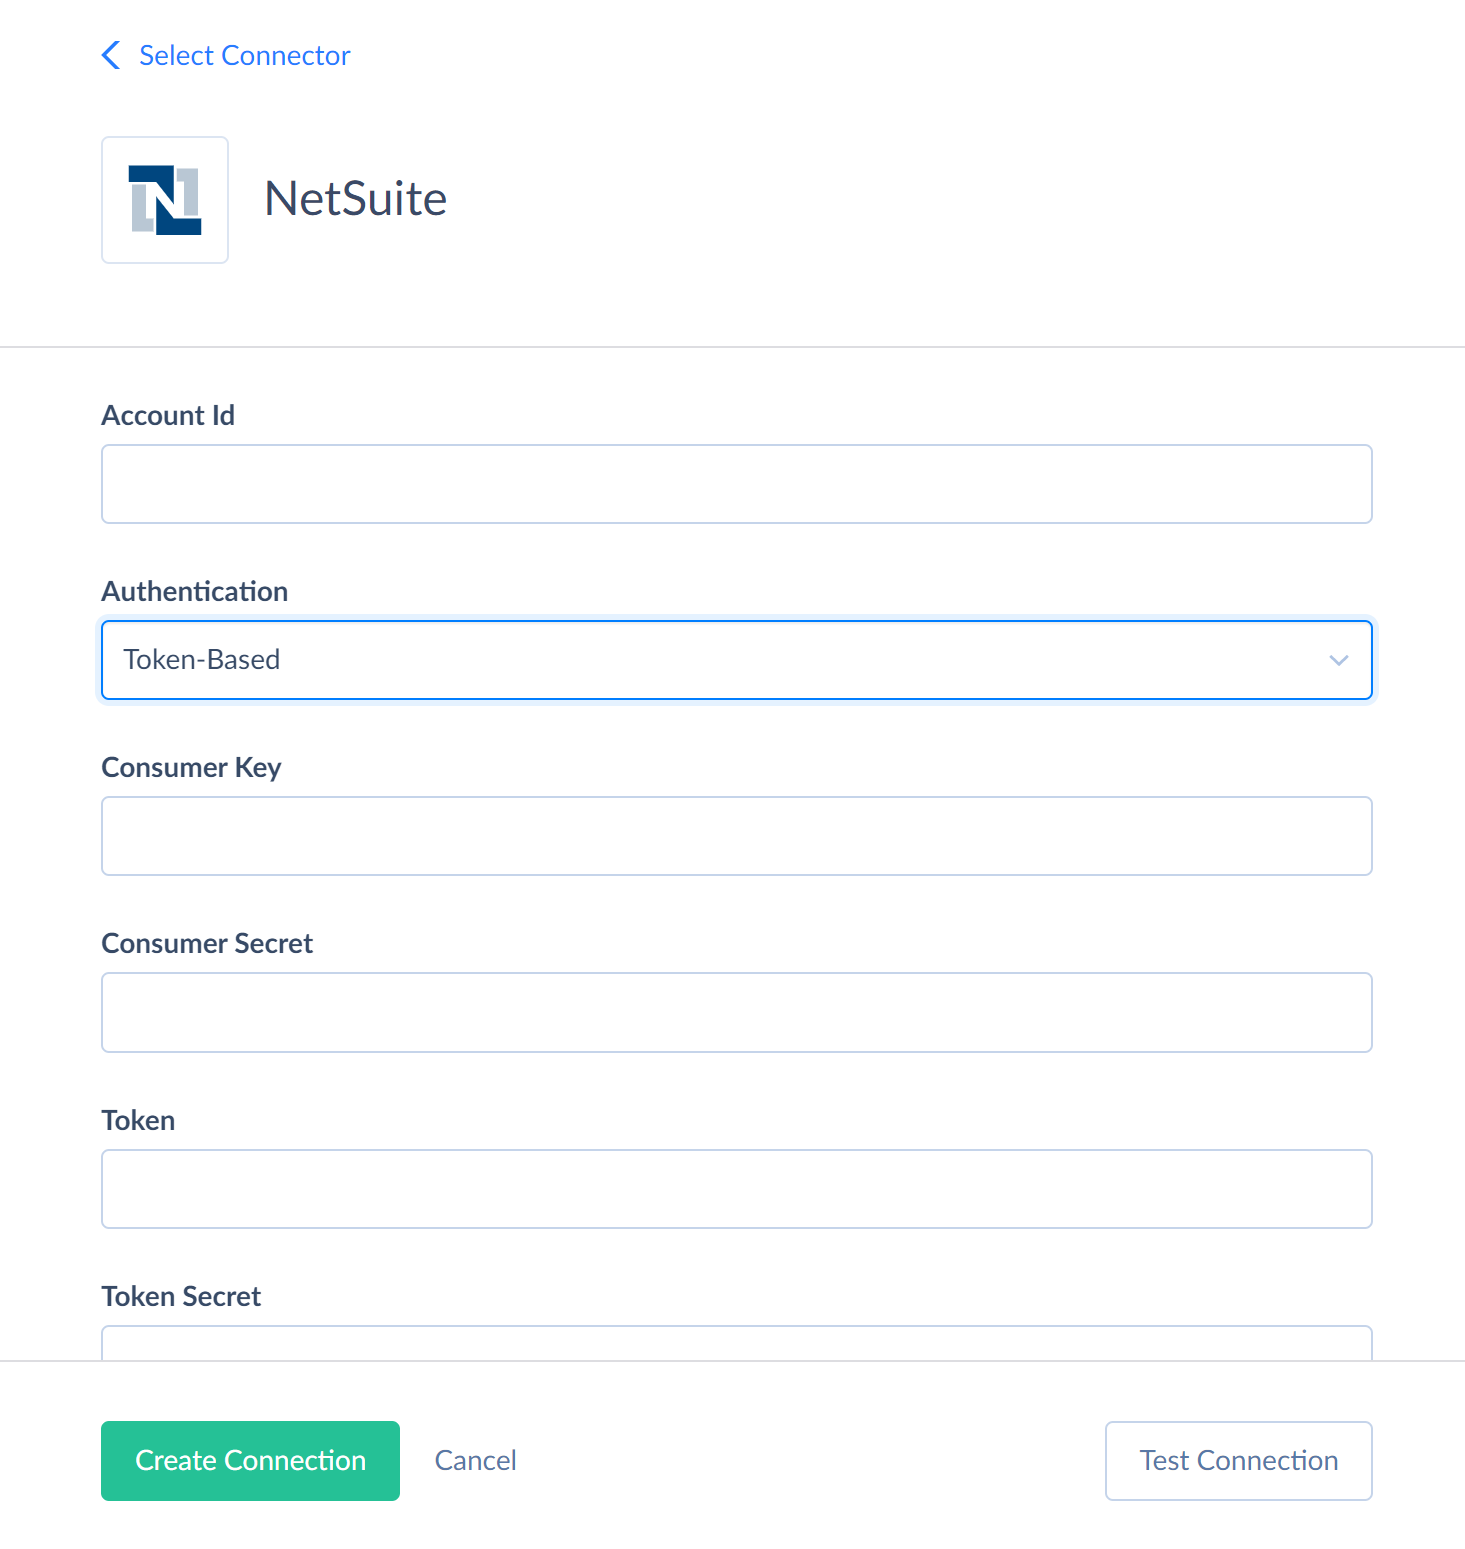
- Enter the obtained NetSuite Account ID.
- Paste the copied Consumer Key / Client ID to the Consumer Key box.
- Paste the copied Consumer Secret / Client Secret to the Consumer Secret box.
- Paste Token ID and Token Secret that you obtain when creating an access token to the Token and Token Secret boxes respectively.
Additional Connection Parameters
Metadata Cache
You can specify the period of time, after which Metadata cache is considered expired.
Custom Objects and Fields
Skyvia supports custom NetSuite objects and fields. Their support is disabled by default. You can enable it using the following connection options:
- Use Custom Tables — select this checkbox if you need to work with custom NetSuite tables in Skyvia. However, please note that processing custom tables may take a substantial amount of time, and it’s better not to select this checkbox if you don’t need to work with custom NetSuite tables in Skyvia.
- Use Custom Lists — select this checkbox if you need to work with NetSuite custom lists (as with other objects) in Skyvia. However, please note that processing custom lists may take a substantial amount of time, and it’s better not to select this checkbox if you don’t need to work with NetSuite custom lists in Skyvia.
- Use Custom Fields — select this checkbox if you need to work with custom fields of predefined NetSuite tables in Skyvia. However, please note that processing custom fields may take a substantial amount of time, and it’s better not to select this checkbox if you don’t need to work with custom fields in Skyvia.
Connector Specifics
Nested Array Fields
This connector does not support NetSuite fields, storing array data. Skyvia cannot extract data from such fields, and they are not displayed in Skyvia interface. If such field is required in the table (must be filled in order to create a new record), Skyvia cannot load data to such tables. Thus, such tables are read-only in Skyvia.
The list of such objects, for example, includes all the transactions objects, because Skyvia cannot extract their items. Here is the list of such objects: BinWorksheet, CashRefund, CashSale, Check, CreditMemo, Estimate, Invoice, Opportunity, PurchaseOrder, ReturnAuthorization, SalesOrder, TransferOrder, VendorBill, VendorCredit, VendorReturnAuthorization, WorkOrder, Deposit, InventoryAdjustment, InventoryTransfer, ItemSupplyPlan, JournalEntry, VendorPayment, SerializedAssemblyItem, ExpenseReport, ManufacturingRouting, PaycheckJournal, ManufacturingOperationTask, CustomerRefund, InventoryAdjustment, InventoryCostRevaluation, ManufacturingCostTemplate. This list is not complete. Skyvia also does not support updating the Address object and some other objects.
Skyvia cannot load data to these tables and cannot load certain data from them.
If you need to work with such fields, use our NetSuite v2 (REST) connector.
Other Connector Limitations
Skyvia also does not support custom NetSuite fields having double quotation marks in their name.
As for NetSuite files, Skyvia cannot read NetSuite file content. Thus, Skyvia can import files to NetSuite, but can only read file metadata and not content from NetSuite.
Supported Actions
Skyvia supports all the common actions for NetSuite.