Working with Backed Up Data
After you have created a backup, you can access all its backed up data via the Snapshots tab. This tab displays the list of all backup snapshots and allows browsing, viewing, and restoring backed up data.
Snapshots Period
By default, the Snapshots tab displays all the snapshots made by this backup. Just scroll the list down to see older snapshots. Whenever necessary, you can select one of the predefined periods or a custom period in the list above the snapshots. Use Custom range to specify any period you want. You can manually enter start and end dates in the box or click the start date and then the end date in the calendar.
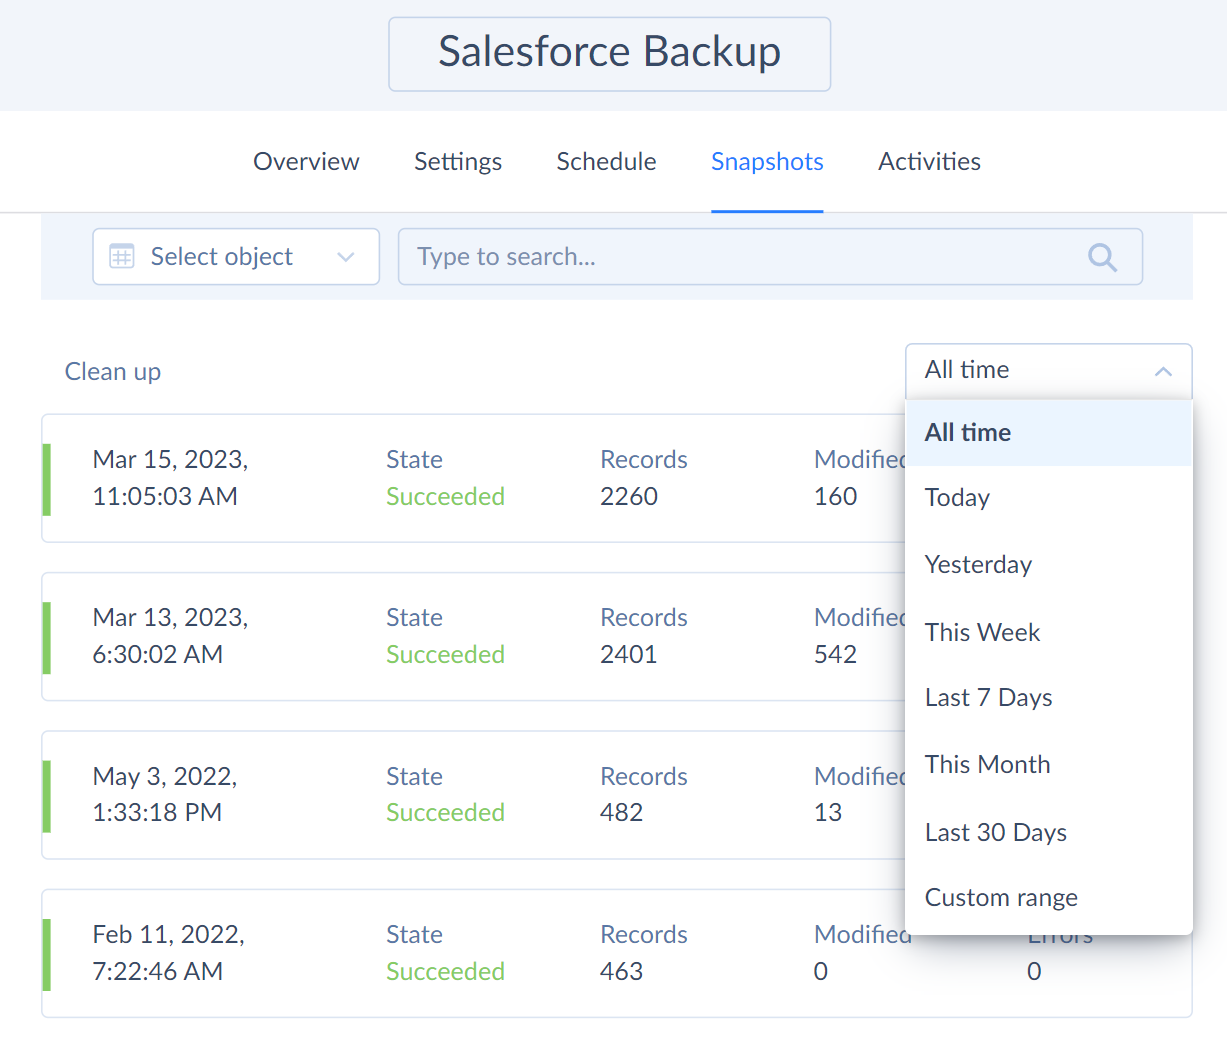
To specify a period of several months, navigate to the start date of the period you want to select by using the arrows at the top of the calendar to scroll through the months and click it. Then, in the same way, navigate to the end date of the necessary period and click the end date.
Viewing and Exporting Data
To view or export data, click the required snapshot in the list to open its details.
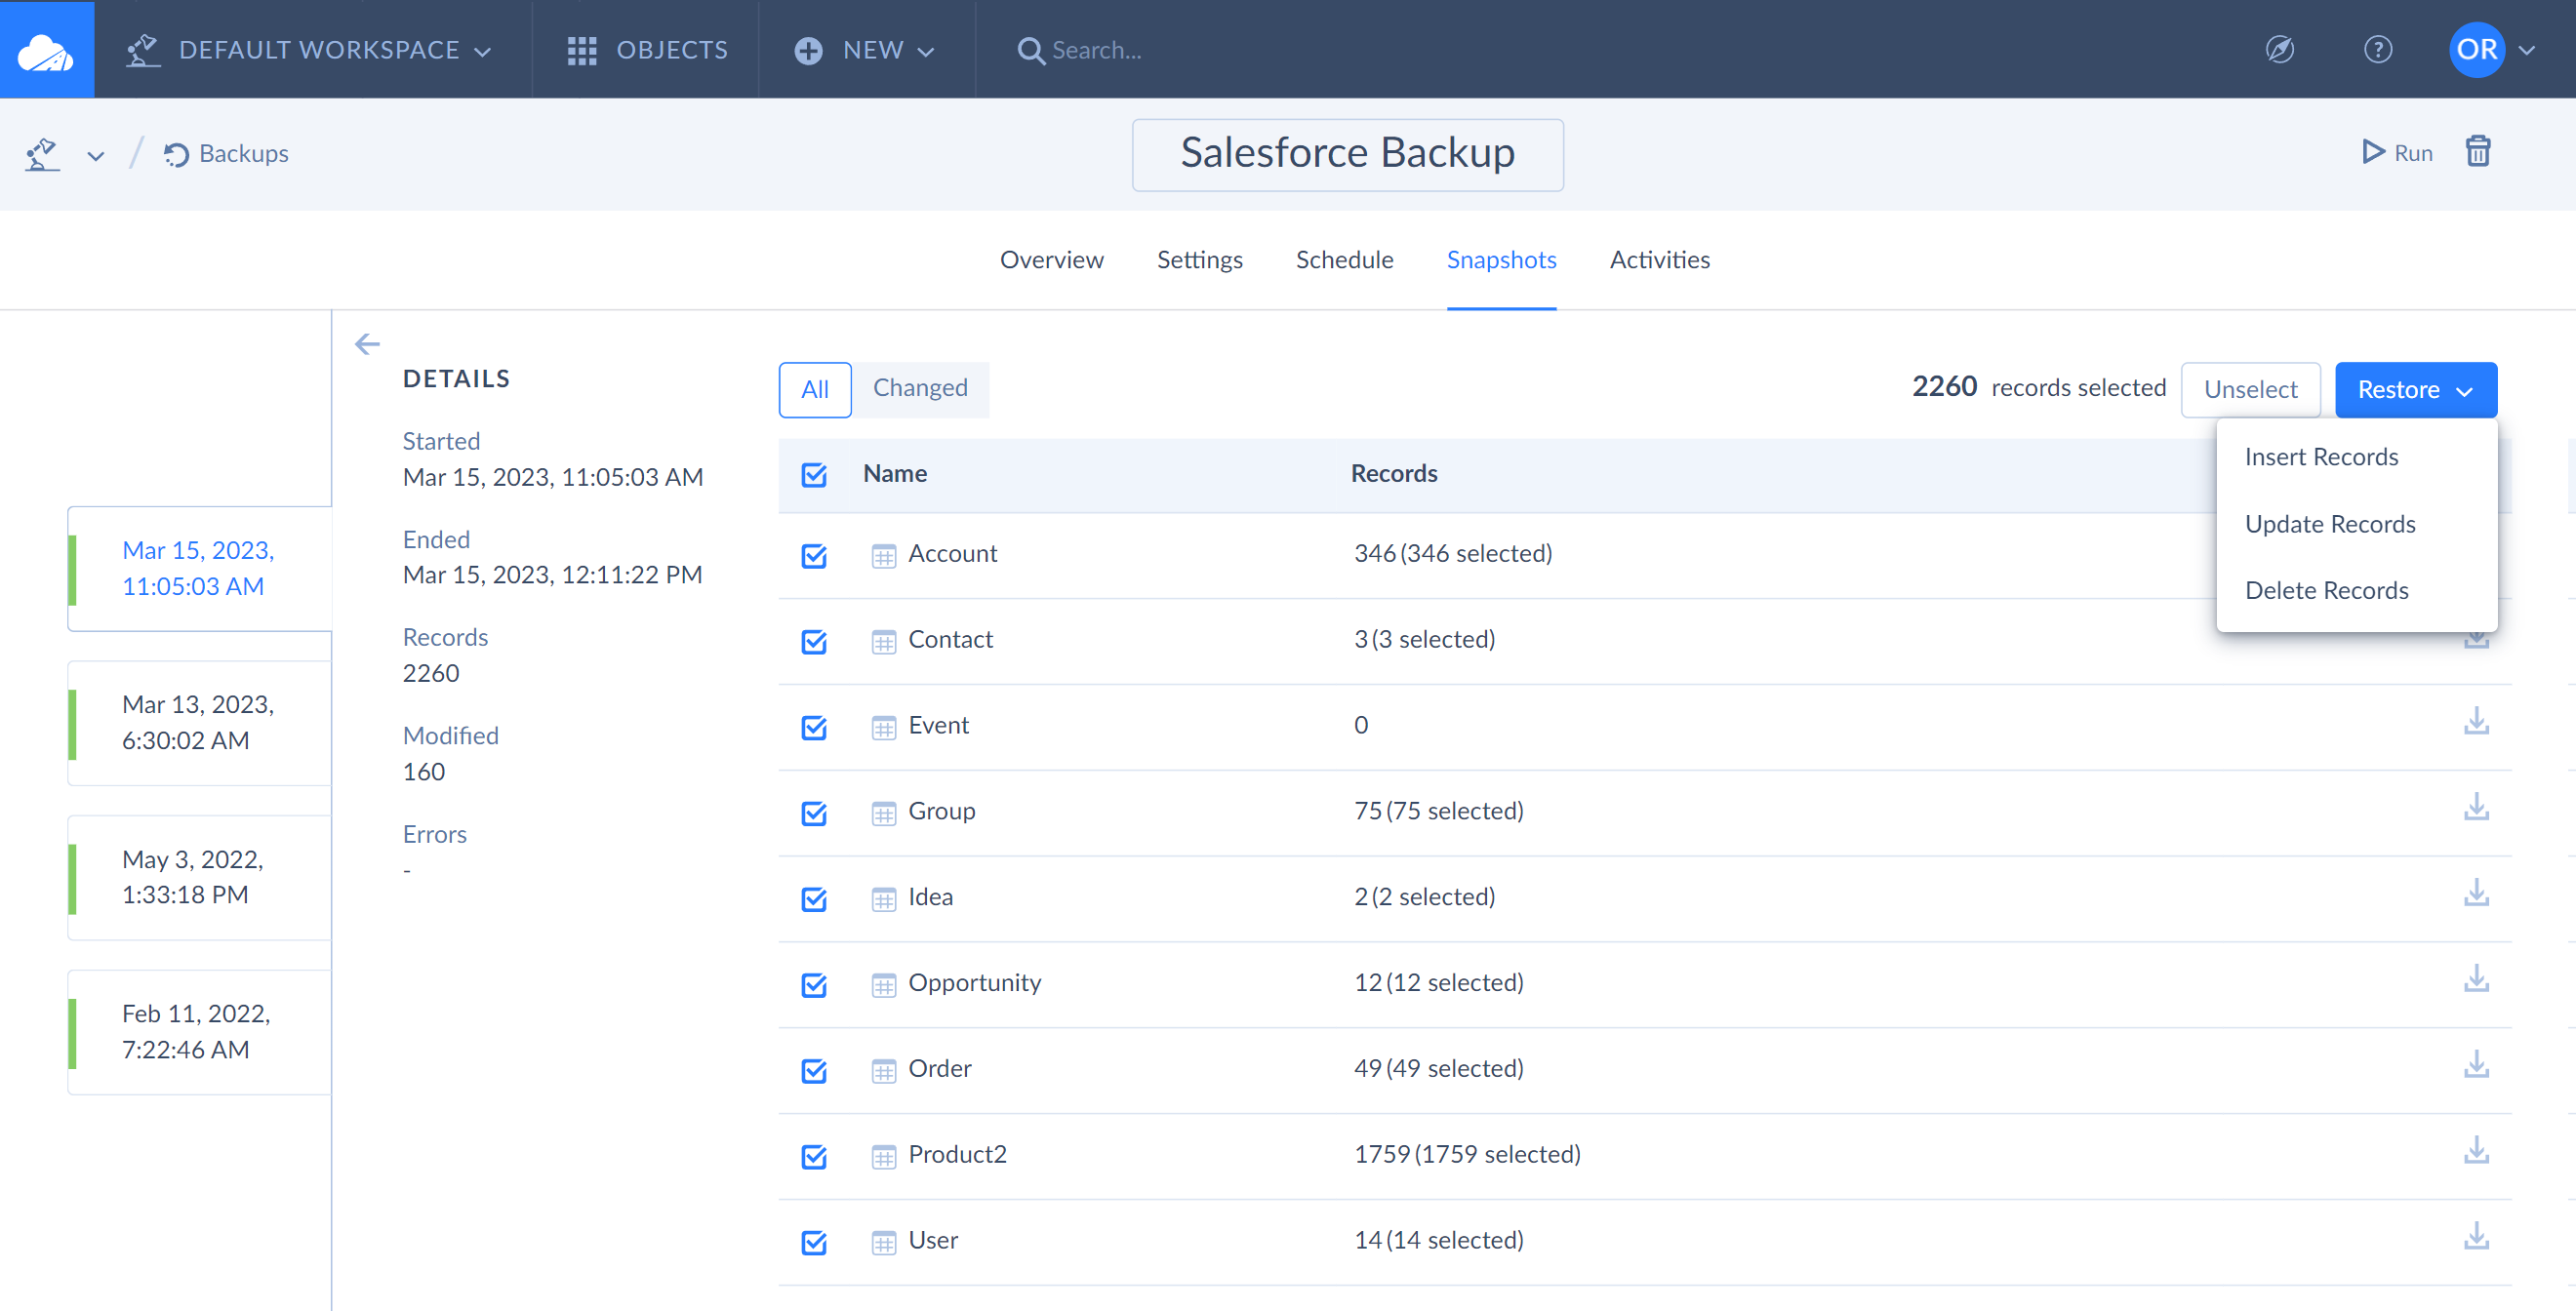
Snapshot Details and Data Export
Skyvia displays the snapshot start date, end date, time of the backup run, the total number of backed up records, the number of records modified since the previous snapshot, and the number of errors if any. It also displays the list of backed up objects and enables snapshot records to be exported to a CSV file.
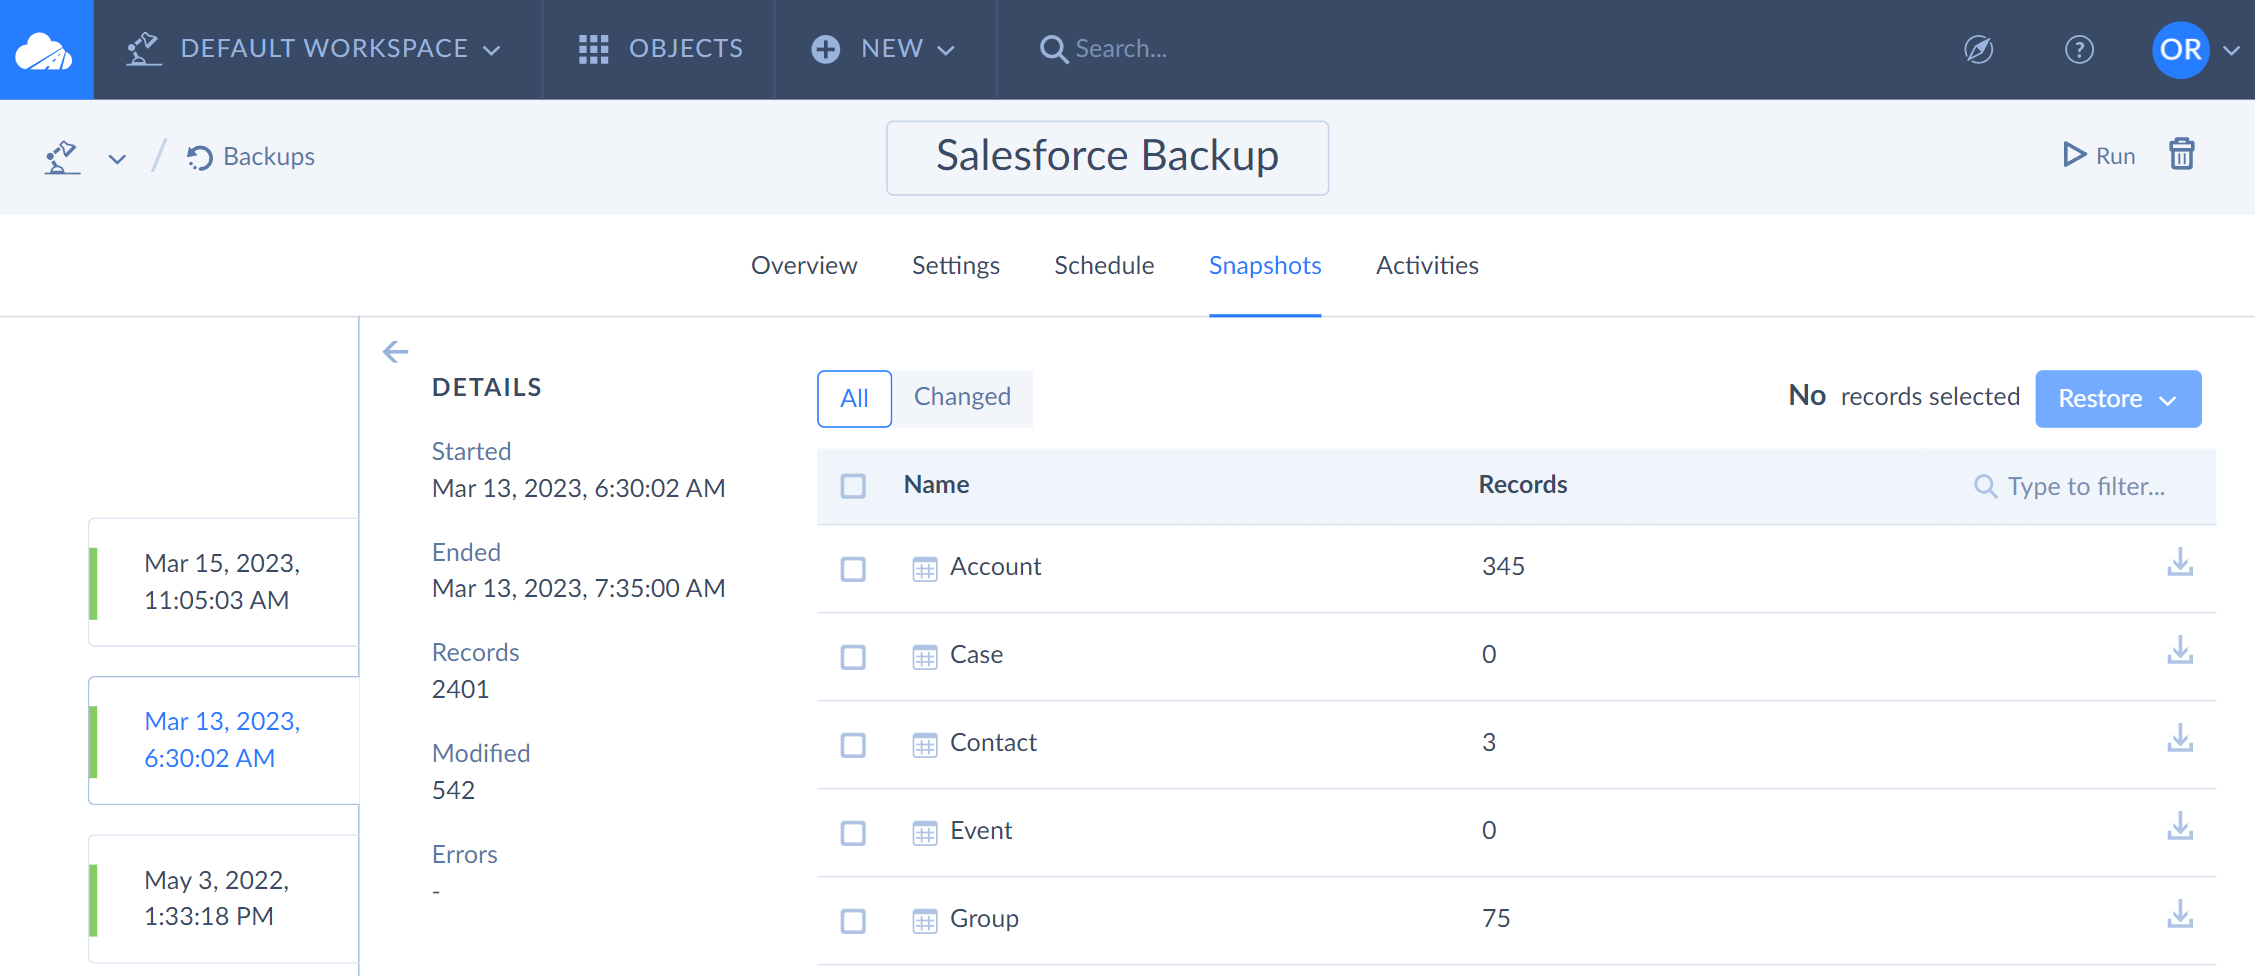
To export data from a backed up object, hover over the needed object and click the ![]() Export button to the right of the exported object.
Export button to the right of the exported object.
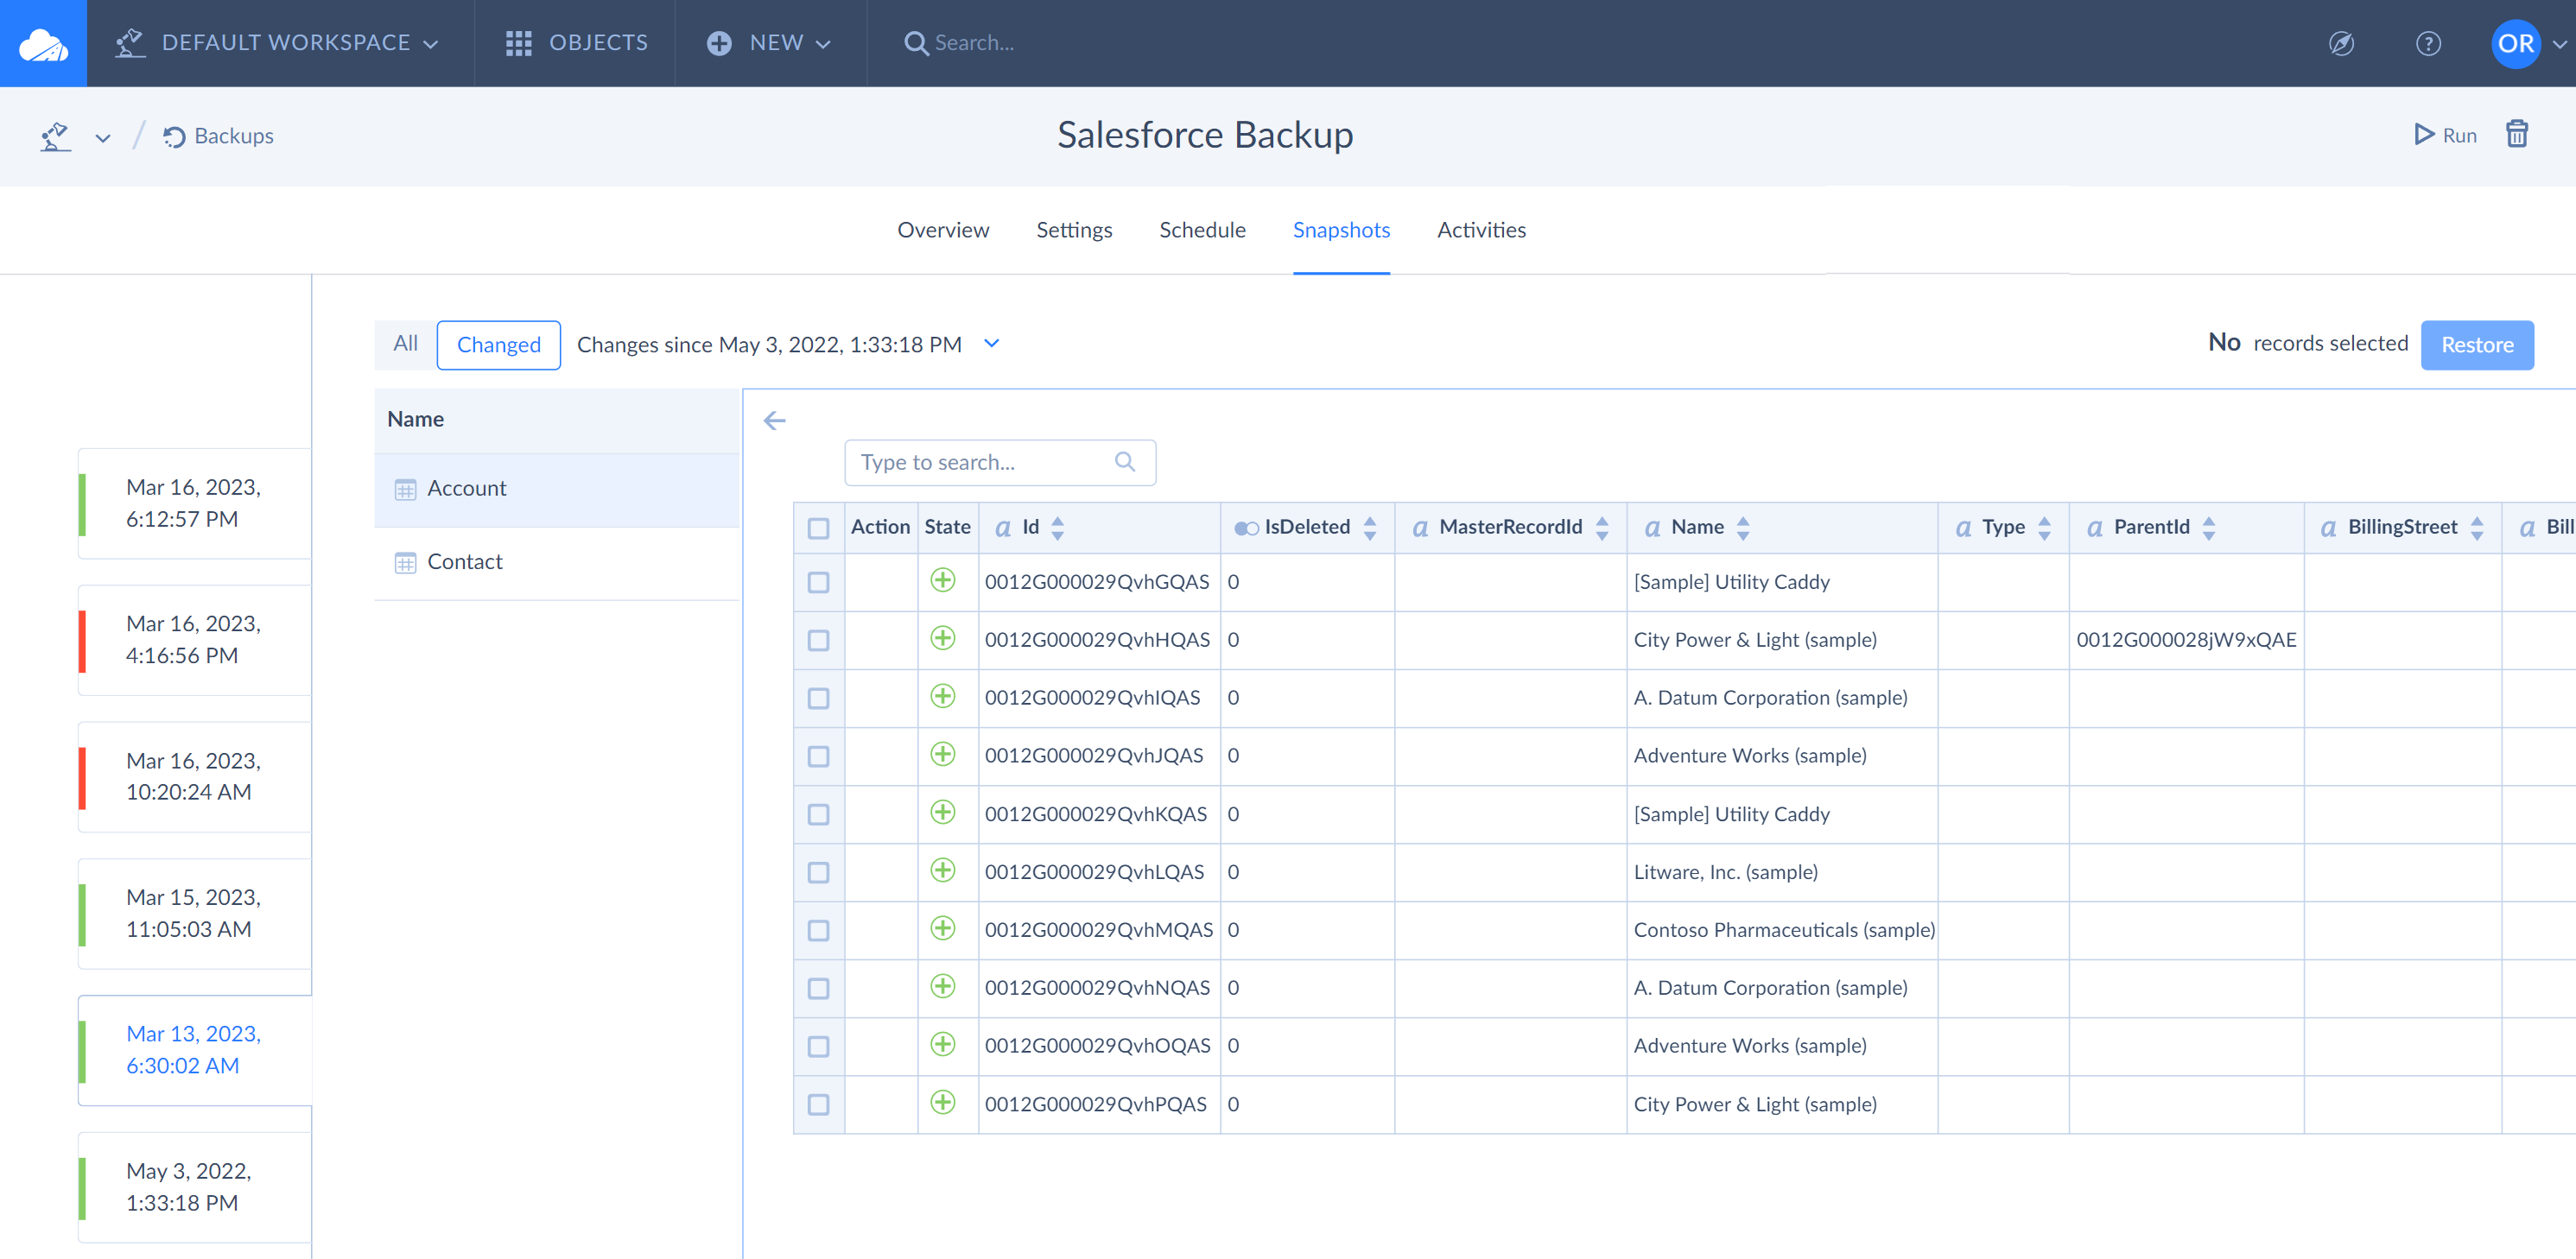
Viewing Records
To view your backed up data, click an object in the list.
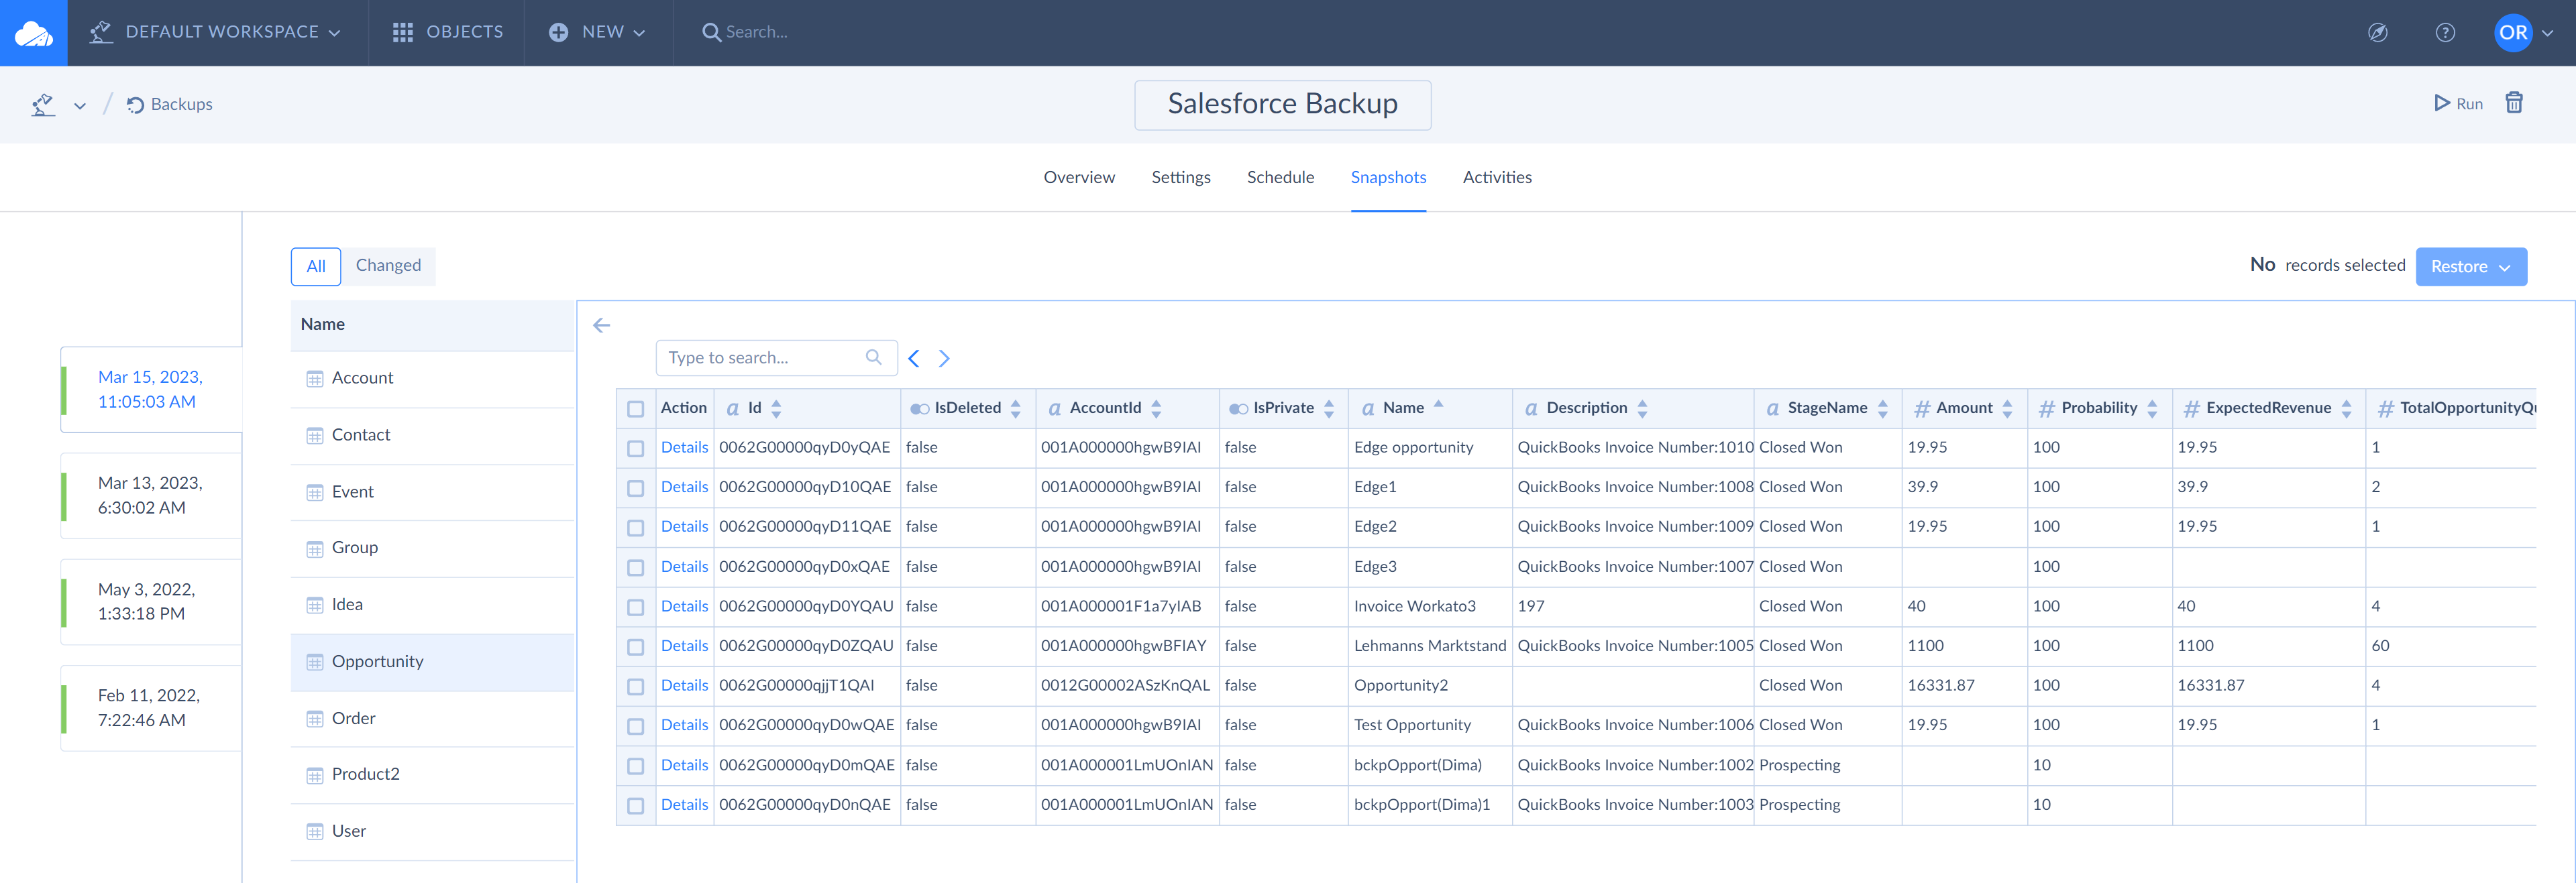
Backup displays data in a sortable grid. By default, the data is displayed in the order the data source returned them when creating the snapshot. To sort the data by column, click the header of this column in a grid. Click it again to change the sorting direction. The sorting direction indicator can be seen in the column header on the right, while the column data type indicator is displayed in the column header on the left.
Skyvia displays records in pages, by default — 10 records per page. You can switch between pages and change the number of records on the page below the grid.
For any record, you can click the click the ![]() button, to view its details.
button, to view its details.
Record Details
The Record Details view displays all the fields of a record and all the records, referencing the current record (child records). It allows you to quickly navigate relations and select related data in order to restore them.
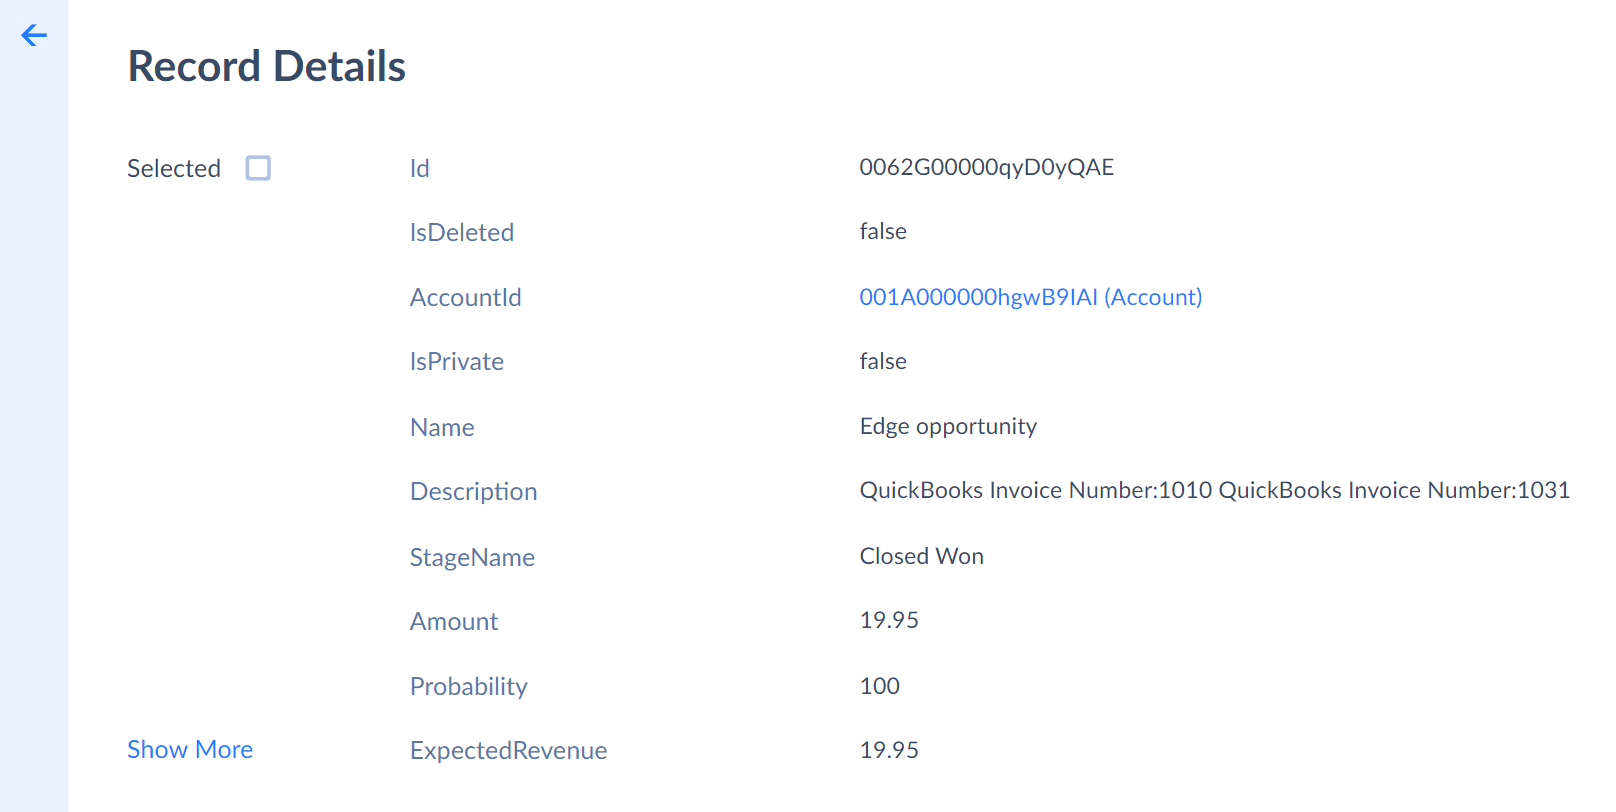
By default, only the first ten fields of the record are displayed. You can display all the fields by clicking the Show More link. Click Show Less to display only ten fields again.
If there are records in the current snapshots that reference the current record, they are displayed in the grids below, grouped by the objects. The grids with related records are titled with the name of the object and the name of the corresponding foreign key field that references the current record.
To open record details, click the ![]() button.
If a field is a foreign key that references another backed up record, the value of this field is displayed as a link that allows you to navigate to the details of this record.
button.
If a field is a foreign key that references another backed up record, the value of this field is displayed as a link that allows you to navigate to the details of this record.
Polymorphic relations (when the same foreign key can reference different objects) are not supported.
For example, suppose we have backed up Salesforce Account, Contact, Case, and User objects. Contact and Case objects reference Account by the AccountId foreign key field, and the three objects, Account, Contact, and Case, have multiple foreign keys to the User object (by the OwnerId, CreatedById, and LastModifiedById fields). In this case, when viewing record details for an Account record, the Record Details page displays all the cases and contacts that reference this account, if there are some.
The grids with related records are titled with the name of the object and the name of the corresponding foreign key field.
In the list of the Account fields above the grids with related records, the OwnerId, CreatedById, and LastModifiedById foreign key field values are links to the details of the corresponding User record.
Comparing Snapshots
Skyvia supports comparing different snapshots and viewing data differences between them. To compare a snapshot with the previous one, click the Changed tab when viewing the snapshot details or object data. After this, you can also compare the current snapshot with an even older one, view field changes between snapshots in a single record, etc. For more details, read Comparing Snapshots and Viewing Data Differences.
Data Search
Skyvia offers powerful data search functionality for your backups. You can search your backed up data by a fragment of one of its fields. For example, if you want to find a specific account in your backups, you can find it by a part of its name, address, phone, etc.
You can search for data in a specific snapshot or in multiple snapshots, from more recent down to older ones.
To search for a record, open a snapshot and open an object in which you want to search for the record. Click the search button and enter the search string into the Search box above the grid. Backup displays the records containing the searched string in any field of the searched object. To continue the search in older or newer backups, click the corresponding buttons on the right in the search box.

Alternatively, you can search data in snapshots made within the specific date range. Select the specific period in the Date Range box. Skyvia will search for records containing the searched string in any of their fields, from the most recently displayed snapshot to the older one. It will open the most recent snapshot object data containing the matching records filtered by the search string.
Restoring Data
You can restore data by selecting records or whole objects and clicking the Restore button. Skyvia then provides you a choice of operations you can do with the selected data — insert to the data source, update the corresponding records in the data source to the values from the snapshots, or delete them from the data source (NOT from Skyvia’s snapshot). You can restore separate records, whole cloud objects, or all the data.
Skyvia Backup is able to restore records with their relations. To do that, select all the necessary related records and restore them together in one restore operation. As described above, you can easily browse record relations using the Record Details view. For more details, please read Restoring Data.
Deleting Snapshots
You can free up storage space by deleting snapshots in several ways. See Managing Storage Space and Deleting Old Snapshots for more information.
You can only delete the whole snapshot. You cannot delete specific records within a snapshot.