Importing Deals and Contacts from Zoho CRM to HubSpot Preserving Relations
In this tutorial, we will show how to import Deals and Contacts from Zoho CRM to HubSpot preserving relations. The difficulty was that in Zoho CRM, the Deal object refers to Contact (id), i.e. one deal can have only one contact, and contact has many deals. Meantime, in Hubspot, the relation between Deals and Contacts is many-to-many, which is implemented through a JOIN table. So we need to set the correct relation between Contacts and Deals to import data from Zoho CRM to HubSpot. We will do it through the DealContacts table. To find out how to do it, read our step-by-step instruction below.
Creating Connection
Regardless of what data integration package you configure, first you need to create connections that you will use as source and target. In our tutorial, we create connections to Zoho CRM and HubSpot cloud apps. If you have already created the necessary connections, you may skip these steps.
Creating Zoho CRM Connection
To create a connection to Zoho CRM, perform the following steps:
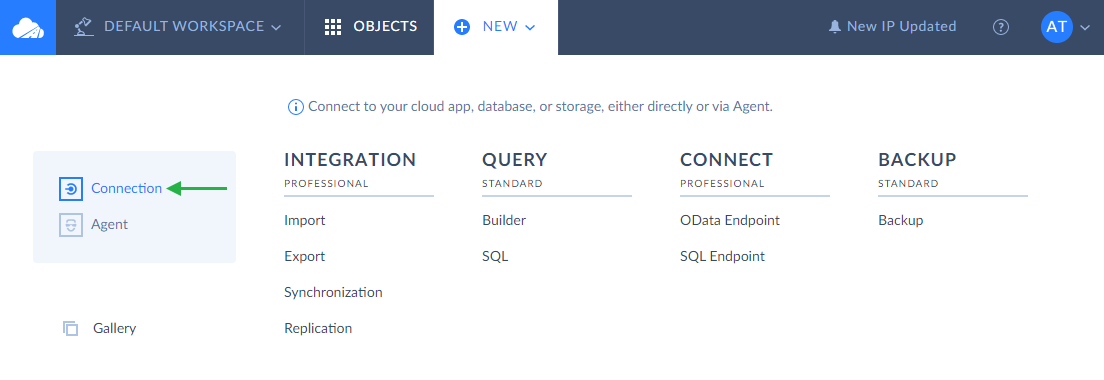
- Click +NEW in the top menu;
-
Click the Connection button in the menu on the left;
- In the opened Select Connector page, select Zoho CRM. To quickly find it, you can either use the Type to filter box or filter connectors by categories using the All list (for Zoho CRM, select the CRM category);
- The default name of a new connection is Untitled. Click it to rename the connection, for example, to Zoho CRM1;
- In the Domain list, select the domain to connect to: crm.zoho.com, crm.zoho.eu, crm.zoho.com.cn, crm.zoho.in or crm.zoho.com.au;
-
In the Environment list, select an environment type — Production or Sandbox;
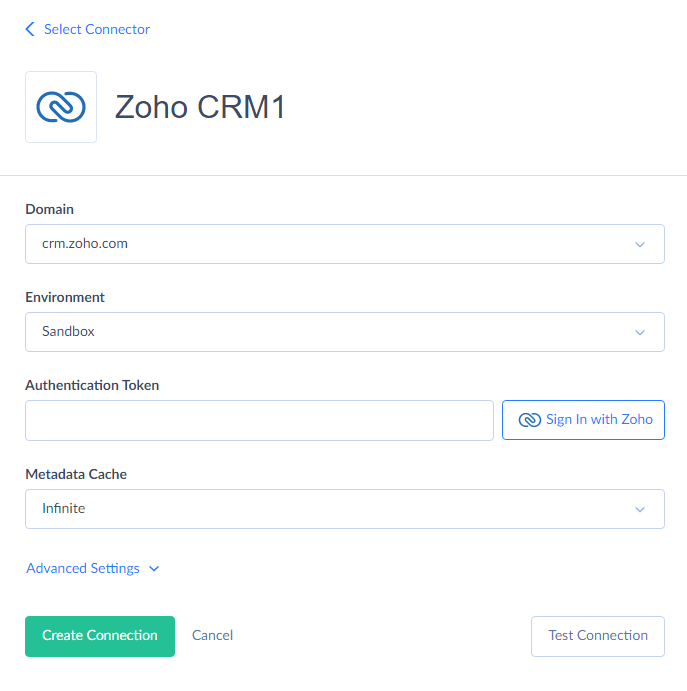
- Click Sign In with Zoho;
-
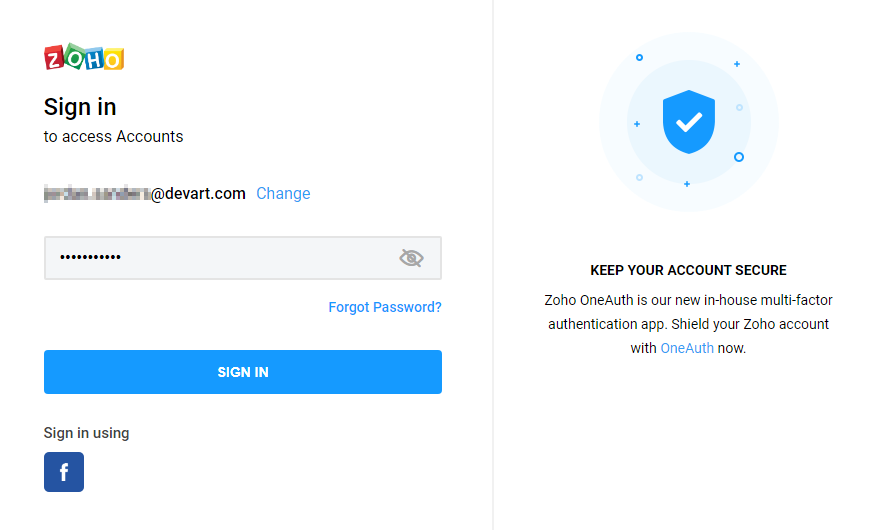
In the opened window, enter email and password to Zoho CRM and click the Sign In button;
- In the opened window, choose the Org you want to access (if you have several ones) and click Submit;
- In the next window, click Accept to allow Skyvia to access data in your Zoho account;
-
The authentication token is generated;

- Optionally change the Metadata Cache parameter value. It determines how often to update cached metadata for the connection. By default, Skyvia caches metadata of available objects for cloud sources. You can configure how often the cache is refreshed automatically or reset it manually on the details page of the corresponding connection by clicking the Clear now link next to the Metadata Cache parameter;
- Click Create Connection.
Creating HubSpot Connection
To create a connection to HubSpot, repeat the following steps:
- Click +NEW in the top menu;
-
Click the Connection button in the menu on the left;
- In the opened Select Connector page, select HubSpot. For quick search, use either the Type to filter box or filter connectors by categories using the All list (for HubSpot, select the CRM category);
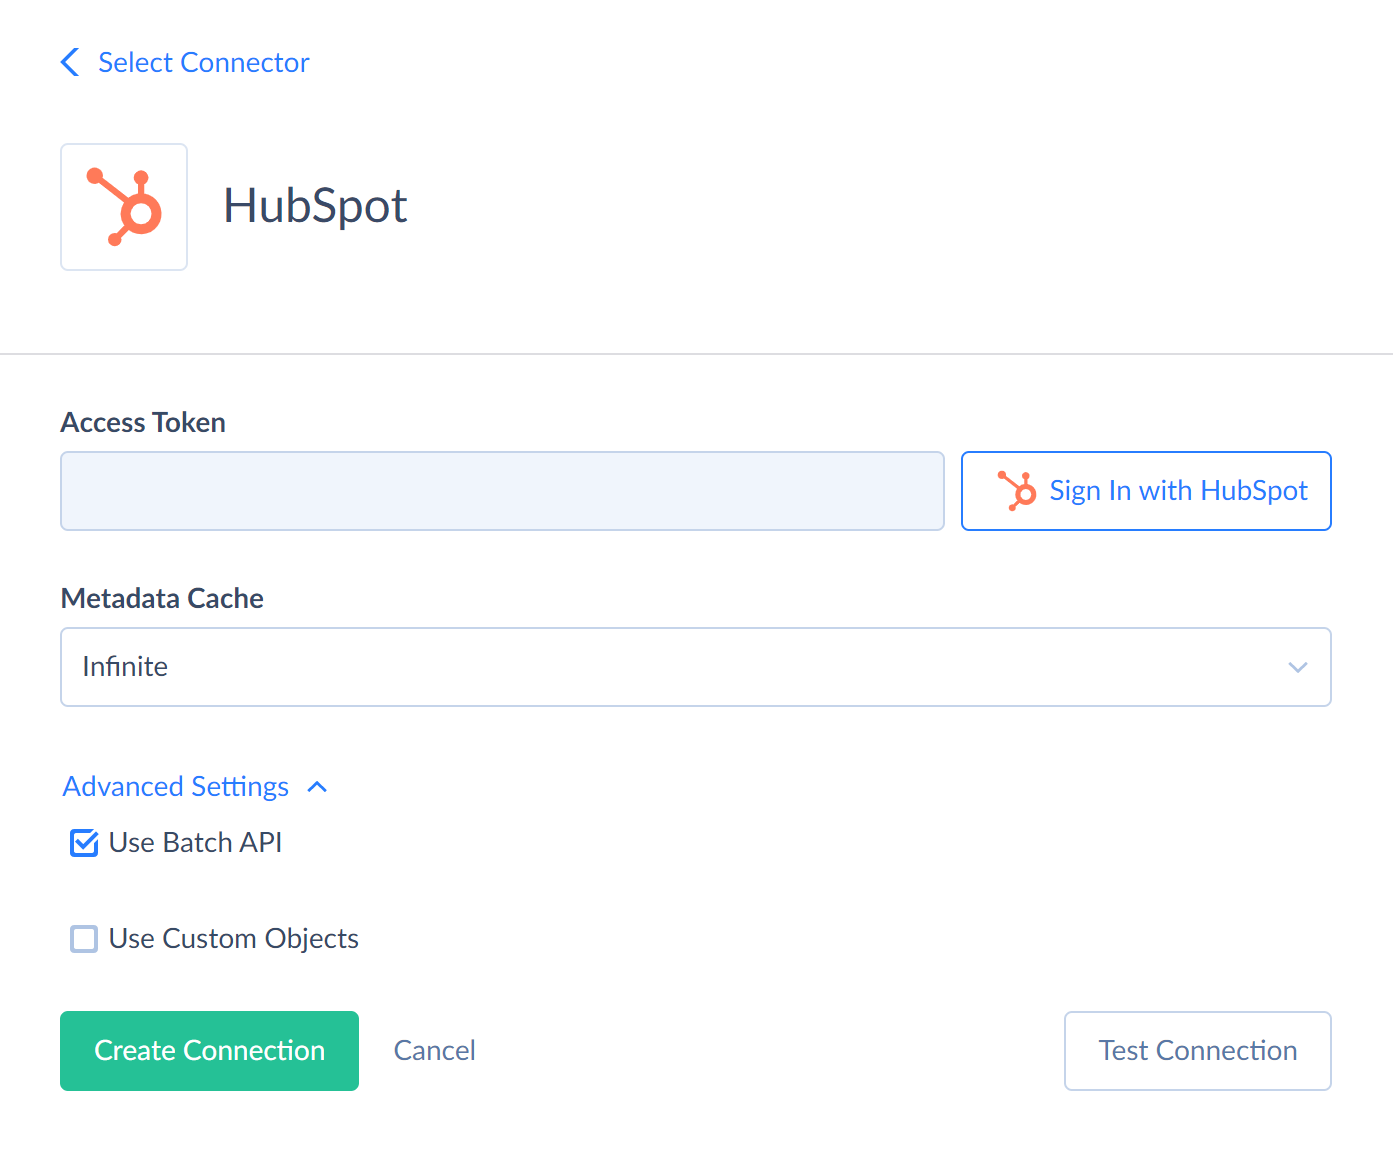
- The default name of a new connection is Untitled. Click it to rename the connection, for example, to HubSpot1;
-
Click Sign In with HubSpot;
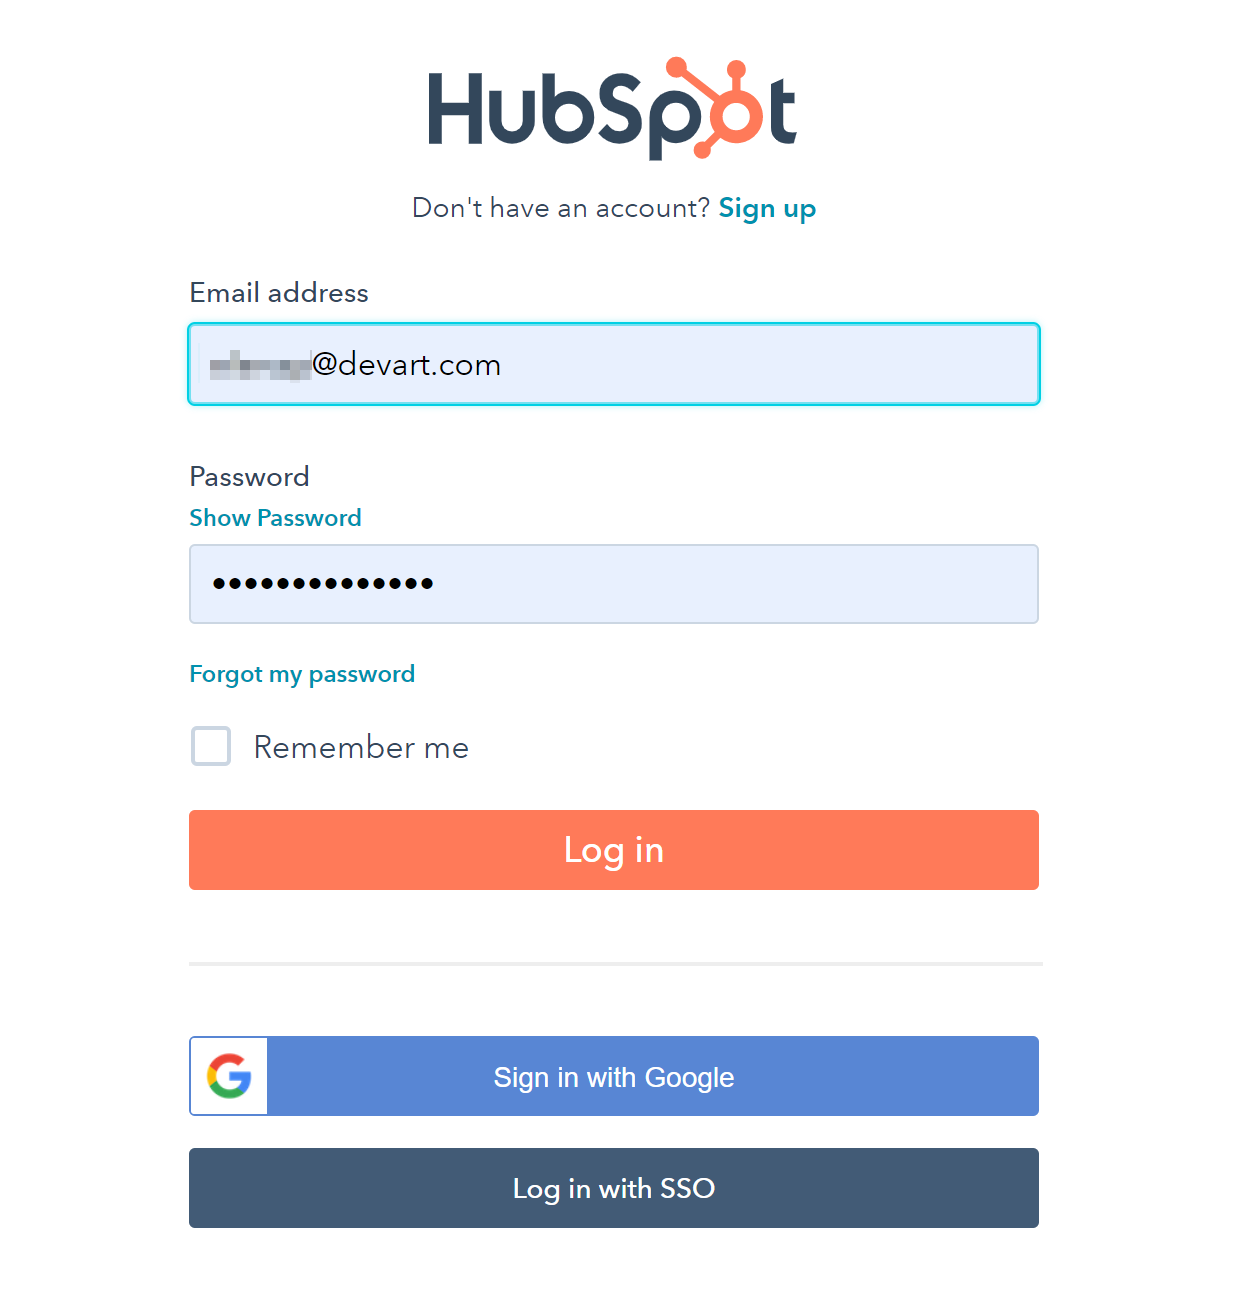
-
In the opened window, enter your HubSpot credentials and click Log in;
- Select your account to use;
- In the opened page, click Grant access to approve access request;
- After the access token is generated, click Create Connection button.
Creating Import Package
To create a new package, follow this step-by-step instruction:
- Click +NEW in the top menu;
- In the Integration column, click Import. The package editor opens;
- Rename your package by clicking and editing the package name. The default package name is Untitled. Please note, if you omit this step, the package name will remain Untitled in the list of created packages;
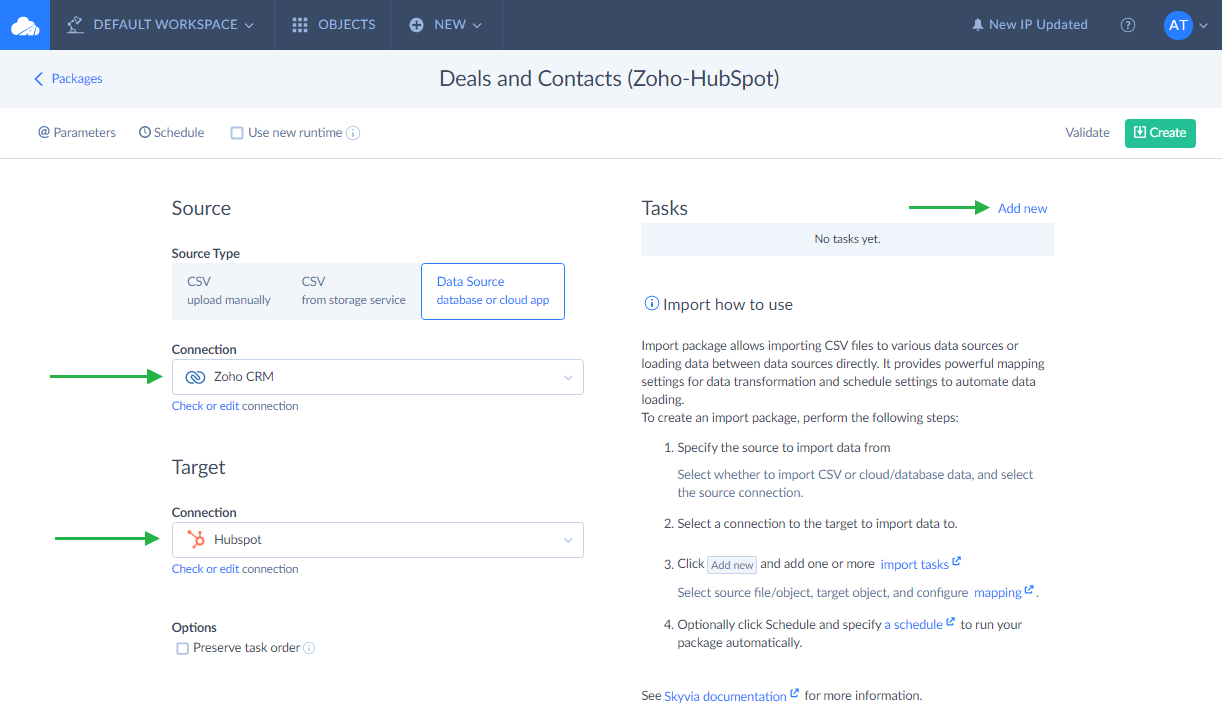
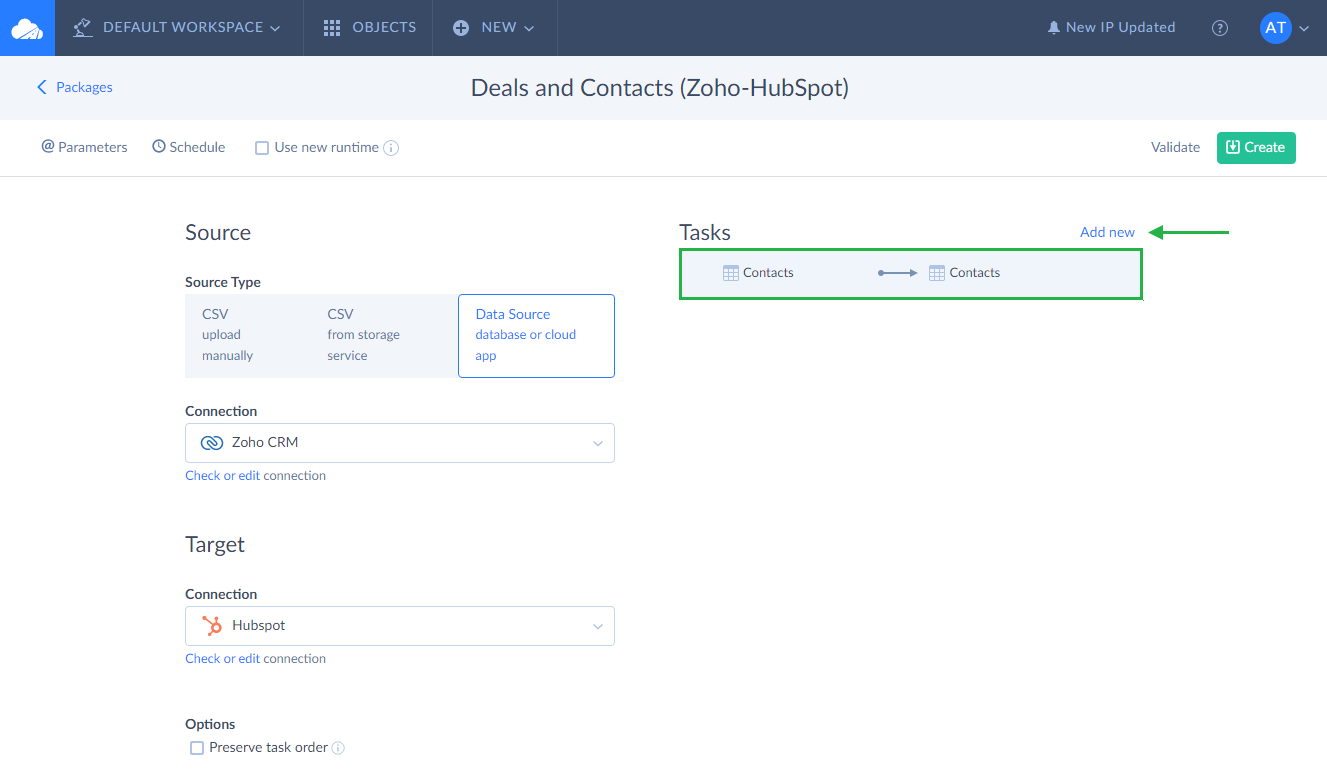
- Under Source, in Source Type click Data Source database or cloud app and select Zoho CRM from the Connection drop-down list;
- Under Target, select HubSpot from the Connection drop-down list;
-
Click the Add new link to open the Task Editor.
Creating Task for Contacts
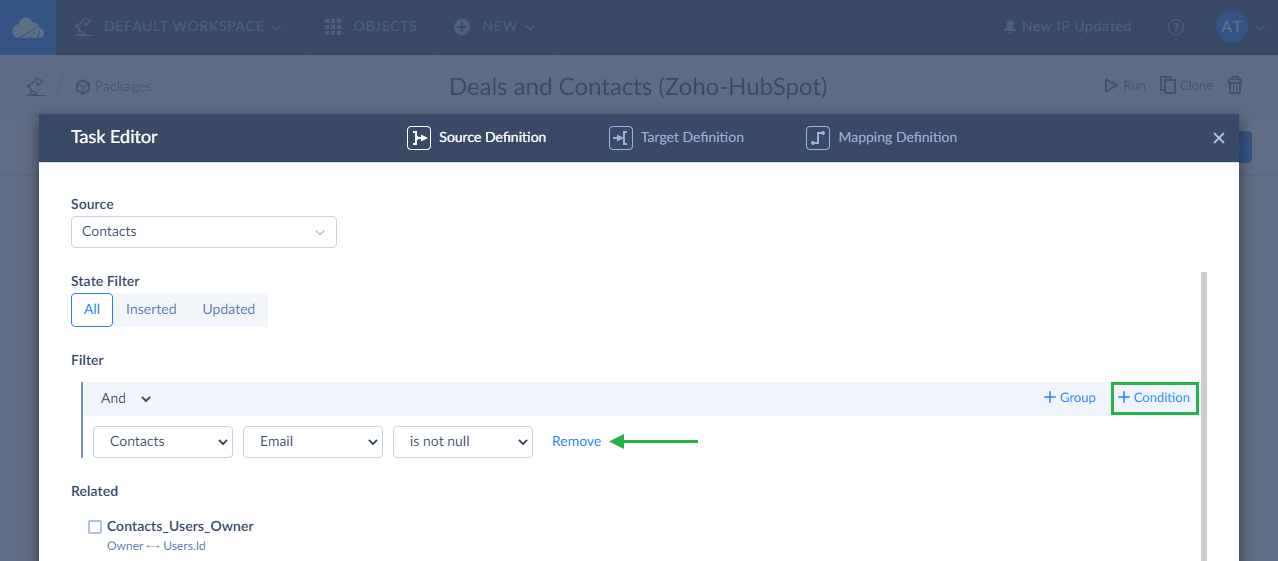
- In the opened Task Editor window, select the Contacts object from the Source drop-down list;
-
Next, add desired filters. For example, you can import only contacts that have non-empty email addresses (email is not null). For this, click +Condition to set a specific condition. You can read more about conditions and filters in the Filter Settings topic.
In our case, we set the condition for the Contact Email to be not null;
- Click the Next step button at the bottom of the window to switch to the next editor page. You can also switch between the editor pages by clicking the corresponding icons: Source Definition, Target Definition, and Mapping Definition;
-
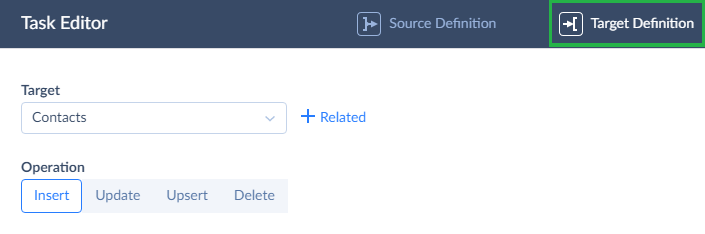
In the Target drop-down list, select Contacts;
- Click the Next step button at the bottom of window to switch to the next editor page or click the Previous step button to return to the previous page;
-
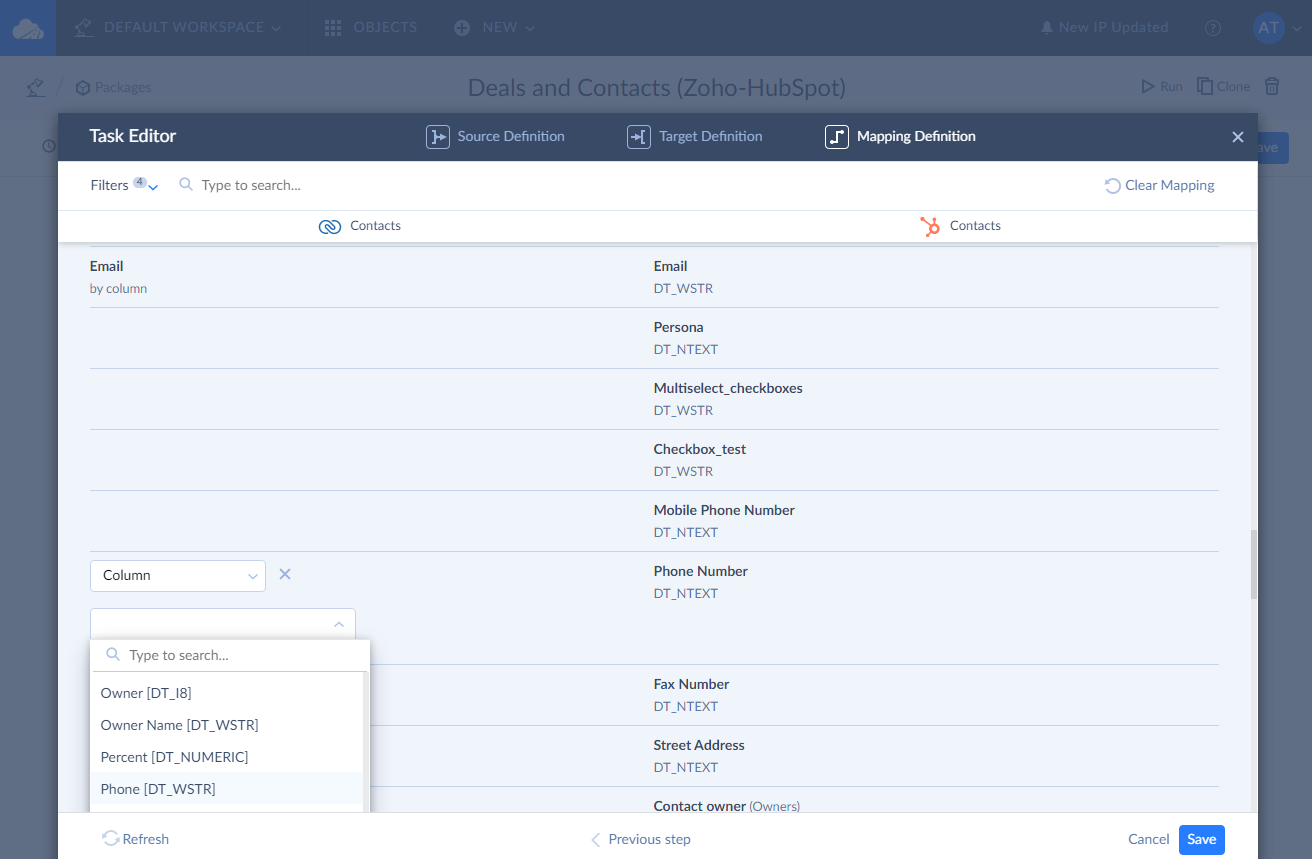
On the Mapping Definition tab, check whether all required columns are mapped. You can read more about different types of mapping here.
The First Name, Last Name, Salutation, and Email fields have the same names in HubSpot and Zoho CRM, so they are mapped automatically. You can also map other fields, which does not have identical names, for example, the Phone field to Phone Number, Fax to Fax Number, etc. if needed;
-
Click Save to save the first task;
- Click the Add new link again to create another task.
Creating Task for Deals
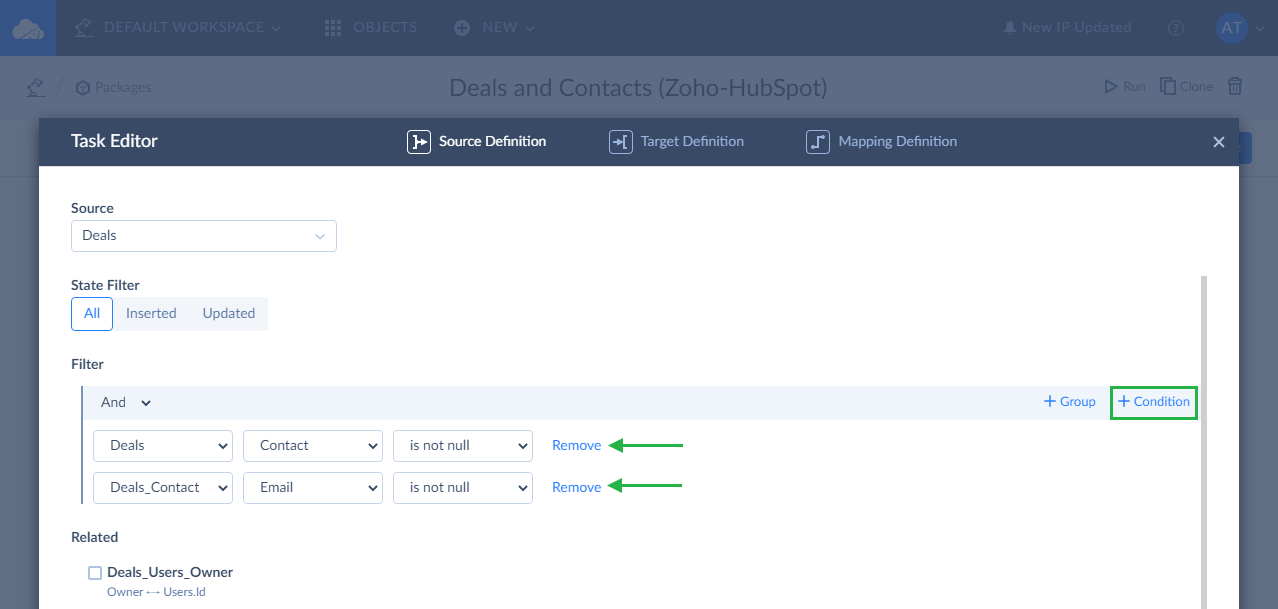
- In the opened Task Editor window, select the Deals object from the Source drop-down list;
- Please note that you import only Deals that relate to the Contacts imported in the first task. So you need to add a filter for the Contacts not to be null. Moreover, if you added some extra filters to Contacts in the previous task, then in Deals you also need to add similar filters (in the first task, the filter was email is not null, so add it to Deals as well). To start setting a condition, click +Condition;
- In the first drop-down list, select Deals, in the second drop-down list, select Contact, in the third drop-down list, select is not null;
- Click +Condition again to set the second condition;
-
In the first drop-down list, select Deals_Contact, in the second drop-down list, select Email, in the third drop-down list, select is not null;
- Click the Next step button at the bottom of the window to switch to the next editor page;
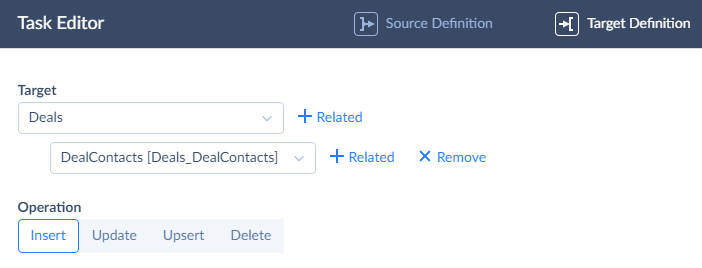
- In the Target drop-down list, select Deals;
-
Click +Related and select DealContacts[Deals_DealContacts];
- Click Next step to proceed with mapping;
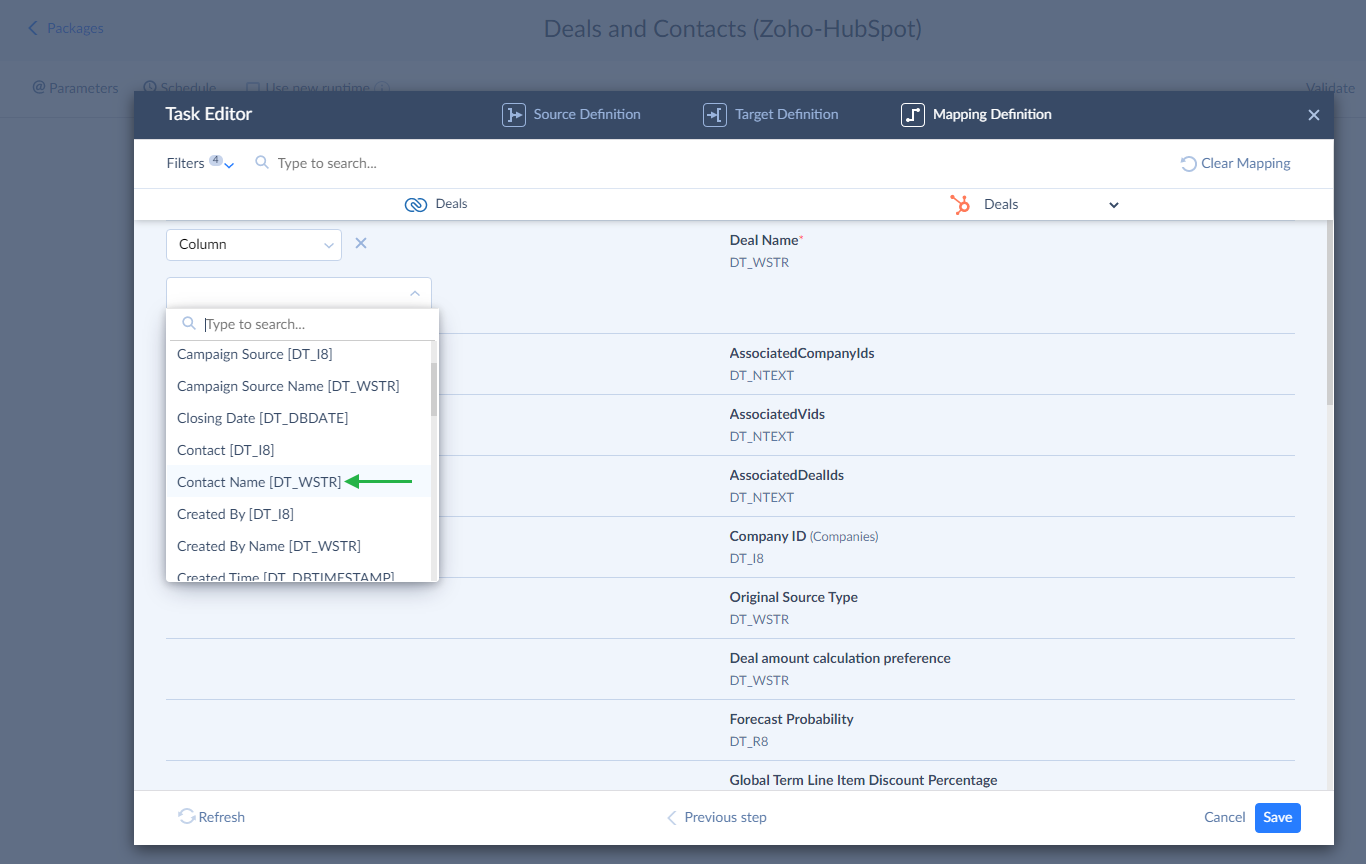
-
On the Mapping Definition tab, map Deal Name column to Contact Name column by selecting Contact Name value. You can also map any other fields if needed;
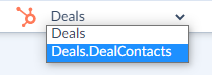
-
To map fields of the related DealContacts object, click the target table name (Deals) and select Deals.DealContacts in the drop-down list;
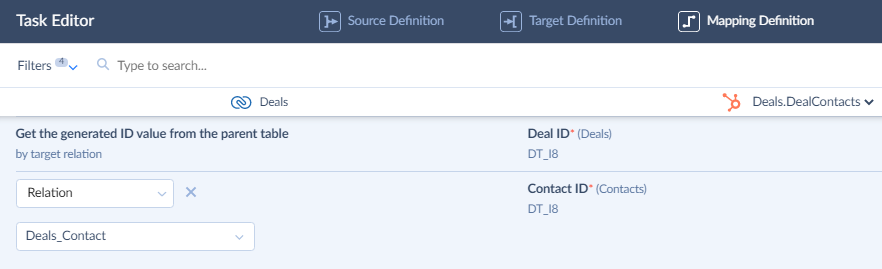
-
Note that the Deal ID column is mapped to the generated value of the corresponding Deal record automatically. Here we only need to map the Contact ID column through relations to Deals_Contact;
- Click the Save button to save the task.
Finally, when two tasks are added, click the Create button to create the package.
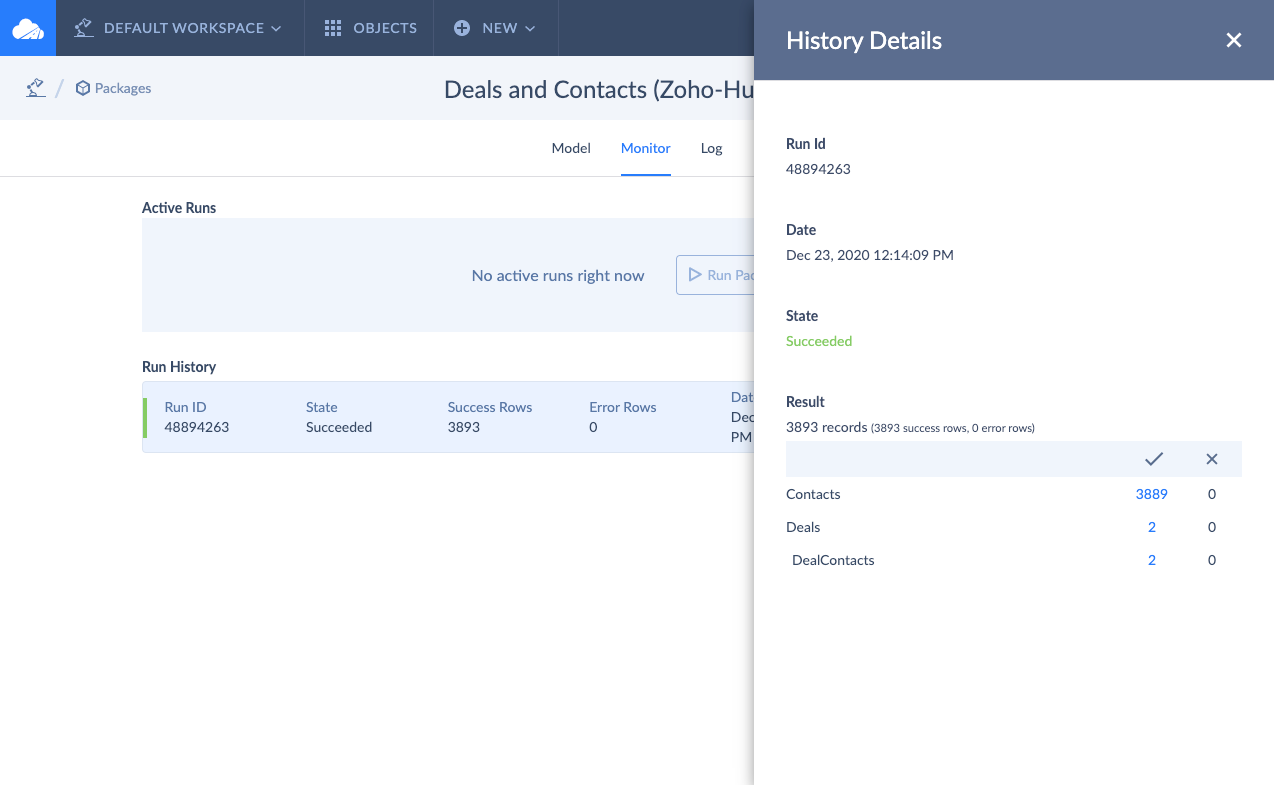
When your package is ready, run it to import data. The data will be imported into two tables, and the correct IDs generated in Hubspot will be inserted into the JOIN table. You can check whether results are successful or not on the Monitor tab. For this, click the Run ID to open the History Details window.