Creating and Deleting Accounts
When users register in Skyvia, they automatically receive a default account with a default workspace. When later they sign in to Skyvia, they sign in directly to their default workspace, which belongs to the default account.
Optionally, users can create additional accounts, or they can be invited to accounts of other users or companies with full or limited permissions. If required, users can delete their accounts including their default account and create the totally new account infrastructure in Skyvia again.
Creating Accounts
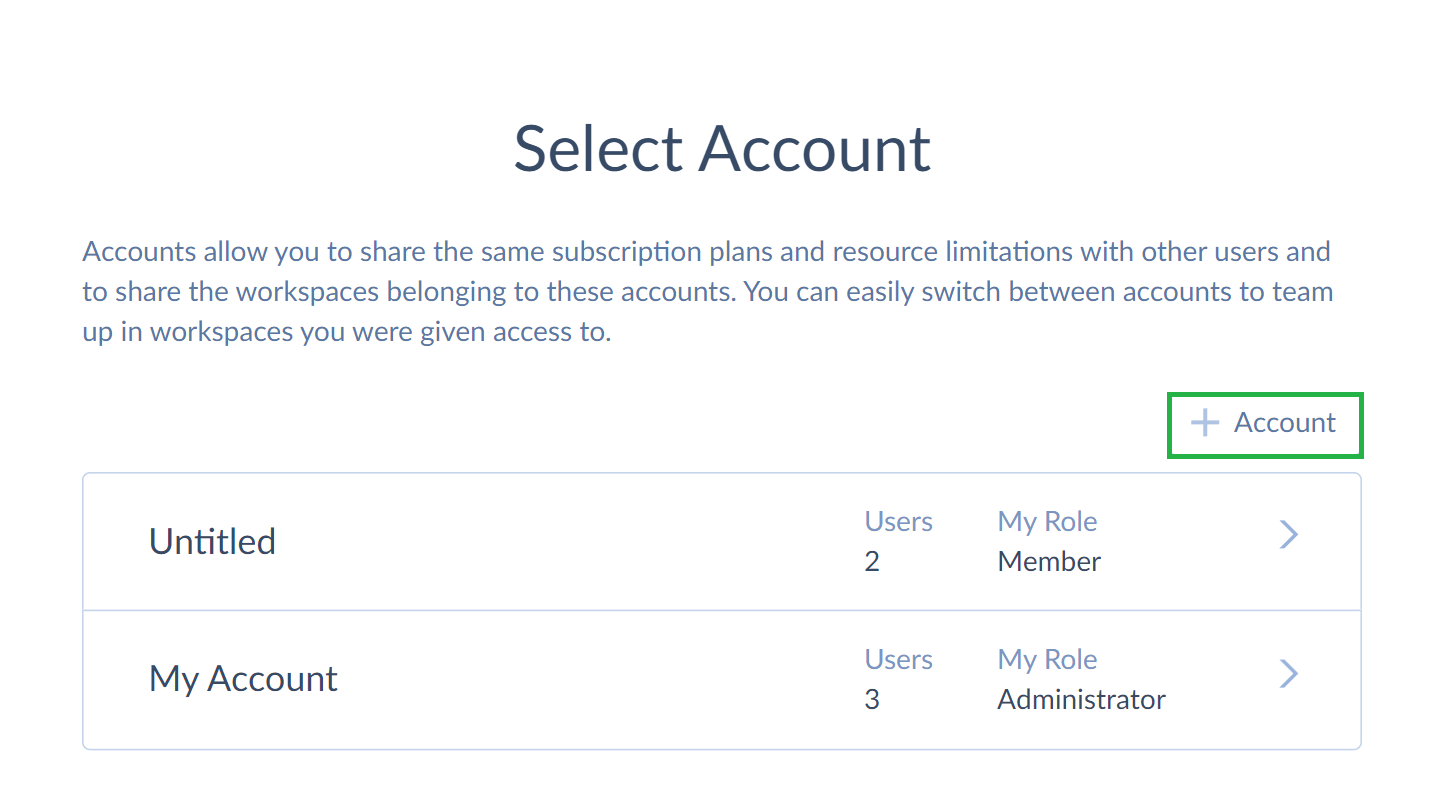
To create a new account, you need to click the User icon and then — Account. You will be transferred to the page of your default account. Skyvia automatically assigns Untitled name to users’ default accounts. However, users can rename their default accounts any time they want.

As an example, we rename our Untitled default account to Skyvia Personal Account and click the Accounts link on the left to switch to the Select Account page. After that click  on the right to create a new account.
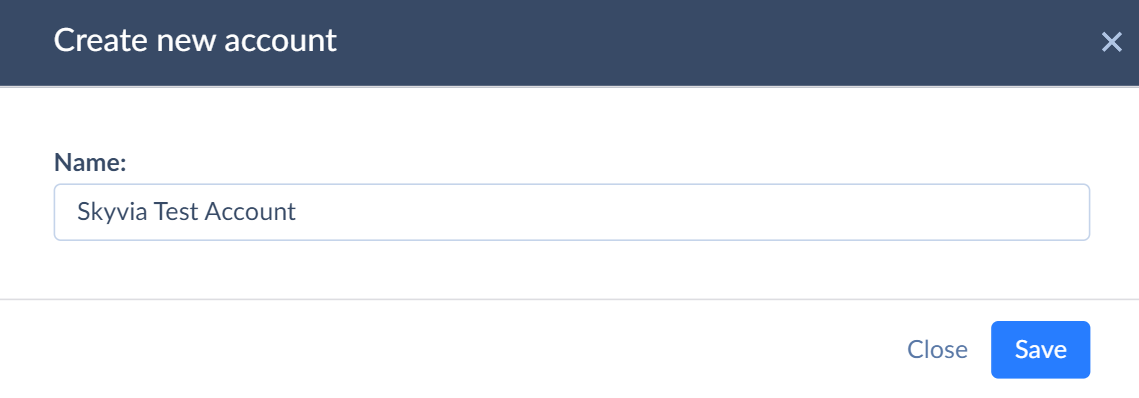
The Create new account window will open. When creating a new account, enter the unique account name in the Name field and click Save. You cannot leave the Name field empty as your account should be easily identified among other accounts (if you have more than one).
Later you can easily rename your account if required. For this, you should switch to the account, the name of which you want to change. Click the account name field and rename it.
Switching Between Accounts
When you have several accounts and want to switch from one account to another, click the User icon and then — Account. You will be transferred to the page of your default account. Here click the Accounts link on the left and switch to the Select Account page. You need to choose the account you want to go to and click it.
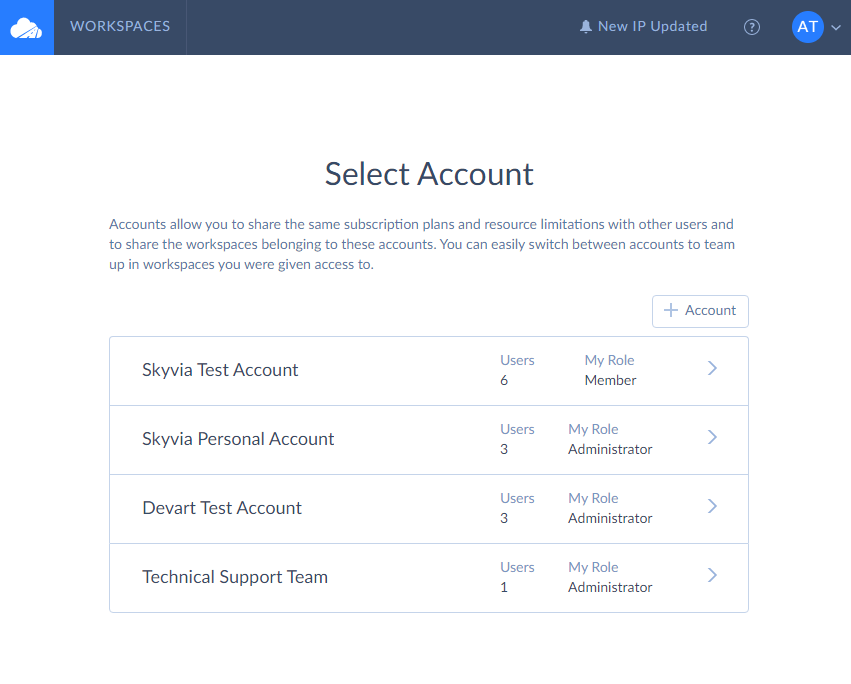
On this page, Skyvia displays all accounts available for you: your default account, additional accounts you have created or accounts of companies/users you’ve been invited to, and it does not matter whether you were invited to the account as an account member or account admin. As an account member you have limited rights, but you can see the account in the list and use the workspace you were invited to (to the extent allowed by workspace admin).
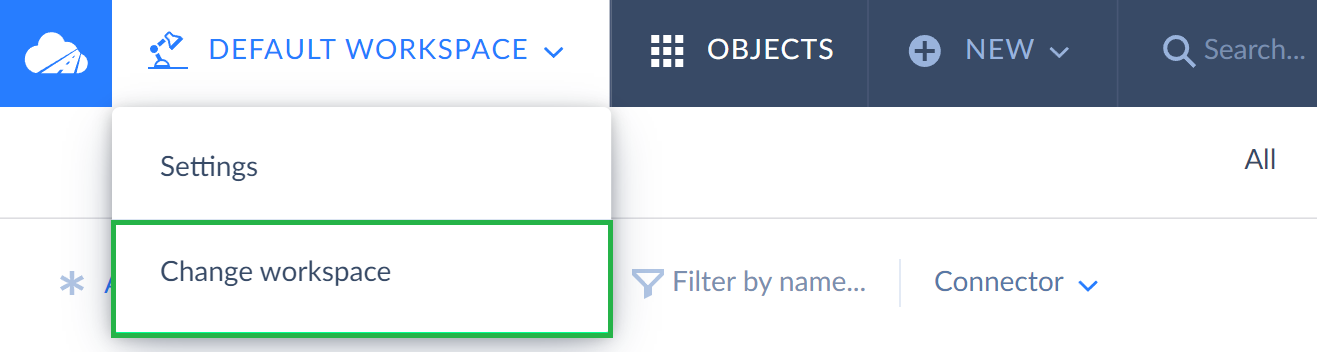
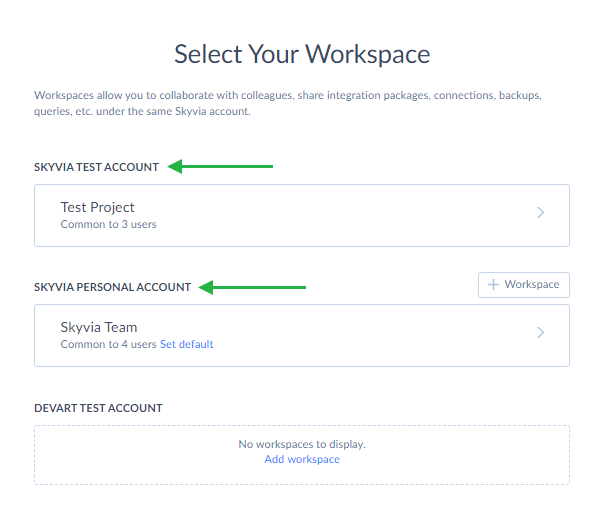
Another way to switch from one account to another is to click the workspace drop-down list in the top menu and select Change workspace. On the screenshot, we can see DEFAULT WORKSPACE as the user is signed in to his/her default workspace. If the user is signed in to another workspace and is working with it now — the name of this workspace will be displayed.
After you have clicked Change workspace, you are redirected to the Select Your Workspace page. Here you can see a list of accounts you created in Skyvia and accounts you were invited to by other users. Under each account you will see workspaces, which belong to this particular account. To switch to a certain account, simply click its name on the left.
Deleting Accounts
To delete an account, you need to click the User icon and then — Account. You will be transferred to the page of your default account. To delete this account, click the  icon next to its name. To select other accounts for deletion, switch to the Select Account page by clicking the Accounts link on the left.
You can also delete an account by clicking Workspaces in the top menu and switching to the account you want to delete.
Please note you can delete an account if you are an account admin. When deleting an account with workspaces, workspaces and their objects (packages, backups, etc.) will be deleted as well.