December 2020
Skyvia team has released several new connectors and features this month. Among them are Returning feature and new Workspace Functionality. Besides that 5 new connectors (Constant Contact, Acuity Scheduling, Timely, Drip and Facebook Ads) have become available in Skyvia.
New Returning Feature
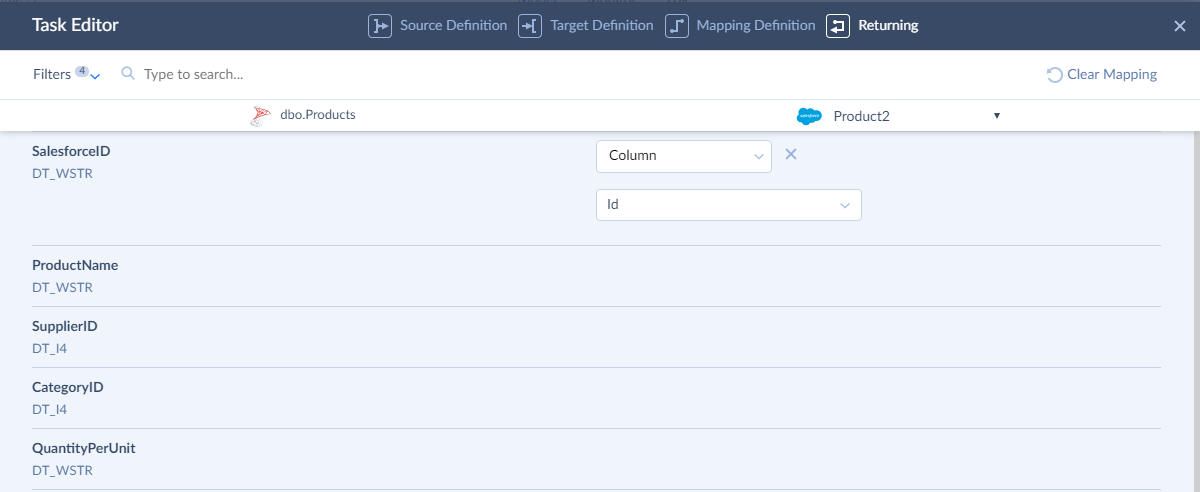
This feature allows obtaining IDs or any other fields from records inserted by the import and assigning them back to the corresponding source records. It can be very useful if you want, for example, to import records from a database to Salesforce and store Salesforce IDs of the imported records in the source database. You may also need to import Salesforce records to some other source and store target IDs in a Salesforce External ID field.
This feature is not limited to Id/primary key values. It allows using any target columns in mapping, as well as constants, expressions, or relation mapping. Thus, you may use the Returning feature, for example, to mark successfully inserted source records with some constant values. You can read more about Returning here.
Returning Requirements
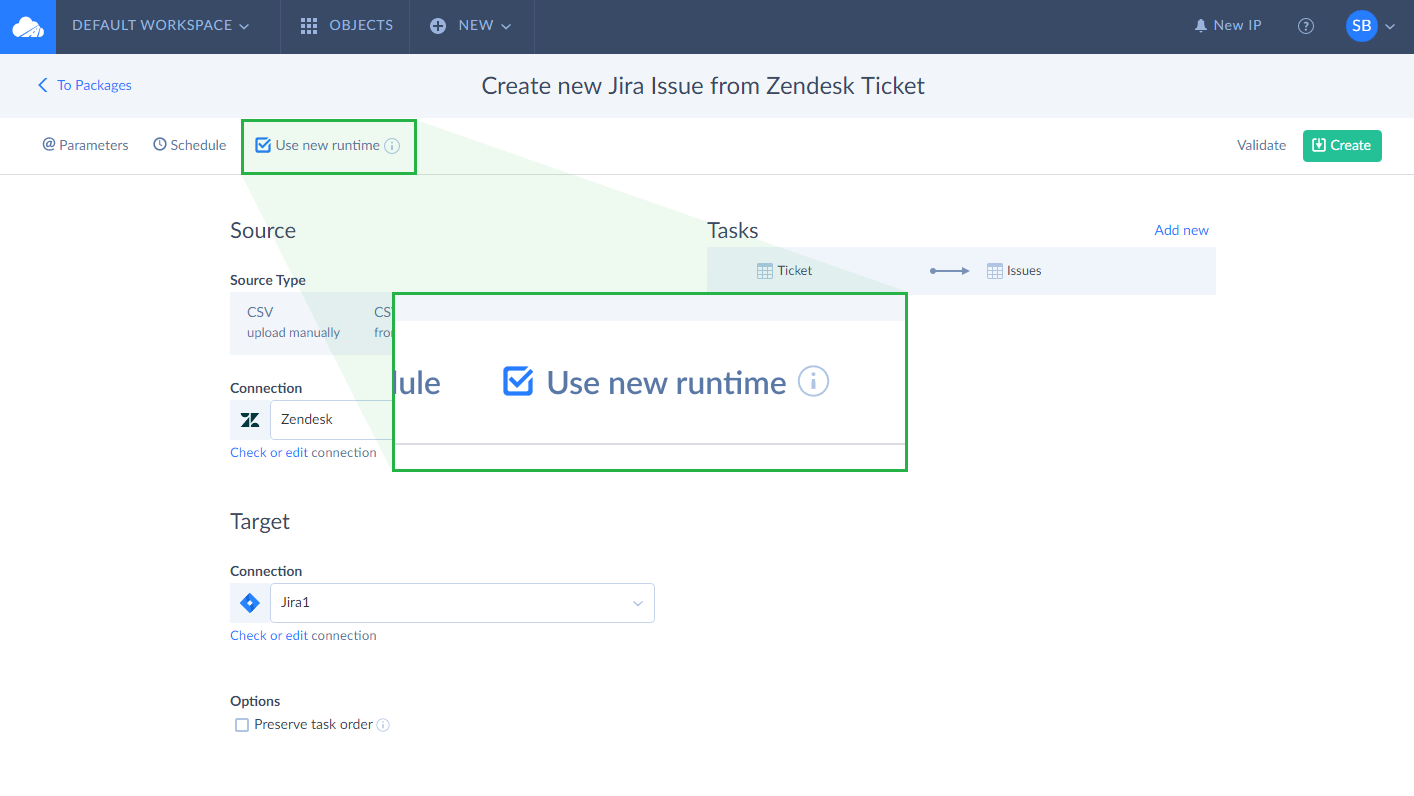
The new Returning feature is available only in the Import packages using the new data integration engine. You should select the Use New Runtime checkbox in your package to use it. Besides, it must be a package, importing data from a cloud app or database, and the source object must support updates.
This feature also returns values only for records that are created in the target. Thus, it is available only for the insert and upsert operations.
How to Use Returning
If your package meets the requirements above, you will see the Use returning check box in the mapping settings. You should select it to make the Returning settings available. In the Returning settings, you configure mapping for source columns as usually, and this mapping will be applied when updating source records for successfully created target records.
New Connectors
Among new connectors this month are Constant Contact, Acuity Scheduling, Timely, Drip and Facebook Ads. Read more about new cloud applications below:
Constant Contact — an easy-to-use email marketing service, which helps to create effective email marketing and other online marketing campaigns to meet customers’ business goals.
Acuity Scheduling — an online appointment scheduling software, where clients can schedule appointments, pay, and complete intake forms online 24/7.
Timely — a fully automatic time tracking tool available for individuals and companies that records your activity and time spent in different work apps, as well as helps track everything your team works on with minimal efforts.
Drip — a marketing automation platform built for e-commerce that helps you gather data, create better customer experiences, bump up long-term loyalty and drive more revenue.
Facebook Ads — a service promoting customer products, services, websites, etc. from Facebook.
New Workspace Functionality
This month all our users have also been transferred to the updated workspace functionality. Our development team did their best to develop the highly convenient, collaborative environment to team up with colleagues and managers, performing tasks and other actions based on the roles assigned in the workspace.
The workspace functionality has a completely new, rather complex, but at the same time user-friendly and intuitive design, many new features, which are useful when working and collaborating with each other, and what is also important – all your data will be even more securely saved and protected as ever before as you access a certain account, having a specific status, and join a certain workspace being assigned a specific role.
Collaboration and Its Key Concepts
In the Skyvia documentation, we have introduced and described the key concepts of collaboration. These concepts include user, account, workspace, personal workspace, workspace role, subscription, etc.
From now on, users can share not only Skyvia subscriptions and resource limitations in the same account, but also workspaces and workspace objects – packages, backups, queries, etc. Multiple users from one company or team can easily work over the same Skyvia objects in one workspace at a time. Users access the workspace and perform tasks or other actions strictly based on the roles they were assigned in the workspace. To get to know better how it all functions, read the Collaboration topic.
New Features of the Account Page
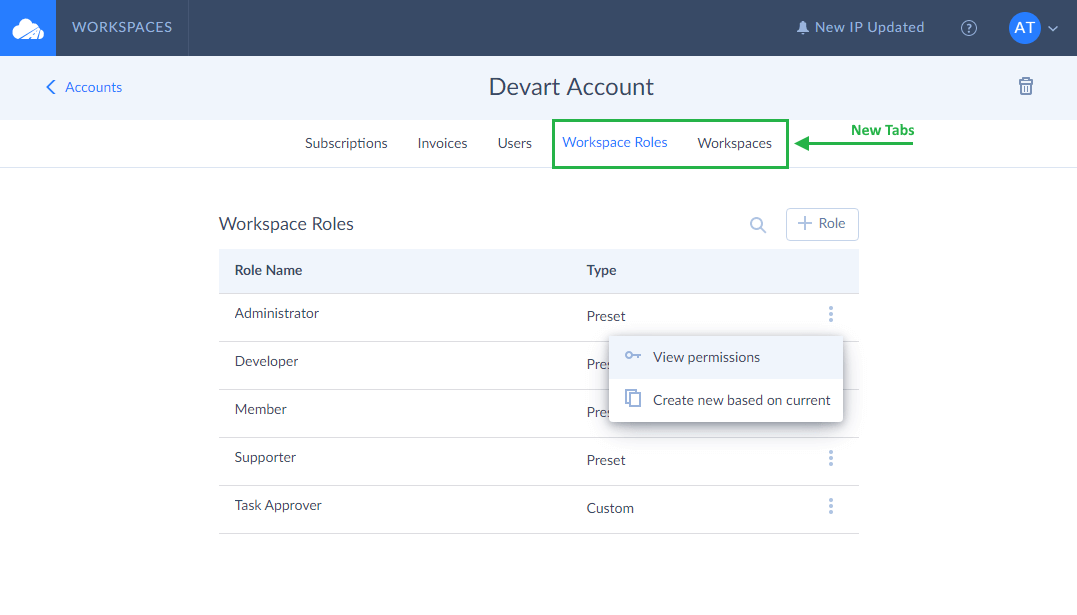
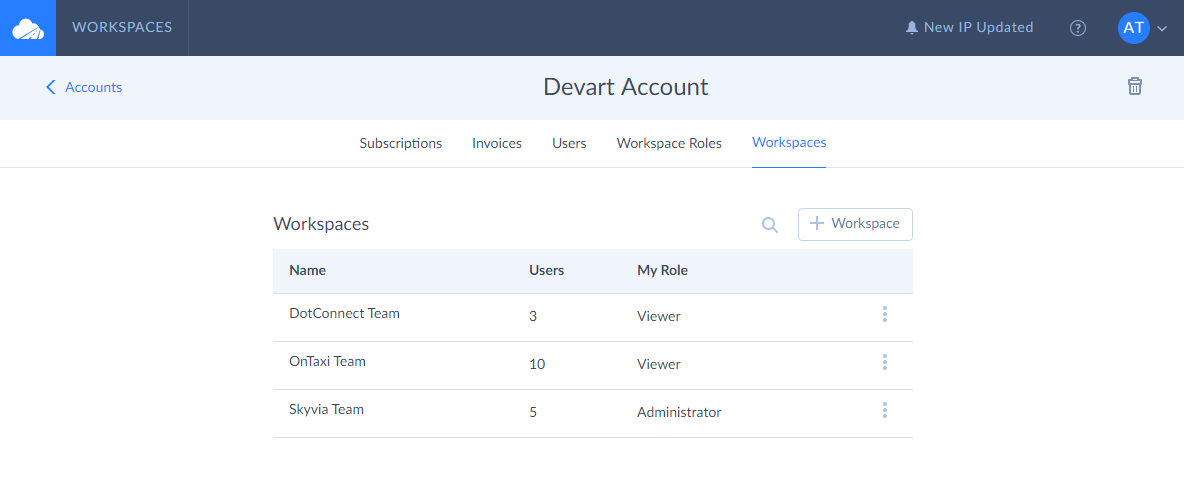
The Account functionality has been greatly improved for users’ comfort. Now, you can name your account the way you want and rename it later if needed. The Account page has two new tabs – Workspaces and Workspace Roles. They help our clients manage existing workspaces or add new ones, check standard (predefined) workspace roles and create new (custom) ones. Read more about it in the Account Management topic.
Workspaces and Workspace Roles
Workspaces and workspace roles have been introduced to facilitate collaboration among users in Skyvia. Depending on your business needs, you can use a single workspace, for example, your default workspace to create packages, backups, queries, etc. or you can create multiple workspaces (two and more).
Multiple workspaces can be beneficial for medium-sized companies with numerous departments, which are quite isolated from one another, or for large project-oriented companies. Such companies usually develop multiple projects, and each project requires a separate workspace where a project manager can collaborate with other project team members (developers, supporters, etc.) sharing with them mutual objects (connections, packages, etc.).
To create a new workspace, you simply need to click +Workspace on the right, enter a unique workspace name in the opened window and save it.
As now users can share workspaces with each other, workspace roles have been implemented to allow admin to manage who can do what in the workspace, i.e. a team can easier and more effectively collaborate.
In Skyvia, we offer 4 standard workspace roles with a predefined set of permissions: Administrator, Developer, Member, Supporter. Skyvia also allows you to create and assign custom roles to invited users, grant individual permissions to them, depending on the tasks they are supposed to fulfill. Read more about standard and custom roles in the Workspace Roles topic of our documentation.
To create a custom role, click +Role on the right, set permissions in the opened window, enter a role name and save it.
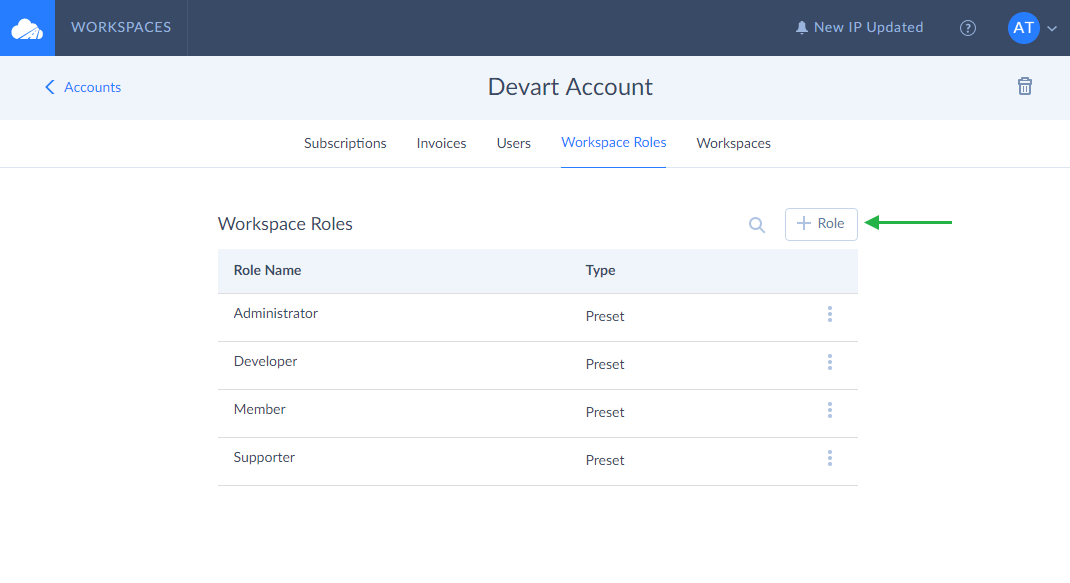
When a new custom role is created, it is added to the bottom of the role list. Later, you can edit the role name or permissions anytime you want, or delete the custom role completely.
Changing Workspace Settings and Assigning Workspace Roles
Users can be invited to multiple workspaces. They can be invited to the workspaces of the same account if this account has multiple workspaces or to workspaces of different accounts, but first they should become members of such accounts.
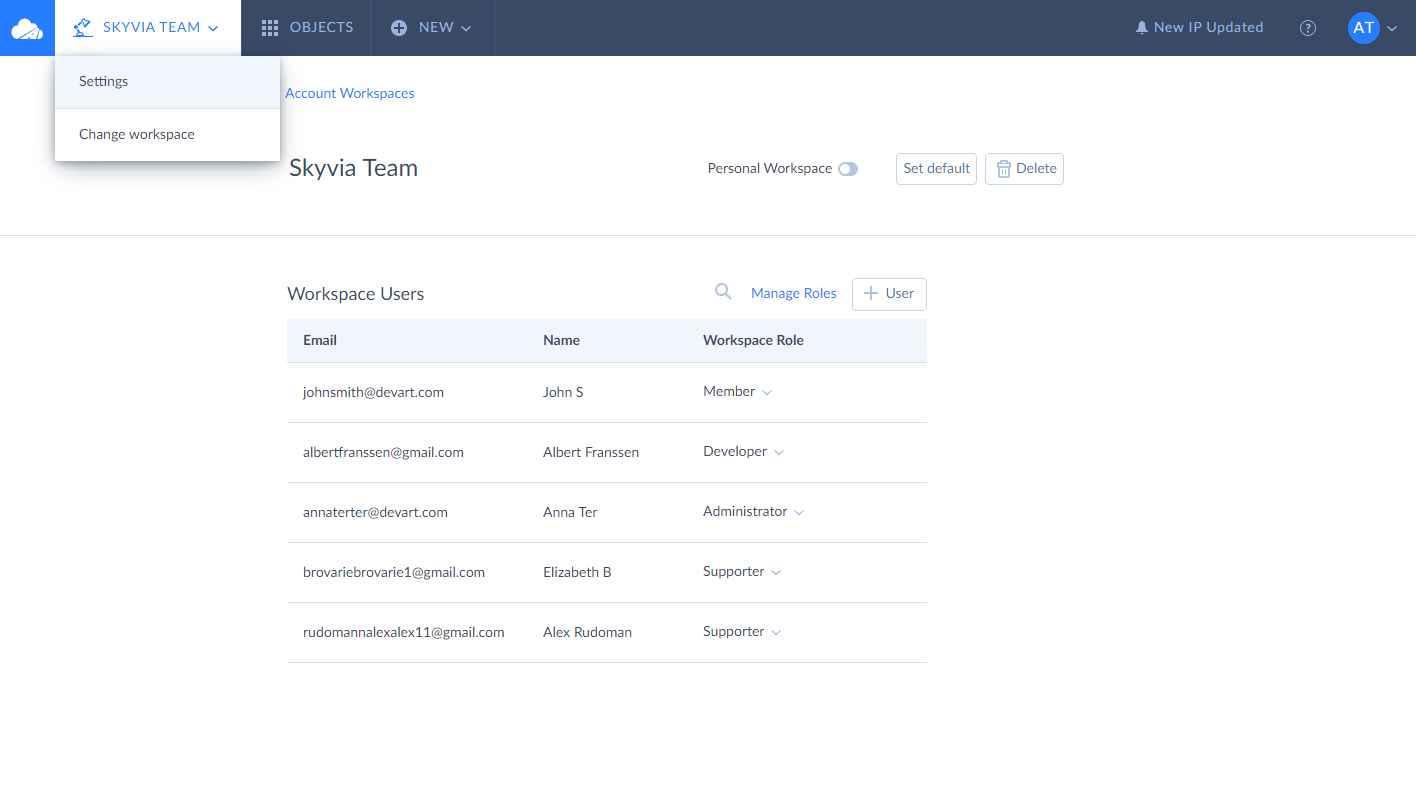
In different workspaces, users can have different permissions and can be assigned different workspace roles. The user can be a workspace admin for one workspace and a developer or member for another workspace.
To add users to the workspace and assign workspace roles to them, click the more options icon next to the necessary workspace and select Change settings from the drop-down list.
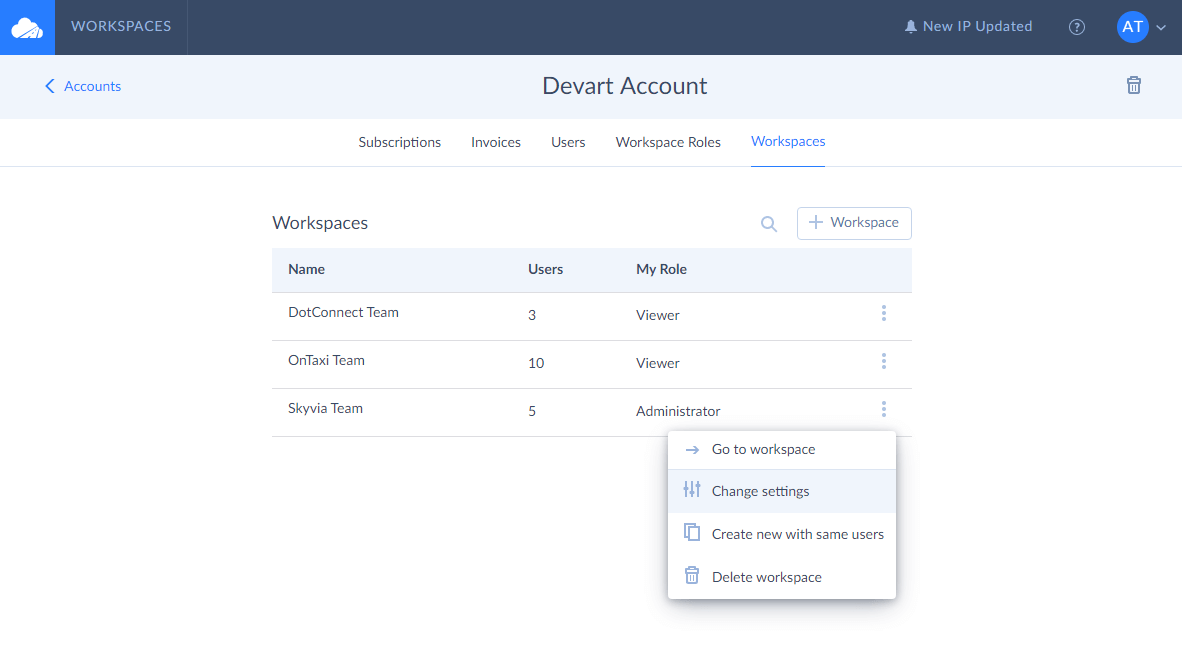
On the Workspace page, you can add users to the workspace, in case they are already among account members, and assign roles to them. Here you can also set the workspace as a default one to drop into it directly after signing in to Skyvia.
Personal Workspace Functionality
Personal workspaces have been developed for security reasons and for compatibility with the old Skyvia. When migrating users to the new workspace functionality, Skyvia automatically changed users’ default workspaces to personal ones.
In old Skyvia, users could not collaborate in the common workspace sharing connections, packages, queries and other Skyvia objects with each other, but they could share the same subscriptions to Skyvia products after being invited to the account. Now, we have implemented the possibility for users to team up in common workspaces. When migrating several users from one account to a new Skyvia interface, we separate their workspaces in order for them not to be able to see objects of each other until they allow it themselves. That is why the system automatically enabled the Personal Workspace toggle for workspaces of current Skyvia users when migrating them to the new workspace structure.
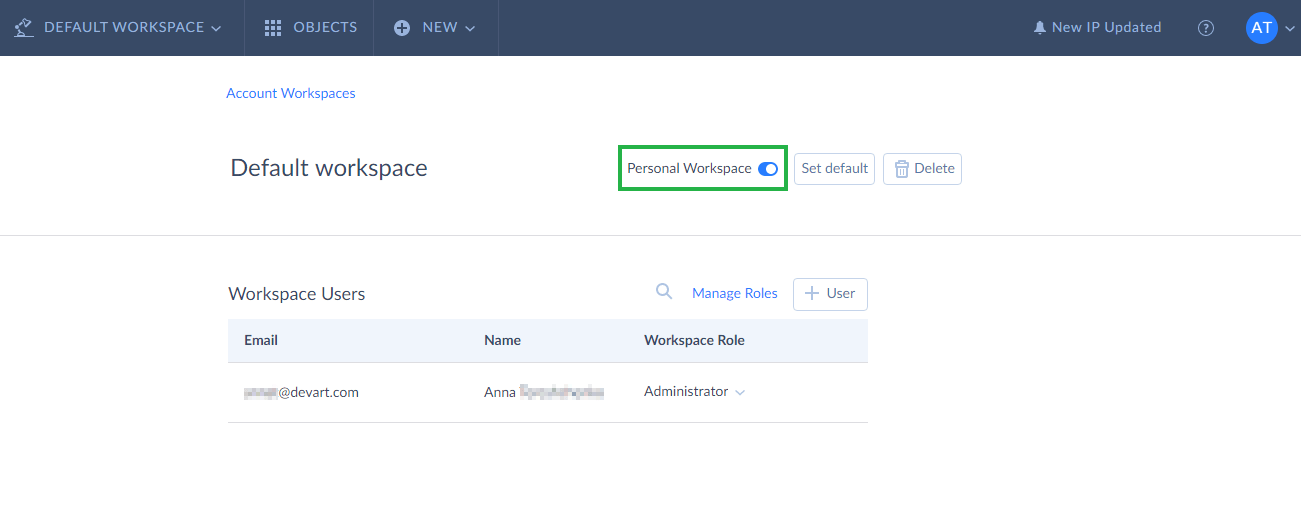
Please note you can switch one of your workspaces to personal on your own to limit access of other users, including other account admins, to it. After that, other users will not be able to view, edit or do any other actions with your personal workspace. You can make a workspace personal only if you are the single user of this workspace. In case there are other workspace members, you will not be able to make it personal unless you delete other members first
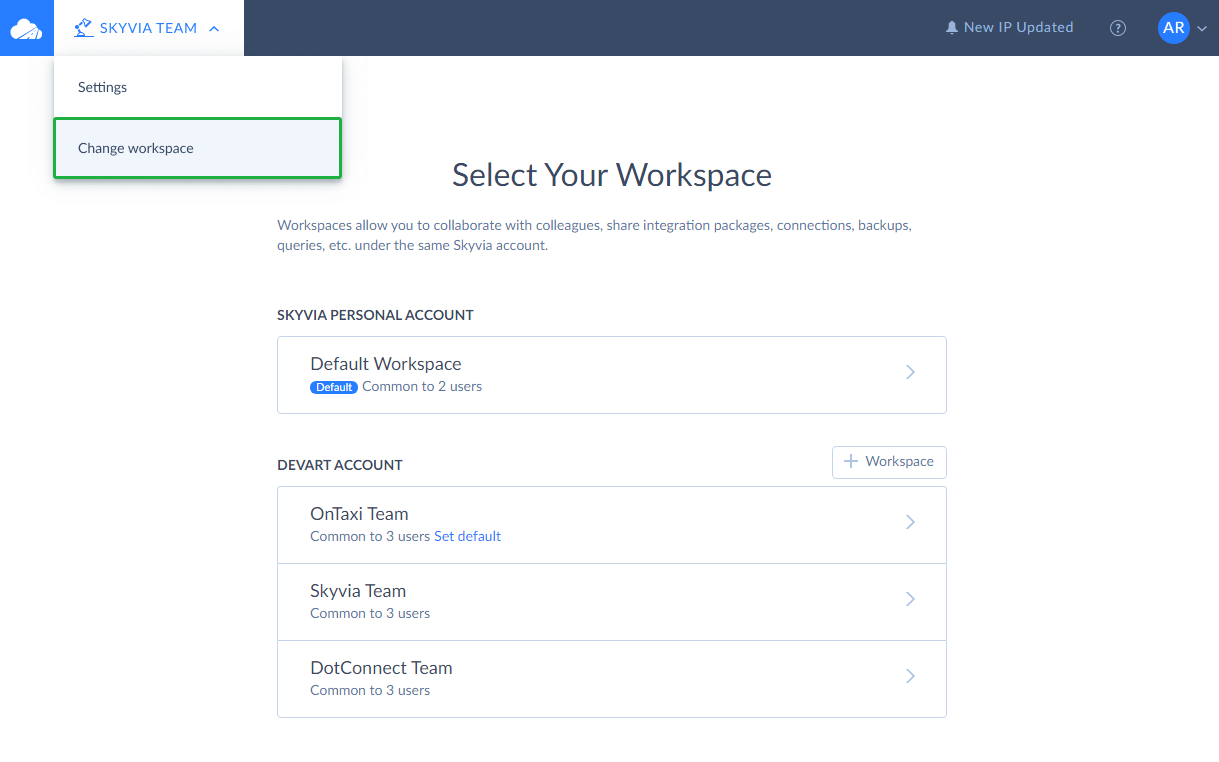
You can check accounts you were invited to and workspaces you were assigned roles in by clicking the Workspace drop-down list in the top menu and selecting Change workspace.