How to Set Up Daily Backup of Salesforce Contacts to Dropbox
In this tutorial, we will show how to configure a daily backup of Salesforce contacts to Dropbox. The tutorial can actually be applied for backing up any Salesforce objects.
Creating Connections
In order to export data from Salesforce to a file uploaded to Dropbox, first we need to create connections to Salesforce and Dropbox. If you have already created the necessary connections, you may skip these steps. To create a connection to Salesforce, perform the following steps:
- Click +NEW in the top menu.
- Click the Connection button in the menu on the left.
- In the opened Select Connector page, select Salesforce. To quickly find it, you can either use the Type to filter box or filter connectors by categories using the All list (for Salesforce, select the CRM category).
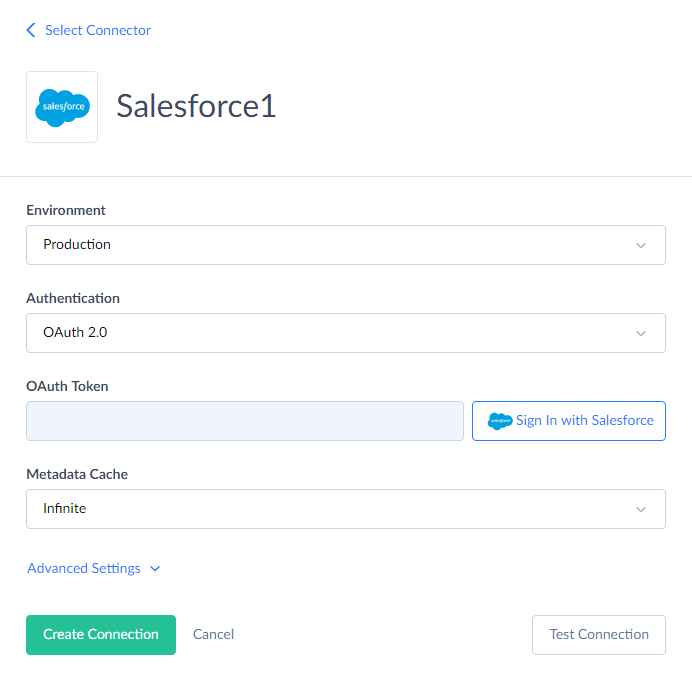
- The default name of new connection is Untitled. Just click it to rename the connection, for example, to Salesforce1.
- From the Environment drop-down list, select the environment type of Salesforce to export data from.
-
From the Authentication drop-down list select the authentication method for connecting to Salesforce. If you don’t mind storing your Salesforce credentials on our Skyvia server, select User Name & Password. If you prefer not to store your credentials, select OAuth 2.0.
-
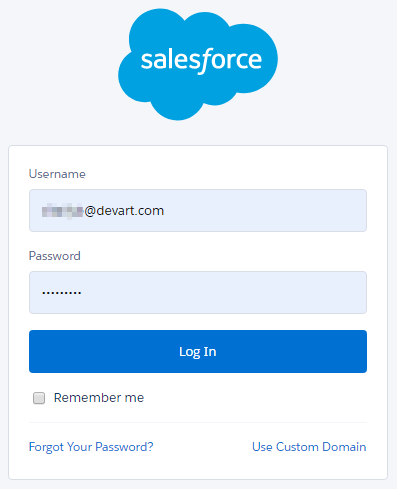
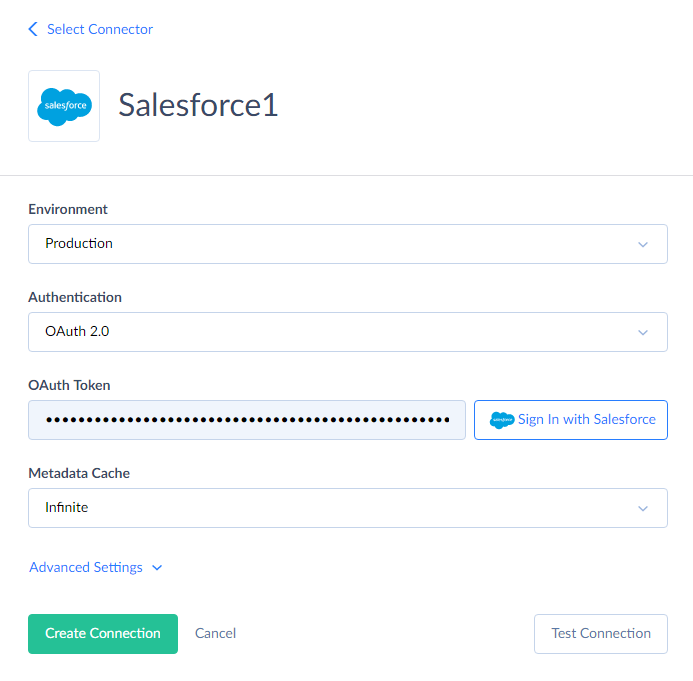
If you have selected User Name & Password, on the previous step, specify your Salesforce account e-mail, password, and security token. Otherwise, if you have selected OAuth 2.0 authentication, click the Sign In with Salesforce button and log in via the Salesforce website on the opened page. The result OAuth token will be stored in the connection data. Your Salesforce credentials will not be stored on our website.
-
Click Create Connection.
To create a connection to Dropbox, perform the following steps:
- Click +NEW in the top menu.
- Click the Connection button in the menu on the left.
- In the opened Select Connector page, select Dropbox. To quickly find it, you can either use the Type to filter box or filter connectors by categories using the All list (for Dropbox, select the Storage category).
-
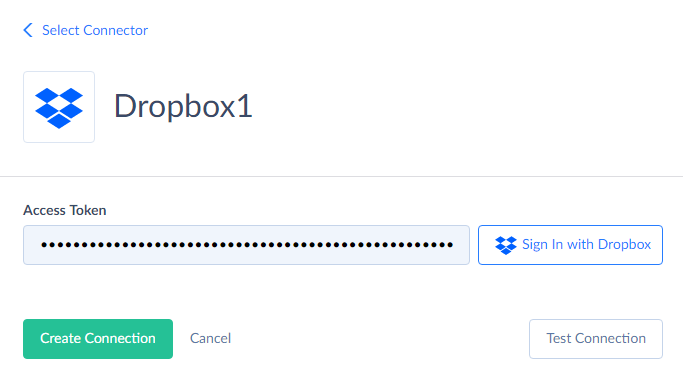
The default name of a new connection is Untitled. Just click it to rename the connection, for example, to Dropbox1.
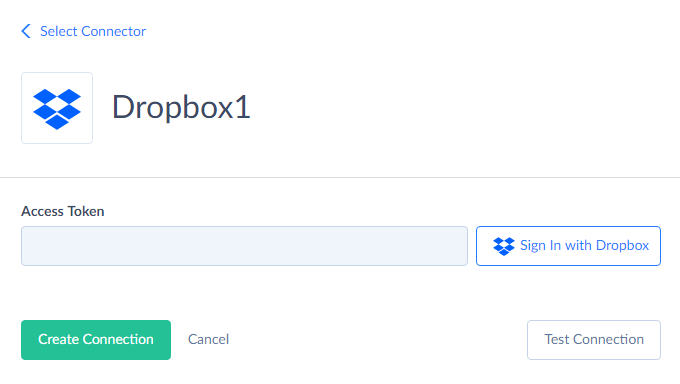
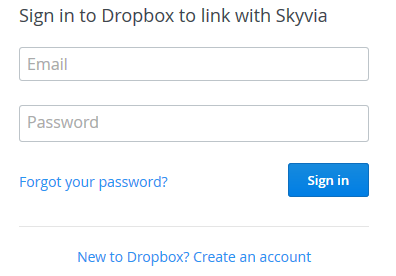
- Click Sign In with Dropbox.
-
Enter your Dropbox credentials and click Sign In.
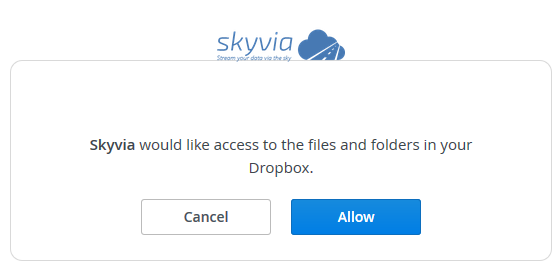
-
Click the Allow button.
-
Click Create Connection.
Now we have the necessary connections created. Let’s create an integration that performs the necessary operation.
Creating Integration
Now let’s create the corresponding export.
- Click +NEW in the top menu.
- In the Integration column, click Export. The export details page will open.
- Rename your integration by clicking and editing the integration name. The default integration name is Untitled. Please note, if you omit this step, the integration name will remain Untitled in the list of created integrations.
-
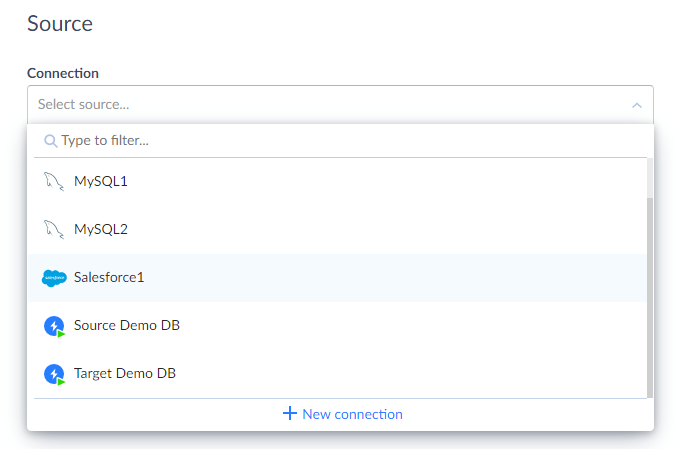
Under Source, in the Connection list, click Select source and select Salesforce connection in the drop-down list. You can use the Type to filter box to find the connection quicker.
-
Then select Target Type you want to export data to. To save CSV file(s) to a file storage service or FTP, click CSV to storage service. After this, click Select target and select Dropbox connection.
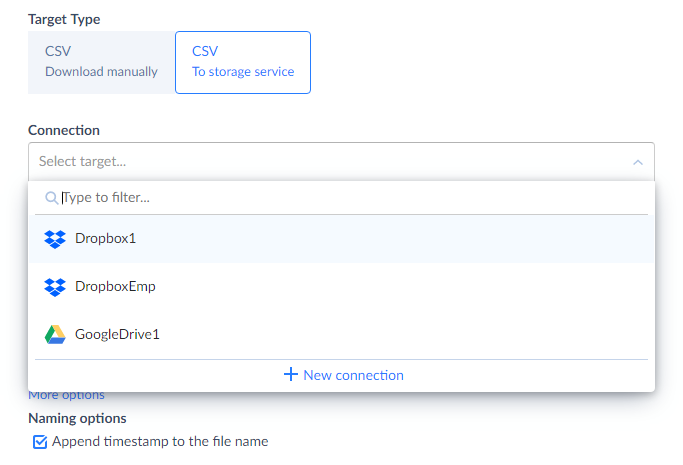
Next, specify the Folder where to place the result file.
- Click the Add new link to open the Task Editor.
- From the Object drop-down list, select Contact.
-
All the Contact fields are selected automatically. Clear the checkboxes next to those fields, you don’t want to export.
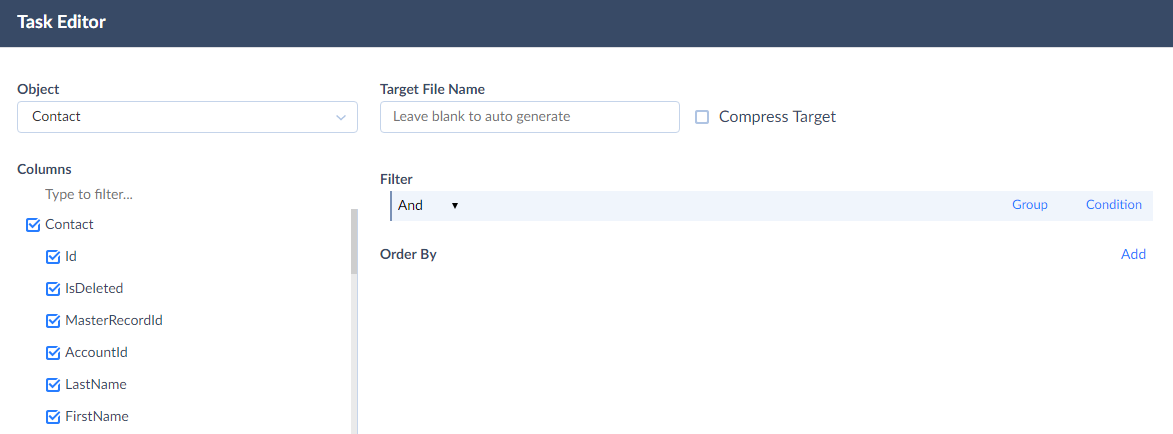
- Click the Save button at the bottom of the Task Editor.
- Then click the Create button to create an integration.
By default, Skyvia creates a CSV file with the name of the exported object (in our case “Contact”) and appended timestamp of the export operation, separated by the underscore character. Thus, the new files will not overwrite the older ones. However, you can disable adding a timestamp if you want the files to be overwritten in the integration Naming options. Or you can set a custom name for the result file in the Target File Name box in Task Editor. In this case, the timestamp will also not be added to the file.
If you need to backup several Saleforce objects at once, you may simply add more export tasks with the necessary object in the same way — just repeat the steps 6-9 selecting the necessary objects instead of Contact.
Scheduling Integration Execution
If you want the export to run periodically in order for you to always have a fresh backup, schedule export execution when creating a integration.
For fresh backup, configure the integration to run every day on a specified time.
Perform the following actions to set the schedule:
- Click Schedule on the left side of the toolbar.
- By default, State, Recurrence, and Run every parameters are already configured to run the integration every day, so let’s keep these settings.
- Then, set the execution time of export operation next to Occur once at.
- Optionally, select At a specific time in the Starting list and specify the necessary date and time you want the schedule to be enabled from.
-
Optionally, specify your Time Zone.
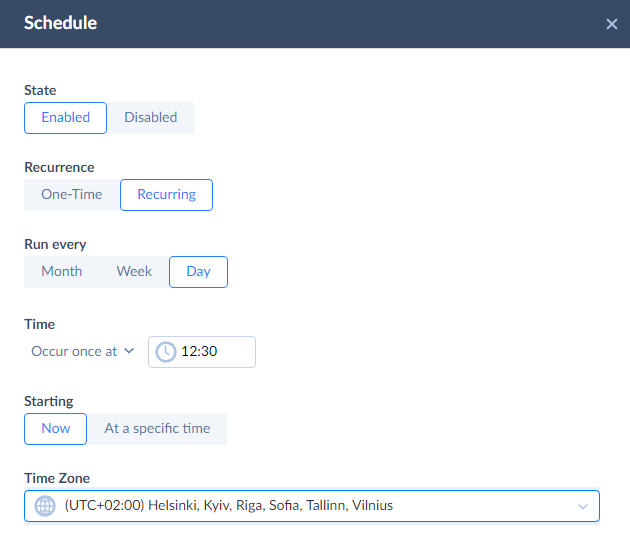
- Click Save to schedule integration execution.
After this, our integration will run automatically every day on the specified time.
You can also visit Scheduling Integrations to get more detailed information on setting an integration schedule.
That is all, the integration is created. It will backup Contacts to CSV files to Dropbox. To restore Contacts from a CSV file, you can use Import.