Connections
Connections in Skyvia are used for connecting to various data sources and working with their data. They represent sets of authentication parameters required to access data from the corresponding data source and some settings that determine how Skyvia works with the data source.
Connections are used in all Skyvia products, and you need to create a connection to a data source so that Skyvia could interact with it. Skyvia does not limit the number of connections that you can use, and you can create and use any number of connections to supported data sources on any pricing plan. If necessary, you can also create multiple connections, using different parameters/data source accounts, to the same data source.
Creating Connections
Creating a connection takes two steps:
-
First you open the list of connectors and select one you want to connect to. Skyvia supports various connectors, including popular cloud applications, relational databases, cloud data warehouses, and file storage services, and even allows defining custom connectors.

-
After you select a connector, you need either to specify the required authentication parameters or perform web login depending on the authentication used by the connector. You can see more details on the necessary parameters or a detailed procedure of creating a connection in the topics about specific connectors in the Connectors section.
In Skyvia, you can open the connector list and create connections in different ways, from different Skyvia tools. Currently, you can create a connection in the following ways:
-
You can create a connection, like any other object, by clicking +NEW in the top menu and selecting Connection in the list on the left.
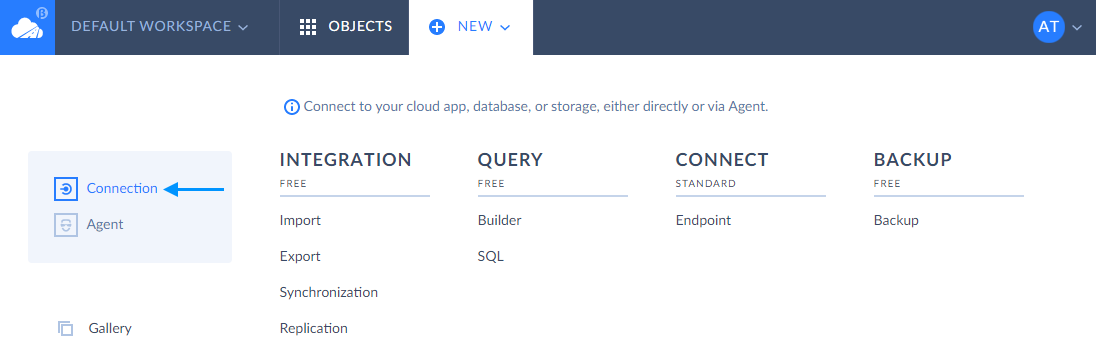
In this case, you create a connection in full-page editors.
-
Alternatively, you can create a connection from the editor of any other Skyvia object, which uses connection. Wherever you can select an existing connection in a list, you can also select + New connection.

Or, when selecting a connection in wizards, like Backup Wizard or SQL Endpoint Wizard, you can click the + Add new button to create a new connection.
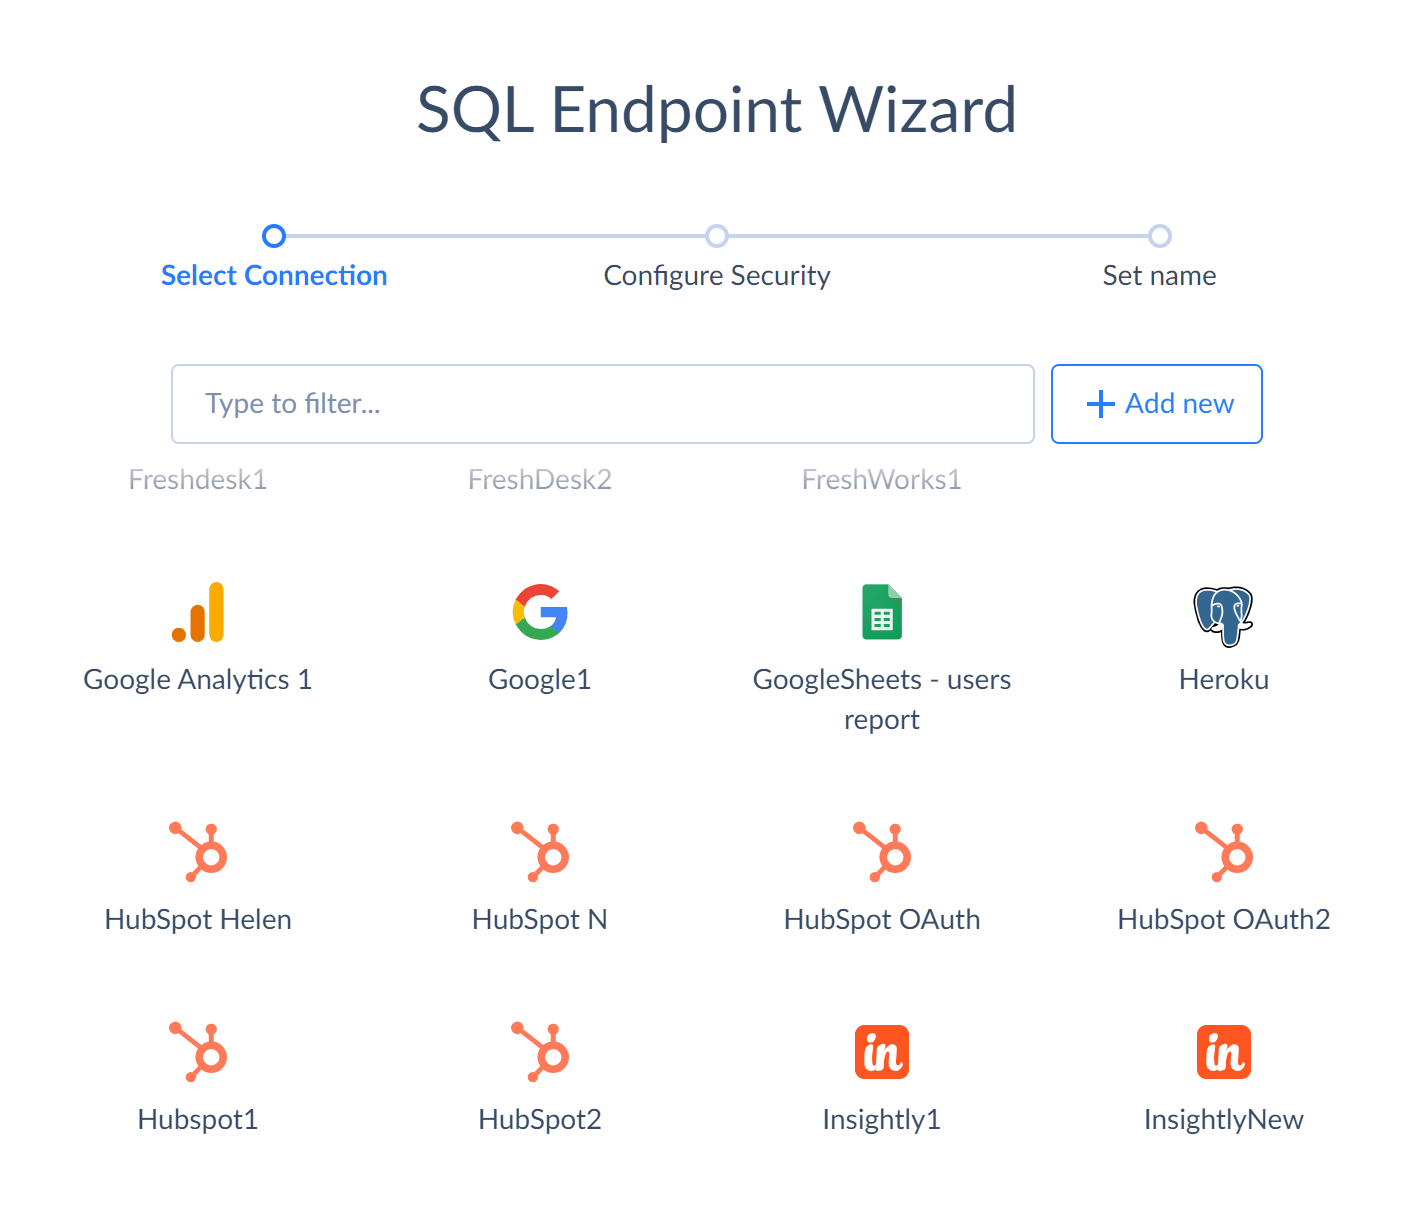
In this case, the connection is created in a dialog window.
-
Finally, some wizards, like Create Endpoint for Looker Studio Wizard, include connection creation steps as their pages.
Managing Connections
As well as the other Skyvia objects, connections are available in the object list, and you can manage them as well as other Skyvia objects. You can organize them into folders, edit or delete them, filter by the connector used, etc.
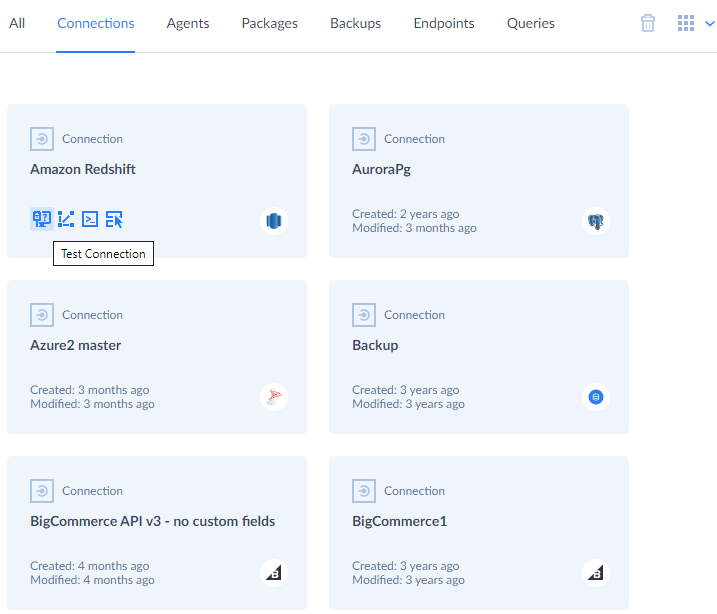
To display only connections, switch to the Connections tab on the workspace toolbar. For connections, Skyvia displays the information when a connection was created and last modified, the connector used, and whether the connection is direct, or it connects via an agent. The following Quick Actions are available for connections: Test Connection, View Dependencies, Query SQL and Query Builder.
By clicking a certain connection, you are transferred to the Connection Editor. Here you can view and modify connection parameters, clone, test connections or delete them.

Different Kinds of Authentication
Different connectors use different authentication kinds, and thus, connections to them are configured differently. For example, for connectors with OAuth authentication, you don't need to enter your login and password in Skyvia. You just sign in to the cloud application itself, and Skyvia does not know your username and password at all. On the contrary, for connectors with username/password authentication, you need to specify and store your username and password in Skyvia.
Some connectors support multiple kinds of authentication. You may select the authentication to use when creating a connection. You can find more information about different authentication kinds in the Authentication topic.
Metadata
Connection metadata is the information on the structure of data available in the connected data source. Metadata includes the list of cloud objects or database tables and views available, their fields with their data types, information about primary keys and relations between the connection objects.
Database Metadata
For different data sources metadata is treated differently. For databases and cloud data warehouses metadata is queried every time when the connection is opened, and you always work with the actual metadata.
Cloud App Metadata
For different cloud applications, the metadata-related behavior is different. For some applications, like Salesforce or Dynamics 365 metadata can be customized, and Skyvia can see these customizations by default. For other cloud applications, custom objects and fields can be added, but querying them takes more time and reduces performance. In order to access these custom fields, you may need to explicitly set corresponding options while creating or editing a connection. For example, NetSuite, Mailchimp, or Salesforce Marketing Cloud connections have corresponding settings in their connection editors.
Retrieving metadata from a cloud application can be a slow process. In order to avoid re-reading metadata each time, Skyvia caches cloud app metadata. So, once it retrieves metadata, it works with metadata cache, and it won't detect metadata changes. To see metadata changes, you will need to clear the metadata cache. For more information on how to configure metadata cache, read the Metadata Cache topic.
Some cloud apps don't support metadata customizations at all, and their metadata is constant. Some support customization, but Skyvia can work only with their predefined objects and fields. For such data sources, metadata information is not read from the data source itself. It is considered constant and is predefined in Skyvia itself.
Connecting to Local Databases
Connecting to local database servers can be challenging because on-premise databases are usually behind a restrictive firewall and/or have no dedicated external IPs. Skyvia allows connecting to these servers in two ways:
- Direct connections. Skyvia connects to the database server directly. This requires database servers to be available from the Internet. You may need to configure port forwarding if the server does not have a dedicated external IP and add Skyvia's IPs to the Firewall access rules. See Skyvia IPs and more information in the How to Configure Local Database Server to Access It from Skyvia topic.
- Agent connections. Skyvia connects to the database server via a secure Agent application. You create an Agent, download and install the Agent application on a computer that has both Internet access and access to the database server, and create Agent connections. Data is securely transmitted between the Agent and Skyvia in an encrypted form, and it doesn't require a dedicated external IP or port and usually does not require additional firewall configuration. Agent also often provides better performance for querying local databases because of protocol optimizations.