Components
Components perform all the data querying, processing, and storing in Data Flow. You can see the list of available components on the left of the data flow designer. Depending on what the components do, they are divided into three categories: sources, destinations, and transformations.
You can add components to your data flow by dragging them from the components list to the diagram. If the component has an input, connect the output of the necessary component to it. After this, you can click this component and configure its details in a sidebar on the right. Each kind of components has its own settings described below.
Sources
Source
Source is a component that extracts data from a data source and starts the data flow. Source is the very first component you should add to the diagram.
After you have added Source, click it and configure its details — select a connection to get data from, select and configure the action to perform in order to obtain data and map its parameters if needed. You can also give Name to the component displayed on the diagram.
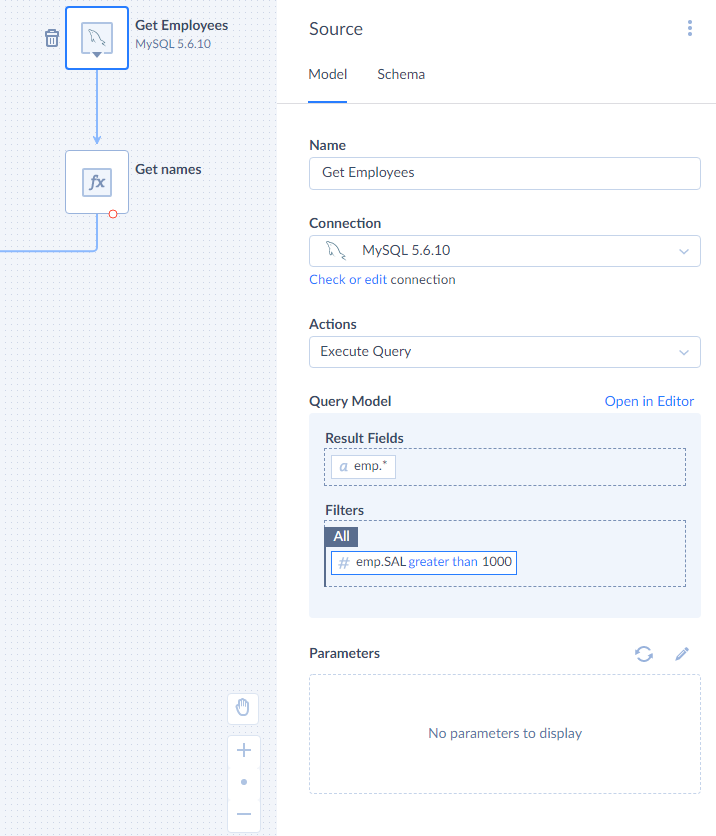
Source component has one regular output and no input. Its output returns the data obtained by the selected action.
CSV Source
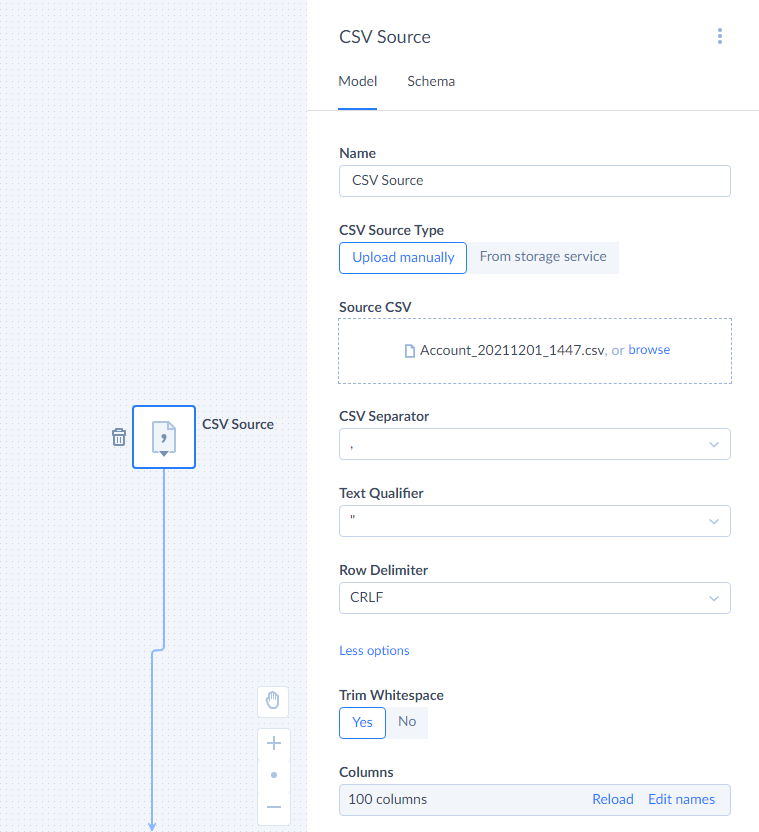
CSV Source is a component that extracts data from a CSV file. You can either manually upload the CSV file when creating or editing a package or load it from a file storage service when the data flow runs.
CSV File
If you want to upload CSV manually, just select the CSV Source component and drag the CSV from an explorer window to your browser, to the drop here your file panel under Source CSV or click browse and open the necessary CSV file. Whenever necessary, you can edit the data flow and replace the uploaded CSV file with another one.
If you want to load your file from a file storage service, under CSV Source Type, select From storage service. Then select or create a file storage connection. Finally, in CSV File Path select the CSV file to use.
Other Options
Optionally, you can click more options and specify CSV file options. Note that Locale and Code page options are not available in the CSV Source component.
You can also use the Trim Whitespace setting to trim leading and trailing whitespaces from the data in CSV fields.
Columns
After you specified the source file, under Columns check the number of detected columns. If this number does not correspond to the number of columns in your file, make sure that the CSV options are specified correctly and that you selected the correct CSV file. For example, if only 1 column is detected, it usually means that incorrect CSV Separator is specified.
You can also review column names and rename columns by clicking Edit names and editing column names. The modified names will be used in data flow scope. Custom names are assigned to CSV file columns in the same order as in the CSV file, i.e. the first column name in the list is assigned to the first CSV file column, and so on. Customizing column name can be useful if the CSV file does not include header row with column names at all.
Destinations
Target
Target is a component that stores input records in a data source. It can also write data to logs.
To configure Target, select a connection to load data to, select and configure the action to perform in order to store the input data and map its parameters if needed. You can also give Name to the component displayed on the diagram.
If batch data loading is supported for a connector used in the selected connection, the Target component loads data in batches into the data source by default. You may change this behavior by setting the Single Row parameter to True.
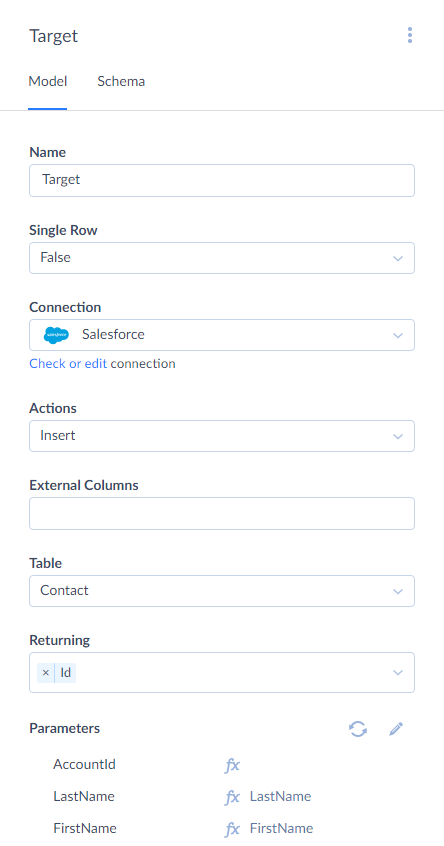
Target component has one input. It also has one regular output, and records, successfully loaded to the data source, are directed to this regular output. For some connectors, actions of the Target component also may obtain values of columns autogenerated in the data source, for example autogenerated IDs, and add the corresponding columns to the scope of the regular output.
Target component also has an error output, and records, failed to be loaded to the data source, are directed to this error output. Target component adds a column with the error message to the scope of this output.
CSV Target
CSV Target is a component that writes data to a CSV file. CSV files can be then downloaded manually or automatically placed to a file storage service.
To configure CSV Target, first you need to select the CSV Target Type — whether you want to download result files manually or place them to a storage service. If you want to upload file to a storage service, you also need to select of create a file storage Connection and select a Folder on the file storage service to place the result file into.
Additionally, you need to configure the result file naming. Select the File Name Type - whether you want to specify the file name as a constant or as an expression. Enter the corresponding Name if you need a constant or use Expression Editor to create an expression, to make your namme unique each time.
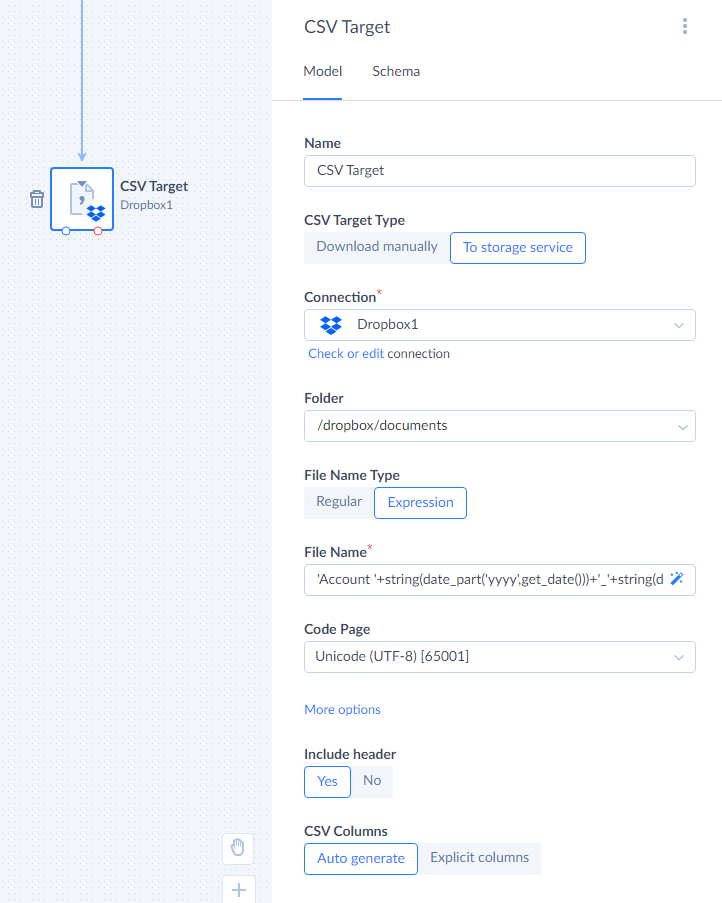
CSV Target can produce a CSV file with or without a header row with column names. This is determined by the Include header setting.
You can either let CSV Target automatically determine the result file columns based on its input columns or define the columns yourself. If you want to define columns yourself, under CSV Columns select Explicit columns. Then click the Edit link. In the CSV Columns dialog box, enter the list of column names. Each column name should be on the new line.
After this, you need to map the action parameters, corresponding to the specified columns.
JSON Target
JSON Target component is used to save output data to the JSON file. You will always receive an array as a result.
You can download JSON to your PC or upload it to the file storage. To automatically upload JSON to the file storage after running an integration, choose To Storage Service, and select your storage connection and the folder to store your JSON in. If you do not have an established connection with your storage service yet, visit the Creating Connection page, to learn how to create a new connection.
JSON file name can have a constant value or can be generated based on the expression. Select Expression as your File Name Type and enter your expression into File Name field to do this.
You can either let JSON Target automatically determine the JSON properties based on the input or define the properties yourself by choosing Explicit properties and modifying the Output Schema.
Transformations
Transformation components either transform the input data, i.e. add new columns to the input records, or modify variable values. They may also split input records into multiple outputs.
Split
Split is a component that passes all the input records to each of its outputs. It has one input and can have any number of regular outputs, which are exact copies of the same input. It does not need any configuration, you just drag it from the component list to the diagram and connect its input and outputs to the corresponding components.
Conditional Split
Conditional Split is a component that splits records into different outputs depending on the specified conditions.
To configure Conditional Split, you need to create one or more conditional outputs. You can also give Name to the component displayed on the diagram.

To create a conditional output, click ![]() next to the Conditional Outputs header and then specify the output name and condition.
next to the Conditional Outputs header and then specify the output name and condition.
For the condition, you need to enter an expression, using our expression syntax. We recommend to use Expression Editor when you deal with complex condition logic.
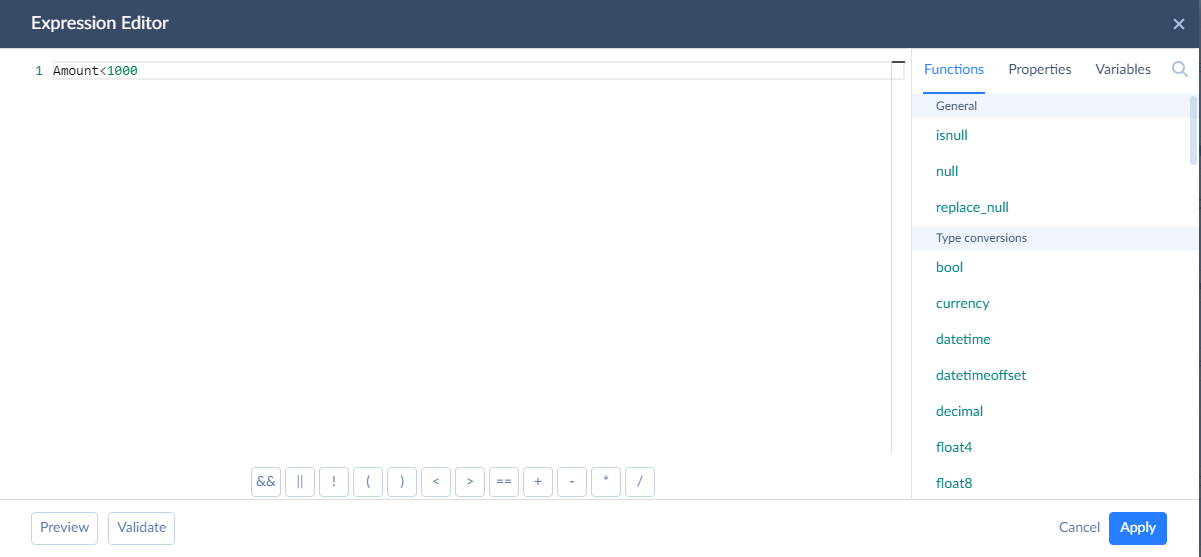
Note that the expression must evaluate to a boolean value. If it returns a value of another type, the record is sent to an error output.
The conditions are fulfilled for each record in the same order as the corresponding outputs are listed in the list of Conditional Outputs. A record is sent to the first output, condition of which evaluates to True, and processing of this record stops. This record is not checked anymore for compliance with other conditions in the next conditional outputs, and it doesn’t go to next outputs even if their conditions would be True for this record as well.
If the record does not match any of the conditions specified in the conditional outputs, it goes to the Default output, which is always available for a Conditional Split component.
In addition to regular outputs, the Conditional Split component has an error output. It sends rows to this output in two cases: when an expression evaluation fails with an error, and when expression returns a result of type other than bool.
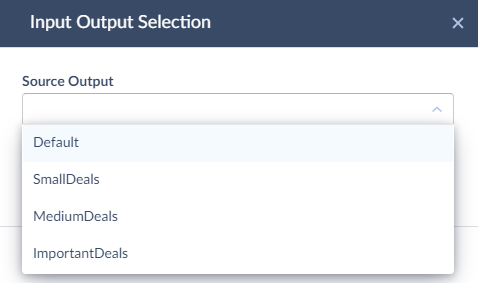
When you connect a regular output of the Conditional Split component to the input of another component, you will be asked to select the output name in order to determine the output to connect to.
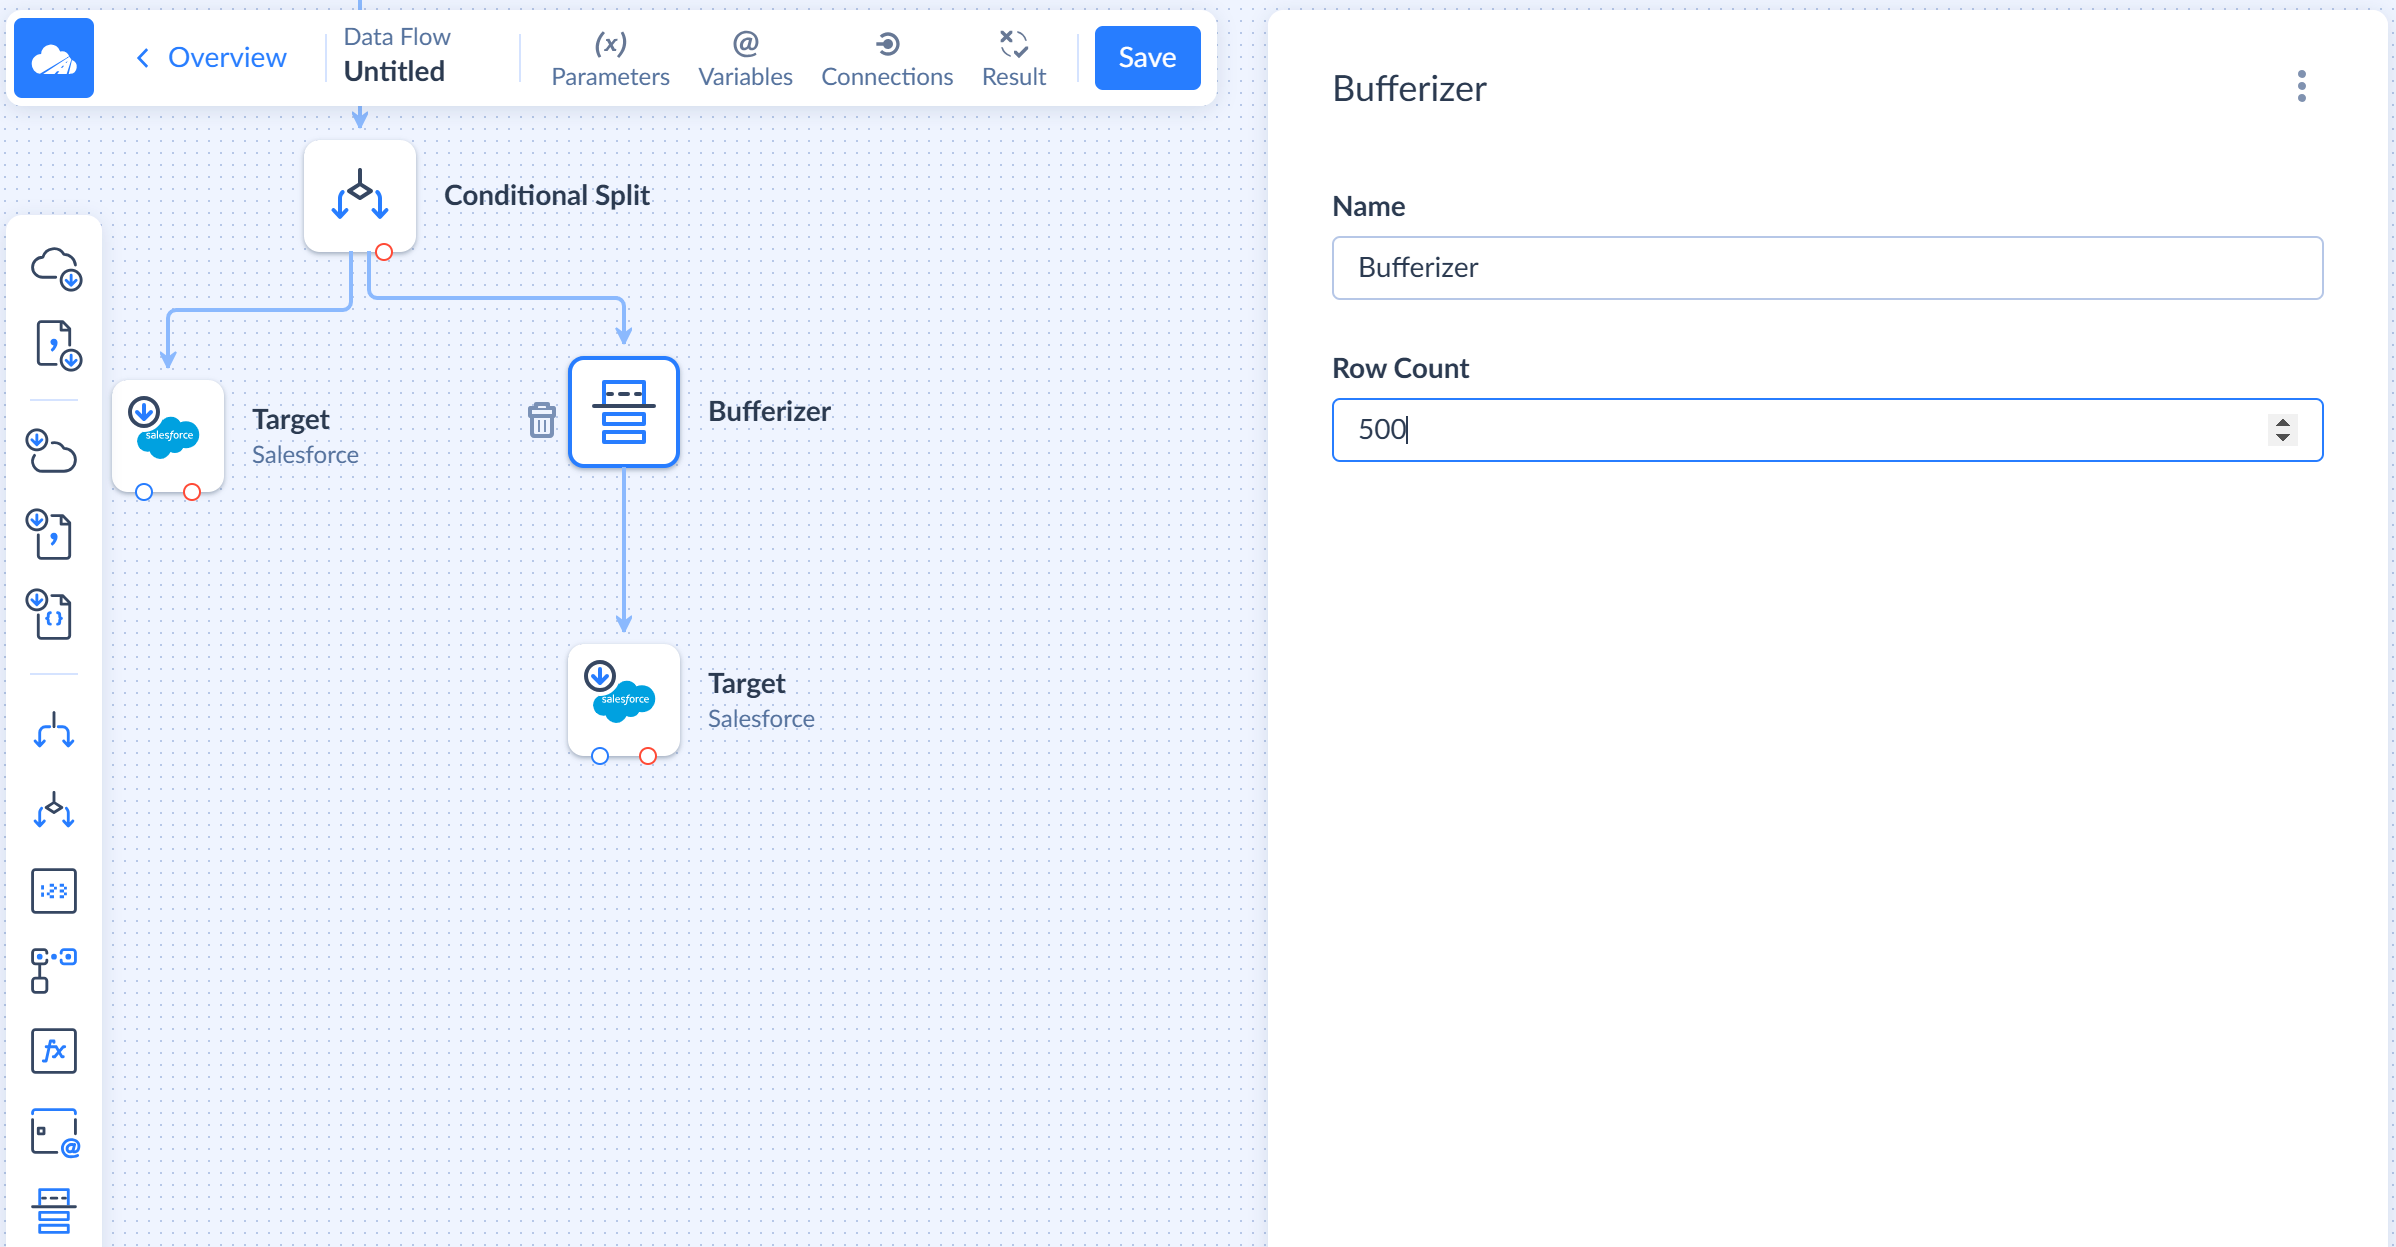
Bufferizer
Bufferizer is a component that caches input records and outputs them in batches of the specified size. To configure this component, you only need to specify the Row Count parameter, which determines the size of output batches.
You can place this component before a Target component in order to send batches of the fixed size to it. This allows you to control the size of batches actually sent by the Target component to the data source.
By default, Source components query and output data in batches of 2000 records. However, while processing data, Conditional Split and Lookup components may split incoming batches into batches of the smaller size, and thus, size of batches, reaching Target components without Bufferizer, can vary.
Controlling batch size can be useful when you need both to increase the size of batches sent to data source at once in order to load more records per an API call and improve API call use efficiency, and to decrease batch size if the target has some additional custom limitation or if smaller batches provide better performance.
Note that each data source has its own API batch size limitations, and sometimes different objects have different limitations. Some of them don’t support sending records in batches at all. Skyvia cannot exceed data source API limits. If the maximum batch size is allowed by the target data source and table is less than the specified Batch Size, the buffered records are automatically split into multiple batches by the Target component.
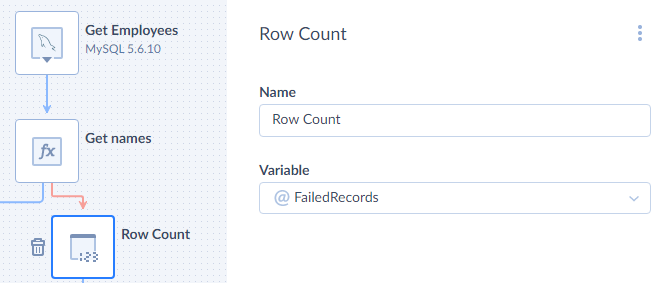
Row Count
Row Count is a component that counts the input rows and writes the result to a data flow variable. It passes its input records to its output without any modification.
To configure Row Count, you need just to select a variable to put the number of the rows to. The variable must have a numeric type. You can also give Name to the component displayed on the diagram.
Lookup
Lookup is a component that matches input records with records from another data source and adds columns of the matched records to the scope.
To configure Lookup, you need to specify Behavior, Scope, Property and select a Connection to get data from. Afterwards, select and configure the action to perform in order to obtain data and map its parameters if needed. You can also give Name to the component displayed on the diagram.
Behavior defines what property types and values you get in the Lookup component’s output.
There are five Behaviour types:
- FirstOrDefault — if there are multiple matches, lookup takes the first value. If there are no matches, property values are set to
Null. - First — if there are multiple matches, lookup takes the first value. If there are no matches, input properties are sent to the error output.
- SingleOrDefault — if there is a single match, lookup takes it and sends it as an output. If there are multiple matches, input properties are sent to the error output. If there are no matches, property values are set to
Null. - Single — if there is a single match, lookup takes it and sends it as an output. If there are multiple matches or no matches, input properties are sent to the error output.
- Array — if there are matches, lookup takes all the values and add them to the array type property in the output. If there are no matches lookup returns an empty array.
If you want to create a new nested type property that will contain lookup results, define its name in the Property field. Note that Property value is required if lookup Behaviour is set to Array.
If you do not want to create a new nested type property but want to use the existing one instead, enter its name in Scope and it will be extended with the lookup results.
Extend
An Extend component adds calculated columns to input records. It allows you to add one or more columns, values of which are calculated based on the input column values and data flow variables. To extend a specific nested type property, select it from the Scope dropdown.
To configure Extend, you need to set up its Output Schema using the Mapping Editor. Create parameters, which correspond to the result columns, and configure their mapping.
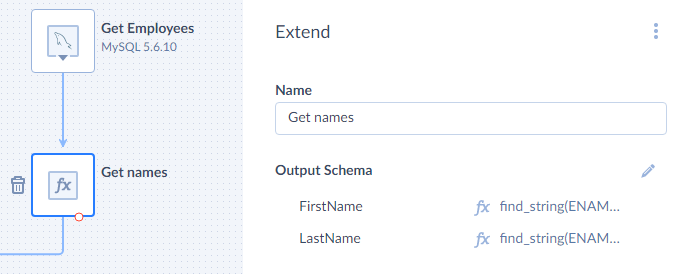
Extend component has one input and one regular Default output for successfully processed rows with calculated columns added. It also has the Error output, to which it passes records, for which one of the expressions failed with an error, and adds the Error column with an error message to them.
Unwind
Unwind component is used to deconstruct a nested type property into separate properties for each item in the nested type (for each element if the nested type is an arary and for each property if the nested type is an object). It uses Scope to indetify which nested type property to deconstruct. See example of using Unwind component.
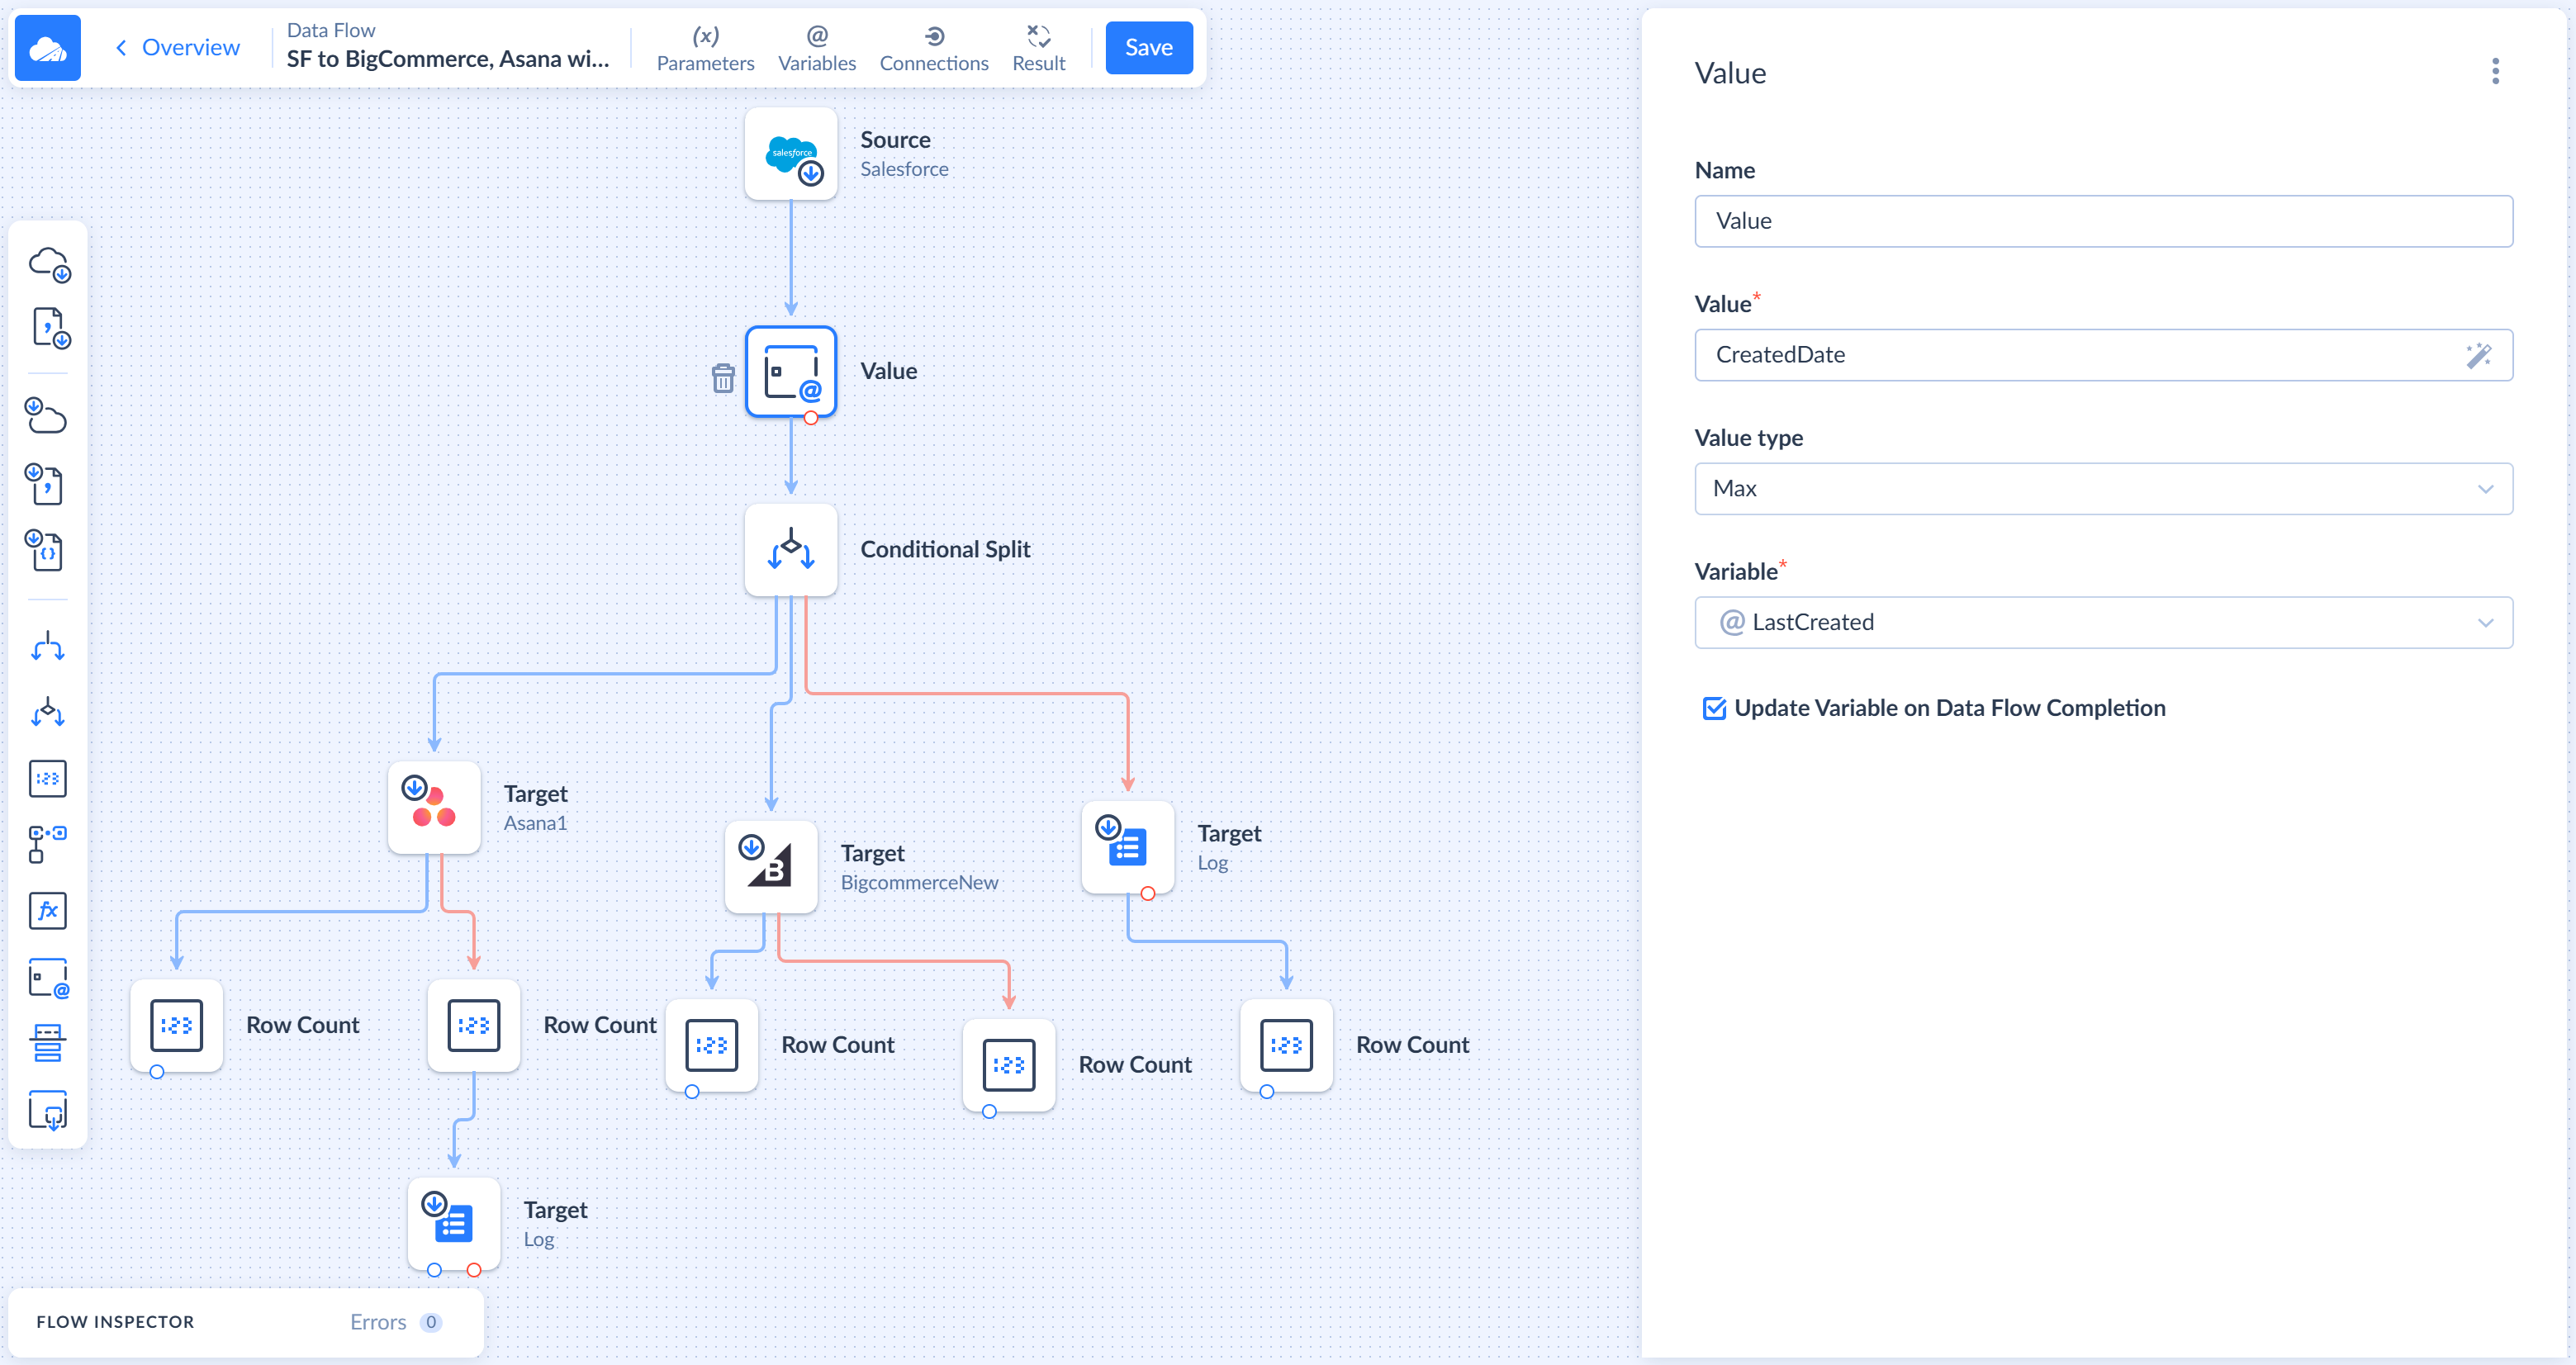
Value
A Value component selects a value obtains the specified value calculated based on the values from input record and assigns it to the specified variable. It can select the min, max, first, or last value from all the processed records.
You can use the Value component, for example, to store the maximum value of record creation time in a parameter, and query only records with the created time greater than this value during the next data flow execution. Thus, every time the data flow starts, it will process only new records.
To configure the Value component, enter an expression by using our expression syntax into the Value box. In a simple case the expression is just the name of an input column. To create complex expressions use Expression Editor.
Then select the Value type — min, max, first, or last. Finally, specify a Variable to store the value in. You can also provide a Name for the component, which is displayed on the diagram.
The Value component can update the variable either after processing each batch or when data flow completes. The latter is useful if you want to use the variable in other places of the data flow before changing its value. If you want to change the variable value only when data flow completes, select the Value Update On Data Flow Completion checkbox.
The Value component has one input and one regular Default output for successfully processed rows. It sends successfully processed input rows to its output unchanged. It also has the Error output, to which it passes records, for which the expressions failed with an error, and adds the Error column with an error message to them.
Actions
Components that interact with data sources perform actions. Action is an operation performed by a component to obtain data from the data source or store them. These are the following components: Source, Lookup, Target.
Action parameters connect component input and variables with the action. They are mapped to input columns and data flow variables using expressions in the Mapping Editor. Their values are calculated for each input row in a batch, and then the action is executed for each row. Some actions are executed for each row separately, and some are executed in batches, for the batches of input rows.
For more information about actions, their configuration, and mapping their parameters see Actions. There you can also find the list of actions, common for most of supported connectors.