How to Import Only Recently Added or Changed Data from Cloud Sources
With Skyvia you can easily propagate data changes, such as inserting new records to a cloud data source or updating existing ones, to other data sources via Import.
When importing data from cloud sources, Skyvia allows creating integrations that import not all the cloud data from the source object but only the records created or modified since the integration creation or since the previous integration execution. To create such a task in import, you simply need to click the Inserted or Updated button on the Source Definition page of the Task Editor. All other settings are configured as usually. The Inserted button imports records created since the last integration run (or integration creation if the integration was never run). The Updated button imports both records that were created and records that were modified since the last integration run.
For example, you can easily create a integration that adds all the new Salesforce leads as Mailchimp subscribers to a Mailchimp list or create QuickBooks customers for new Salesforce accounts, etc. After this, you can schedule it to execute every several minutes, and subscribers will be automatically added for all the new Salesforce leads.
This functionality allows you to create trigger-action-like integrations or simply load all the new records and updates from one source to another automatically. However, it is not a full-featured replacement for data synchronization, because an import cannot perform actions for recently deleted records.
Importing recently added or updated records is supported only when the Source is a cloud application. It also requires a source object to have fields that store timestamps for the creation time and last modification time. For example, in Salesforce, these fields are CreatedDate and LastModifiedDate. However, there is a workaround for relational databases described below.
Please note that not in some cloud sources only some objects have these fields, and thus, for some objects this feature is not available. For example, it cannot be used when importing data from Salesfoce Marketing Cloud data extensions. Some data sources, like Podio or SendPulse, does not have such fields at all.
Workaround for Relational Databases
To import only recent data from relational databases, you can use the following workaround:
Add columns for storing timestamps of creation time and/or last modification time to the database table you want to import data from yourself. The date and time in these columns must be in UTC. Also you need to create triggers that assign current timestamp to these columns whenever a row is inserted or modified. Then you can use source data filters and add filters on these columns that use the LAST_RUN relative constant. Thus, you can import only records with creation or modification date and time more than the date and time of the previous integration run. This relative constant is equal to the timestamp of the previous integration run, and, if a integration has not been run yet, to the date and time of its creation.
Adding New Salesforce Leads to Mailchimp List
Suppose we need to integrate Mailchimp subscribers with Salesforce leads. We already have subscribers for existing leads and want to create subscribers from new ones automatically. So, to create such an import, let's do the following:
Creating an Integration
-
Click +NEW in the top menu.
-
In the Integration column, click Import. The import details page will open.
-
Rename your integration by clicking and editing the integration name. The default integration name is Untitled. Please note, if you omit this step, the integration name will remain Untitled in the list of created integrations.
-
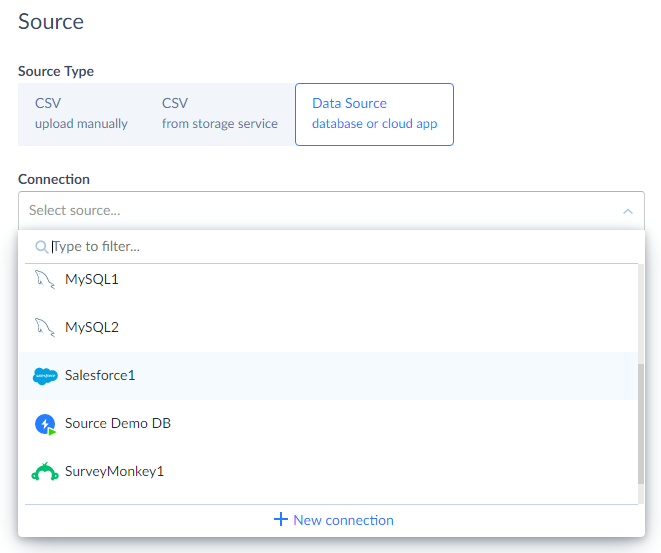
Under Source, in Source Type, click Data Source database or cloud app and select Salesforce connection from the drop-down list. If you have not created the connection yet, see the Salesforce topic.
-
Under Target, in the Connection list, click Select target and select Mailchimp connection from the drop-down list. If you have not created the connection yet, see the Mailchimp topic.
-
Click the Add new link.
Configuring Source
-
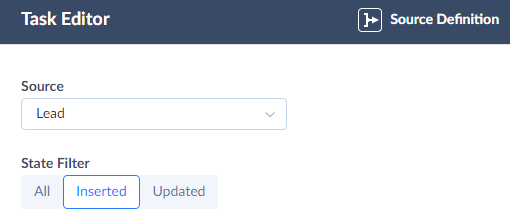
In the Source list, select Lead.
-
Click Inserted to import only recently inserted records.
-
Click Next step.
Configuring Destination
-
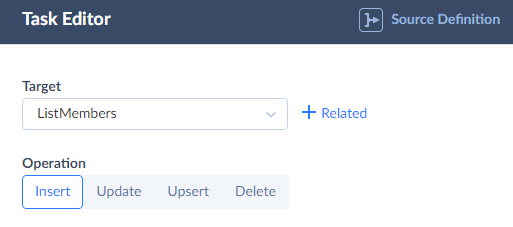
In the Target list, select ListMembers.
-
Click Next step.
Configuring Mapping
-
Click ListId.
-
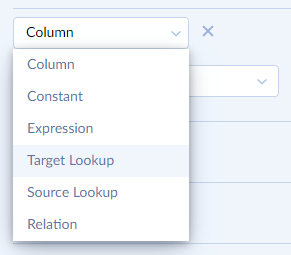
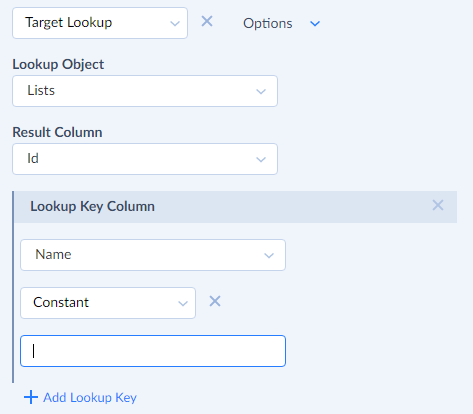
Click Column and then select Target Lookup from the drop-down list.
-
In the Lookup Object list, select Lists.
-
In the Result Column list, select Id.
-
In the Lookup Key Column list, select the Name target column.
-
Click Column and then select Constant from the drop-down list.
-
In the bottom drop-down box, enter the name of the list to add new subscribers to.
-
Click the Last Name column and map it to the Last Name source column using column mapping.
-
Click the First Name column and map it to the First Name source column using column mapping.
-
Click the EmailType column and map it to the constant "Html" (without quotes) using constant mapping.
-
Click the Status column and map it to the constant "Subscribed" (without quotes) using constant mapping.
-
Click Save.
Scheduling Integration
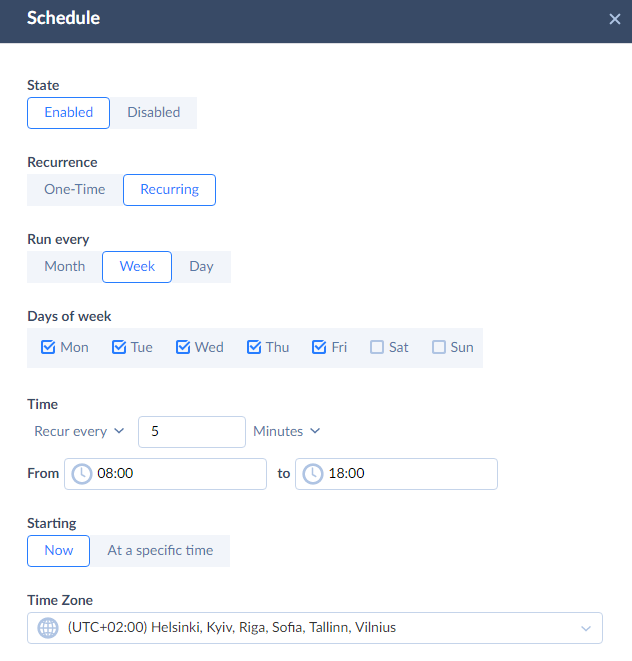
Now all you need is to schedule a integration for automatic execution so that it creates Mailchimp subscribers from new Salesforce leads automatically. We will configure it to run every 5 minutes on workdays from 8:00 to 18:00.
-
Click Schedule on the left side of the toolbar.
-
Under Run every, select Week.
-
Under Days of week, select checkboxes with all the workdays.
-
Click Occur once at and then select Recur every on the list.
-
Enter 5 in the corresponding box.
-
Click Minutes.
-
Click Set time restrictions.
-
Enter 8:00 and 18:00 to the corresponding boxes.
-
Click Save to schedule integration execution.