Configuring Synchronization
Synchronization is a specific kind of integration, which performs bi-directional data synchronization between cloud applications and relational databases.
Creating a Synchronization Integration
To create a synchronization integration, click + Create New in the top menu and select Synchronization in the Integration column. When the integration details page opens, perform the following steps:
- Specify the data sources you import data from and to and connections (one-to-one; one-to-many; many-to-one) to them.
- Create synchronization tasks for the integration.
- Optionally schedule the integration for automatic execution.
Synchronization Requirements and Supported Sources
Skyvia supports synchronization of cloud applications and relational databases. It does not support synchronization of cloud data warehouse services, like Amazon Redshift, Google BigQuery, or Azure Synapse Analytics.
For synchronizing database data, the primary key columns of the database tables must be autogenerated. For example, you may use autoincrement/identity columns for a primary key or create triggers to generate and assign primary key values.
Synchronized cloud objects must have fields storing information about when an object was created and last modified. Both of the fields must be present in an object. In some cloud applications some of the objects may have only one of such fields or don’t have any. Such objects cannot be added to a synchronization. If you try to select such an object for synchronization, the corresponding error message is displayed.
Note that some cloud applications, like Podio or SendPulse, do not have objects with both such fields at all. These data sources cannot be synchronized.
Source and Target Connection
When creating a synchronization, first you need to select source and target connections.
Synchronization is bi-directional. It means that the only difference between the Source and Target is that in case of conflicts source data changes have priority over the target data changes. If the same records were modified in both source and target between synchronizations, the source values are applied to the corresponding records in the target.
You can specify integration connections in the following way:
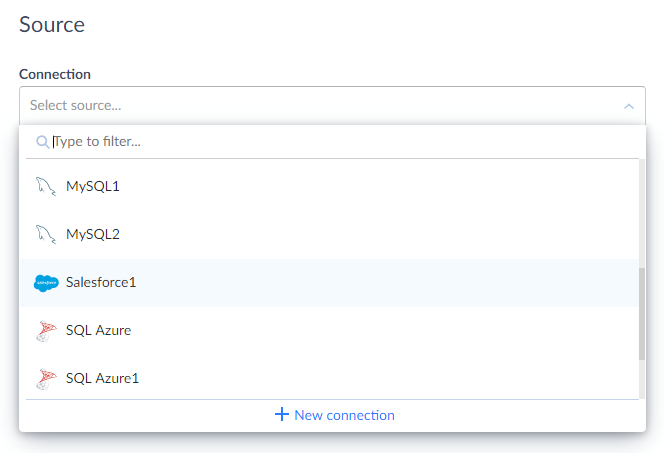
Under Source, in the Connection list, select the source connection from the drop-down list. If you have not created the source connection yet, click the +New connection button and create a new connection (learn how).

Under Target, in the Connection drop-down list, select the target connection to synchronize data with.
Creating Tasks
To create a synchronization task, click the Add new link and configure a new synchronization task in the Task Editor as described in the How to Create Synchronization Task topic.
Integration Settings
You can rename your integration by clicking and editing the integration name. The default integration name is Untitled. Please note, if you omit this step, the integration name will remain Untitled in the list of created integrations.
You can schedule your integration for automatic execution. See Scheduling Integrations for more details.
Dedicated Account
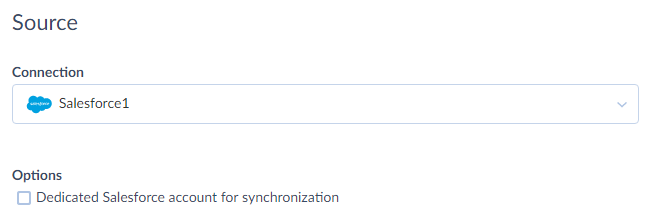
If the source or target are Salesforce, Dynamics 365, SugarCRM, or Zoho CRM, and synchronization uses a CRM account that is not used for any other data update operations, select the Dedicated [CRM] account for synchronization checkbox (where [CRM] can be Salesforce, Dynamics 365, SugarCRM, or Zoho CRM). This checkbox means that this account is used only for the synchronization, and changes made by this account are ignored by the synchronization.
If this checkbox is selected:
- The first synchronization synchronizes all the data.
- If users, other than the user specified in the synchronization connection, make changes to application data during the synchronization operation or after it, these changes are synchronized in the next synchronization operation.
- Any changes, performed by the user specified in the synchronization connection, are ignored. Skyvia assumes that this application user account is dedicated for the synchronization operation and does not perform any other data changes.
If this checkbox is not selected:
- The first synchronization synchronizes all the data.
- Any changes to CRM data performed during the synchronization operation are ignored. If other side is a relational database, all the changes to it performed during the synchronization operation are also ignored. It’s highly recommended not to edit the data being synchronized during the synchronization operation.
- Any changes, performed by the user specified in the synchronization connection or any other user between the synchronization operations, are synchronized.
We recommend creating a dedicated cloud application account for the synchronization operation and selecting the Dedicated [CRM] account for synchronization checkbox.

Locale
The specified Locale determines locale settings including DateTime format, number format, string collation, currency format, etc. This option is applied when non-textual data (like dates, numbers, etc.) is converted to a string. Such conversion can happen in expressions or when mapping a non-textual field to a string field. If this option is not set, InvariantCulture is used. The invariant culture is culture-insensitive; it is associated with the English language but not with any country/region.
After you have configured your integration, click the Create button.
Synchronization Parameters
In Skyvia, synchronization integrations have the following two parameters.
| Parameter | Description |
|---|---|
| LastSyncTime | The time since the last synchronization. When synchronization is executed, Skyvia sets this parameter to the current time, and the next integration execution will synchronize the changes made since the time specified in this parameter. You can reset this parameter in order to reload all the data |
| InitTrackingObjects | A Boolean value, determining whether to create tracking tables and triggers in the synchronized database. It is true before the first integration run, when they are not created yet. Integration execution sets it to false. You can reset it when you need to re-create the tracking tables and triggers in the database |

Editing Existing Integration
Editing an existing integration is performed via the same integration editor page with the same interface elements as when creating a new integration. To edit a integration, click Edit on its details page.
In the integration editor, you can change connections, add, edit, or delete tasks, enable, configure, or disable integration schedule, etc.
Editing or Deleting Tasks
When editing an existing synchronization, which have already run, you can freely delete tasks and unmap fields. However, when mapping new fields or changing mapping for already mapped fields, you should note that next synchronization run won’t resync all the records with the new mapping automatically. Next synchronization run will only sync records that were modified since the previous integration run, so the new mapping will be applied only for these records.
If you want to resync all the records with the updated mapping, you can choose one of the following workarounds:
- Сlear the LastSyncTime parameter by clicking Parameters and then Reset value to perform synchronization as for the first time. Your data are previously synced that means you have same records in both data sources. In order not to make duplicated records during the next synchronization, delete them in one of the data sources. Skyvia will load all the records from one side to the side with the deleted records. Note that you should not forget to clear the LastSyncTime parameter or you may lose your data.
-
Perform a mass update of your records in one of the sources with the same values that are already in this data source. For example, you may use our Query tool and perform an UPDATE statement. Here is an example of such statement for Salesforce Pricebookentries:
1
UPDATE PricebookEntry SET IsActive = IsActive
This statement does not actually modify data, because it assigns an already assigned value for records, but the records will be considered modified, and the synchronization will resync them to the other source.
When using any of these workarounds, please be careful and act only if you know what you are doing. Incorrect actions may cause data loss.
Adding Tasks
Adding a task to an existing integration that has already run is a more complex case. If one or both of the sources are databases, you will definitely need to reset both of the synchronization parameters and run the integration as in the first time. If you have synchronized data, you may need to truncate previously synchronized tables on one of the sides to avoid creating duplicates.
If both of the synchronized sources are cloud applications, then it is possible to use the second workaround for the added object.
Anyway, we recommend to plan your synchronization integrations in advance and add all the necessary tasks when creating them. In case you need to add tables/objects to synchronization, it may be better to create a completely new integration.