Workspace Roles
Workspace role defines permissions for a user to perform certain tasks in the workspace. Skyvia offers the possibility either to assign standard roles with a predefined set of permissions or to create and assign custom roles with individual permissions to users.
As roles allow you to manage who can do what in the workspace, team can easier and more effectively collaborate with each other. However, you also need to consider carefully which role you assign to other users in the workspaces since workspace administrators, for example, are able to remove other users, including you, manage and delete workspace objects or the entire workspace itself.
Please note that workspaces can be created by account admins only. When you create a workspace, you become by default a workspace administrator. You can invite another user to the workspace and transfer your workspace admin rights to this user. The workspace admin can later assign standard or custom roles to other users to control their work in the workspace depending on the tasks the workspace admin wants each user to be responsible for.
Standard Roles
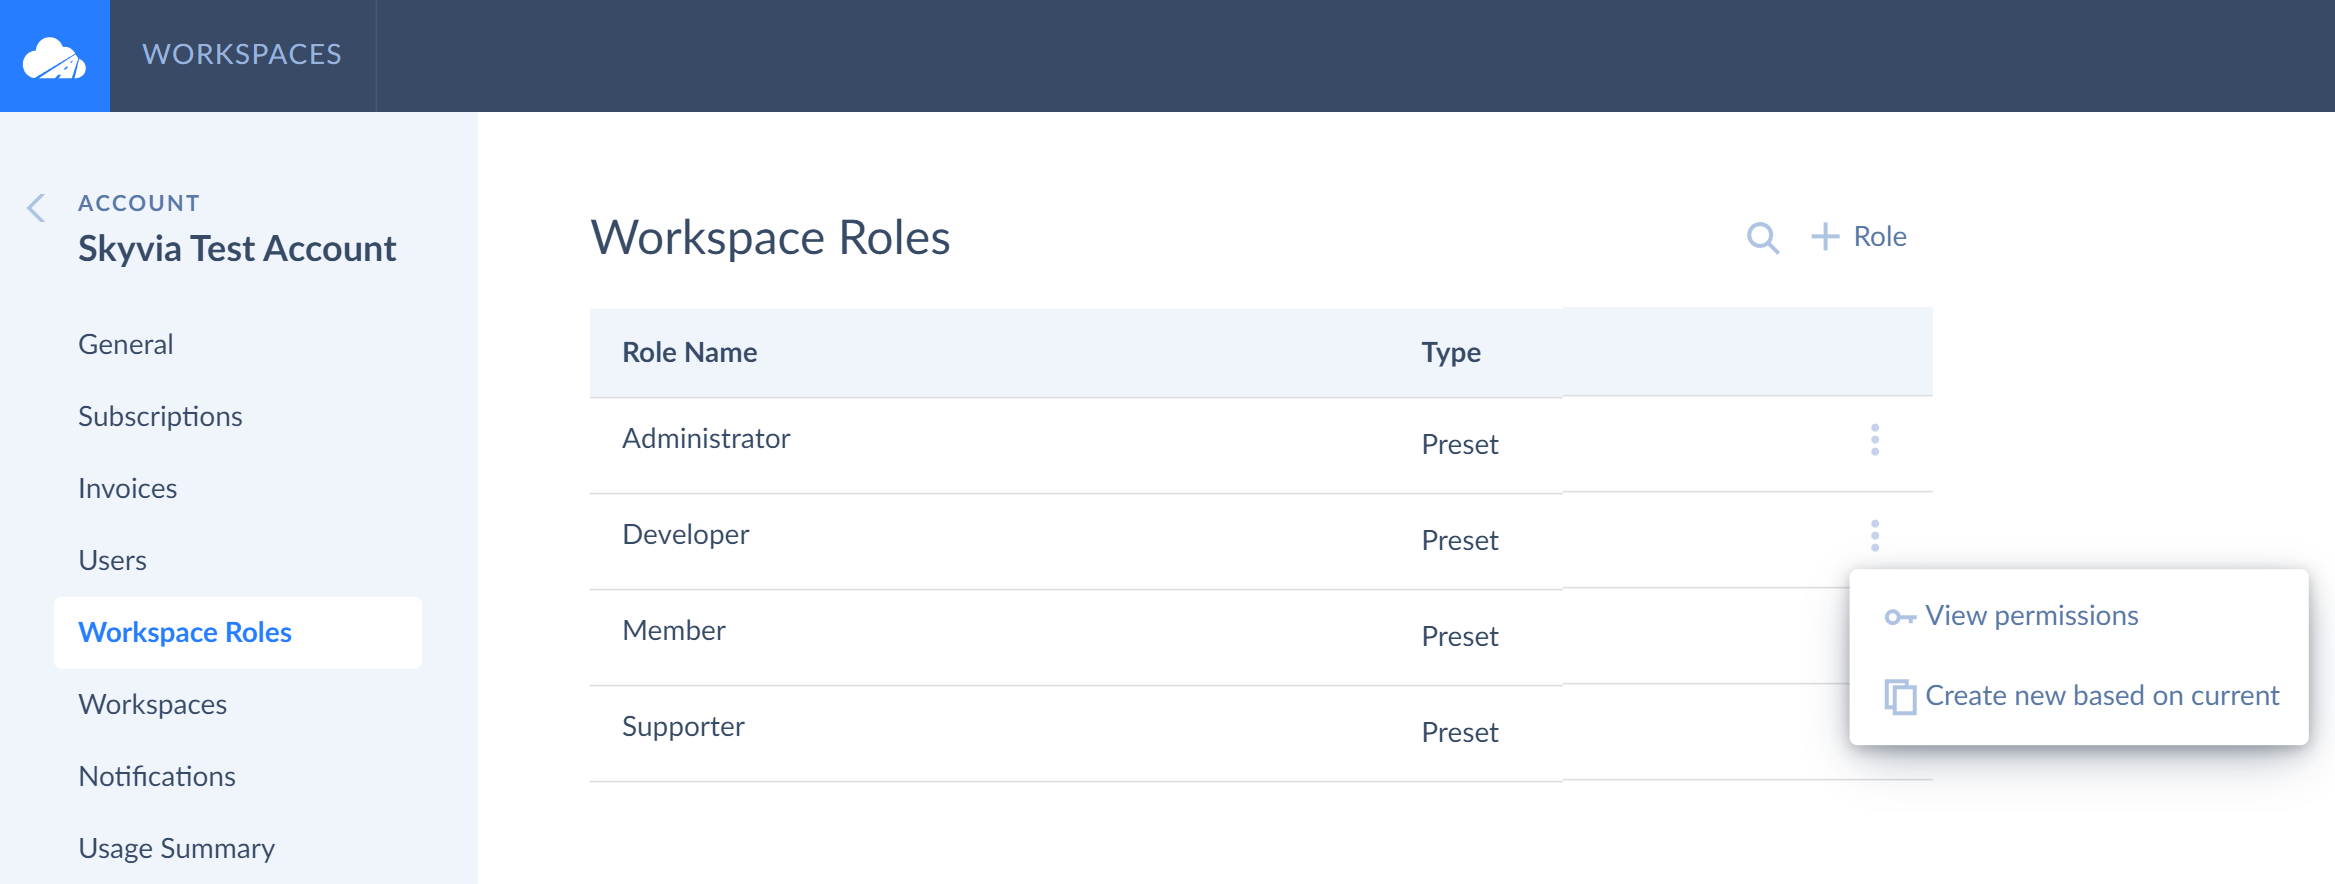
Skyvia offers 4 standard workspace roles: Administrator, Developer, Member, Supporter. Each of these roles is preset and cannot be deleted. You can view them on the Workspace Roles tab.
Administrator can manage workspace settings, workspace objects (create, update, delete), invite or delete users from workspaces, assign workspace roles to them.
Developer has the same rights as administrator except the right to manage workspace settings and invite, delete users from workspaces or assign workspace roles to them.
Member cannot manage the workspace or workspace objects (create, edit, delete) but can execute already created integrations, backups, queries; member can also view or download integration logs, view backed up data.
Supporter can view or download integration logs to help customers resolve their problems. The checkboxes next to other permissions are disabled for this role.
Click the ![]() More Options icon next to each standard role to view its permissions or to create a new (custom) role based on the current (standard) one.
More Options icon next to each standard role to view its permissions or to create a new (custom) role based on the current (standard) one.
Custom Roles
Skyvia also allows you to create and assign custom roles to invited users, grant individual permissions to them, depending on the tasks they are supposed to fulfill. To create a custom role, click  on the right. In the opened window, enter a role name, turn on toggles next to permissions you want to grant and click Save.
When a new custom role is created, it is added to the bottom of the role list. Later, you can edit the role name or permissions anytime you want, or delete the custom role completely.
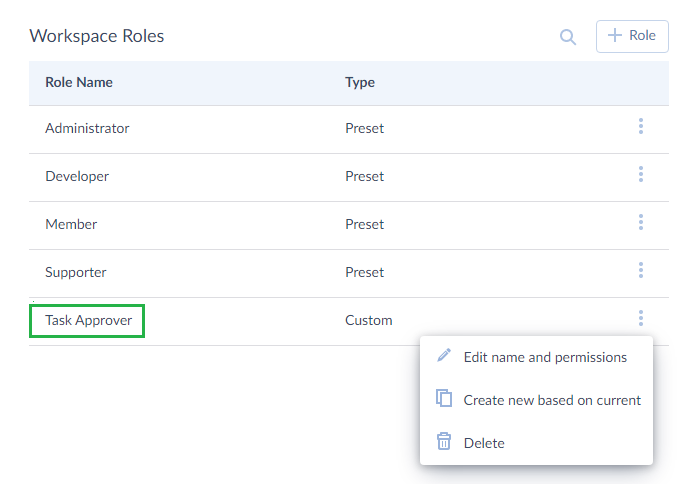
If the custom role is deleted for any reason, the user is not. The user will stay in the workspace and retain permissions given to him/her with this role. Instead of the deleted custom role, the user will see custom permissions in the workspace role column.
Adding Users to Workspaces
To assign a workspace role to a user, first you need to switch to the workspace you want to add a user to. You can do it in 2 ways:
-
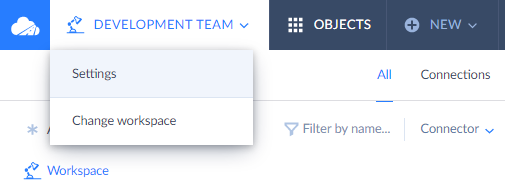
By clicking the workspace you need on the Select Your Workspace page. You will be transferred to the workspace page. Workspace can be default or can have specific name you have chosen before. Click the workspace name in the top menu and click Settings in the drop-down list.
-
By going to a certain account. On the Account page, you need to switch to the Workspaces tab. Here, click the
 More Options icon next to the corresponding workspace, select Change settings in the drop-down list and click Users .
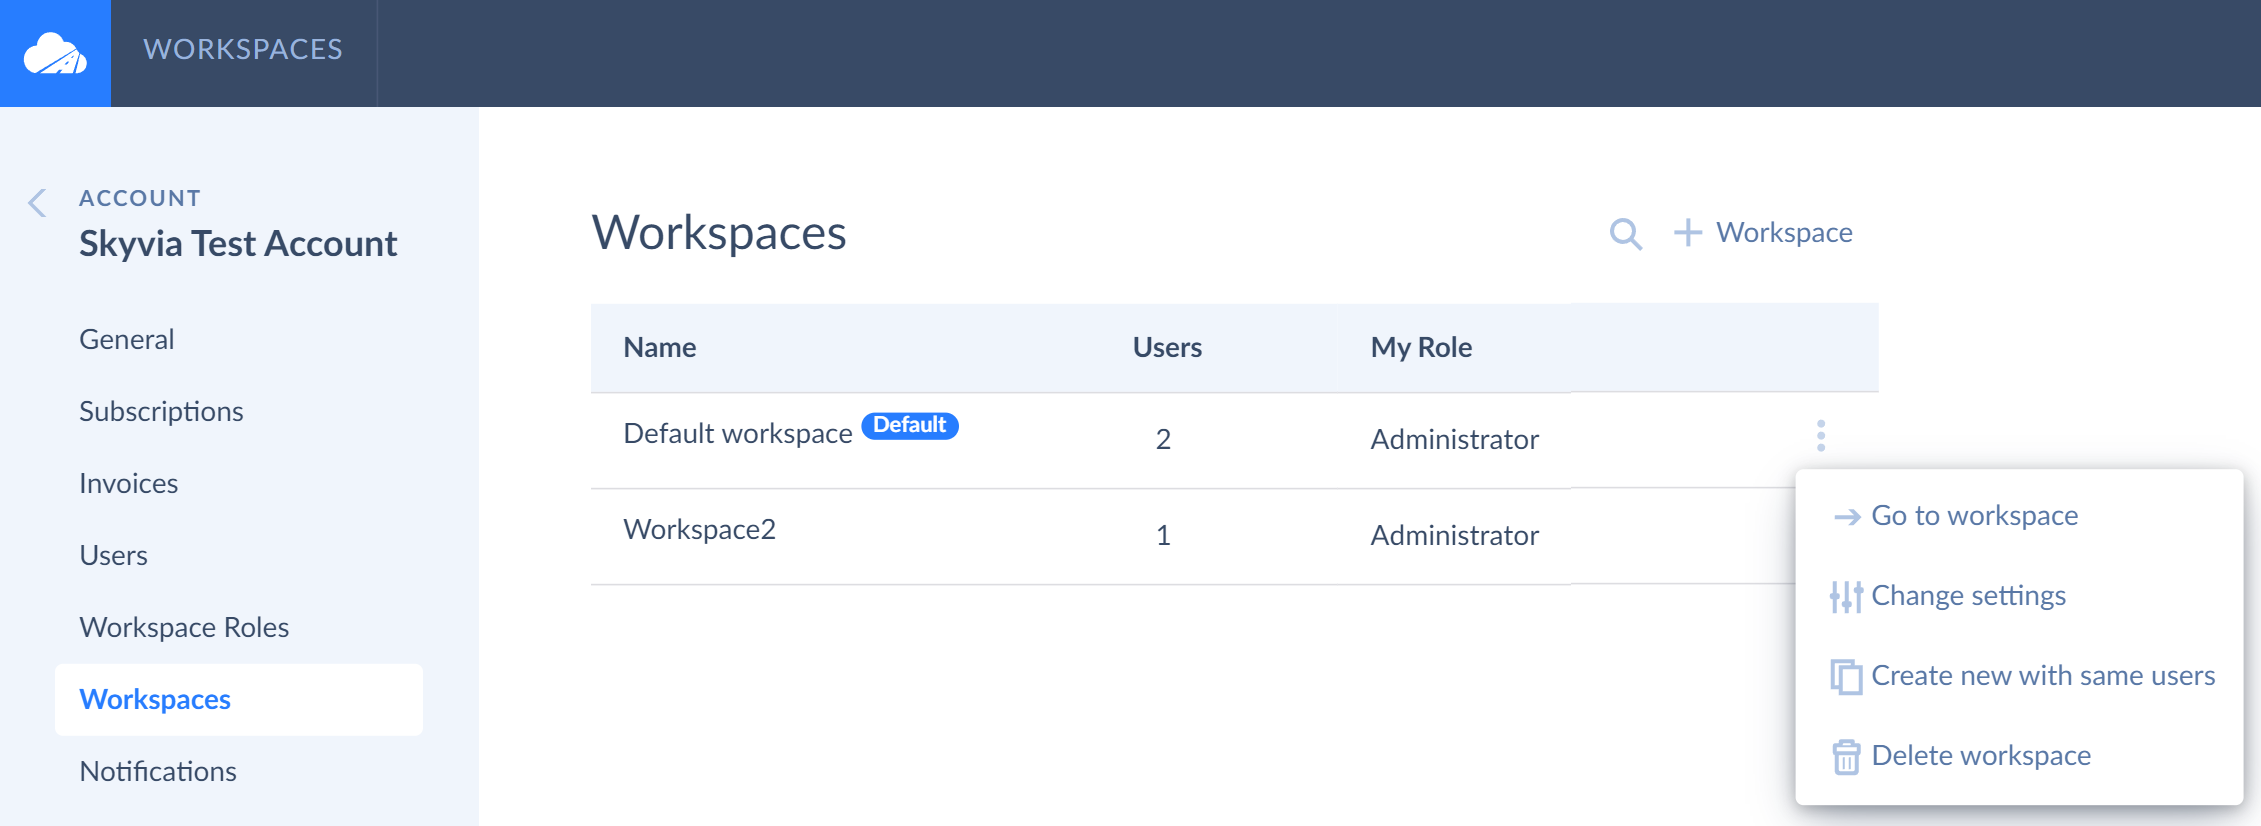
You can add users to the workspace and assign their workspace roles by clicking + Add User. You can assign either standard roles or custom. Custom roles should be previously created on the Workspace Role tab.
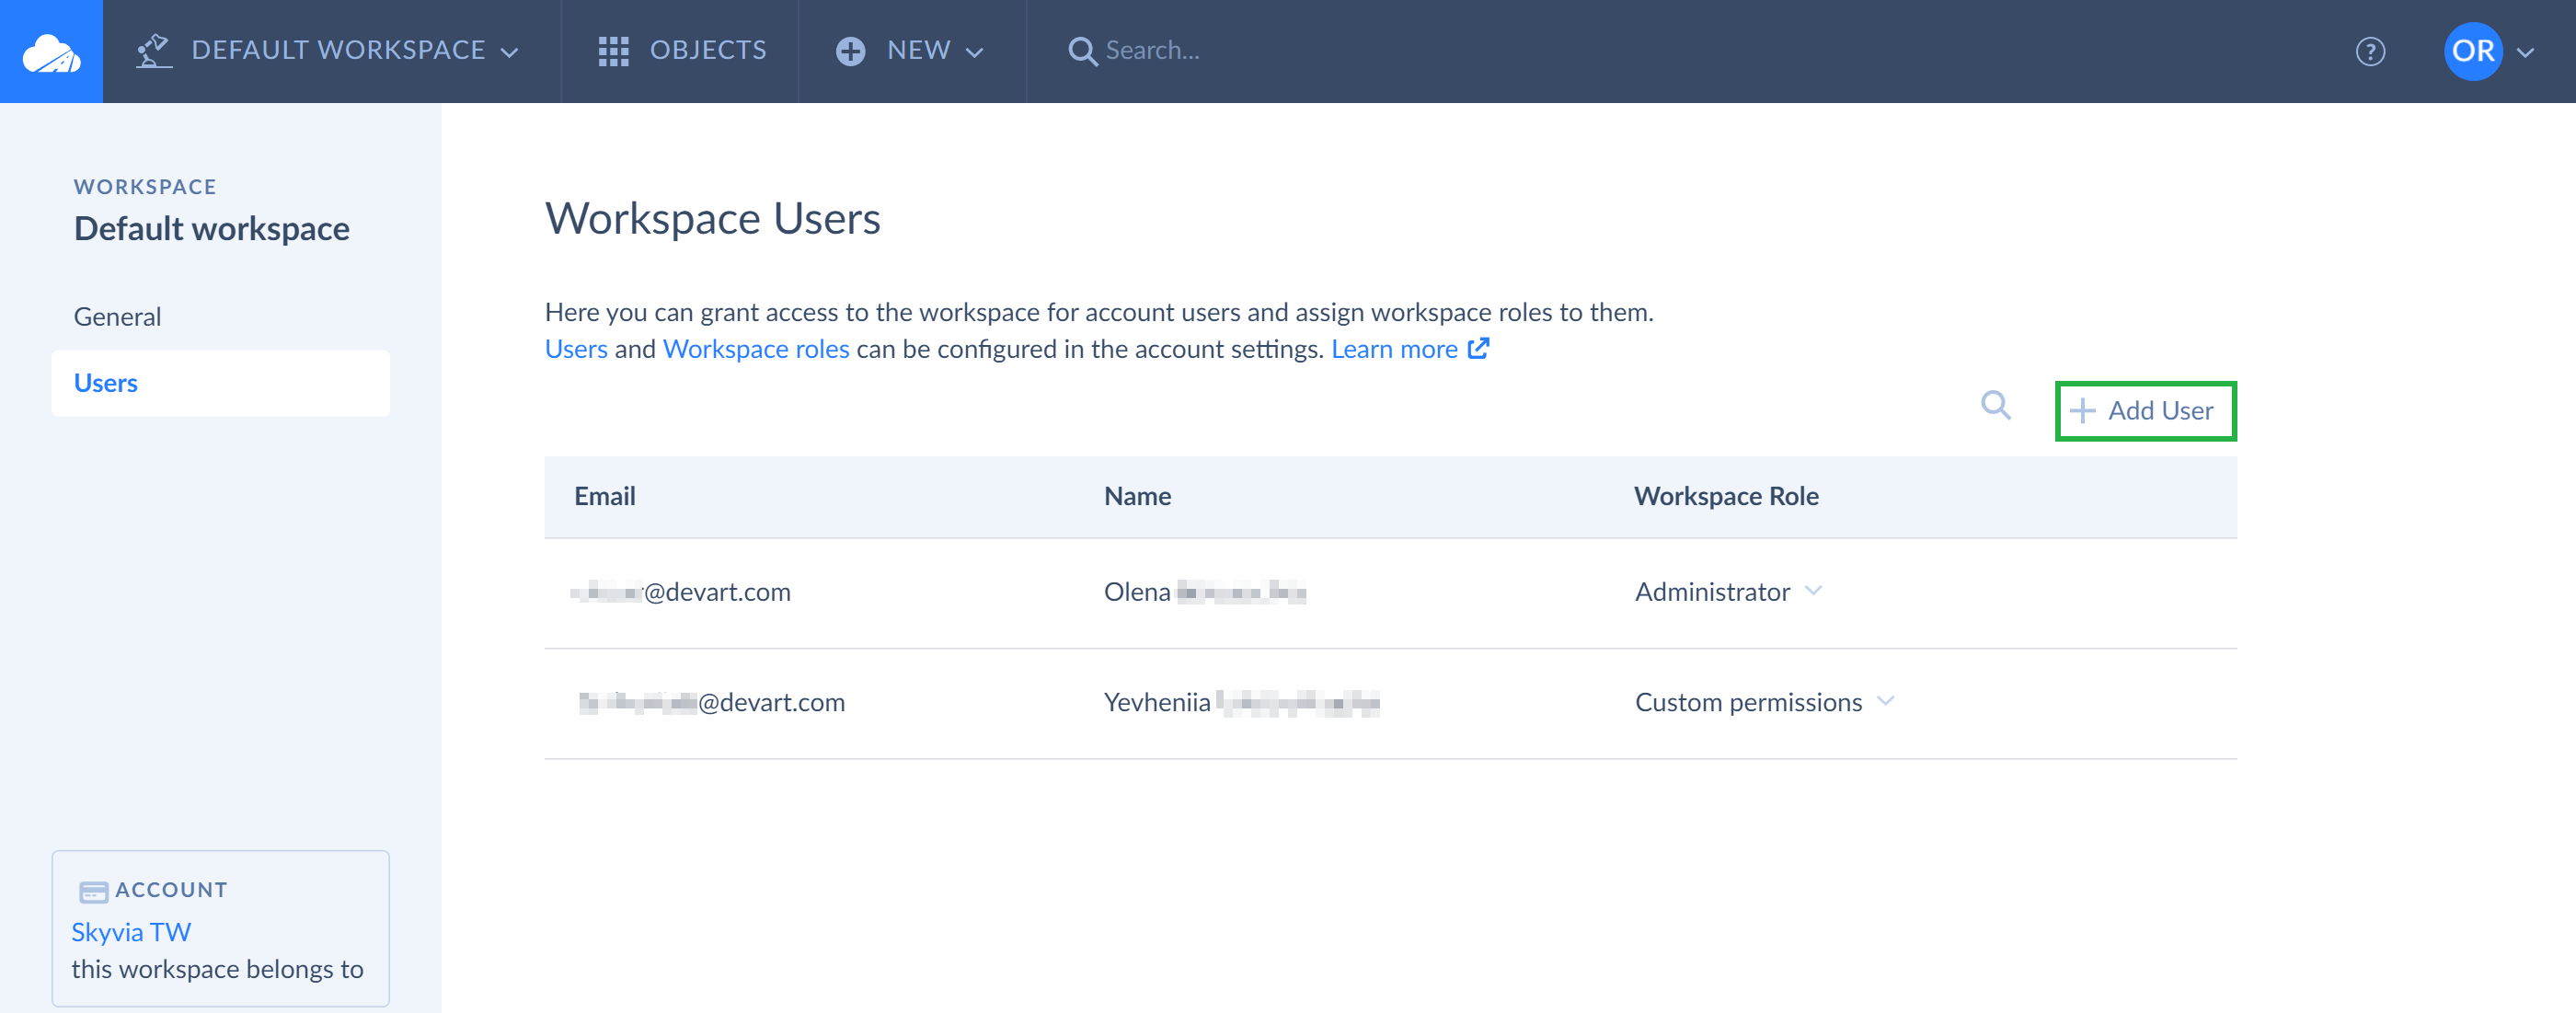
Assigning user roles allows delegating responsibilities, managing workflows, providing the overall workspace security and proper collaboration among users.
Deleting Users from Workspaces
To delete a user from a certain workspace, you need to switch to this workspace. On the workspace settings page, click Users and click the  icon next to the users you want to delete from the workspace. Later you can easily add users back to the workspace and assign the same or another role to them.
Please note if you are a workspace admin, you can remove yourself from the workspace as well and later add yourself back by clicking the + Add User button.