Configuring Import
Import is a specific kind of integration, which loads data to a cloud CRM or a relational database. Data can be imported from a cloud CRM, relational database, or CSV files.
Creating an Import Integration
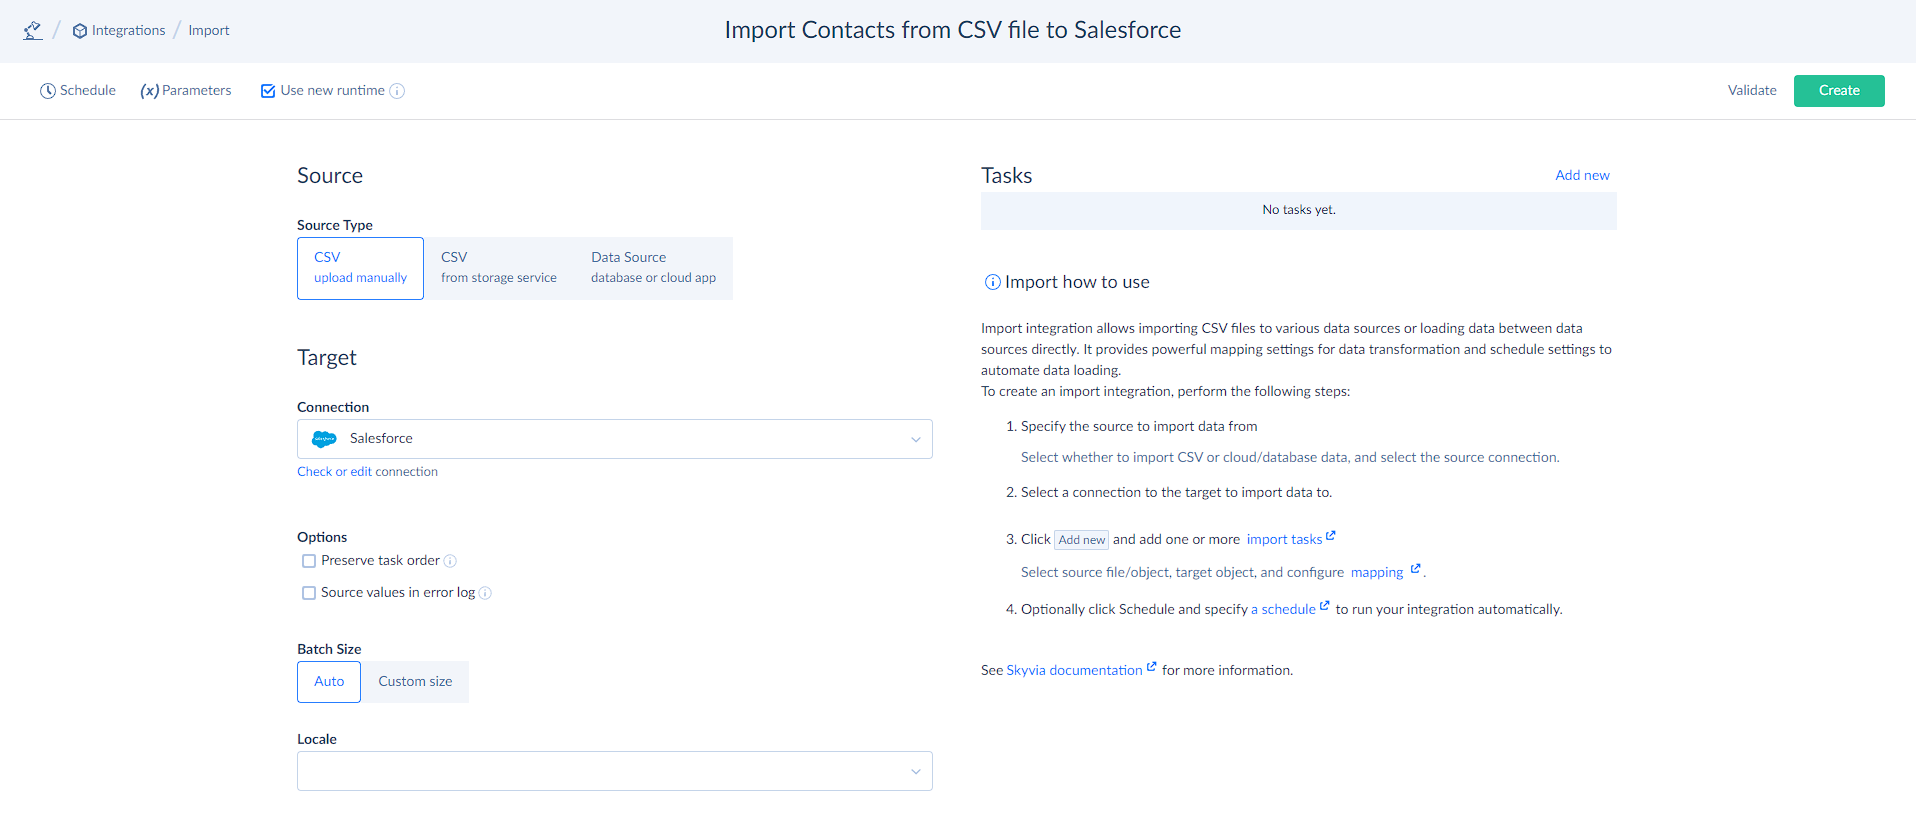
To create an import integration, click + Create New in the top menu and select Import in the Integration column. When the integration details page opens, perform the following steps:
- Specify a source connection you import data from and a target connection you import data to;
- Create import tasks for the integration;
- Optionally schedule the integration for automatic execution.
Source and Target Connection
Source Connection
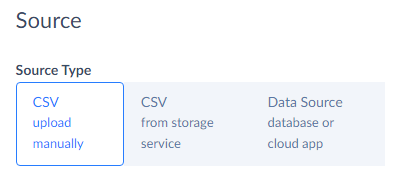
There are three scenarios of data import from source:
-
By default, data are imported from manually uploaded CSV file(s).
-
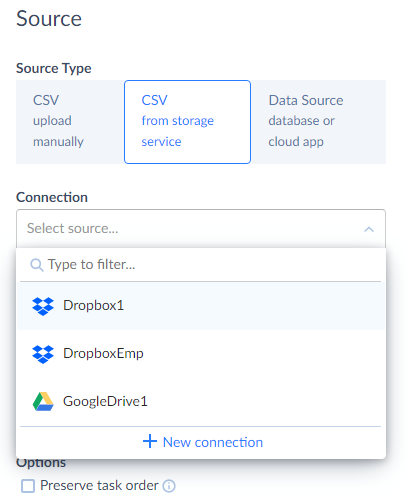
As a second scenario, data can be imported from CSV file(s) uploaded to a file storage service. If you want to load data from CSV file(s) stored in a file storage service or FTP, click CSV from storage service under Source Type.
Then, select a connection to your storage service or FTP from the Connection drop-down list or create a new one if you have not created it yet. See the topics in the File Storages section to find out how to create a connection to the corresponding file storage service.
-
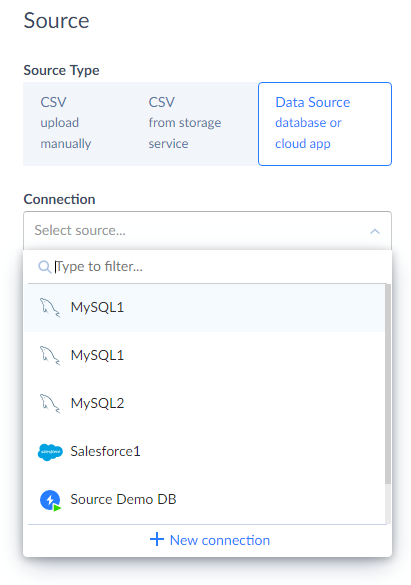
As a third scenario, data can be imported from database or cloud app.
If you want to select this scenario, click Data Source database or cloud app under Source Type and select the corresponding database server or cloud application from the drop-down list. If you haven't created the source connection yet, click +New connection and specify the connection parameters in the opened Select Connector page. See the Connections section for more details.
Target Connection
In the Connection list, select the corresponding database server or cloud application from the drop-down list. You can use the Type to filter box to quickly find the necessary target connection.
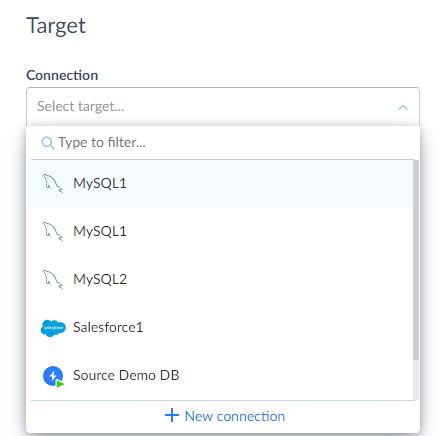
If you have not created a target connection yet, click +New connection and create a new connection. To learn more, go to the Connections section.
Creating Import Tasks
To create an import task, click the Add new link and configure a new import task as described in the How to Create Import Task topic.
Import Settings
You can rename your integration by clicking and editing the integration name. The default integration name is Untitled. Please note, if you omit this step, the integration name will remain Untitled in the list of created integrations.
You can also schedule your integration for automatic execution. Read more about it in the Scheduling Integrations topic.
Task Execution Order
By default, Skyvia analyzes data relations and lookups and executes tasks in order depending on these relations. If tasks are not related, Skyvia may run up to four tasks in parallel.
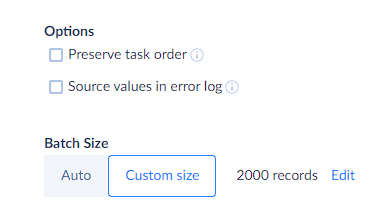
If you want to run your tasks exactly in the same order they are listed in the integration, select the Preserve task order checkbox in target options.
Source Values in the Error Log
If something went wrong during the Import run, you can check for errors in the error log. It provides you with the errors linked to the data that caused them. By default, in the error log you receive the already processed values that failed to load into Target. If you enable Source Values in the Error Log option, the error log will provide you with the initial records from Source instead. This option might be helpful during the Import troubleshooting.
Batch Size
This option is available only for integrations, which use new data integration runtime. You need to make sure that the Use new runtime checkbox is selected in the integration settings.
The Batch Size option provides you with better control over the number of rows in batches that are sent to the target data source. It specifies the number of rows to cache in a buffer before sending them to the target. Thus, it allows to always send batches of a fixed size to the target.
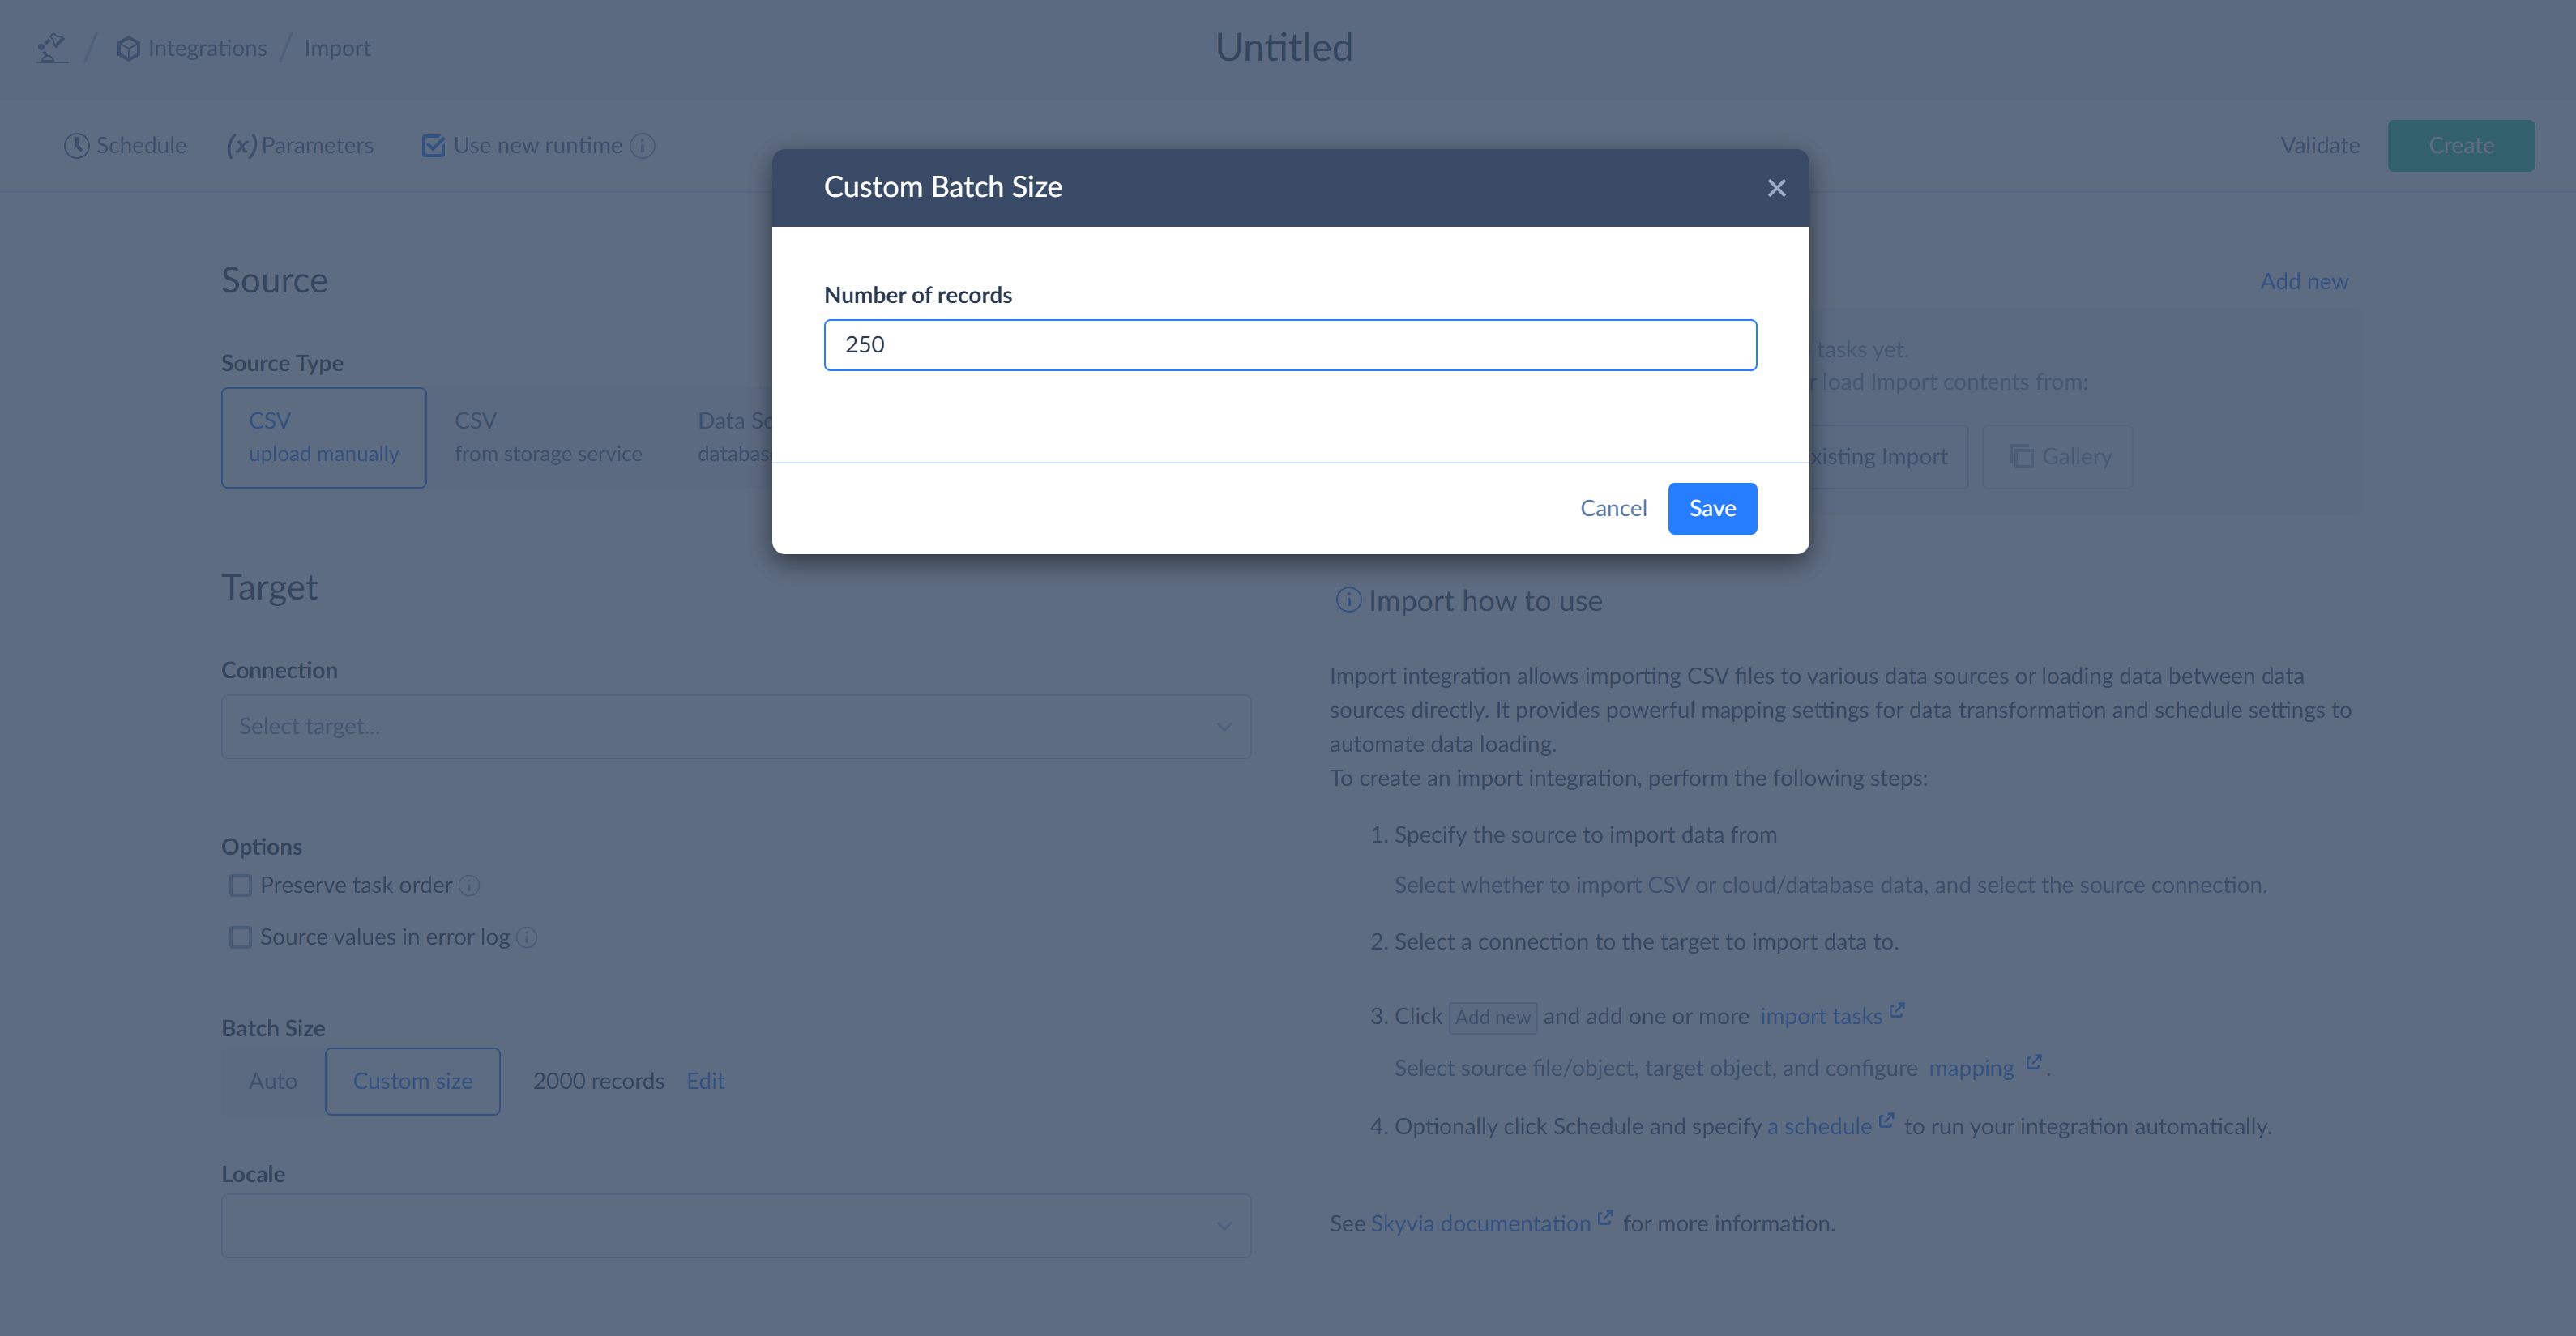
This can be useful both to increase the batch size for loaded data in order to load more records per an API call to improve API call use efficiency and to decrease batch size if the target has some additional custom limitation or if smaller batches provide better performance. To set custom batch size, click Custom size and then click Edit.
In the opened window, you can specify the batch size you prefer and save changes. Afterwards, save the integration.
By default, the Batch Size is set to Auto in import integrations, which is equal to 0. This means the old behavior is preserved. From the source, data is extracted in batches of up to 2,000 rows. However, depending on how data is processed, transformed, and filtered, the size of the batch can decrease, and the data can be sent to target in smaller batches of non-fixed size. No caching is performed before sending records.
Note that each data source has its own API batch size limitations, and sometimes different objects have different limitations. Some of them don't support sending records in batches at all. Skyvia cannot exceed data source API limits, so if the max batch size allowed by the target data source and table is less than the specified Batch Size, the buffered records are automatically split into multiple internal batches.
Nested Objects
Objects in some cloud apps have fields, storing nested objects or nested arrays of objects. By default, Skyvia treats them as text fields, storing nested objects in JSON format.
If you want to unwind the content of such fields, and use the fields of their nested objects/arrays in mapping, select the Nested Objects checkbox in the integration settings. Note that the checkbox is displayed only after you select Data Source in the Source Type.
See here how to map these nested object fields.
Locale
The specified Locale determines locale settings including DateTime format, number format, string collation, currency format, etc. This option is applied when non-textual data (like dates, numbers, etc.) is converted to a string. Such conversion can happen in expressions or when mapping a non-textual field to a string field. If this option is not set, InvariantCulture is used. The invariant culture is culture-insensitive; it is associated with the English language but not with any country/region.
After you have configured your integration, click the Create button.
Editing Existing Integration
Editing existing integration is performed via the same integration editor page with the same interface elements as when creating a new integration.
The integration editor page allows you to check or edit integration connections, add new tasks to the integration, edit or temporarily disable existing ones, or delete them completely if needed. In the integration editor, you can also enable/disable a new runtime mode as well as change the scheduled execution time of an integration.
To edit an integration, click OBJECTS in the top menu, navigate to the Integrations tab and select the required integration. For a quicker search, use multiple integration filters. You can filter integrations by their types, status, by the connector used in the integration, etc.
Editing Tasks in the Integration
Except editing the entire tasks in the task editor, you can temporarily disable some of them and enable them later when needed in the integration itself. This feature is useful when you have several tasks in the integration and need to run only one or several of them without deleting others.
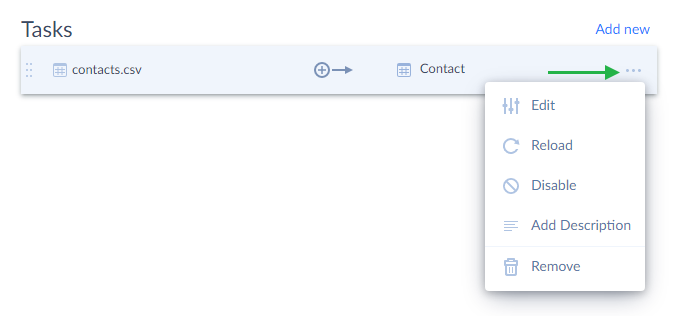
To disable a task, click the  More Options icon next to the required task and select Disable in the drop-down menu. Please note that this feature is available only in import integrations, which use New runtime.
You can also make notes or leave comments under tasks if needed, which helps you better and quicker identify the required task among several available ones. See the screenshot below.

For integrations that import manually uploaded CSV files, there is another option available. You can update an old CSV file with a new one by clicking ![]() Reload. In the opened window, browse to the necessary file and upload it. Note that this file must have the same columns as the previous one. Otherwise, you may need to edit a task and reconfigure the mapping.
Reload. In the opened window, browse to the necessary file and upload it. Note that this file must have the same columns as the previous one. Otherwise, you may need to edit a task and reconfigure the mapping.