Importing QuickBooks Invoices to Salesforce Opportunities
In this tutorial, we will show how to configure Salesforce - QuickBooks integration: import data from QuickBooks Invoices to Salesforce Opportunities. The main problem of such an import operation is that the Invoice object in QuickBooks contains Invoice Line, which is not represented as ordinary fields of complex type, it has an array data structure.
However, when you select the Nested Objects checkbox in your import, it becomes possible to map fields of QuickBooks Online invoice line items to Salesforce OpportunityLineItem fields.
To find out how to create an import and configure mapping settings of nested objects correctly, read our step-by-step instruction below.
Please note that the Nested Objects functionality is available when the new data integration runtime is selected.
Make sure you have selected the Use new runtime checkbox in your import before adding a task.
Creating Connections
First, you need to create connections in Skyvia, which you will use as source and target in your import. For our scenario, we create connections to QuickBooks (source) and Salesforce (target) respectively.
Read the QuickBooks and Salesforce topics to find out how to configure settings of necessary cloud apps as well as view the Connections topic to know how to create a connection following several simple steps.
Creating Import
To successfully create and run a new integration, you need to adjust general integration settings and configure task editor settings. Follow these simple steps to adjust general integration settings:
-
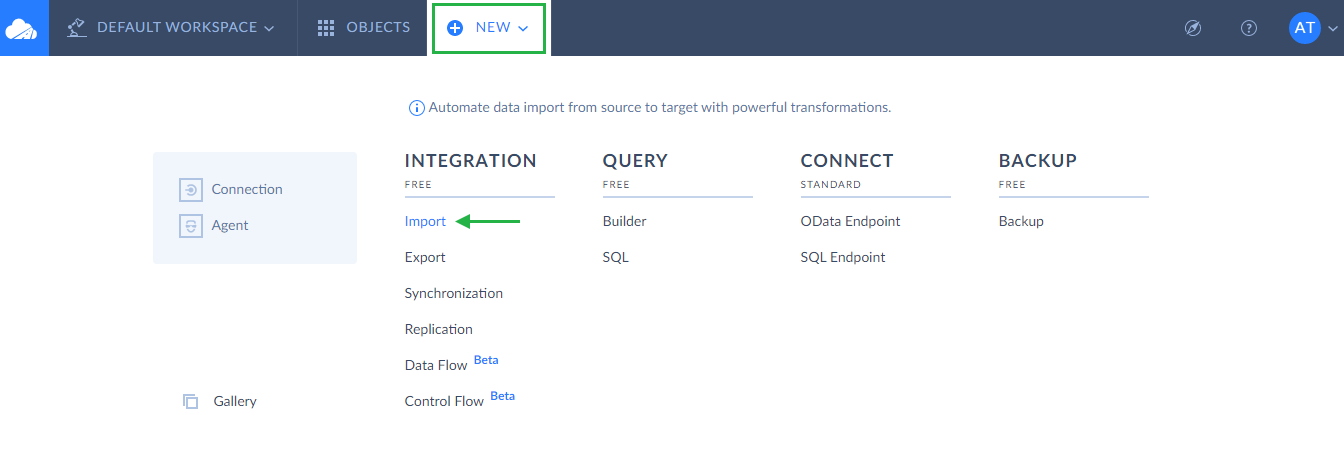
Click +NEW in the top menu;
-
In the Integration column, click Import;
-
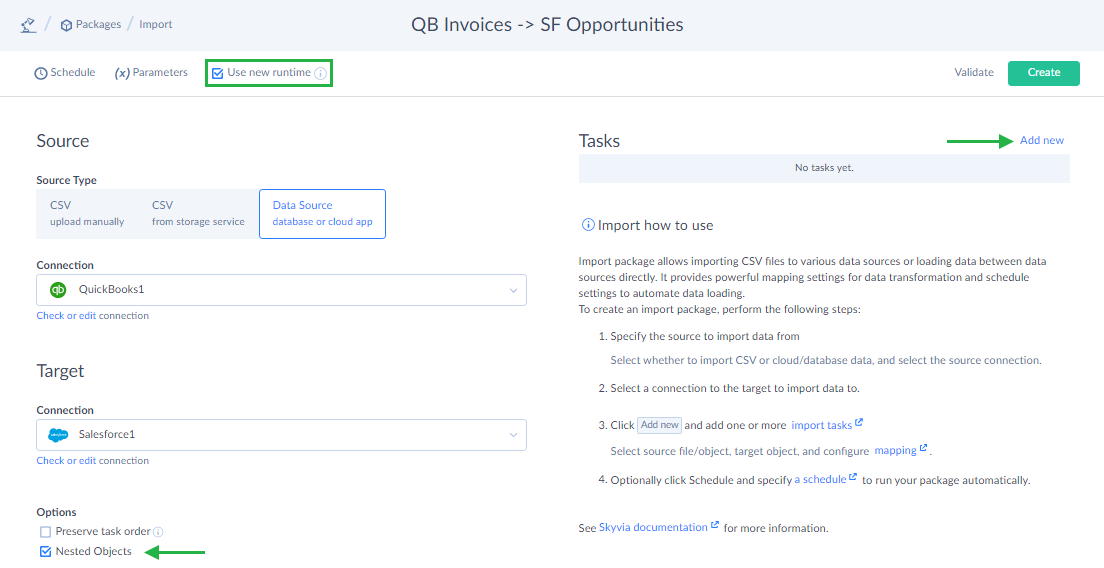
In the open integration editor, rename your integration by clicking and editing the integration name. The default integration name is Untitled. Please note that if you omit this step, the integration name will remain Untitled in the list of created integrations.
-
Select the Use new runtime checkbox to activate the Nested Objects option;
-
As you import data from the cloud app, click Data Source database or cloud app and select QuickBooks as source from the Connection drop-down list;
-
In the next drop-down list, select Salesforce as target;
-
Select the Nested Objects checkbox to be able to map the columns from the Opportunity object and related OpportunityLineItem in Salesforce to the corresponding columns of Invoice and Invoice Line in QuickBooks;
-
Click the Add new link to open the Task Editor.
Configuring Task Editor Settings
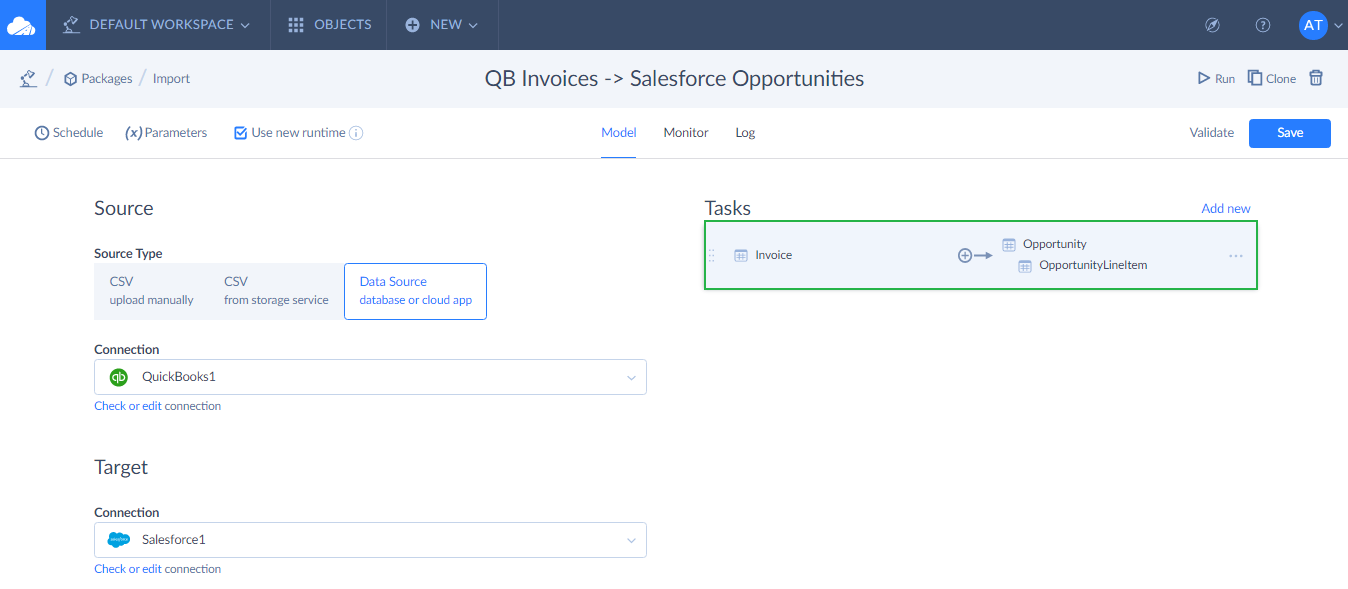
Each import can contain one or more import tasks, which are configured in the convenient task editor. For our scenario, we need to create and configure settings for one import task, which will load data from the QuickBooks Invoice object to the Salesforce Opportunity object and its related OpportunityLineItem.
Source Definition Tab
On this tab, you need to configure all necessary QuickBooks settings. Select a source object to load data from and if needed specify filter settings to filter data being imported. To configure settings, follow these simple steps:
-
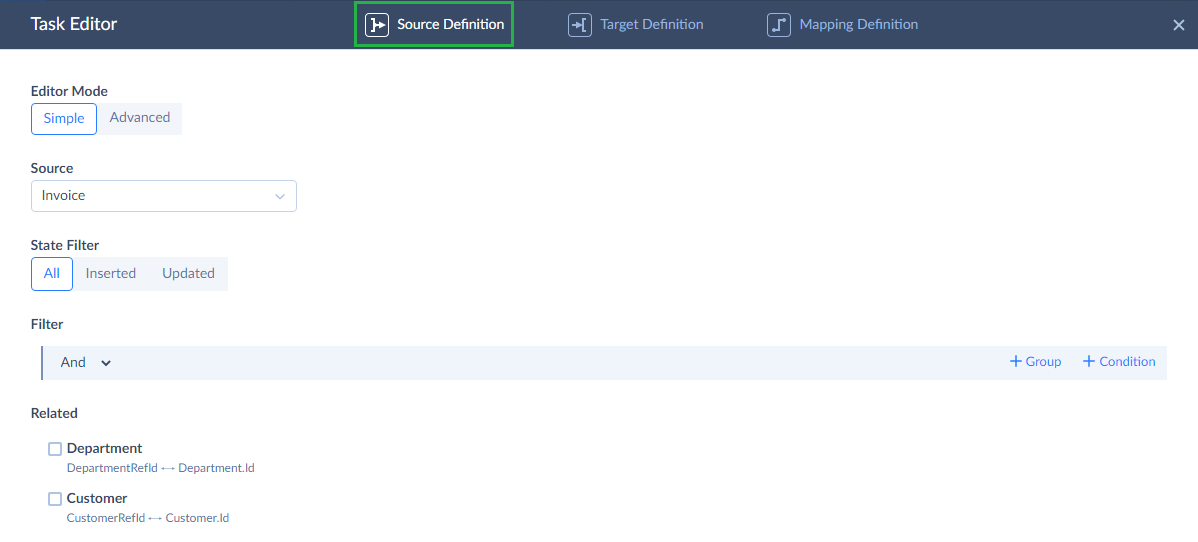
When the task editor opens, select the task editor mode you want to work with (Simple or Advanced). You can read more about task editor modes here.
-
Next select the Invoice object from the Source drop-down list.
-
Optionally, below you can add a filter by clicking +Condition and setting a certain condition. Let us say, if you need to insert a specific Invoice, you can filter it by ID: Invoice -> Id -> equals -> 9.
In our scenario, we import all Invoices from QuickBooks that is why we do not need to apply filters. More information about filters and conditions can be find it in the Filter Settings topic.
-
Click the Next step button at the bottom of the window to switch to the next editor tab. You can also switch between the editor tabs by clicking the corresponding icons: Source Definition, Target Definition, and Mapping Definition;
Target Definition Tab
On this task editor tab, you need to configure all necessary target settings, i.e. Salesforce settings. To do it, follow the below steps:
-
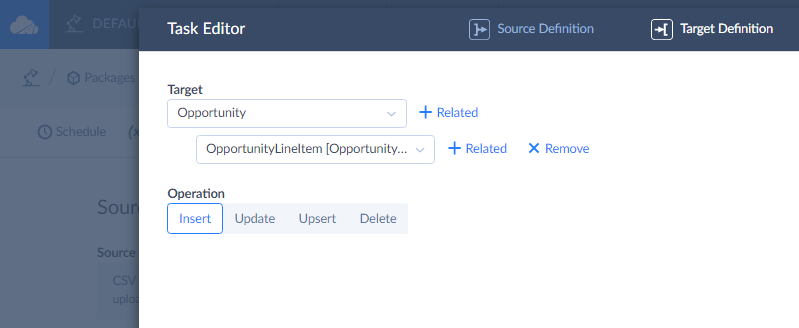
On the Target Definition tab, select Opportunity from the Target drop-down list.
-
Click + Related and select an object related to the main one in the new drop-down list (in our scenario it is OpportunityLineItem). You need to select the related OpportunityLineItem object in order to match the Line Item object in QuickBooks Invoice.
-
Select an operation type you want to use (Insert).
-
Click the Next step button to proceed with mapping.
Mapping Definition Tab
On this tab, first, you need to map columns of the Salesforce Opportunity object to the columns of QuickBooks Invoice and, second, configure mapping for the Salesforce OpportunityLineItem and QuickBooks Invoice Line.
Mapping Salesforce Opportunity to QuickBooks Invoice
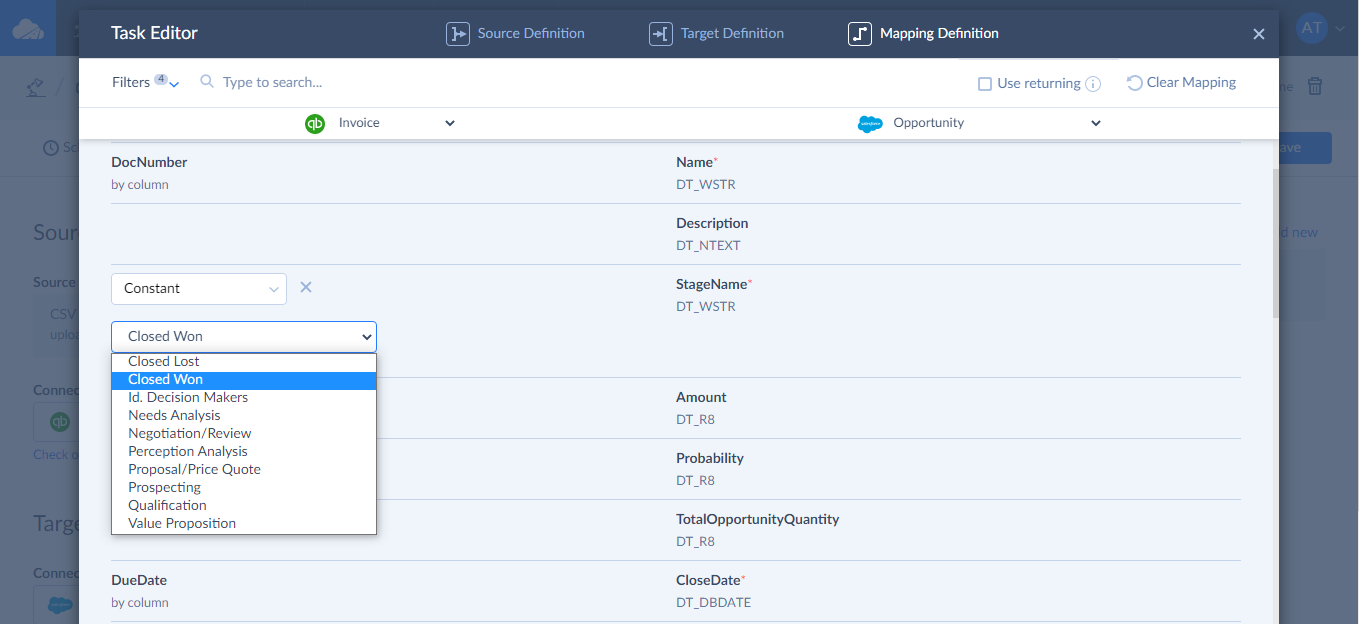
Fist of all, pay attention to the required columns of the Salesforce Opportunity object. Among required columns are Name, StageName and CloseDate. They should be mapped to save and successfully run a integration.
-
For the Name and CloseDate columns, use Column mapping.
-
For the StageName column, use Constant mapping and select a proper QuickBooks value from the drop-down list (for example Closed Won status).
Mapping Related Salesforce OpportunityLineItem to QuickBooks Invoice Line
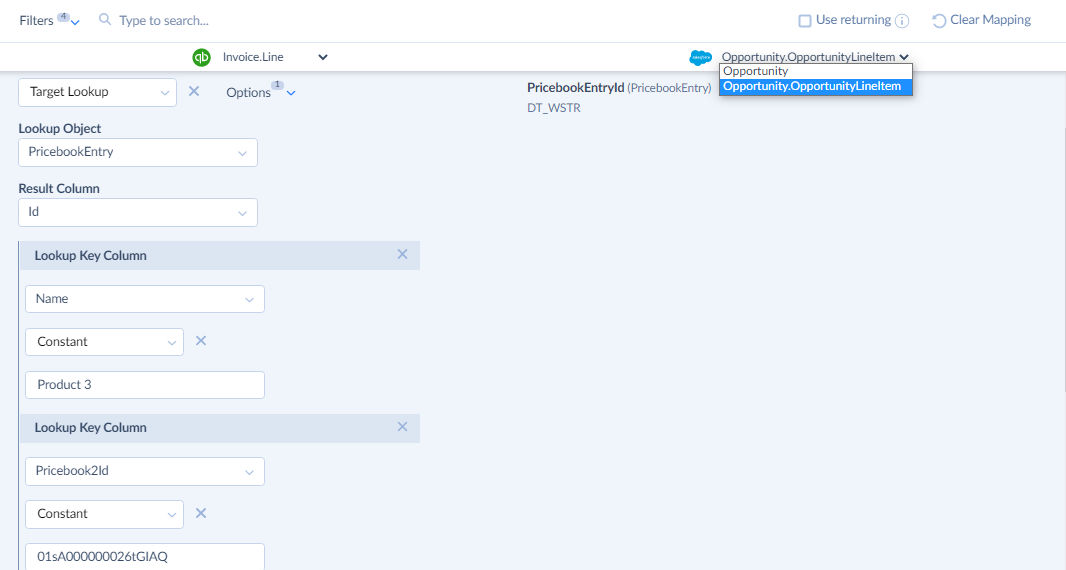
After we mapped all the necessary fields of the Opportunity object, let's proceed to the OpportunitylineItem object. Select this object in the list.

Also select the nested Invoice.Line object in the list of source objects on the left.
As a first step, you need to map PricebookEntryId, using Lookup mapping. We require mapping of both PricebookEntryId and OpportunityId as OpportunitylineItem is a junction object between Opportunity and PricebookEntry.
However, the OpportunityId was generated automatically by Skyvia from the parent Opportunity object, and now you only need to configure mapping for PricebookEntryId, following the below steps:
-
Click PricebookEntryId column and, in the QuickBooks Column drop-down list on the left, select Target Lookup.
-
In the Lookup Object drop-down list, PricebookEntry will be selected automatically.
-
In the Result Column list, Id will be mapped.
-
Under Lookup Key Column, select Name.
-
Next, select Constant mapping and type in the required name.
-
Click + Add Lookup Key to add another lookup key column.
-
Select Pricebook2Id from the below list.
-
Select Constant mapping and paste the Id value.
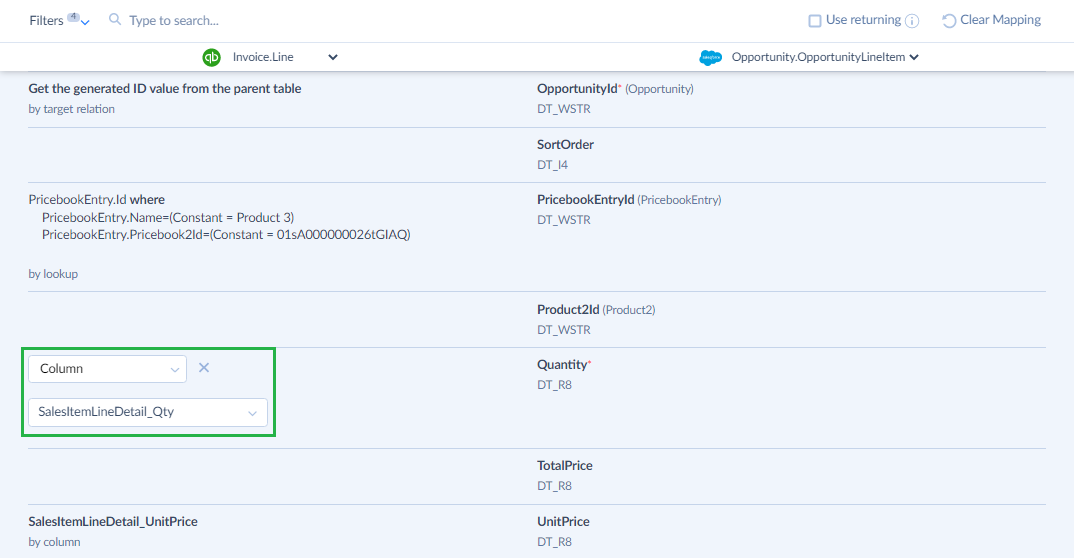
As a second step, you need to map two other columns, one of which is required for successful integration execution:
-
Click the Quantity column in Salesforce and map it to the SalesItemLineDetail_Qty column in QuickBooks.
It is a required field and if values are missing in the SalesItemLineDetail_Qty column in QuickBooks, records won't be inserted to Salesforce, and integration will fail with errors.
-
Next, map the the Salesforce UnitPrice field to QuickBooks SalesItemLineDetail_UnitPrice, using Column mapping. You can read more about different types of mapping here.
Saving Import Task
When everything is ready, click Save to save the task. You will see the created task in your integration settings.
Running Import
We have successfully configured our integration for QuickBooks - Salesforce integration. Сlick Create to create the integration and run it to import data from QuickBooks to Salesforce. The data will be imported into two tables. You can check whether results are successful or not on the Monitor tab. For this, click the Run ID to open the History Details window.
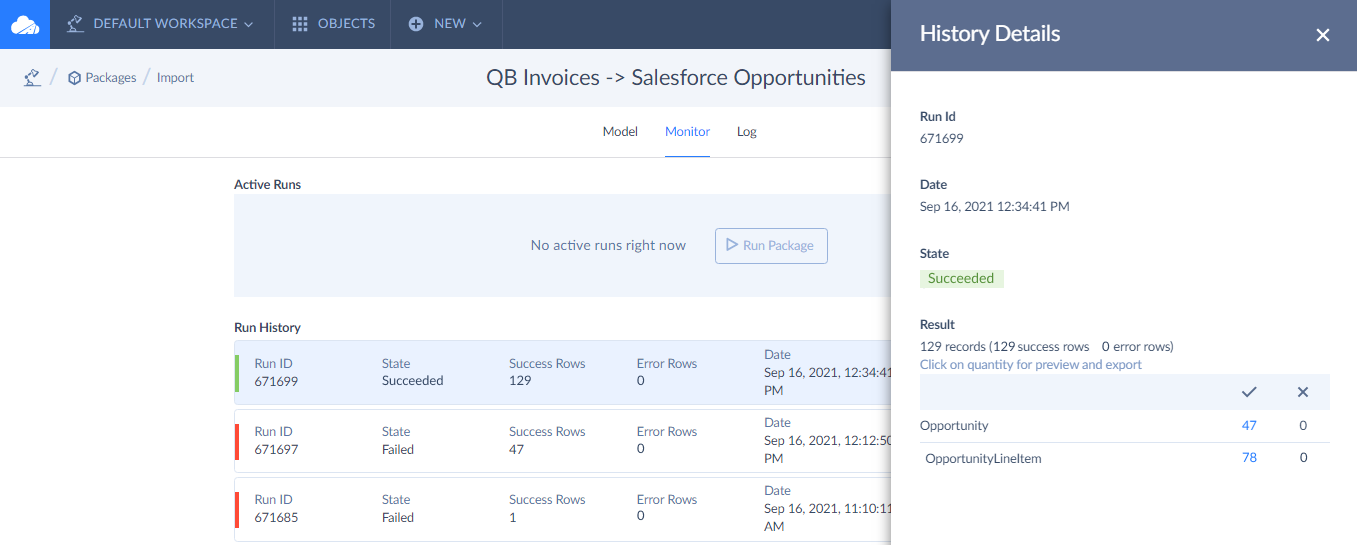
The number of failed and successfully imported rows are displayed as links for each table. You can click a link to download a CSV file with the result values of the mapped target columns. When there are failed rows, you can always receive a detailed per-record error log.