Working With Data
In this topic, we describe how components operate with data inside the automation flow. Before you start exploring, get familiar with the following concepts:
Actions and triggers are the only components that add data to the automation flow. Other components use this data or transform it. The data is added to the scope through the component's output.
Component's Output
Triggers and Actions can return data. To check this data, click Ouput in the component's settings. There are two possible output datatypes: array and object. The output datatype depends on a trigger or action you use. For example, the Insert action always returns an object, while Execute Command always returns an array.
Let's check an example of a simple automation that gets Products data from the SQL Server, inserts it into Salesforce Contact, and returns the ids of the inserted records. To create this automation, we use a trigger, two actions, and Foreach.
For demonstration purposes, we use a manual trigger that starts automation whenever we press the Run button. The first action is Execute Command. It executes the Select * from Products query. To check what fields are returned by the action, we go to the Output tab.
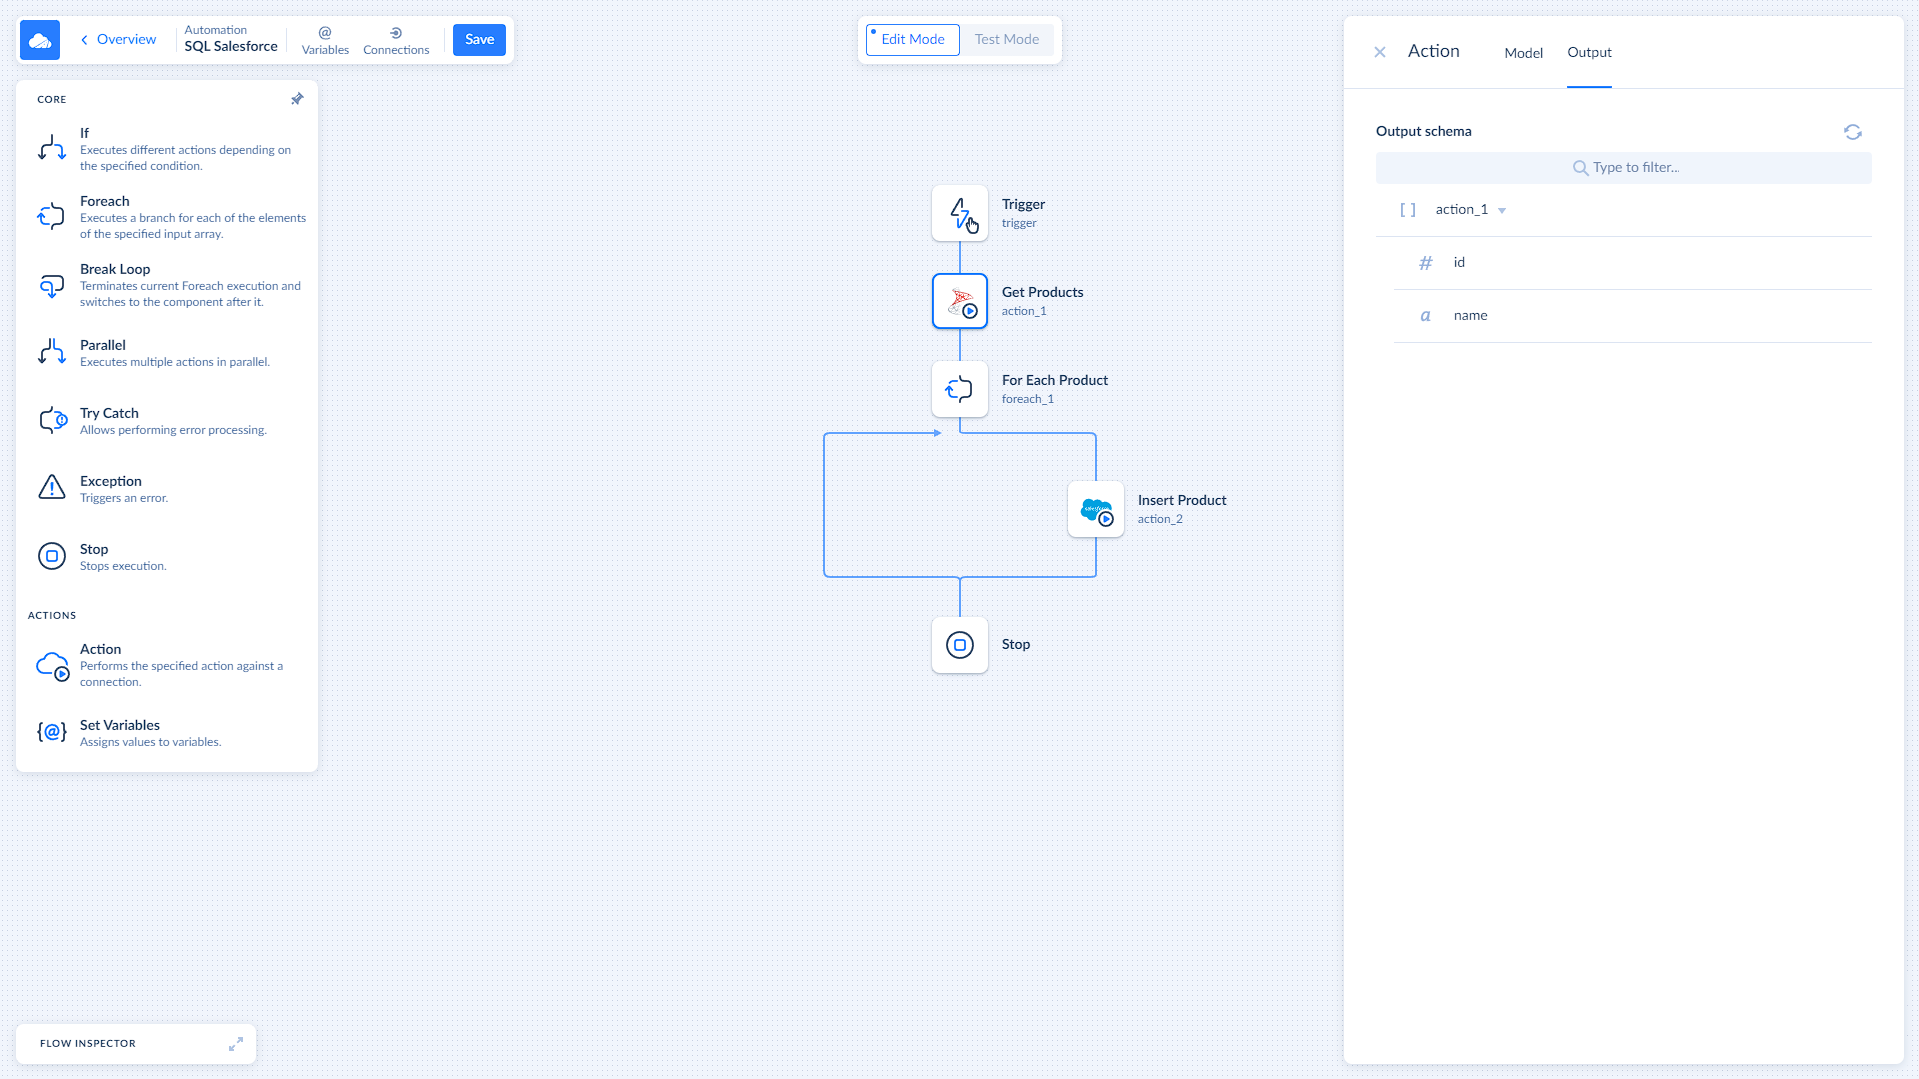
All data from the component's output was added to the scope and will be shared with the further components via pipeline so the second action can operate with this data.
Our second action is Insert. It uses the data from the first action's output and inserts it into the Contact object in Salesforce. We select Returning option to receive the ids of the inserted products in the output.
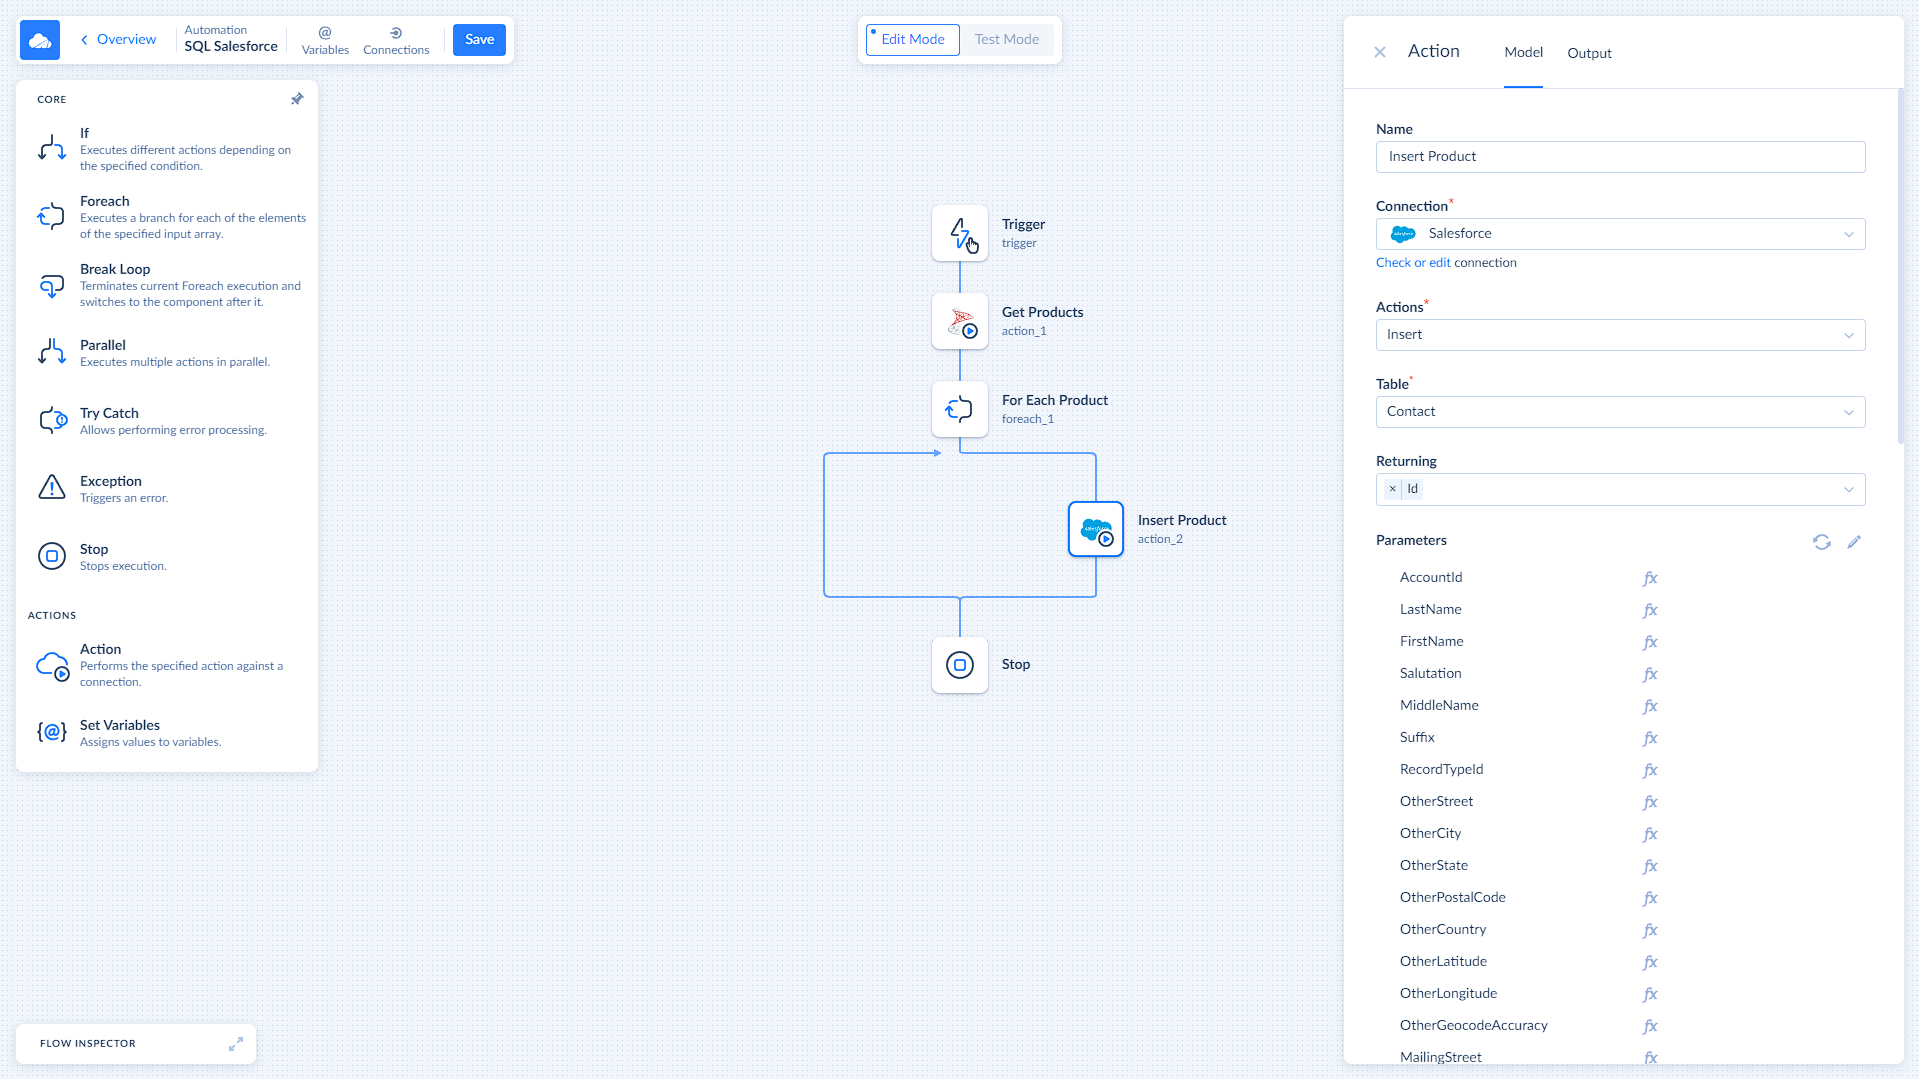
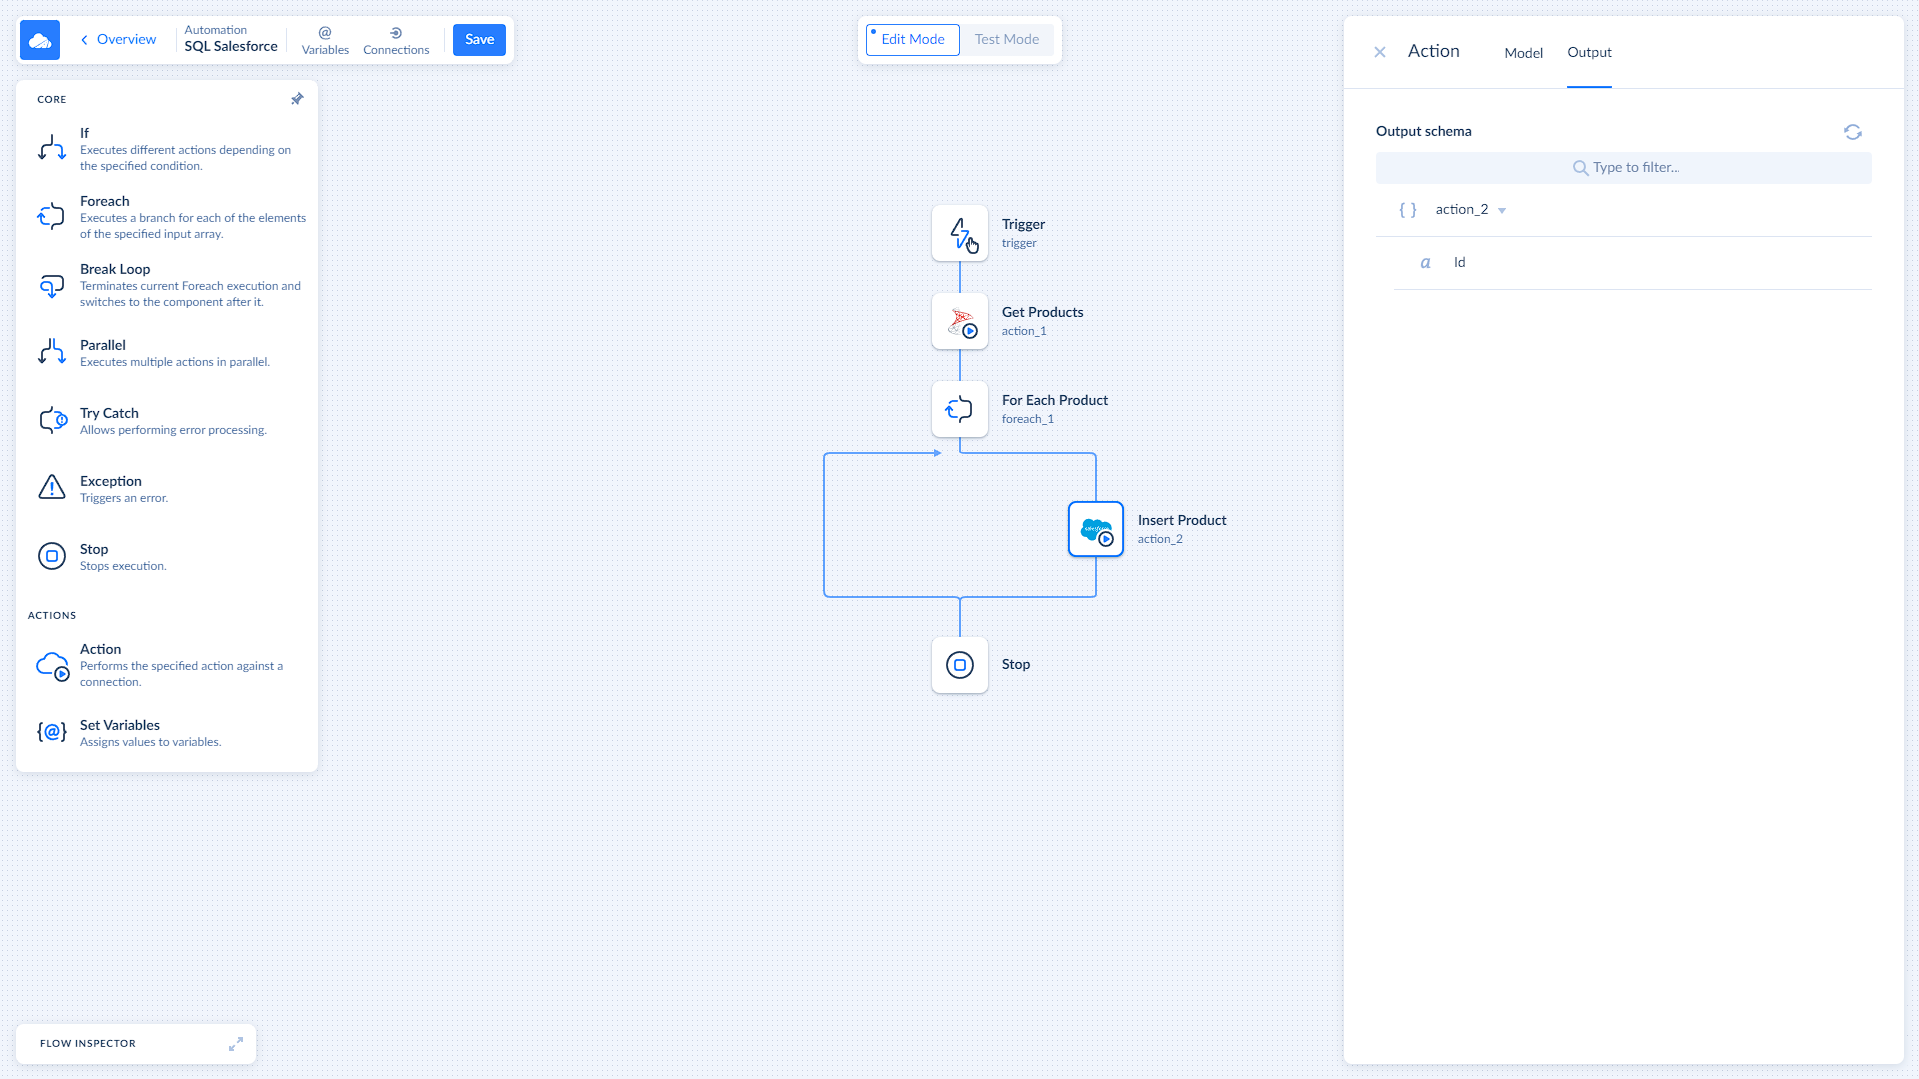
We can later use these ids to Insert them into our SQL Server or for any other purposes. The returning output is also displayed on the Output tab.
Disabling Component's Output
If you disable a component in the automation flow, you also disable access to its output.
Scope
Scope represents all the data that can be accessed by a specific component and is shared between components via pipeline. Here is an example:
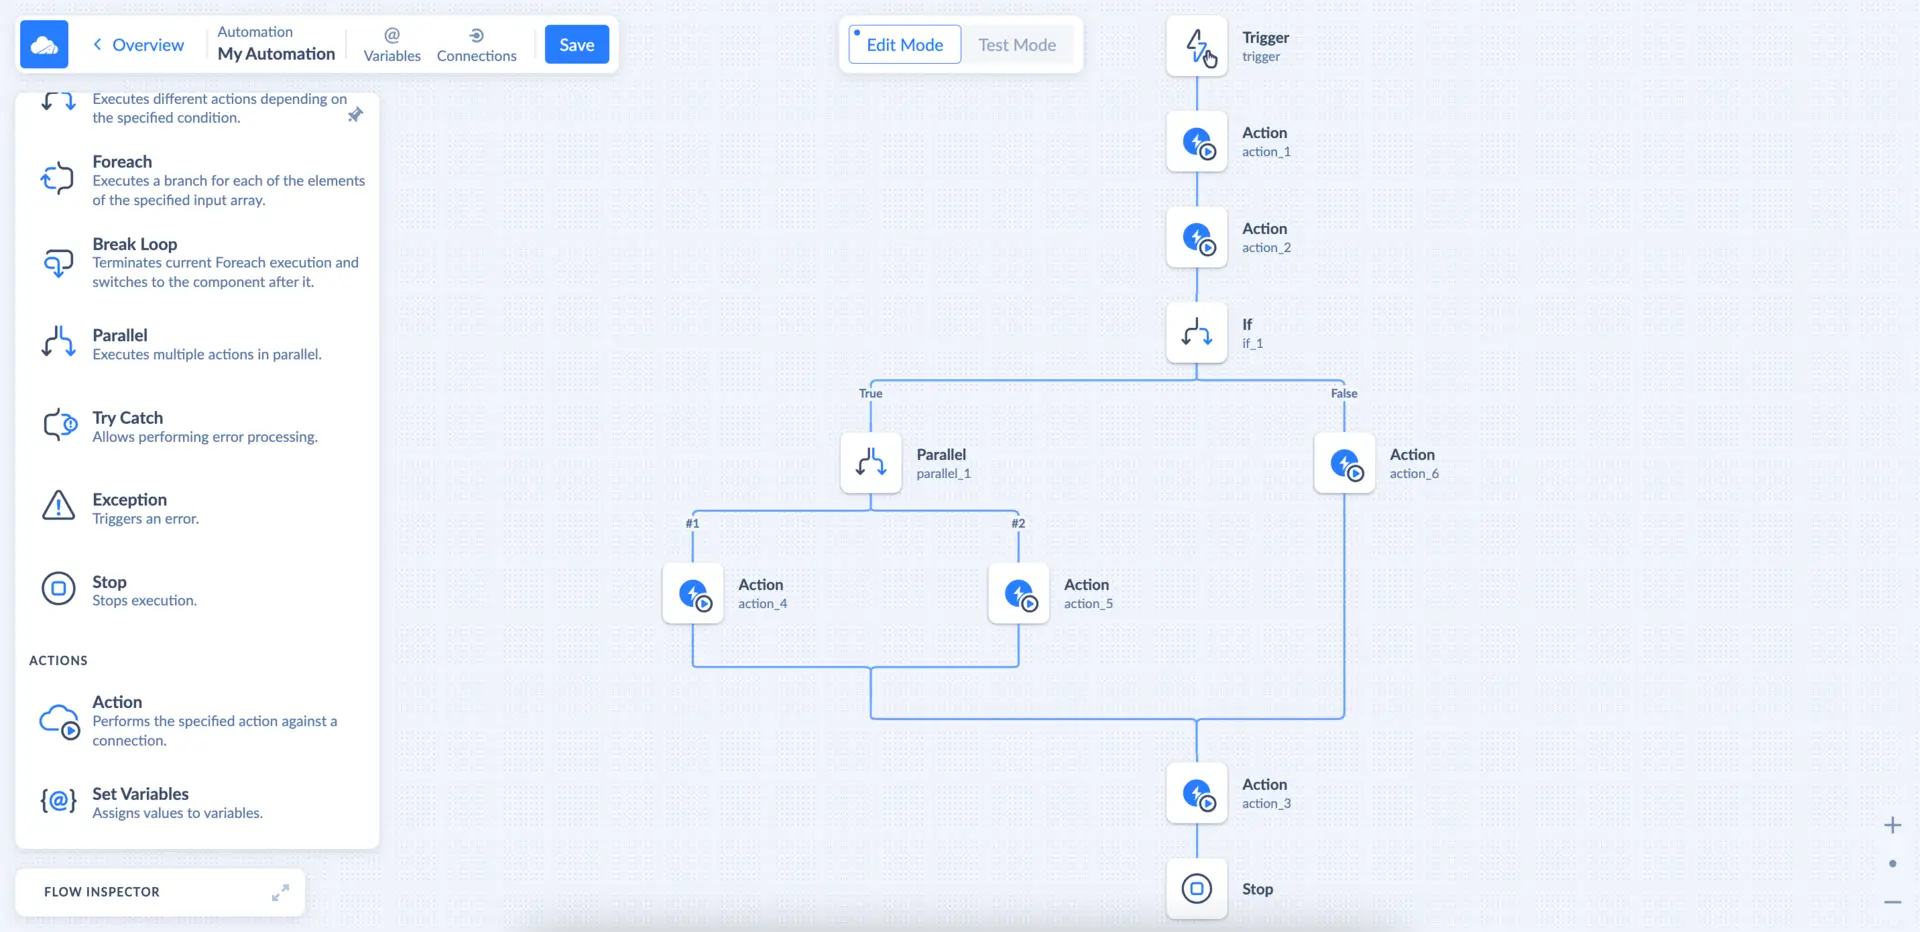
In the automation flow shown above:
- Action_3 has access to the data added to scope by all other actions.
- Action_6 has access to the data added to scope by Action_2 and Action_1.
- Action_6 doesn't have access to the data added to scope by Action_3, Action_4, and Action_5. Only components that come before Action_6 in the automation flow can share their scope with it.
Inner Scope
Foreach and Try/Catch components use inner scope. The data that is available inside the Foreach loop and a Catch branch of the Try/Catch component is not available to components that follow them in the Automation Flow. Here is an example:

In the automation flow shown above:
- Action3 has access to the data added to the scope by Action2, Action1, and Trigger.
- Action4 has access to data that is added to scope by Action1 and Trigger.
- Action4 doesn't have access to Action2 or Action3 as they return data to the inner scope of Foreach.
To get access to the inner scope data from outside, create a variable. Use Set Variable inside the inner scope to assign a value to the variable. Variables are visible to all components throughout the Automation Flow.
Using Data
In automation, you can use data to map fields, assign it to variables, and set conditions.
Using Data to Map Fields
Transfering data from one data source to another is a common case in Automation. To ensure that the data is transfered consistently you need to map fields between objects in data sources using Mapping Editor and Expression Syntax. Here is an example:

On the automation flow shown above we get the list of customers from Customers object in one data source and insert each customer's shipping address and company name to the Contact object in another data source. For the sake of simplicity lets call the initial data source—Source, and the destination data source—Target.
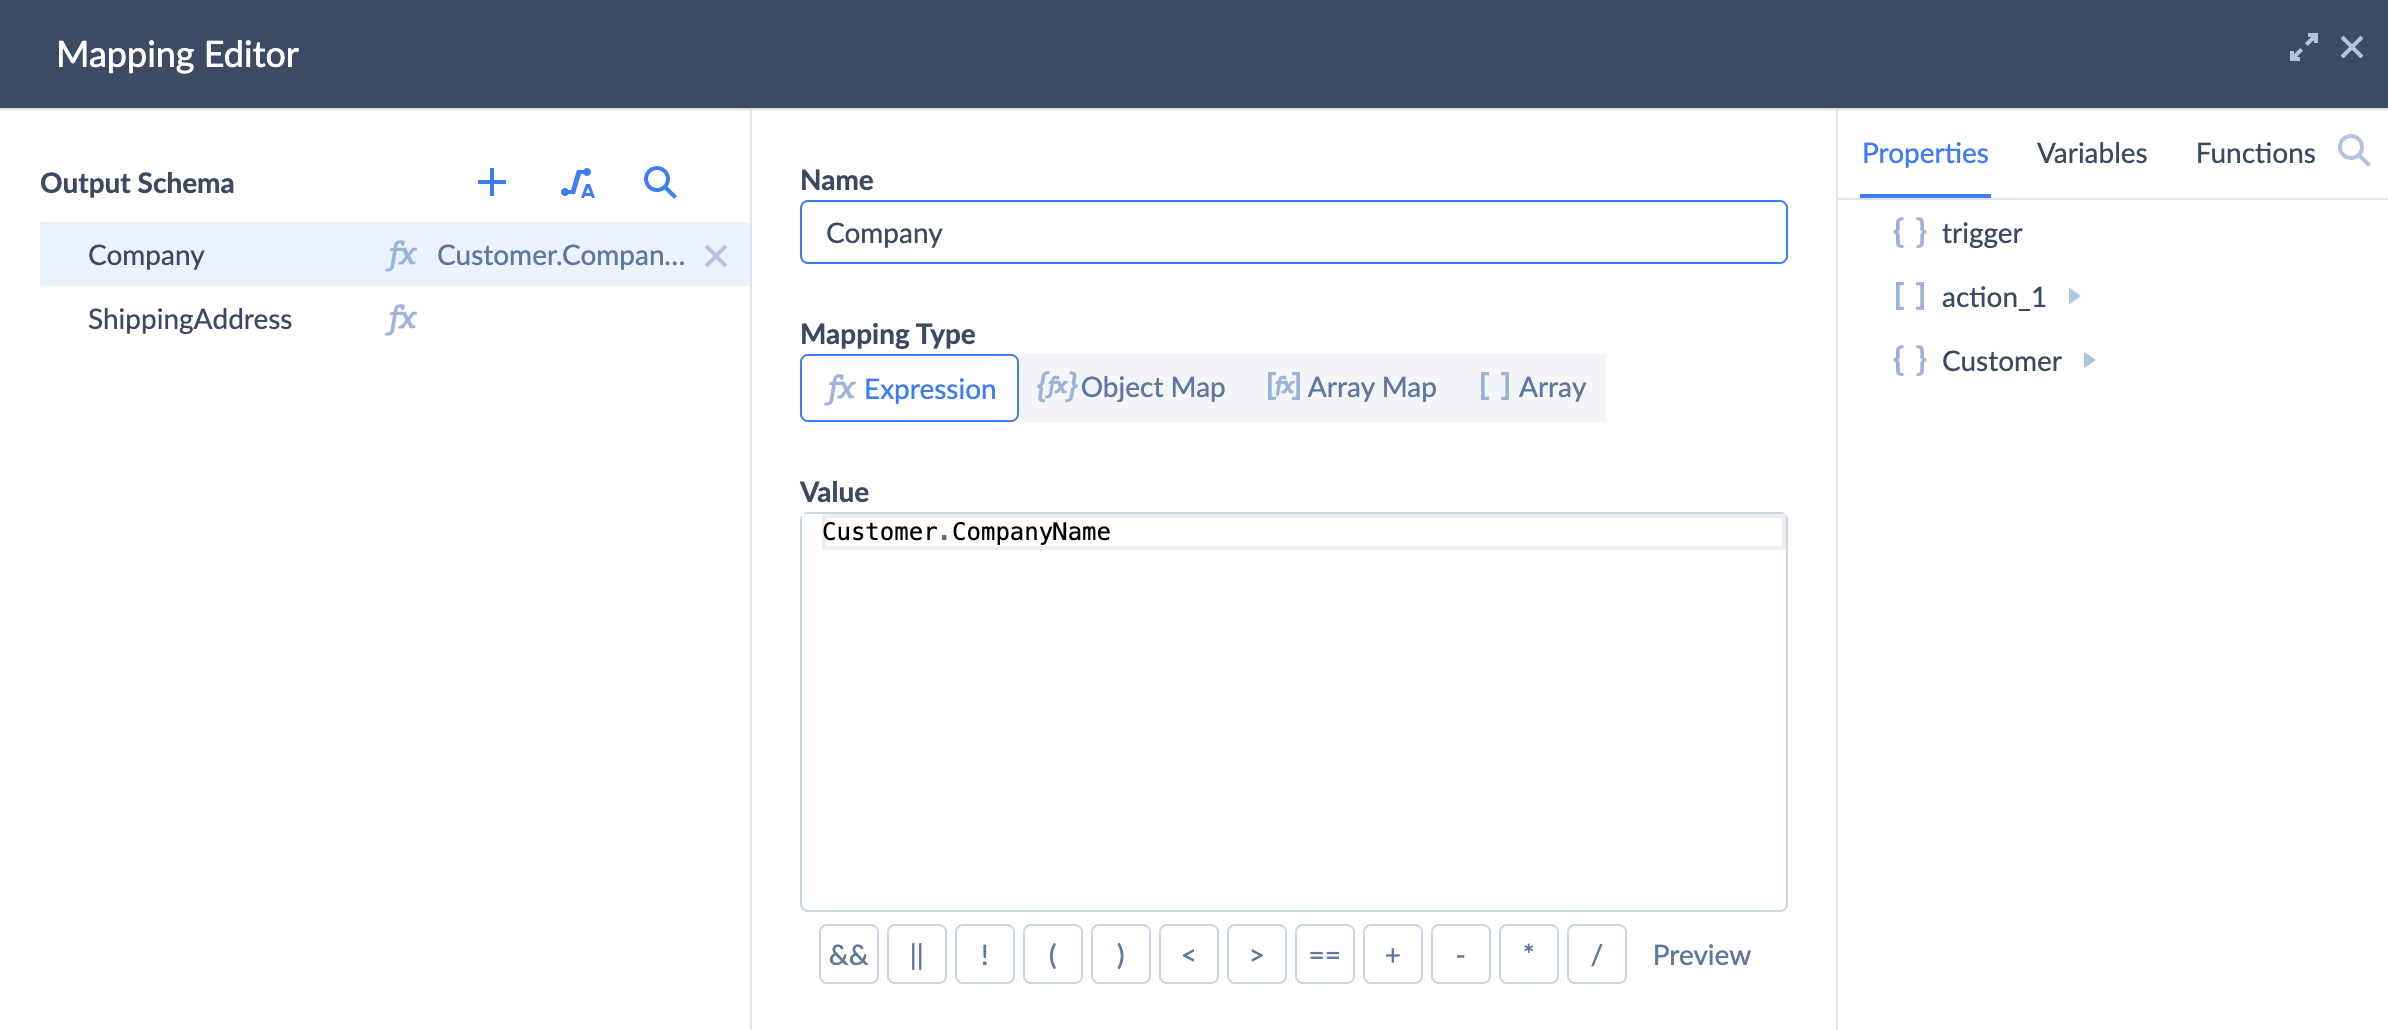
We use Mapping Editor to map fields as company's name is stored in an CompanyName field in Source, and in a Company field in Target.
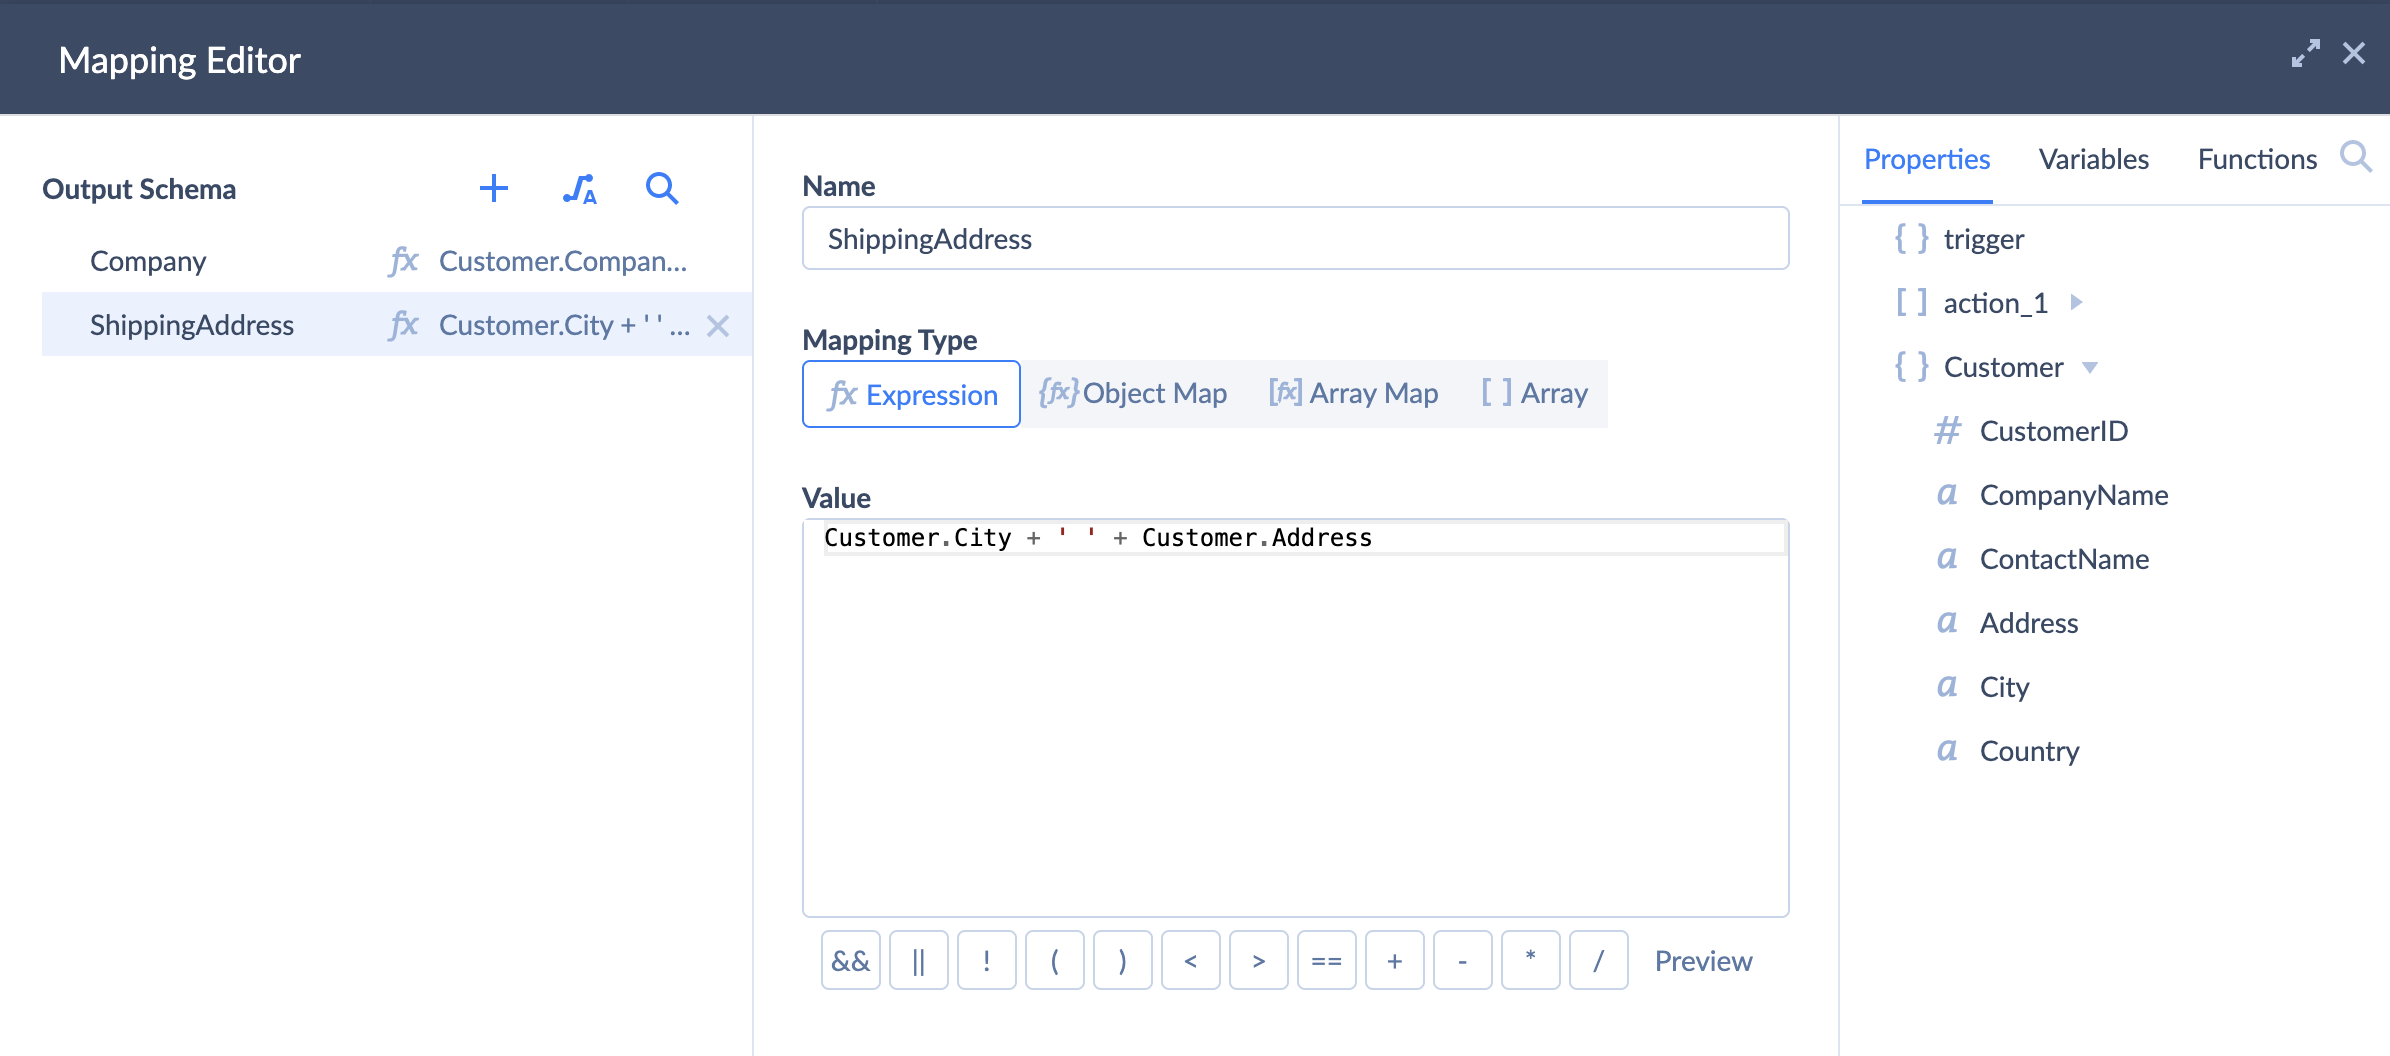
Moreover, the shipping address in Source is stored in two different fields: City and Address. We use expression to concatenate those two fields and map the expression's result to the ShippingAddress in Target.
Note: When mapping fields, pay attention to the field types. Skyvia will try to convert the types if possible, but do not expect to insert a boolean value in a Date/Time field.
Using Data to Set Conditions
When you build an automation you can navigate the automation flow execution based on conditions with the help of components such as If. Expression Editor helps you to create expressions that will be evaluated to a boolean value. Let's check a data driven condition example:
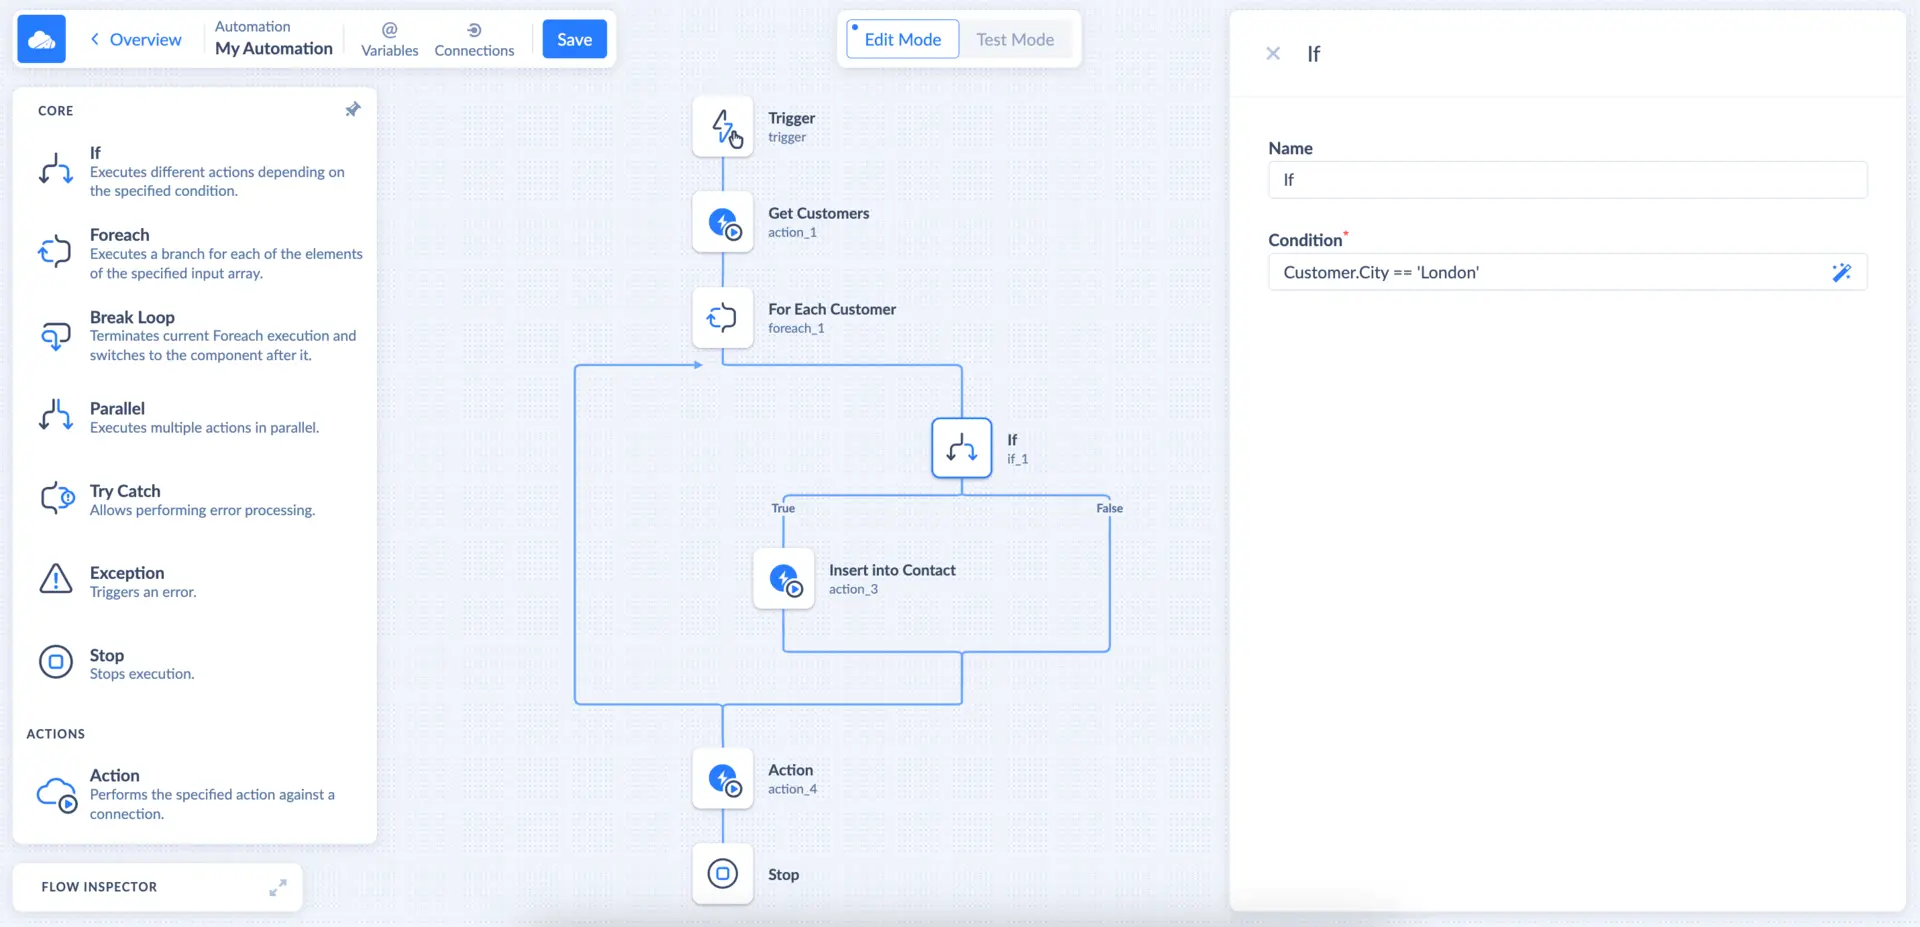
In the automation flow shown above we get a list of customers and interate over this list with the help of Foreach component. We set a condition to insert customer records to Contact only if customer's city is London.
Assign Data to Variables
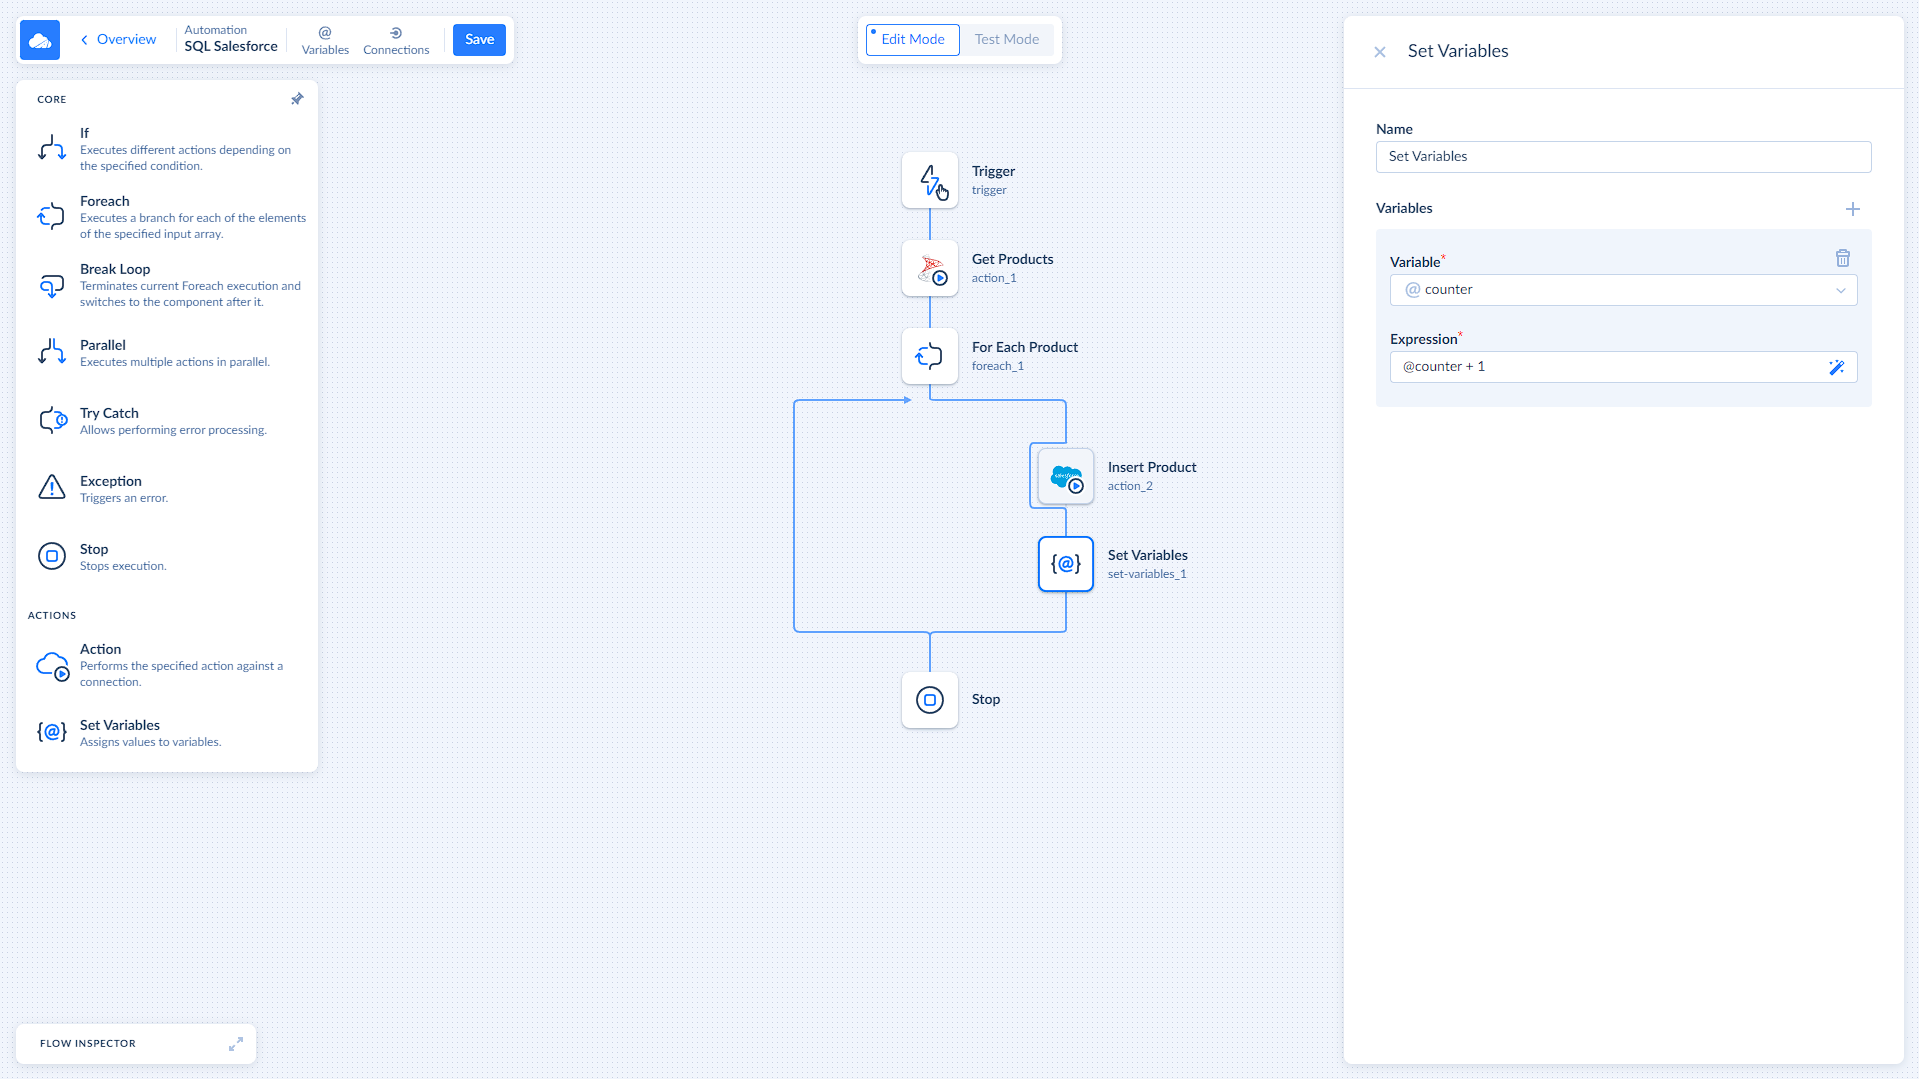
With the help of Set Variable component you can assign values to variables to store data during the Automation execution, perform calculations, and get access to the inner scope. For example, you can count the number of elements in the array.
Accessing Array's Data
Execute Command always returns an array. A default way to operate with the arrays is to use Foreach component. There are cases when you know that Execute Command will return a single element in the array. We implemented a way to access this element without overwhelming the automation flow with Foreach components.
You can access the properties of the first element of the array the same way you access an object properties. For example, if you have an array of product objects called Products, and it consists of a single product, you can access the name of the product by using Products.Name.