Agents
For connecting to on-premise databases located in local networks or on users' computers behind the firewall, Skyvia offers Agent application. You install this application on your computer and start it. The application connects to Skyvia and serves as a secure gateway between Skyvia and a local database server.
The agent application connects to Skyvia and exchanges data via the HTTPS protocol. To use the agent, outbound connections to https://agents.skyvia.com via the HTTPS port 443 must be allowed. This port is usually open by default in most systems, so in most cases you don't need to do anything.
If you have already installed the Agent application and want to create a connection, see Agents Connections.
Managing Agents
In order to use the Agent application, you need to create an Agent in Skyvia first. The Agent represents an instance of the Agent application, running on a specific computer. It has a unique Key that is used to identify a specific agent when connecting.
If you need to install agent application onto multiple computers to connect to databases in different local networks, you need to create multiple Agent.
As well as the other Skyvia objects, agents are available in the object list, and you can manage them as well as other Skyvia objects. You can organize them into folders, edit or delete them, view their dependencies, etc.
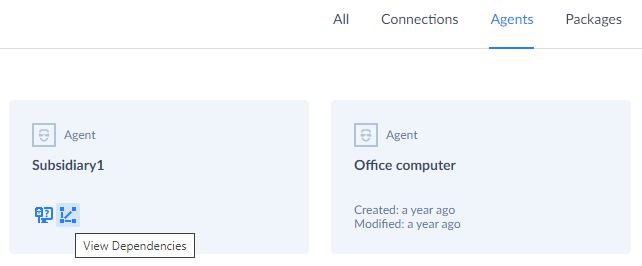
By clicking a certain agent, you are transferred to its details. Here you can download the Agent application and key, test agent, edit its name or delete it.
Creating and Using Agents
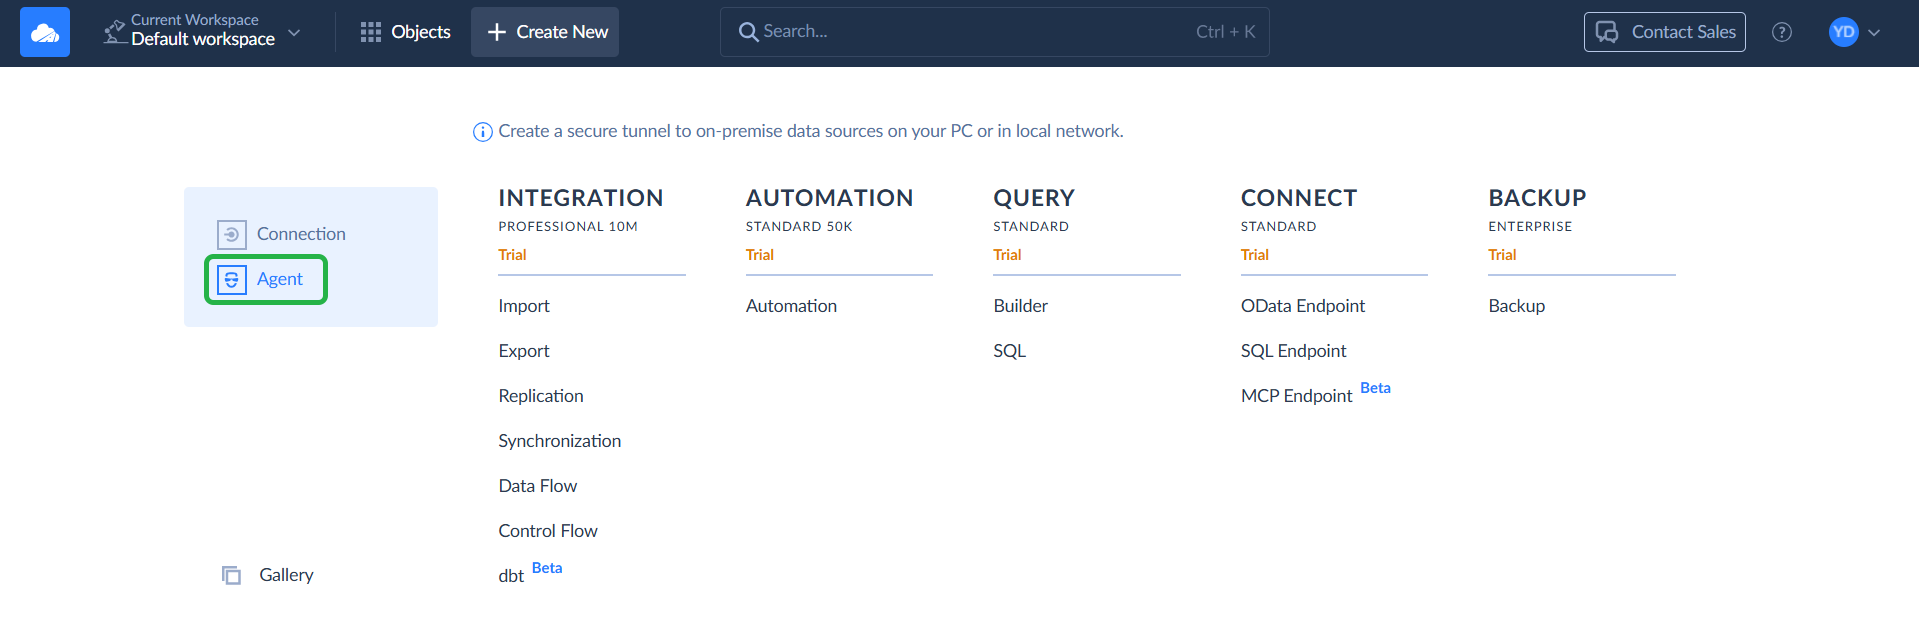
To create an Agent, click + Create New and select Agent in the menu on the left.
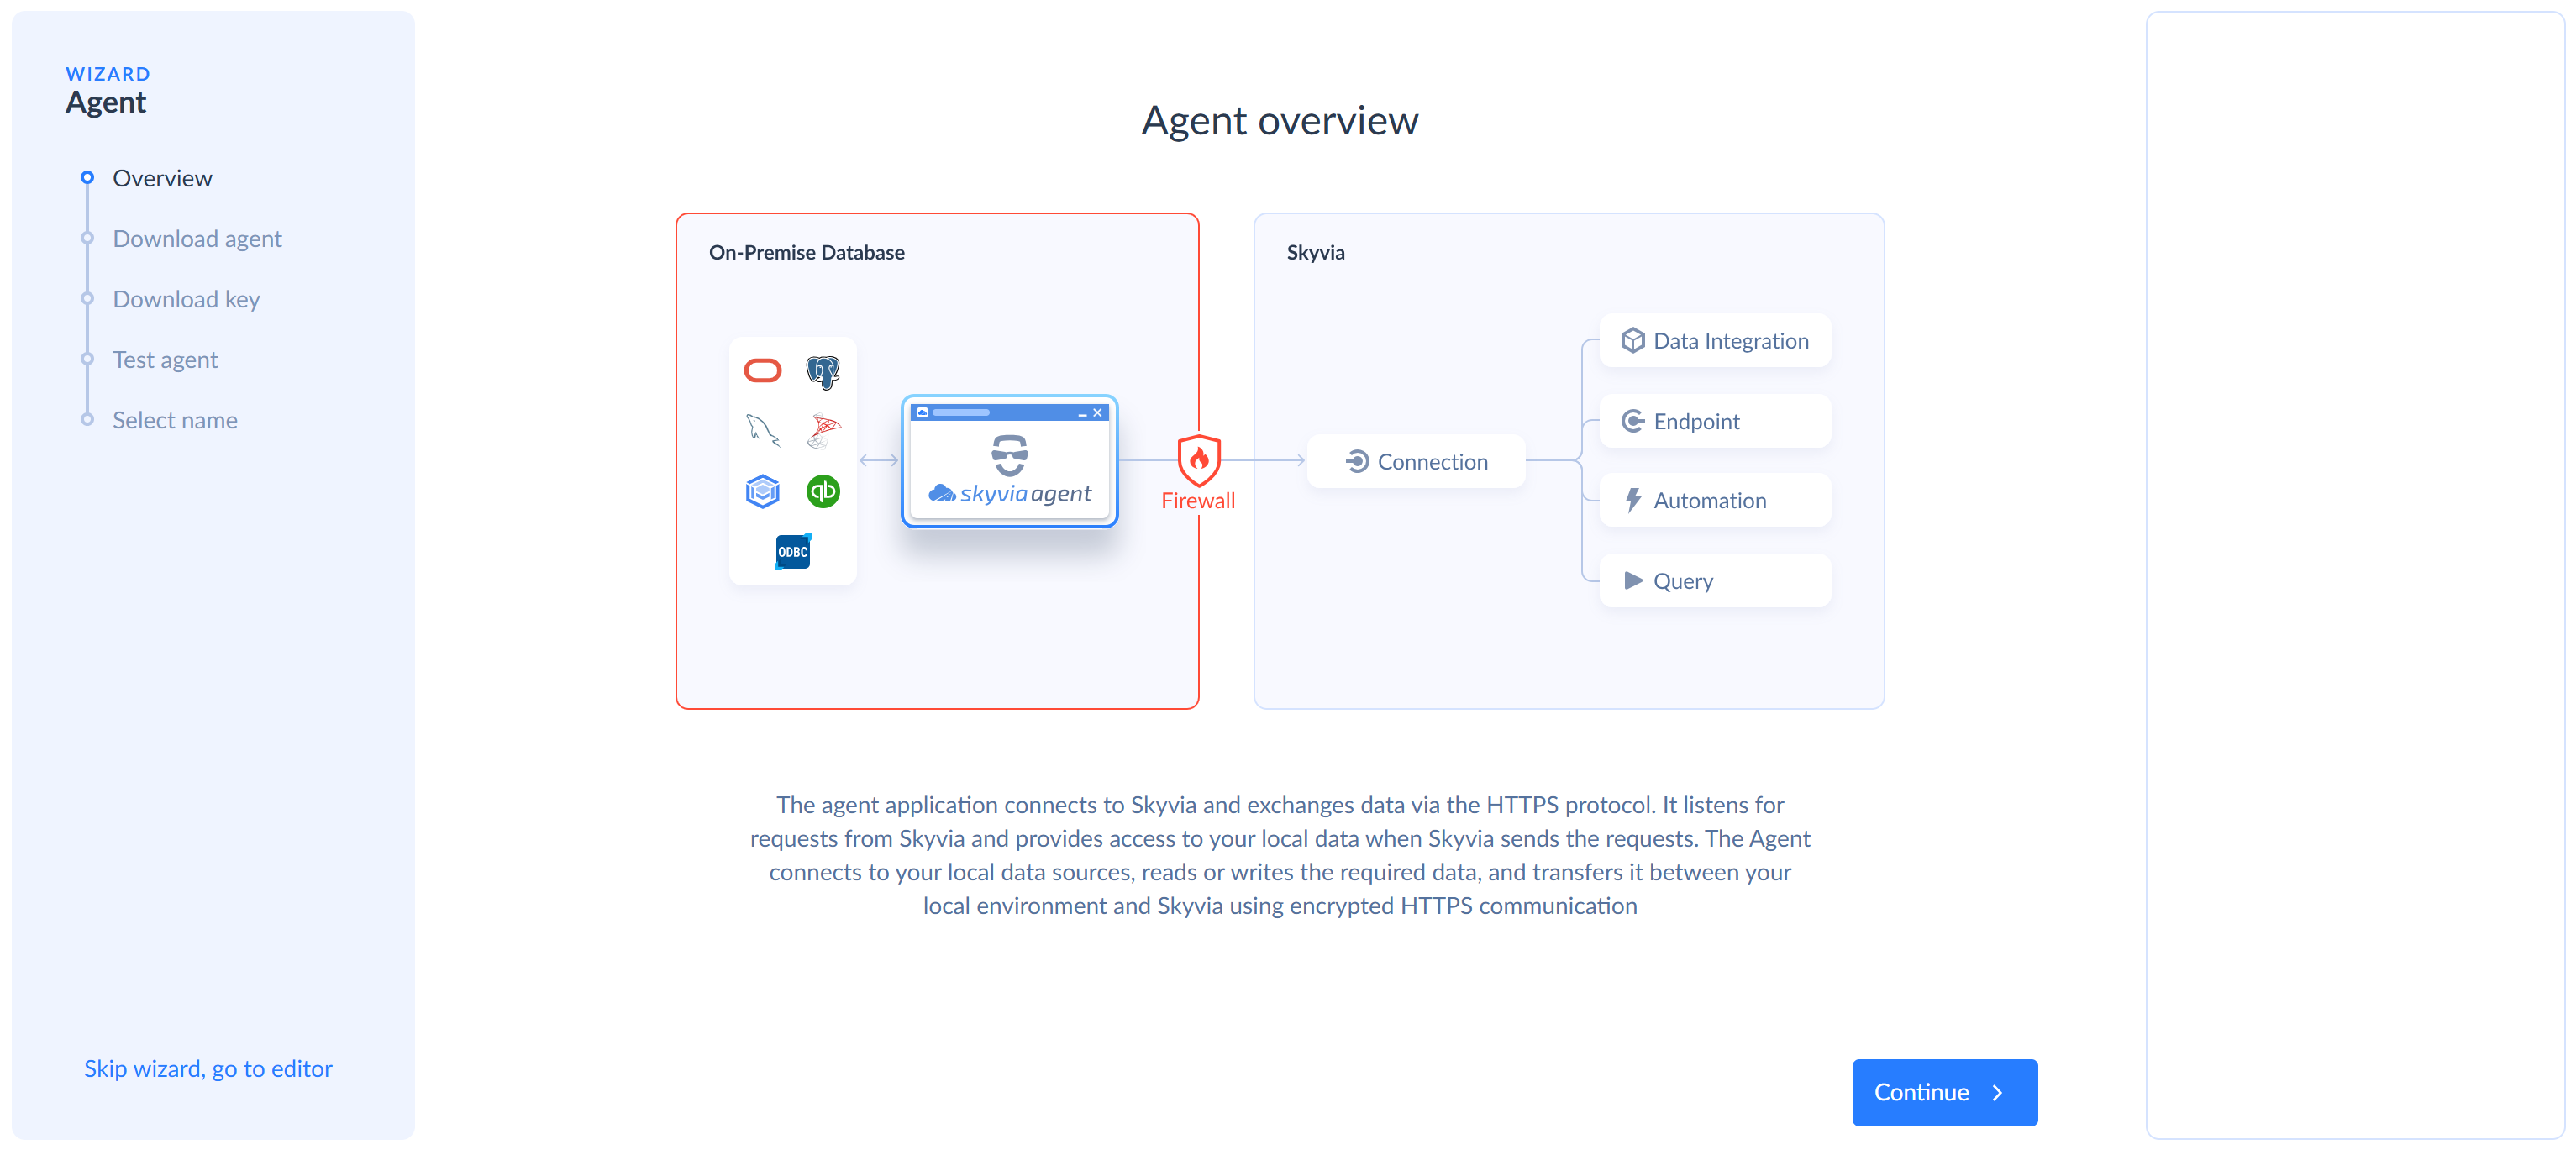
By default, Agent wizard opens with the following steps:
-
Overview - provides a brief information about agent functionality.
-
Download agent - download and install the Agent application.
-
Download key - either download the agent key as a file and place it to the folder where the Agent application is installed or copy it and specify it in the Agent application with GUI.
-
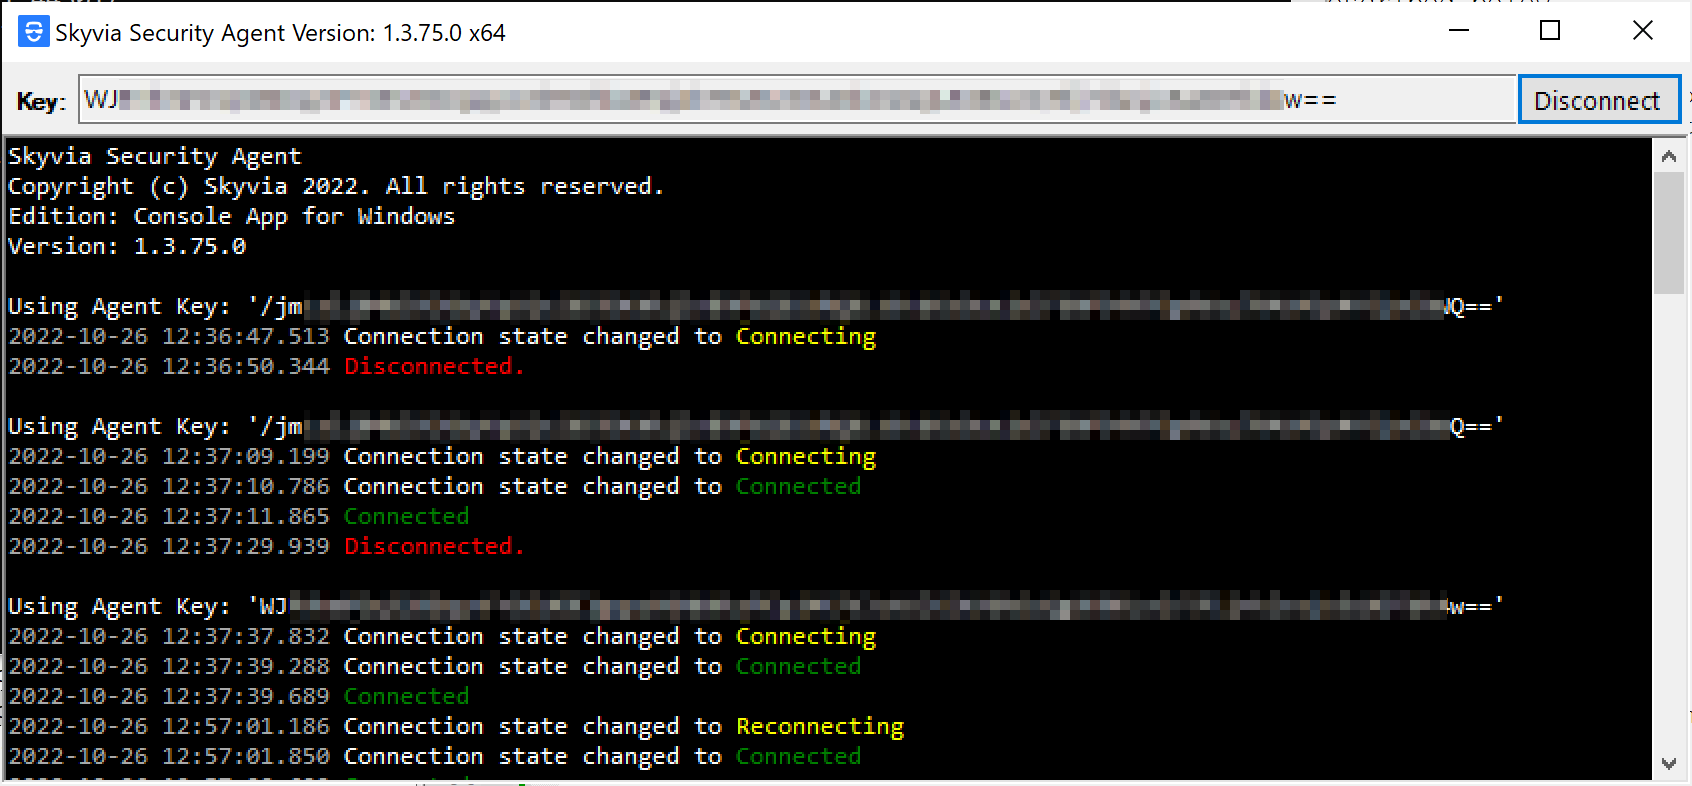
Test agent - here you can check whether the Agent application is running and connected to Skyvia.
-
Select name - specify a meaningful name instead of the default 'Untitled'.
You can switch to the editor instead of the wizard by clicking Skip wizard, go to editor in the bottom left corner of the page. After this, the wizard will show no more. In the editor, the Agent is immediately created, and its details are opened.
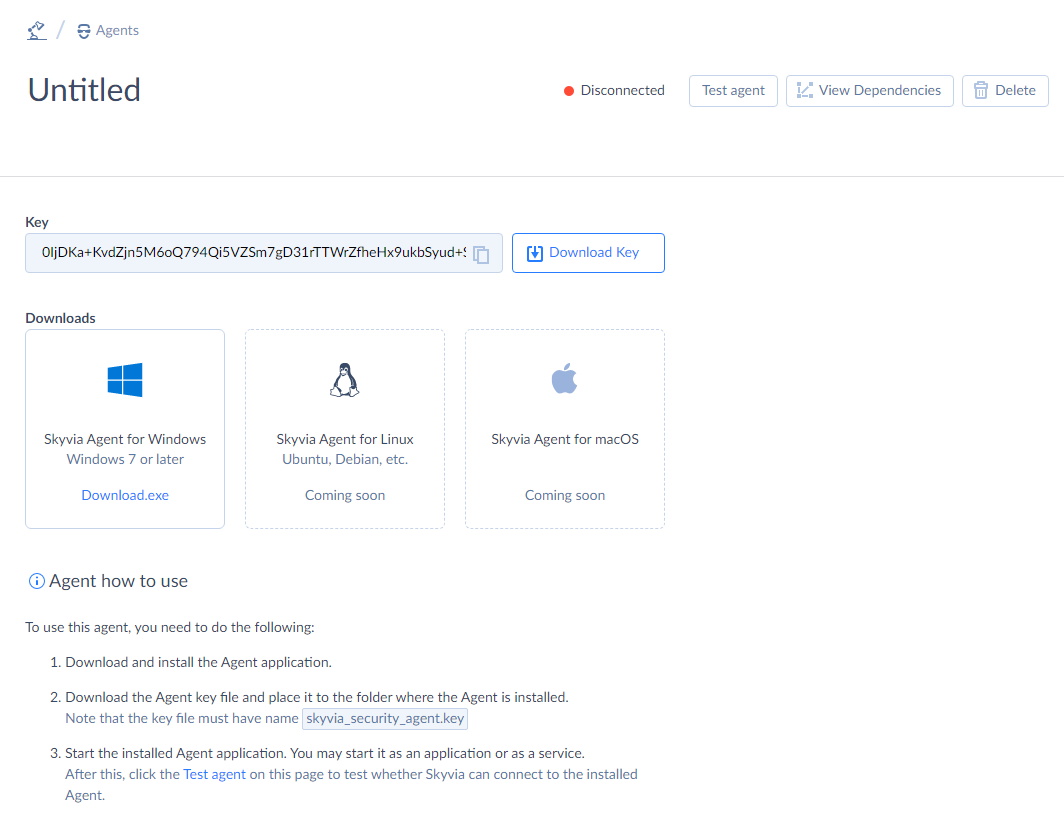
In the editor, you can perform the same actions - download and install the Agent application, download and place the key file to its folder, and then run the Agent application, rename the agent.
The key file must have name
skyvia_security_agent.key. If you downloaded keys multiple times, browser may rename files in order to avoid overwriting already existing one. In such case, rename it back in the Agent application folder.
Agent Applications
On 64-bit operating system, the Agent application is installed to the %programfiles(x86)% directory (by default, it is C:\Program Files (x86)). When you install the Agent application, 4 executable files are installed:
| File Name | Description |
|---|---|
| Skyvia.Agent.Client.x64.exe | Console application, 64 bit |
| Skyvia.Agent.Client.UI.x64.exe | Application with GUI, 64 bit |
| Skyvia.Agent.Client.UI.exe | Console application, 32 bit |
| Skyvia.Agent.Client.exe | Application with GUI, 32 bit |
Applications with GUI allow you to manually enter the key instead of loading it from the downloaded file. The entered key is saved to the skyvia_security_agent.key file the folder where the Agent application is installed. It is saved when the agent connects to Skyvia, and if there is an existing file, it is overwritten.
Console apps can be installed as a service, as described below.
Both console and GUI applications come with 32-bit and 64-bit versions. Usually, you can run any of them and won't notice the difference, but in case of using ODBC connections it is important to use the application of the same bitness as the installed ODBC driver that you want to use.
Running Agent as a Service
Console Skyvia Agent apps can be installed as a service. For this, run the agent with the -i command line argument:
Skyvia.Agent.Client.exe -i
Note that the command should be run from the agent application folder.
Then you can start the service like this:
net start Skyvia.Agents.Client
To unregister the service, run the agent application with the -u command line argument:
Skyvia.Agent.Client.exe -u
How Agent Works
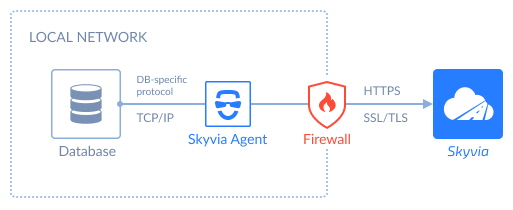
Agent application is installed on a computer in the same local network, in which your database server is running. The Agent application must be running and have access to the Internet in order to work.
After Agent is started, it connects to the Skyvia service and keeps this connection. Since it initiates the connection itself, it does not need a dedicated external IP. When Skyvia connects to a local database via Agent, it sends the corresponding request to Agent, and it connects to the database and performs all the database interaction inside the local network, to which it is installed.
This is why you should specify database connection parameters when creating an agent connection so as if you are connecting from the computer where the Agent is installed.
Agent sends the requested data to Skyvia and receives the data to load into the database encrypted, over HTTPS protocol. This protocol is usually allowed in firewalls, so usually Agent requires no additional firewall settings. Besides, Agent's protocol is often more optimized for exchanging data over the Internet than database protocols. It uses less granulated operations and performs less roundtrips between the Agent and Skyvia.
Checking Agent Status Automatically
You can check whether the Agent application is running and connected to Skyvia from an automated monitoring or checking service by using the Skyvia API.
Use the Test Agent endpoint:
POST https://api.skyvia.com/v1/workspaces/{workspaceId}/agents/{agentId}/test
This endpoint requires an API token with permission to test agents. For details on API tokens and required scopes, see API Settings.
Proxy Settings for Agent
If the computer you install the Agent on is connected to the Intenet via a proxy server, you need to configure your agent and set up proxy parameters. This can be done by editing the Skyvia.Agent.Client.exe.config file in the agent installation directory and providing the necessary values for parameters in the appSettings section:
1
2
3
4
5
6  <appSettings>
    <add key="proxyHost" value="" />
    <add key="proxyPort" value="" />
    <add key="proxyUsername" value="" />
    <add key="proxyPassword" value="" />
  </appSettings>
You need to specify the following values:
- proxyHost - Domain name or IP address of your proxy server, by which it can be accessed from the computer, where Agent is installed.
- proxyPort - Proxy port to use.
- proxyUsername - If your proxy server requires authentication, specify the username to use for authentication on proxy server.
- proxyPassword - If your proxy server requires authentication, specify the password to use for authentication on proxy server.
For example:
1
2
3
4
5
6  <appSettings>
    <add key="proxyHost" value="192.168.0.17" />
    <add key="proxyPort" value="3128" />
    <add key="proxyUsername" value="test" />
    <add key="proxyPassword" value="11111" />
  </appSettings>