SQL Endpoints
Skyvia Connect allows you to create API endpoints that allow running SQL statements against your data over the Internet. You can create SQL endpoints visually, in just a few simple steps, and you don't need to care about service hosting, deployment, and administration at all. The service is hosted on the endpoint.skyvia.com subdomain and uses this subdomain certificate. All the deployment and administration tasks are performed by Skyvia engineers, who has taken care about everything needed.
Skyvia Connect allows you to use SQL against both databases and cloud applications. It also provides an additional security layer with it's own user accounts and passwords, so you don't need to share your actual data source credentials in order to share your data. All the API calls to the endpoint are logged, and whenever necessary you may monitor and analyze your endpoint activity.
Please note, when you query a database, use a database-specific SQL syntax. To learn more about SQL syntax for cloud sources visit Supported SQL for Cloud Sources page.
SQL Endpoint Protocol
Skyvia uses its own protocol for access to the SQL Endpoint. You send POST HTTP requests to the /execute resource with a JSON object, containing SQL and parameter values, as the body parameter, and retrieve the returned data and metadata in a JSON format. You can see more details on the protocol and other available calls by adding /help to your SQL endpoint URL.
However, usually there is no need to study the protocol details, because we provide API Clients for SQL endpoints, so you may work with them via well-known interfaces. You can download them from the details of a created SQL endpoint.
Creating SQL Endpoints
An SQL endpoint can be created using the +Create New menu, as any other object. SQL Endpoints are created in a convenient SQL Endpoint Wizard, in just three simple steps:
- Select a connection to your data source.
- Optionally configure security settings (user accounts and IP ranges, from which access is allowed).
- Enter name for the new endpoint.
That's all. An SQL endpoint that provides access to all the data, available via the selected connection, is created.
Working with Created Endpoints
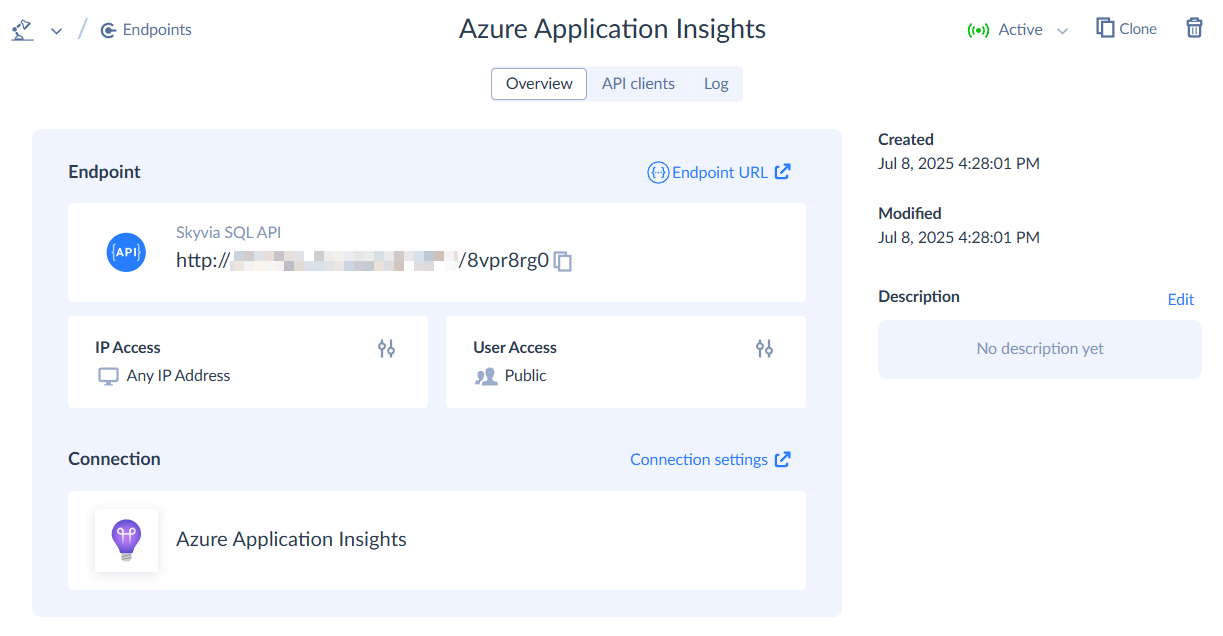
After you create an SQL endpoint, its details open automatically. The details consist of three tabs: Overview, API clients, and Log.
On the Overview tab you can find the endpoint URL, which you can use to work with the created SQL endpoint. The Overview tab also displays basic endpoint information (endpoint kind - OData or SQL, endpoint connection, creation and modification timestamps, numbers of endpoint users and IP address ranges) and allows accessing and changing security settings.
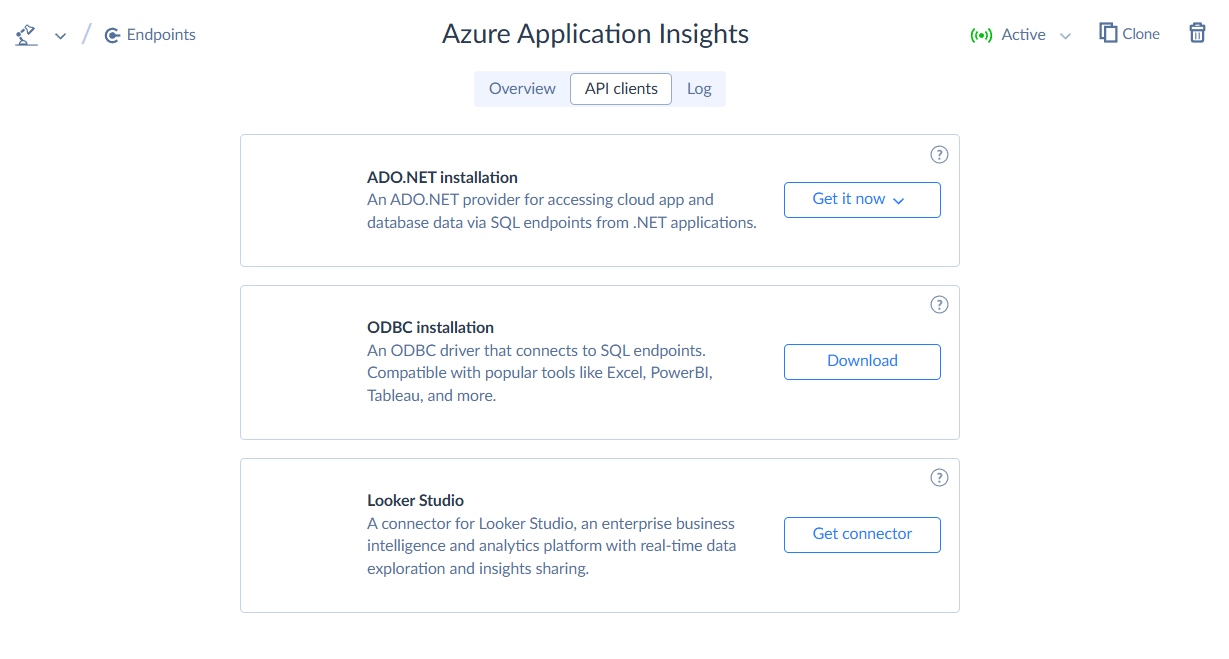
On the API clients tab, you download the SQL API client to use.
Skyvia offers the following SQL API clients:
-
ADO.NET Provider - a provider to access data from .NET applications.
-
ODBC Driver - a driver for data access via a well-known ODBC interface, supported in different applications, like Excel, and development platforms.
-
Looker Studio connector - allows you to connect the Looker Studio BI tool from Google to your endpoints and analyze their data.
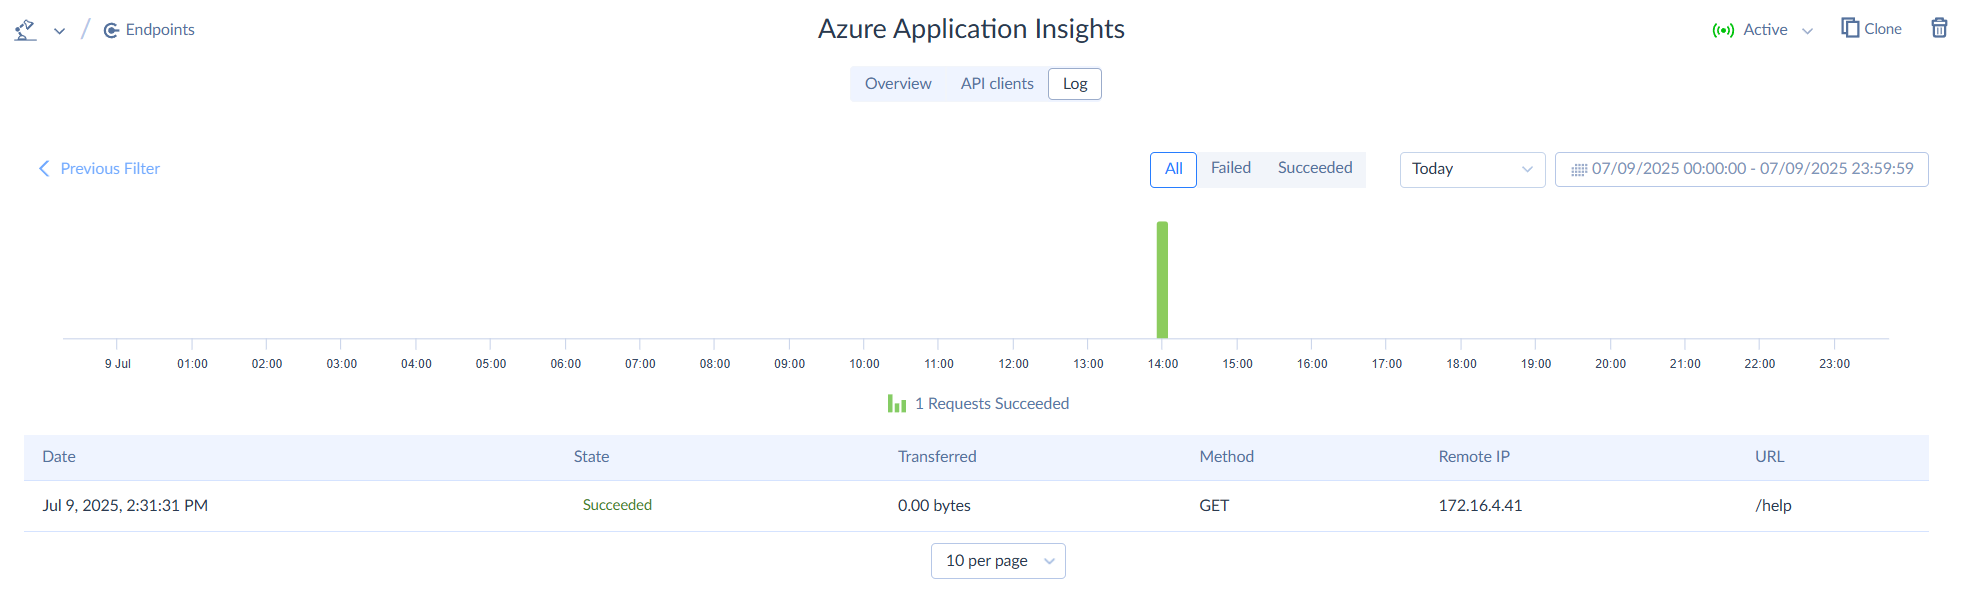
The Log tab allows you to monitor all the data access via the endpoint. Check the Monitoring Endpoint Activity topic for more details.
If your endpoint is valid, and it does not use features, not available in your Connect pricing plan, it is activated immediately, and you can copy and use the endpoint URL in your applications. Whenever necessary, you may change the status of your endpoint to Inactive or back to Active in the endpoint title bar or via the corresponding quick action button in the object list.
If your endpoint is invalid or uses features, not available in your pricing plan, it is created inactive, and it cannot be activated till you fix it or upgrade your connect subscription to a plan, which includes the necessary features.