Importing Related Customer, Order, and Product Data
In this tutorial, we will show how to import data from the Products, Customers, Orders, and Order Details tables from the Microsoft standard Northwind database on SQL Azure to Salesforce. Here is the schema of the imported data.
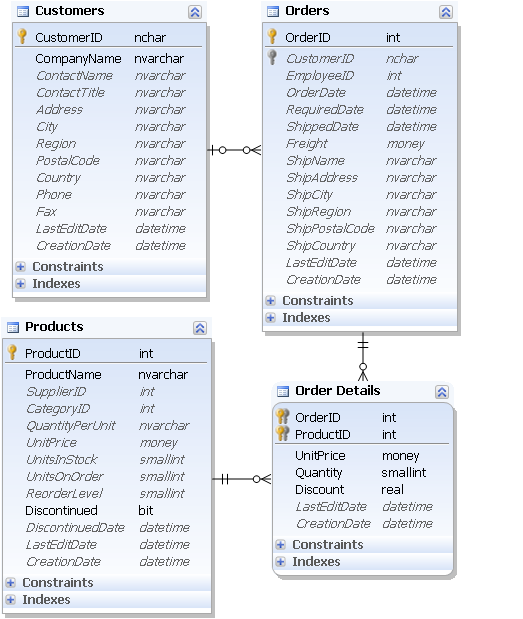
This schema differs from the target Salesforce schema. The data from the Customers table should be imported to Salesforce Accounts and Contacts. Data from the Orders table goes to the Opportunity table. Information from the Products tables should be divided between the Product2 and PricebookEntry Salesforce objects, and information from the Order Details table goes to the OpportunityLineItem Salesforce object.
The problem of such operation is to preserve the relations of the source data when importing them to Salesforce. For example, when we import the Customers table to Accounts and Contacts, the relation should be created between the corresponding Account and Contact in the Salesforce database. This is easy with Skyvia. When inserting data from one table or CSV file, to multiple Salesforce objects, it builds such relations automatically.
Creating Connections
In order to import data from SQL Azure to Salesforce, first we need to create connections to Salesforce and SQL Azure databases. If you have already created the necessary connections, you may skip these steps. To create a connection to Salesforce, perform the following steps:
-
Click +NEW in the top menu.
-
Click the Connection button in the menu on the left.
-
In the opened Select Connector page, select Salesforce. To quickly find it, you can either use the Type to filter box or filter connectors by categories, using the All list (for Salesforce, select the CRM category).
-
The default name of a new connection is Untitled. Just click it to rename the connection, for example, to Salesforce1.
-
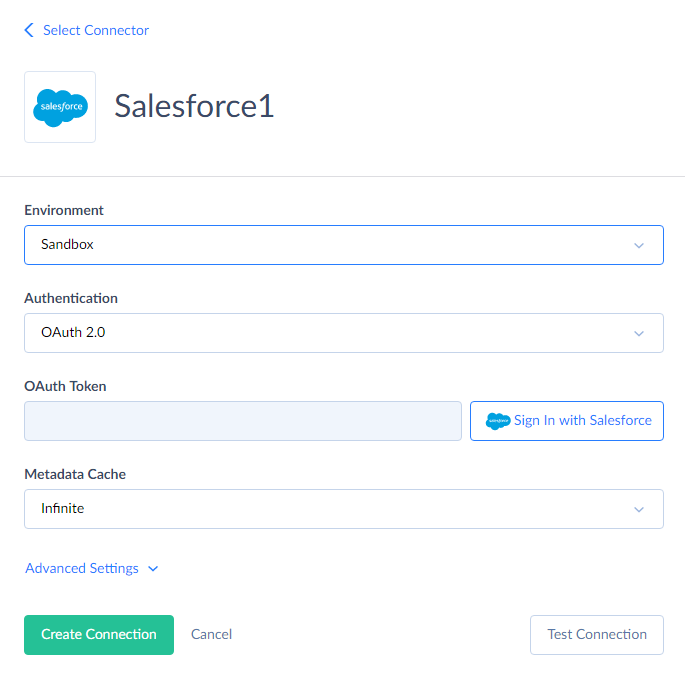
From the Environment drop-down list, select the Salesforce environment type to import data to. Since this is just a sample walkthrough, the Sandbox environment is recommended.
-
From the Authentication drop-down list select the authentication method for connecting to Salesforce. If you don't mind storing your Salesforce credentials on Skyvia server, select User Name & Password. If you prefer not to store your credentials, select OAuth 2.0.
-
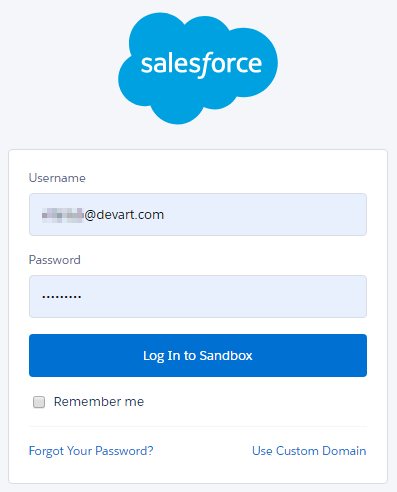
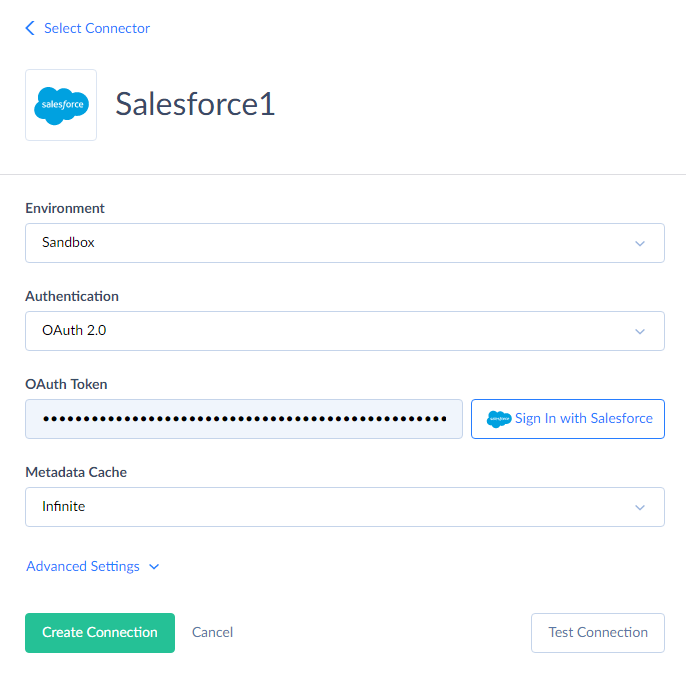
If you have selected User Name & Password, on the previous step, specify your Salesforce account e-mail, password, and security token. Otherwise, if you have selected OAuth 2.0 authentication, click the Sign In with Salesforce button and login via the Salesforce website on the opened page. The result OAuth token will be stored in the connection data. Your Salesforce credentials will not be stored on our website.
-
Click Create Connection.
To create a connection to SQL Azure, perform the following steps:
-
Click +NEW in the top menu.
-
Click the Connection button in the menu on the left.
-
In the opened Select Connector page, select SQL Server. To quickly find it, you can either use the Type to filter box or filter connectors by categories using the All list (for SQL Server, select the Database category).
-
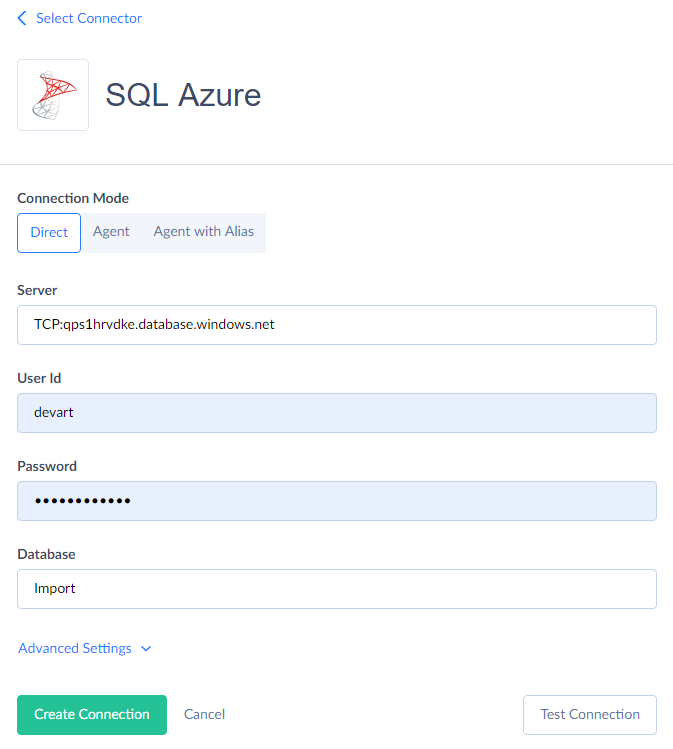
The default name of a new connection is Untitled. Just click it to rename the connection, for example, to SQL Azure.
-
In the Server box, enter "TCP:<server name>". Replace "<server name>" with your actual server name.
-
Specify your User Id, Password, and Database to connect to.
-
Click Create Connection.
Now we have the necessary connections created. Let's create an integration that performs the necessary data import operation.
Creating an Integration
To create an integration, perform the following steps:
-
Click +NEW in the top menu.
-
In the Integration column, click Import. The import integration details page will open.
-
Rename your integration by clicking and editing the integration name. The default integration name is Untitled. Please note, if you omit this step, the integration name will remain Untitled in the list of created integrations.
-
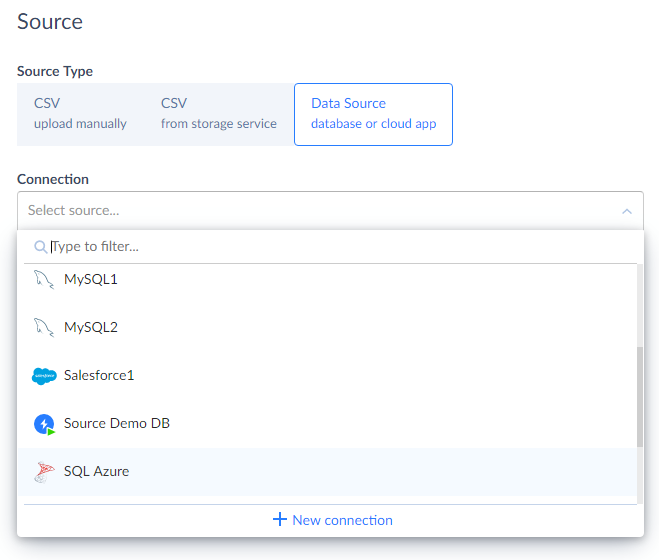
Under Source, in Source Type, click Data Source database or cloud app and select SQL Azure from the Connection drop-down list.
-
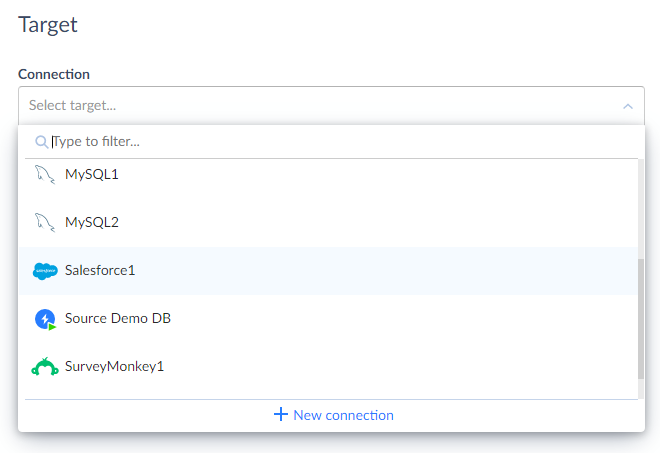
Under Target, in the Connection list, click Select target and select Salesforce connection from the drop-down list. You can use the Type to filter box to quickly find the necessary connection.
Now we have an empty integration ready for adding tasks. A task is a unit of data extracting, transforming and loading process. When creating an import integration, we need to add a task for each source table or CSV file.
Importing Customers Table
The first task we create is a task for importing the Customers table. When creating an integration that imports several data files or tables that have complex relations between them, it's better to start with "master" tables or files that does not depend on other tables, then add tasks for tables that depend only on these master tables, then move on to the next dependency level.
To create the task, perform the following steps:
-
Click the Add new link to open the Task Editor.
-
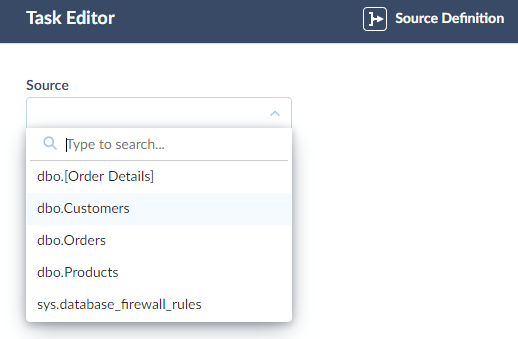
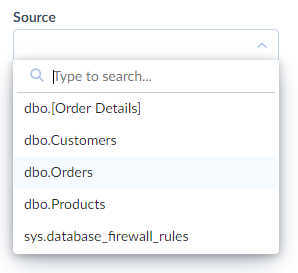
Select Customers in the Source list and click the Next step button in the bottom of the dialog box to switch to the next editor page. You can also switch between the editor pages by clicking the corresponding icons: Source Definition, Target Definition, and Mapping Definition.
-
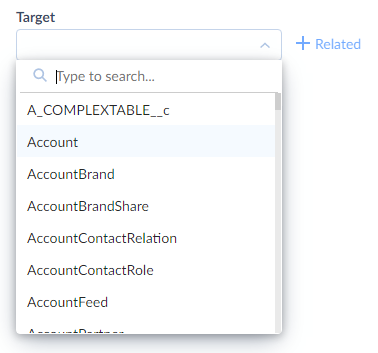
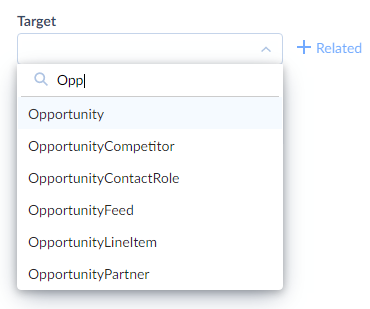
Select Account in the Target list.
-
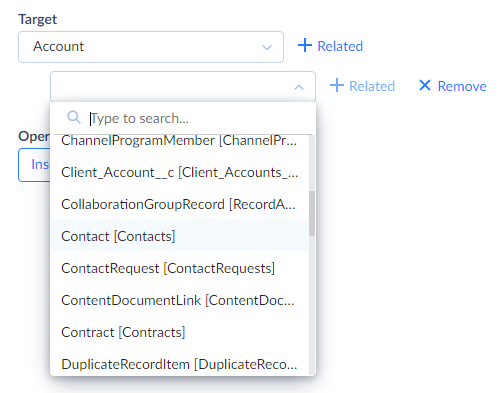
Click the +Related button. A new drop-down list will appear.
-
In this new drop-down list, select Contact.
-
Click the Next step button in the bottom of the dialog box to switch to the next editor page or click the Previous step button to return to the previous page.
-
On this step we need to map the target Salesforce object fields to the source table columns. At first, fields of Account Salesforce object are displayed. As you can see, some columns, such as Phone and Fax were mapped automatically. We use simple column mapping for Account fields - each field is mapped to a source table column. To map a field, simply click it and select the corresponding column from the drop-down list.
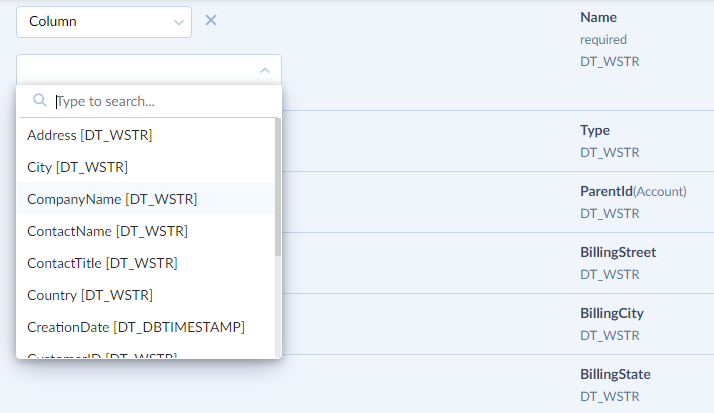
We need to map the following fields:
- Name — to the CompanyName column;
- BillingStreet — to the Address column;
- BillingCity — to the City column;
- BillingState — to the Region column;
- BillingPostalCode — to the PostalCode column;
- BillingCountry — to the Country column. {: type='a'}
-
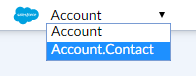
To map Contact object fields, click the target table name (Account) and select Account.Contact in the drop-down list. Note that the AccountId column is mapped to the generated value of the corresponding Account record automatically. Here we only need to map the LastName field to the ContactName column.
-
Click the Save button to save the task.
Importing Products Table
The next task will import the Products table data to Product2 and PricebookEntry Salesforce objects. Perform the following steps:
-
Click the Add new link to open the Task Editor.
-
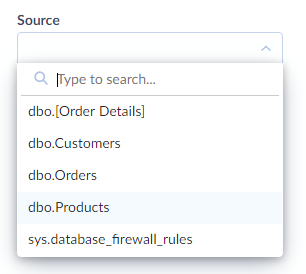
Select Products in the Source list and click the Next step button in the bottom of the dialog box.
-
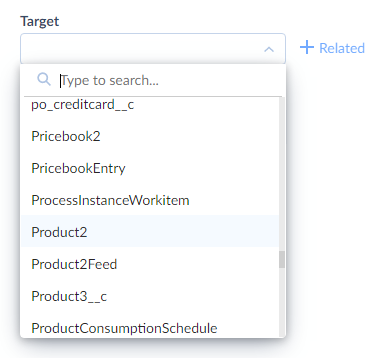
Select Product2 in the Target list.
-
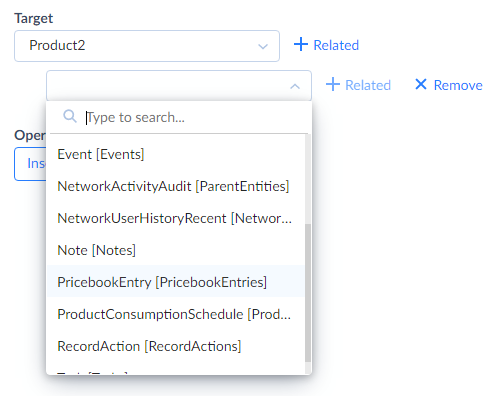
Click the +Related button. A new drop-down list will appear.
-
In this new drop-down list, select PricebookEntry.
-
Click the Next step button in the bottom of the dialog box.
-
On this step we will map the Product2 fields to the source columns. First, map the Name field to the ProductName column — click Name and select ProductName from the drop-down list.
-
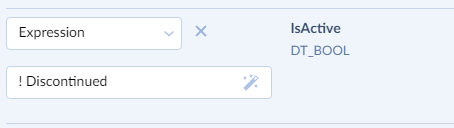
The Products table has the Discontinued column, that determines whether the product is discontinued. Product2 has the IsActive field, which means the opposite. So we need to insert the opposite of the Discontinued column values to the IsActive field. We will use the Expression mapping for this case.
Click the IsActive field and then in the Column drop-down list select Expression. Enter "! Discontinued" (without quotes) to the Expression box. The exclamation mark is the boolean NOT operator, which returns the opposite of its argument.
-
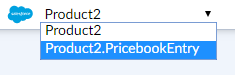
To map PricebookEntry object fields, click the target table name (Product2) and select Product2.PricebookEntry in the drop-down list. Note that the Product2Id column is mapped to the generated value of the corresponding Account record automatically.
-
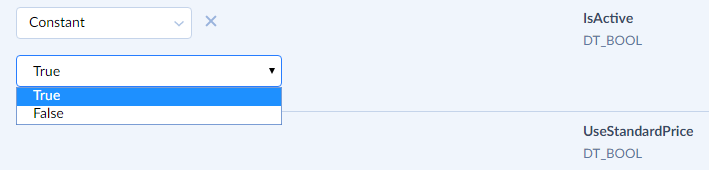
For PricebookEntry we will map the IsActive column to be always true. Click the IsActive field and then, in the Column drop-down list, select Constant. Select True in the drop-down list below.
-
We also need to map the Pricebook2Id field, which stores the ID of Pricebook, the PricebookEntry belongs to. We will map it to the ID of the standard pricebook, which is automatically created for any Salesforce database. Retrieve this ID and copy it to the clipboard. For example, you may retrieve this ID in the following way:
- Open a new browser tab or window (do not close the current page).
- Log in to the salesforce.com website.
- Open the Products tab.
- In the Maintenance section on the bottom of the Products tab, click Manage Price Books.
- Click the link to your standard pricebook. The part of the url of the pricebook page after "https://***.salesforce.com/" will be the pricebook ID. Copy it. {: type='a'}
-
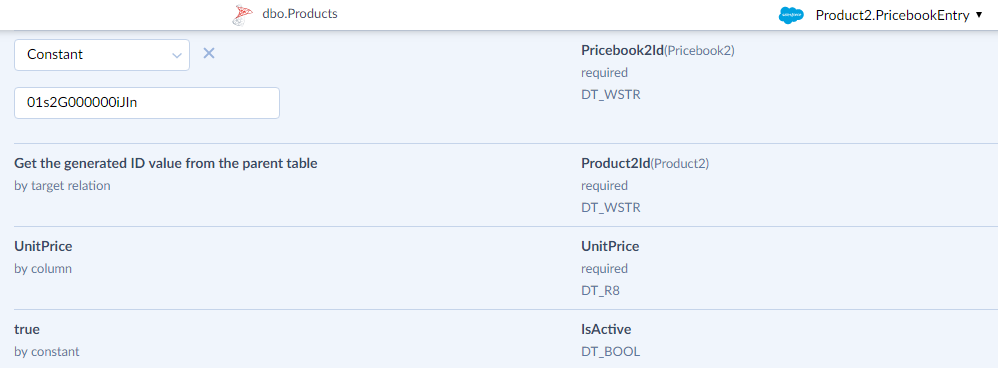
After you copied the ID of the standard pricebook, switch back to the task editor. Click Pricebook2Id and then, in the Column drop-down list, select Constant. In the Constant box paste the copied ID value.
-
Click the Save button to save the task.
Importing Orders Table
After this we need to import the Orders table. This case is a bit more complex since the Orders table has a foreign key to the Customers table, and we want to preserve this relationship in the Salesforce database as the corresponding reference to the Account object. Skyvia offers two ways to map this relationship: external IDs and source relations. External IDs are used when the referenced data are already imported, and the referenced Salesforce object has an External ID field, which can be used to identify the record to get ID value from. Since by default Account object does not have External ID field, we will use the relation mapping.
-
Click the Add new link to open the Task Editor.
-
Select Orders in the Source list and click the Next step button in the bottom of the dialog box.
-
Select Opportunity in the Target list.
-
Click the Next step button in the bottom of the dialog box.
-
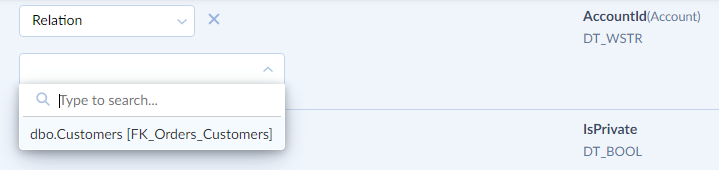
Now we map the AccountId foreign key field using the relation mapping. Click AccountId and then, in the Column drop-down list, select Relation.
-
Select dbo.Customers [FK_Orders_Customers] in the drop-down list below. This list contains the foreign key relations (note that the name of the item to select may differ if you use schema other than dbo).
-
Now map the Name and CloseDate fields to the ShipName and OrderDate columns respectively.
-
We will use constant mapping to map the StageName field to a constant. Click the StageName field and then in the Column drop-down list select Constant. Select Closed Won in the drop-down list below.
-
Click the Save button to save the task.
Importing Order Details Table
When importing the Order Details table, we will also use the relation mapping to preserve the foreign key between Order and Order Details as the relation between Opportunity and OpportunityLineItem. Also we need to store the foreign key between Product and Order Details as the relation between Opportunity and PricebookEntry.
-
Click the Add new link to open the Task Editor.
-
Select Order Details in the Source list and click the Next step button in the bottom of the dialog box.
-
Select OpportunityLineItem in the Target list.
-
Click the Next step button in the bottom of the dialog box.
-
Now we map the OpportunityId foreign key field using the relation mapping. Click OpportunityId and then, in the Column drop-down list, select Relation.
-
Select dbo.Orders [FK_Order_Details_Orders] in the drop-down list below (note that the name of the item to select may differ if you use schema other than dbo).
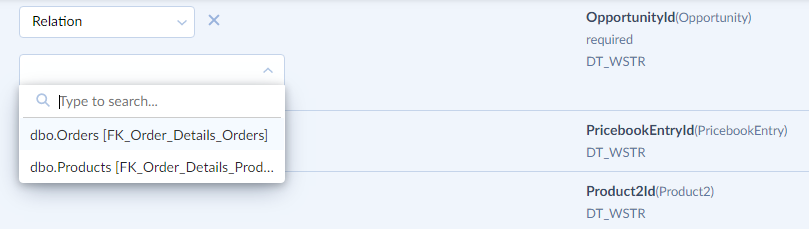
-
After this we map the PricebookEntryId foreign key field using the relation mapping. Click PriceBookEntryId and then, in the Column drop-down list, select Relation.
-
Select dbo.Products [FK_Order_Details_Products] in the drop-down list below (note that the name of the item to select may differ if you use schema other than dbo).
-
Click the Save button to save the task.
Now your integration is ready. The default integration name is Untitled. You can rename your integration by clicking and editing it. In our case, we rename it to SQL Azure Tutorial.
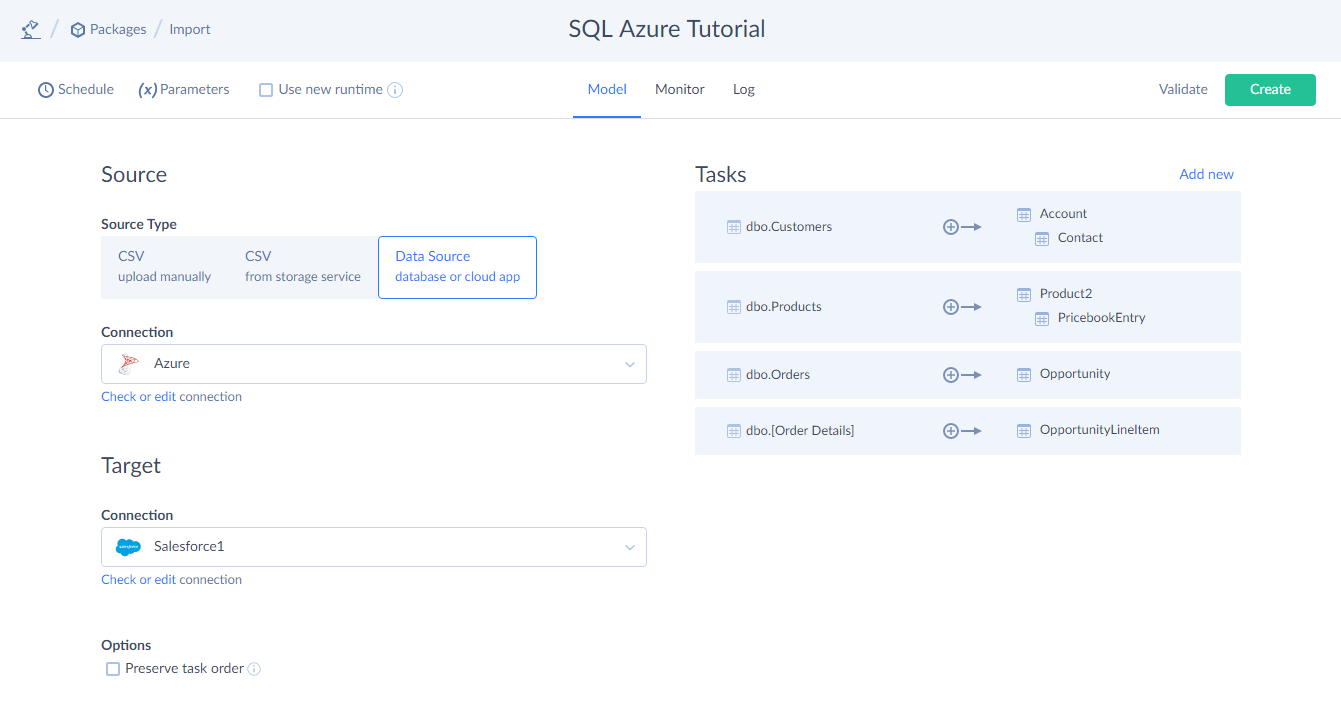
Click the Create button to create it. After this, you can run the integration by clicking the Run button. After you run it, you will see the results of integration execution on the Monitor or Log tabs. Click a certain integration run to open the History Details window with detailed information.