Greenhouse
Greenhouse is a recruitment and onboarding platform which optimizes and automates the hiring process.
Data integration: Skyvia supports importing data to and from Greenhouse, exporting Greenhouse data to CSV files, replicating Greenhouse data to relational databases and synchronizing Greenhouse data with other cloud apps and relational databases.
Backup: Skyvia Backup does not support Greenhouse.
Query: Skyvia Query supports Greenhouse.
Establishing Connection
To create a connection to Greenhouse, enter your API Key. If you want to load data to Greenhouse, and not just read data from Greenhouse, you also need to specify your User Id.
Getting Credentials
Getting the API Key
API Key — Greenhouse API token. You can read more about creating an Greenhouse API Key here.
You need sign in as a user that has the "Can manage ALL organization's API Credentials" permission in the "Developer permission" section to create the API key. To get a new Greenhouse API Key, perform the following steps:
-
Sign in to Greenhouse.
-
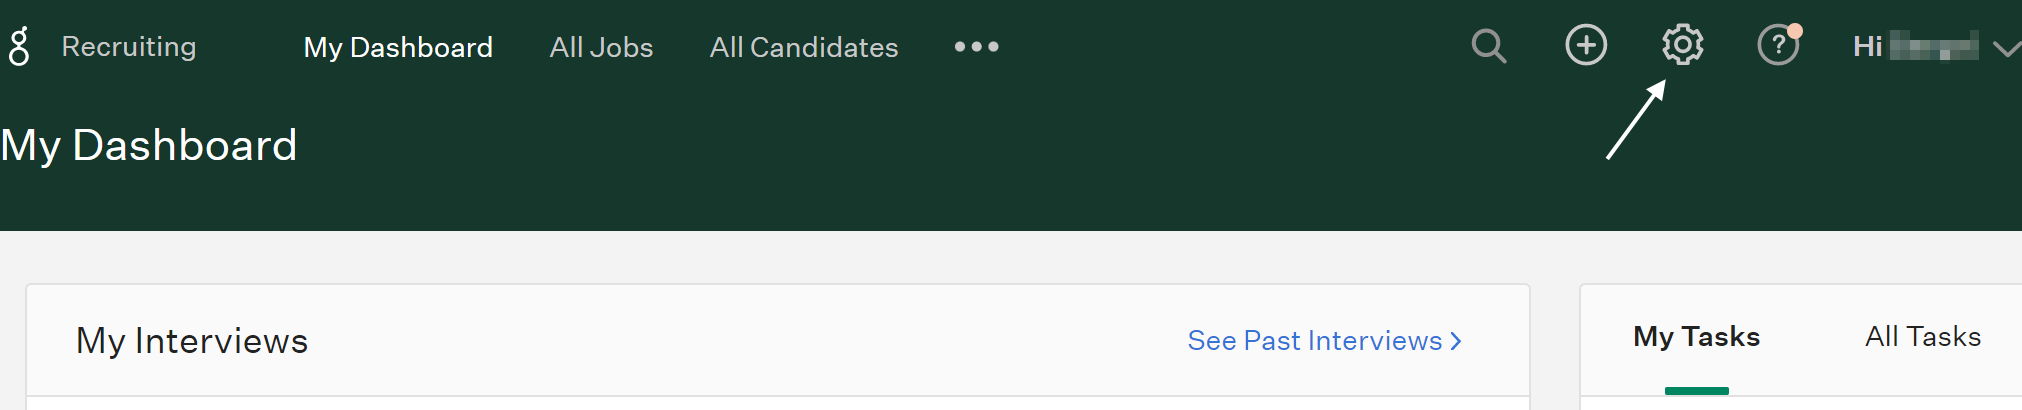
Click the gear icon in the top menu.
-
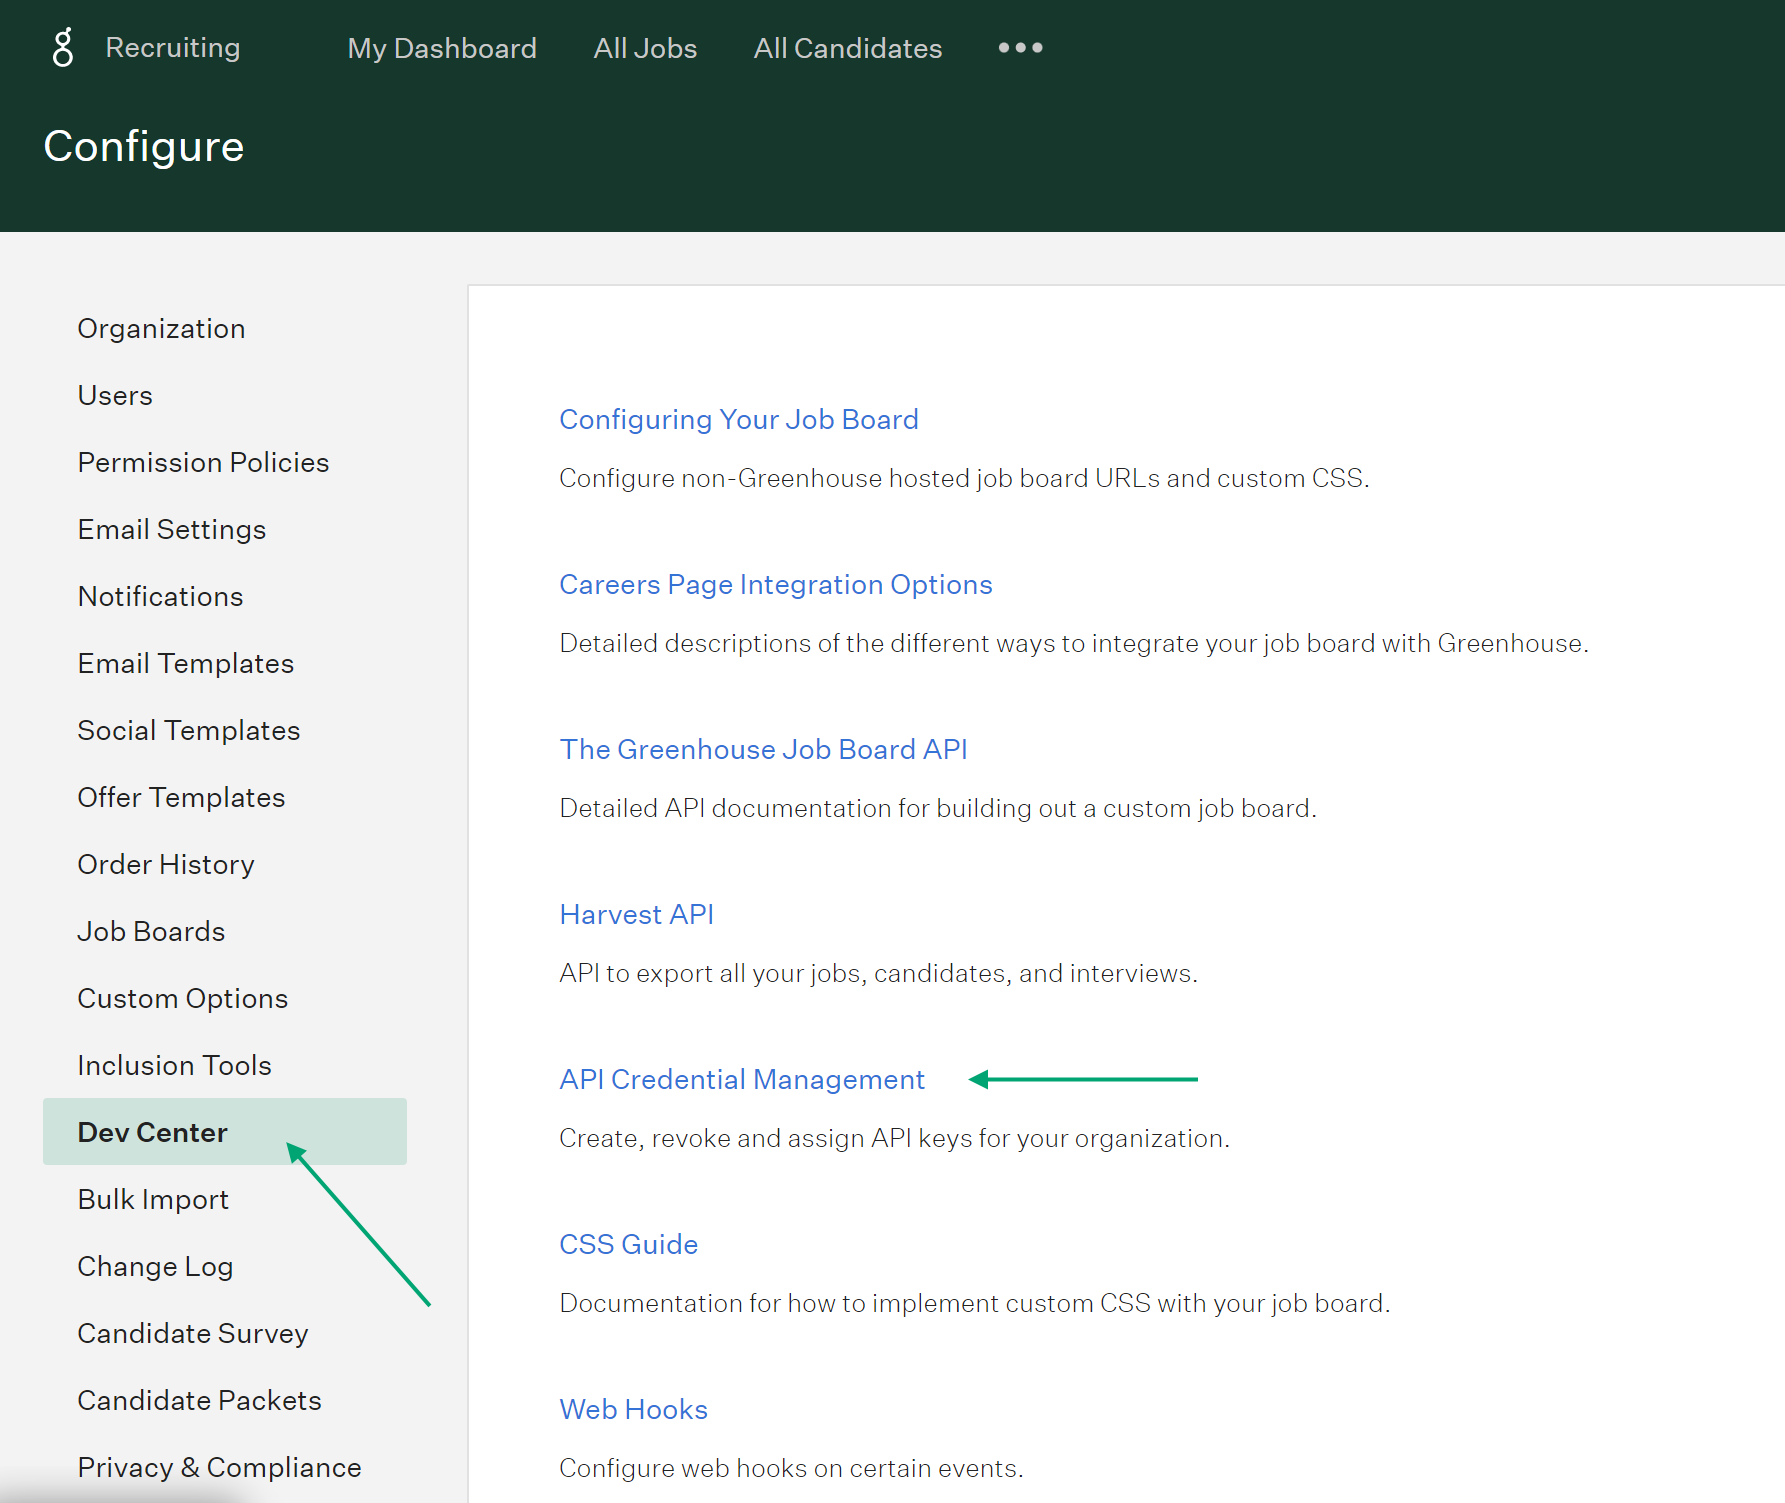
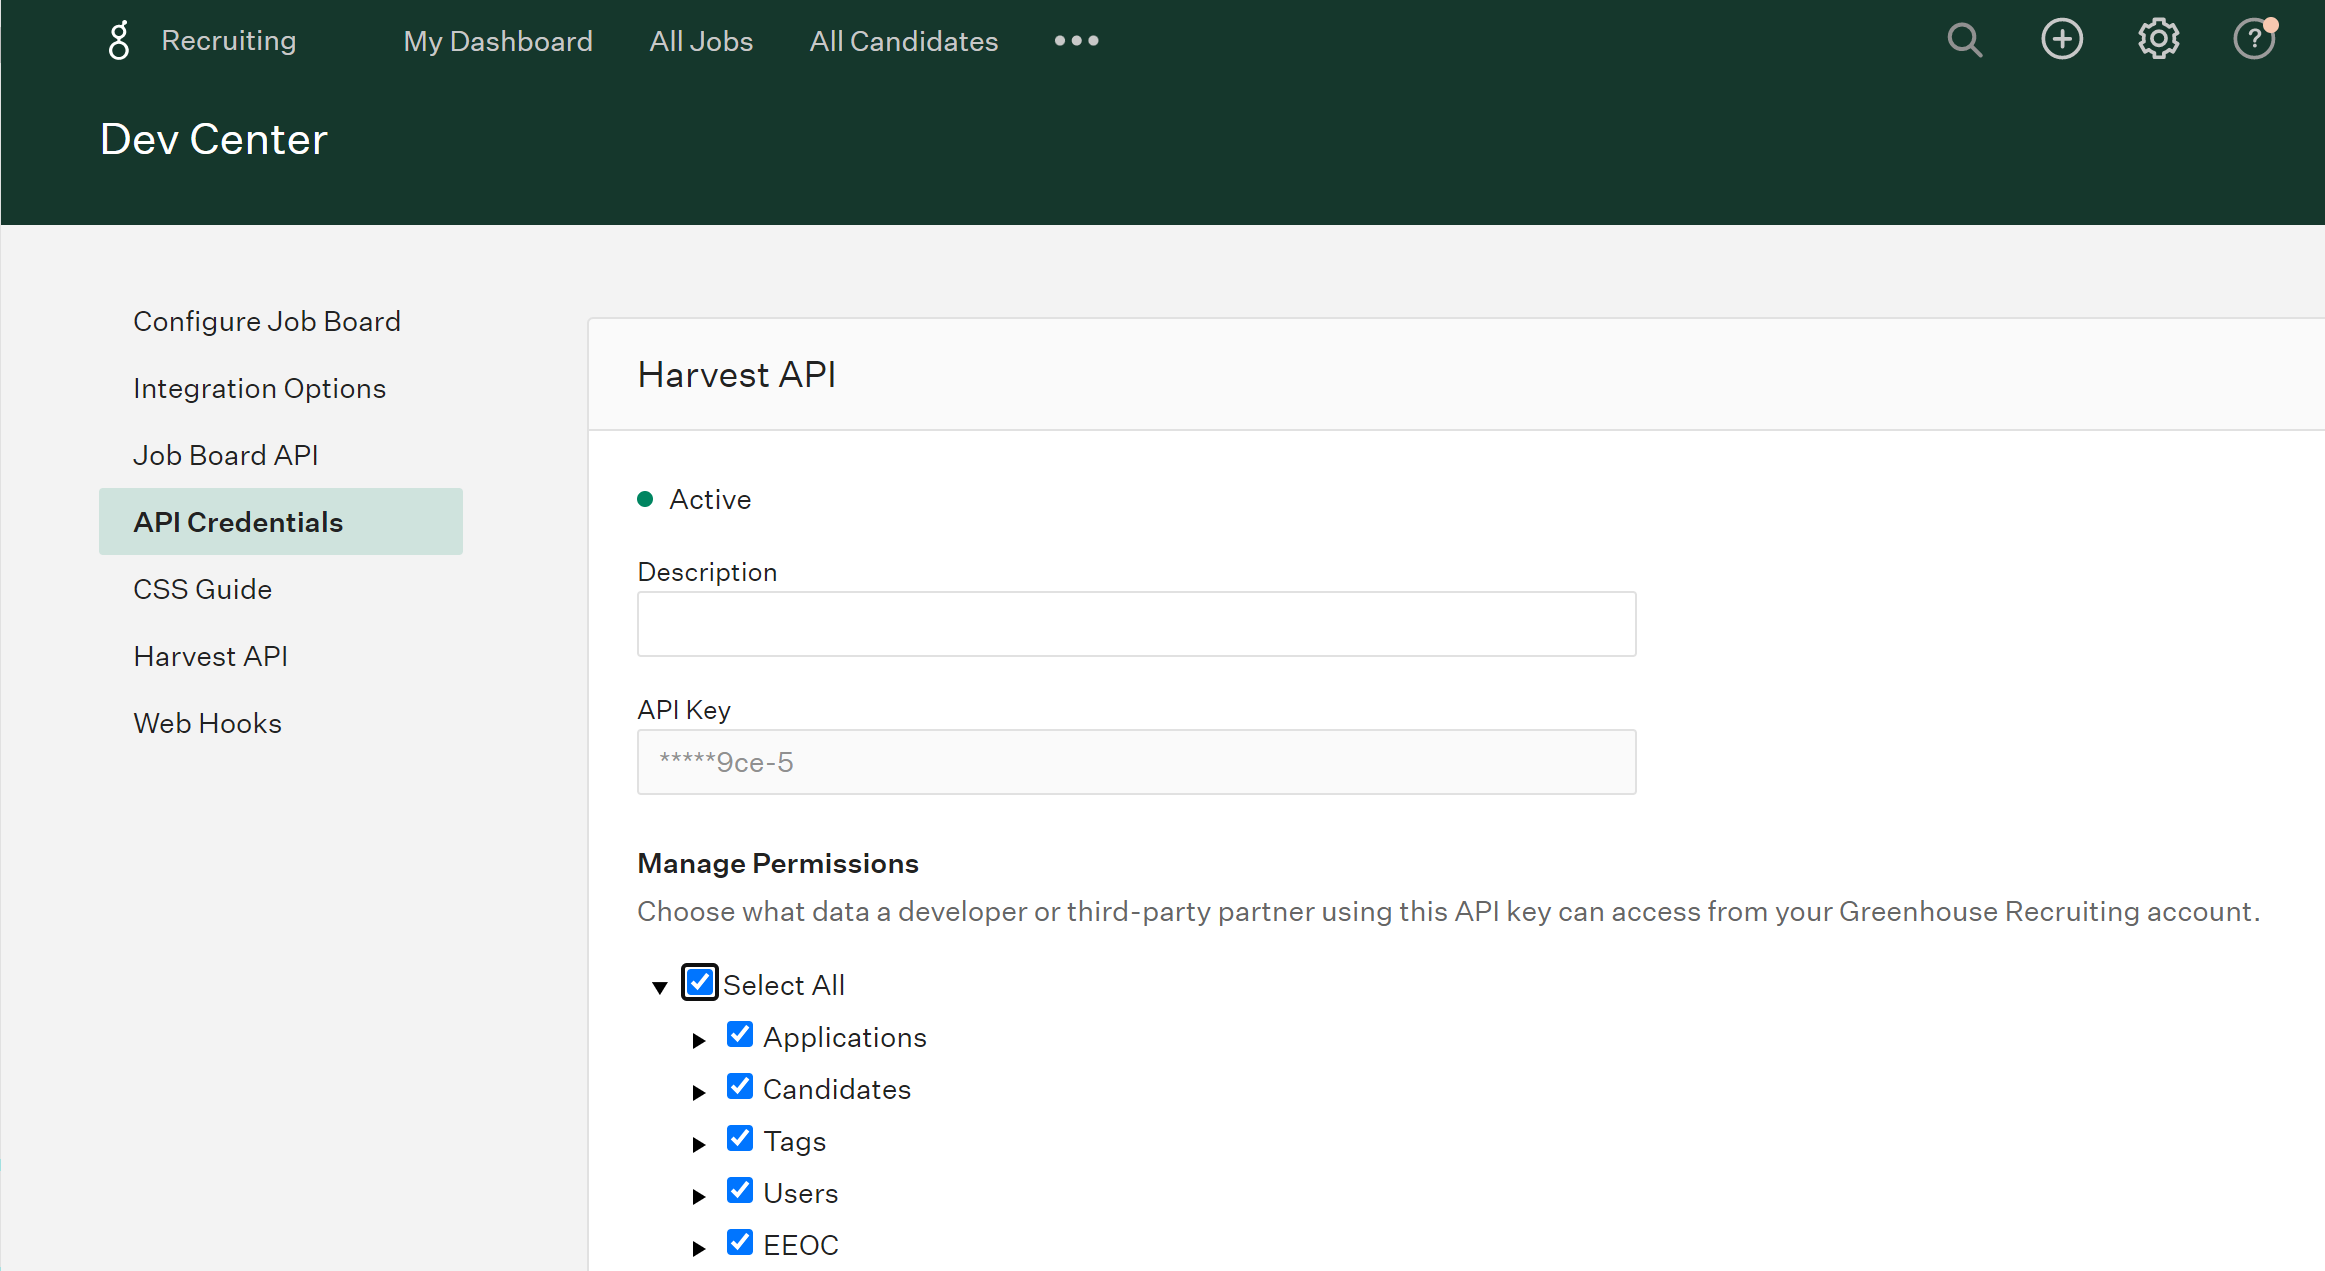
Select Dev Center and then API Credential Management.
-
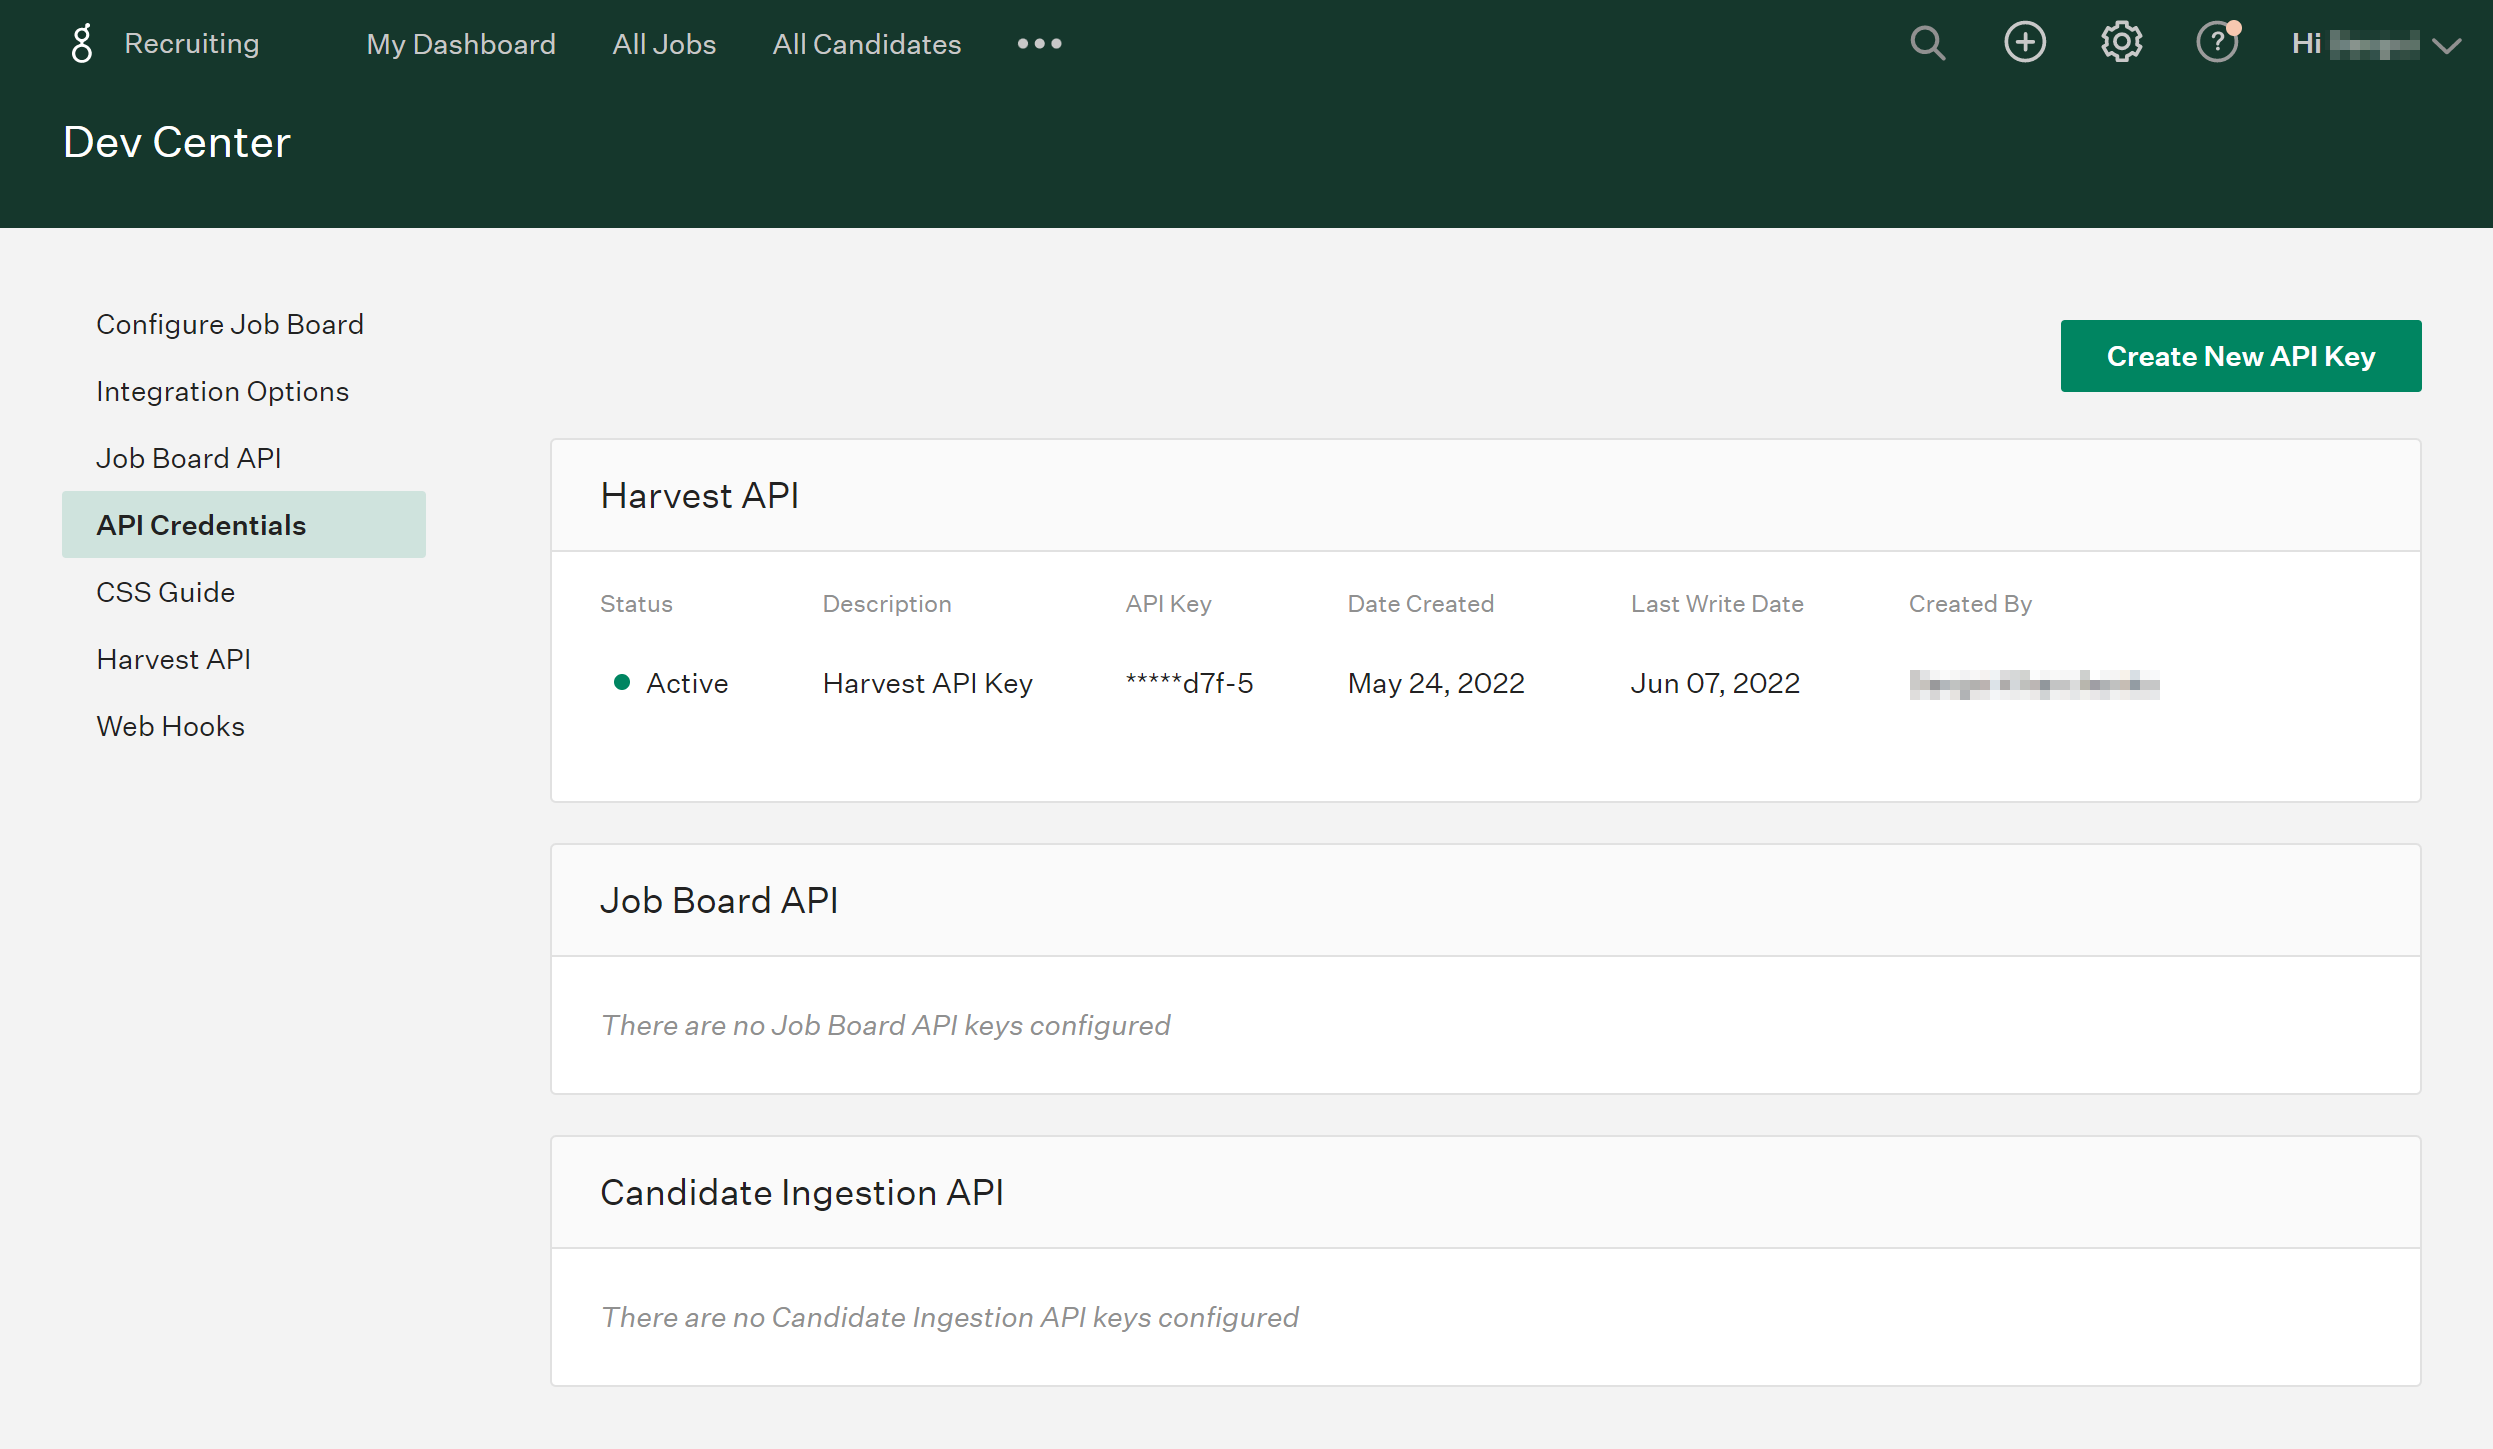
Click New API Key.
-
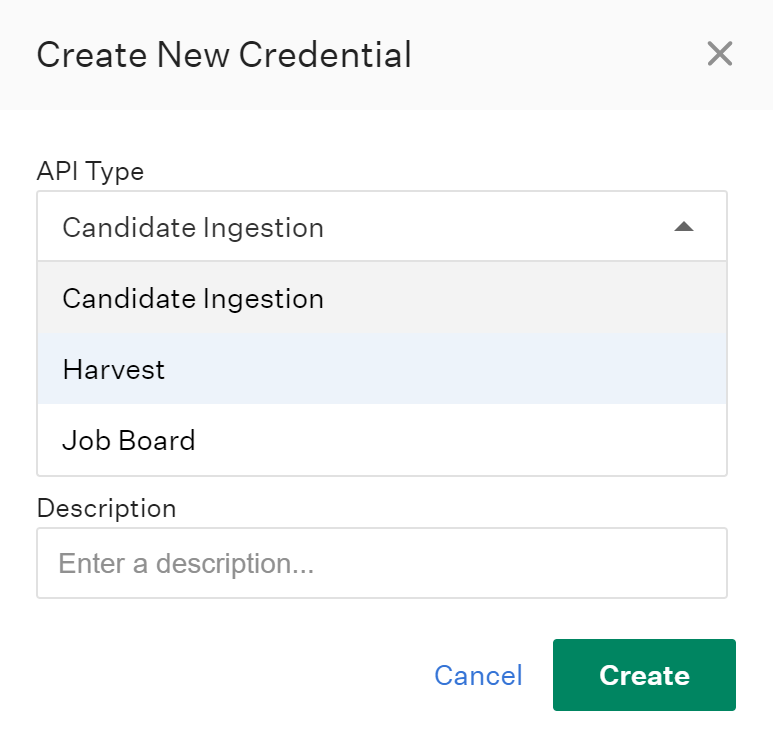
In the API Type list, select Harvest.
-
Enter an optional key description, and click Manage Permissions.
-
Copy the API Key and store it in a safe place.
API Key is available for full copying only once when it is created. Later on it will be half hidden. So paste your API Key to a safe place (word document, etc).
-
Select the Select All checkbox and click Save at the bottom of the page.
Getting the User Id
If you don't know your User Id, you can omit it for now. The easiest way to find your user Id is to create a read-only connection, first. Then obtain your User Id with above instructions, edit the connection, specify it and save the connection.
The easiest way to obtain your Greenhouse user ID is via one of the Skyvia tools — Query or Export. Both of these ways can be used even within the limits of the free pricing plan.
To get user ids via Query, perform the following steps:
-
Click +NEW in the top menu.
-
Under Query, click Builder.
-
Click Select connection on the left and select your Greenhouse connection.
-
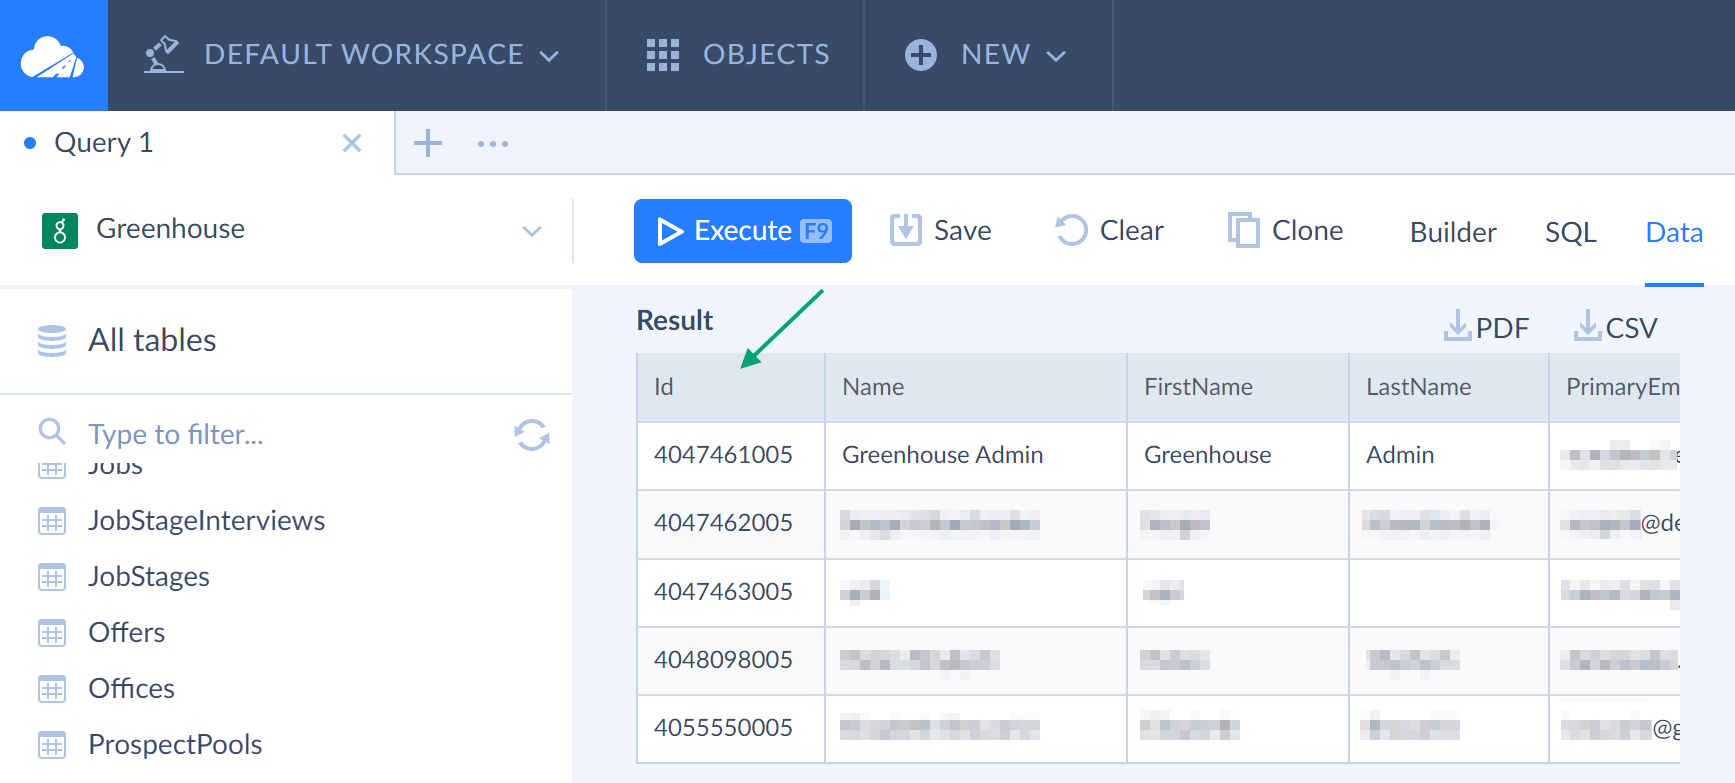
Scroll down the object list on the left till you see the Users object. Drag it to the Results pane.

-
After this, you can see your Greenhouse users' data. Find the corresponding user in the table and copy the value from the Id column of the corresponding row.
Alternatively, you can use Skyvia Export to get the contents of the Users object to a CSV file and copy User Id from this file.
Creating Connection
To start creating a connection, follow the below steps:
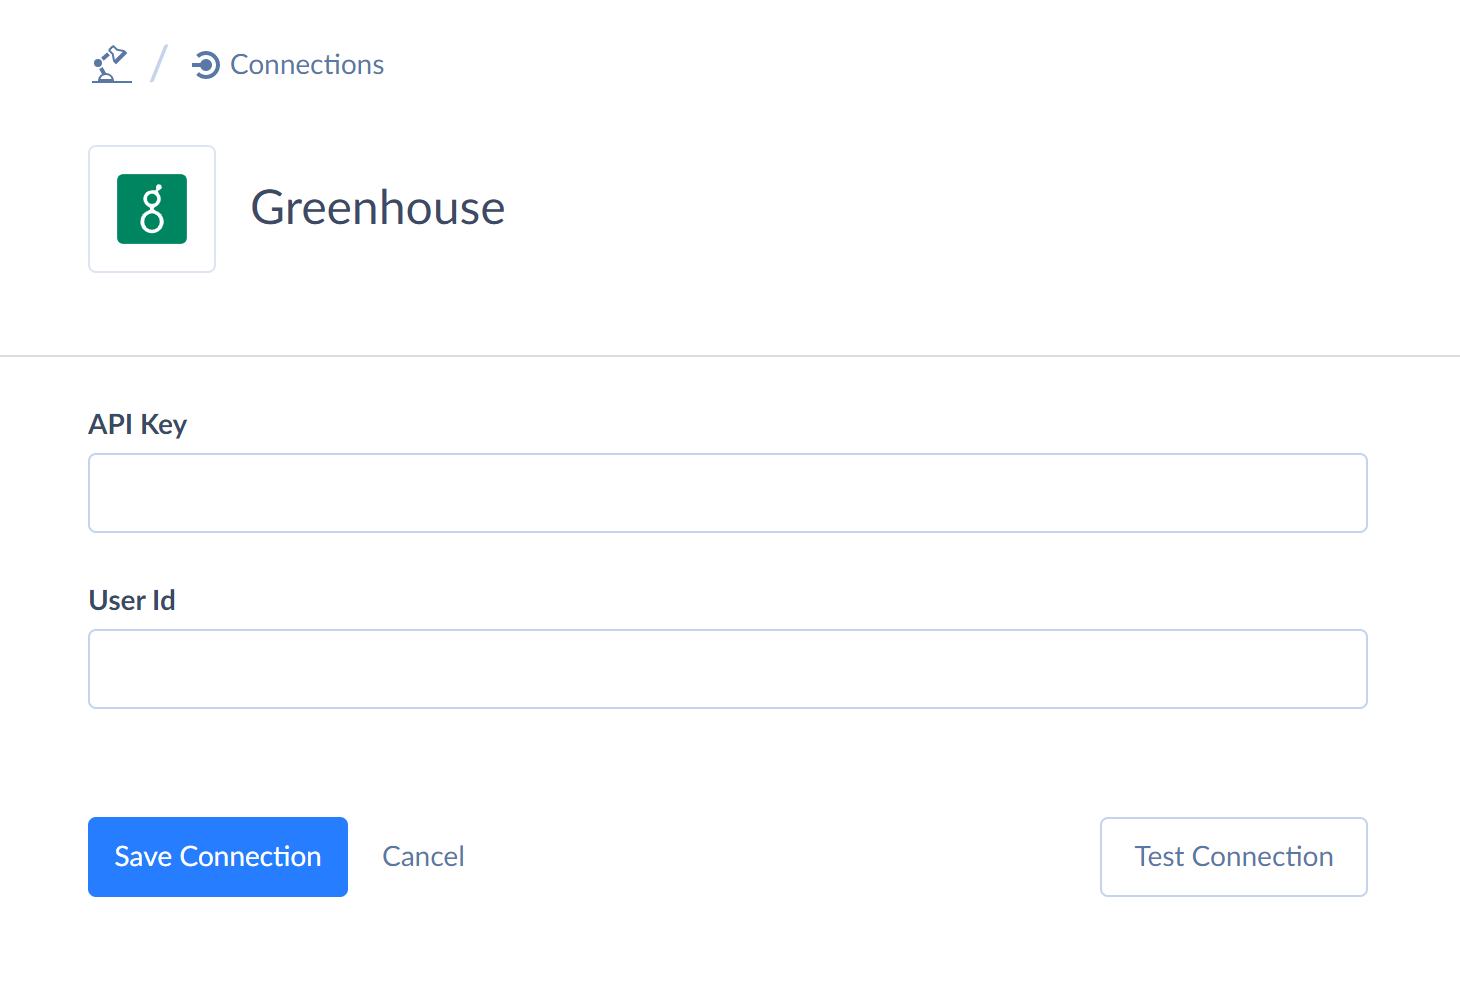
- In the Connection Editor, enter your API Key
- If you know your User Id (an integer value identifying the Greenhouse user) and want a read-write connection to Greenhouse, enter your User Id. Otherwise, the connection will be read-only.
Connector Specifics
Object Peculiarities
Candidates
When importing data to the Candidates object, specify the Applications field as a JSON array, as in example:
[{"job_id": 215725}, {"job_id": 185289}]
UserJobPermissions and UserFutureJobPermissions
UserJobPermissions and UserFutureJobPermissions objects do not support import of records with UserId containing Ids of a user with the job admin role.
CandidateTags
When importing data to the CandidateTags object, the TagId and CandidateId fields are not displayed in the integration logs after execution.
Applications
Greenhouse API supports several options of creating applications for candidates. Every option may have different set of fields required for mapping. Thus, we defined only the CandidateId as field as required for mapping. Other fields may be required depending on the option of record creation.
DML Operations Support
Skyvia supports DML operations for such Greenhouse objects
| Operation | Object |
|---|---|
| INSERT, UPDATE, DELETE | Applications, Candidates, ScheduledInterviews |
| INSERT, UPDATE | Departments, Jobs, Offices, Users |
| INSERT, DELETE | CandidateTags, Tags, UserFutureJobPermissions, UserJobPermissions |
| INSERT | JobOpenings |
| UPDATE | JobPosts |
Incremental Replication and Synchronization
Skyvia supports Replication with Incremental Updates for such Greenhouse objects: Applications, Candidates, EmailTemplates, JobPosts, Jobs, JobStages, Offers, ScheduledInterviews, ScoreCards, Users.
Skyvia supports Synchronization for such Greenhouse objects: Applications, Candidates, Jobs, ScheduledInterviews, Users.
Supported Actions
Skyvia supports all the common actions for Greenhouse.