How to Configure OData Endpoint in Simple Mode
To create an OData endpoint, click + Create New > OData Endpoint. With Skyvia's OData Endpoint Wizard, you can create an OData endpoint for your data source in just a few simple steps:
- Select Simple mode to define the endpoint model.
- Select a connection to your data source.
- Define the endpoint model — select the objects to publish and optionally adjust OData entities.
- Configure endpoint security settings.
- Specify the endpoint name and OData settings and click Continue.
Endpoint Connection
On the Set up connection step, select a connection or create a new one to publish data from.
You can create OData endpoints for all supported cloud applications, databases and cloud data warehouses.
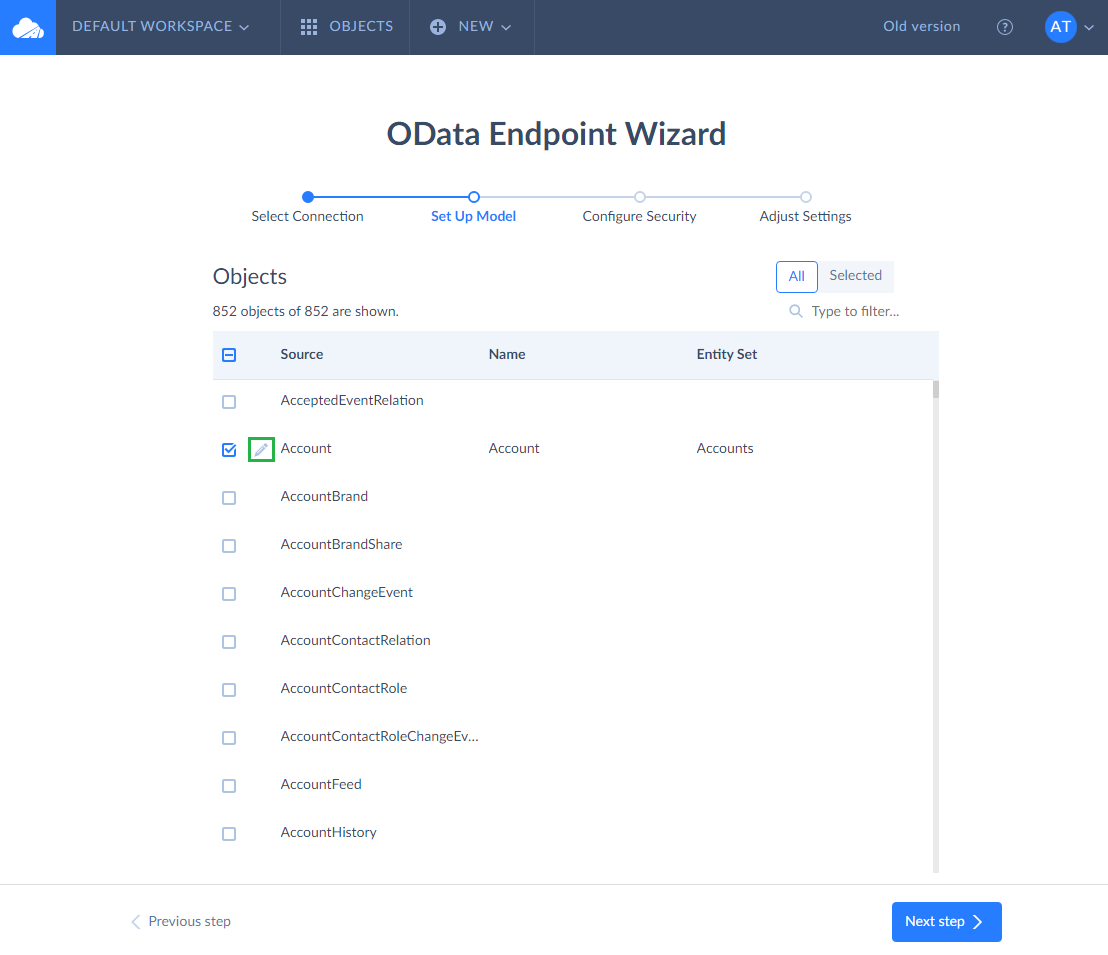
Selecting Data to Publish
On the Set up model step, the wizard displays the list of objects available for the selected connection. To add an object to the endpoint, simply select its checkbox. Select the checkbox in the header of the table with objects to add all of them. For added objects, Skyvia displays the generated Entity Type and Entity Set names.
By default, Skyvia exposes all the table fields via the OData protocol. If you want to adjust your entities, modify the autogenerated names, exclude some fields from endpoint, click its ![]() Edit Entity icon next to the selected checkbox.
Edit Entity icon next to the selected checkbox.
Endpoint Security
On the Configure security step, you can protect your endpoint. You can allow access to your endpoint only for specific IP addresses, and add user accounts with passwords to make your endpoint data available only for authenticated users. Check Security Settings for more information.
General Settings: OData Version, Access Mode
On the General settings step, you can specify the new endpoint name and configure additional settings: default OData protocol version and endpoint access mode.
The following OData versions are available:
- oData Last — the latest supported version is used. Currently this is OData v4.
- oData v4 — OData v4 is used. It uses JSON format for returned data and metadata.
- oData v1-v3 — OData v3 (backward compatible with OData v1) is used. By default, it uses ATOM format for returned data and metadata.
The selected version is the default and can be accessed through the base endpoint URL. Regardless of the selected version, Skyvia creates both OData v1-v3 and OData v4 endpoints, which are available by adding odata3/ or odata4/ to the endpoint URL.
By default, Skyvia creates an endpoint with read and write access. Write operations are available only if the source supports updates for the tables or objects. To prevent data modifications, switch to the Read only mode.