Easy Importing Invoices and Customers Between QuickBooks Online Accounts
In this tutorial, we will show how to import Customers and Invoices from one QuickBooks account to another one. If the Customer object is simple for import, the Invoice object is not so easy in mapping. The main problem of importing the Invoce object is that its Line column is not represented as separate fields, it has an array data structure, and if during transfer of invoices from one QuickBooks company to another, you need to make changes to the quantity of goods for each invoice for example, you should specify it somehow inside json strings, which is quite inconvenient and problematic.
However, when you select the Nested Objects checkbox in your import, the nested Line object is divided into separate fields, and it becomes possible to use Expression or Constant, then map necessary columns easily and import data with changes made.
To find out how to create an import to load customers and invoices into QuickBooks Online and configure mapping settings of nested objects correctly, read our step-by-step instruction below.
Please note that the Nested Objects functionality is available when the new data integration runtime is selected.
Make sure you have selected the Use new runtime checkbox in your import before adding a task.
Creating Connections
First, you need to create connections in Skyvia, which you will use as source and target in your import.
As we are going to import Invoices and Customers between two different QuickBooks accounts, we create two connections to two QuickBooks accounts. One connection will serve as source, another one — as target.
Read the QuickBooks topic to find out how to configure settings of the necessary cloud app and check the Connections topic to know how to create a connection following several simple steps.
Creating Integration for Importing into QuickBooks
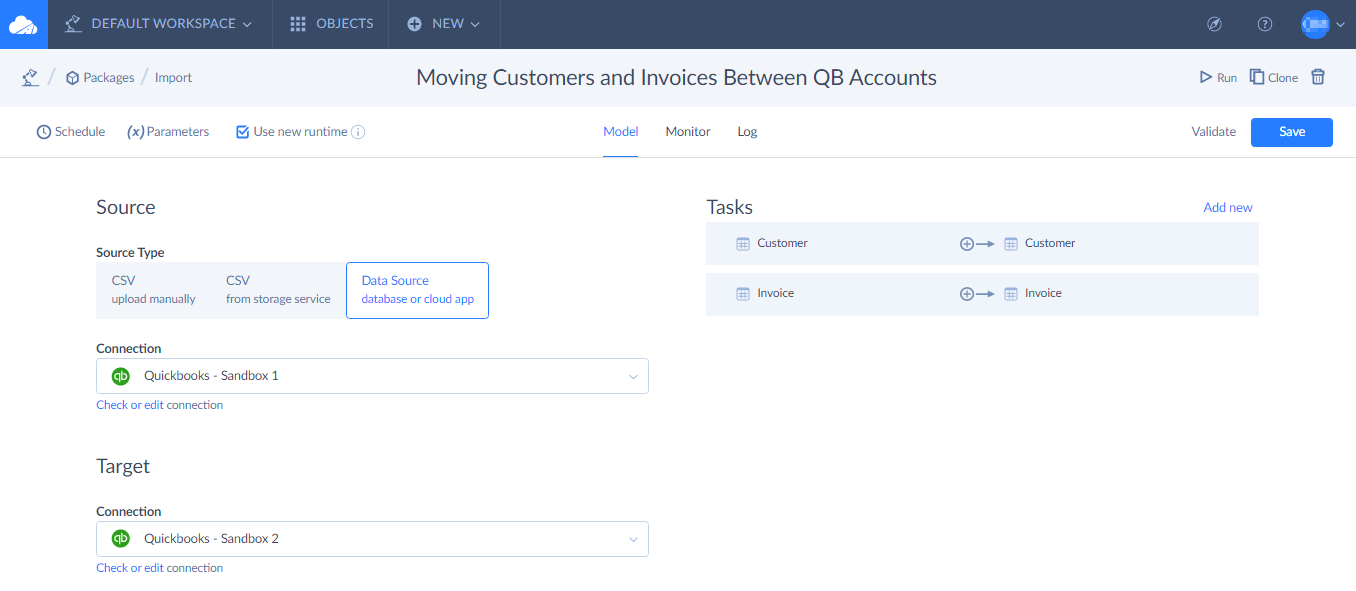
To create and run a new integration, you need to adjust general integration settings and configure task editor settings. Follow these simple steps to adjust general integration settings:
-
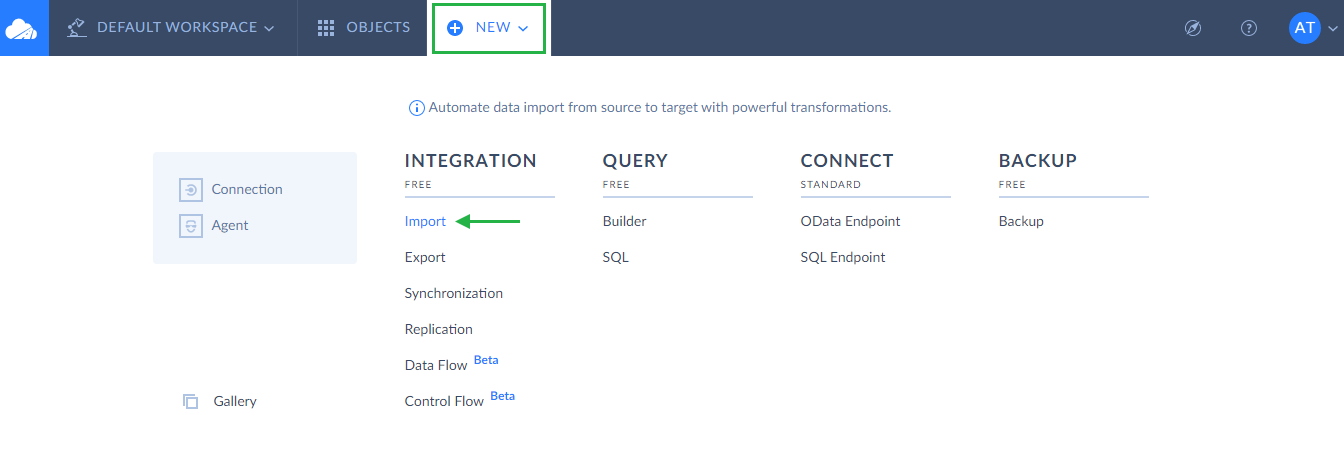
Click +NEW in the top menu;
-
In the Integration column, click Import;
-
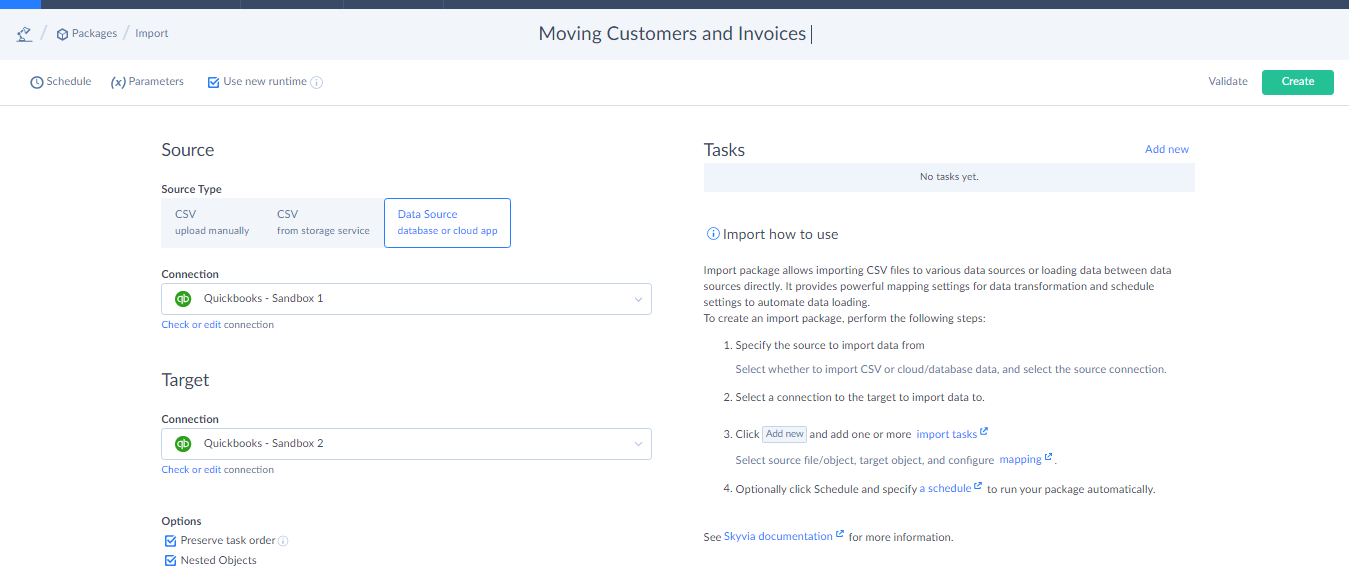
In the open integration editor, rename your integration by clicking and editing the integration name. The default integration name is Untitled. Please note that if you omit this step, the integration name will remain Untitled in the list of created integrations.
-
Select the Use new runtime checkbox to activate the Nested Objects option;
-
Click Data Source database or cloud app and select one QuickBooks connection as source from the drop-down list;
-
Select another QuickBooks connection as target from the next drop-down list;
-
Select the Preserve task order checkbox to run your tasks exactly in the same order you create them in the import. This feature is optional;
-
Select the Nested Objects checkbox to be able to map the columns of the nested QuickBooks Line objects;
-
Click the Add new link to open the Task Editor.
Configuring Task Editor Settings
Each import can contain one or more import tasks, which are configured in the convenient task editor. For our scenario, we need to create and configure settings for two import tasks.
The first task will contain settings and mapping for importing QuickBooks Customers, the second one — for importing invoices into QuickBooks.
Creating Task to Import Customers
Source Definition Tab
On this task editor tab, you select a source object to load data from and if needed specify filter settings to filter data being imported. To configure settings, perform the following quick steps:
-
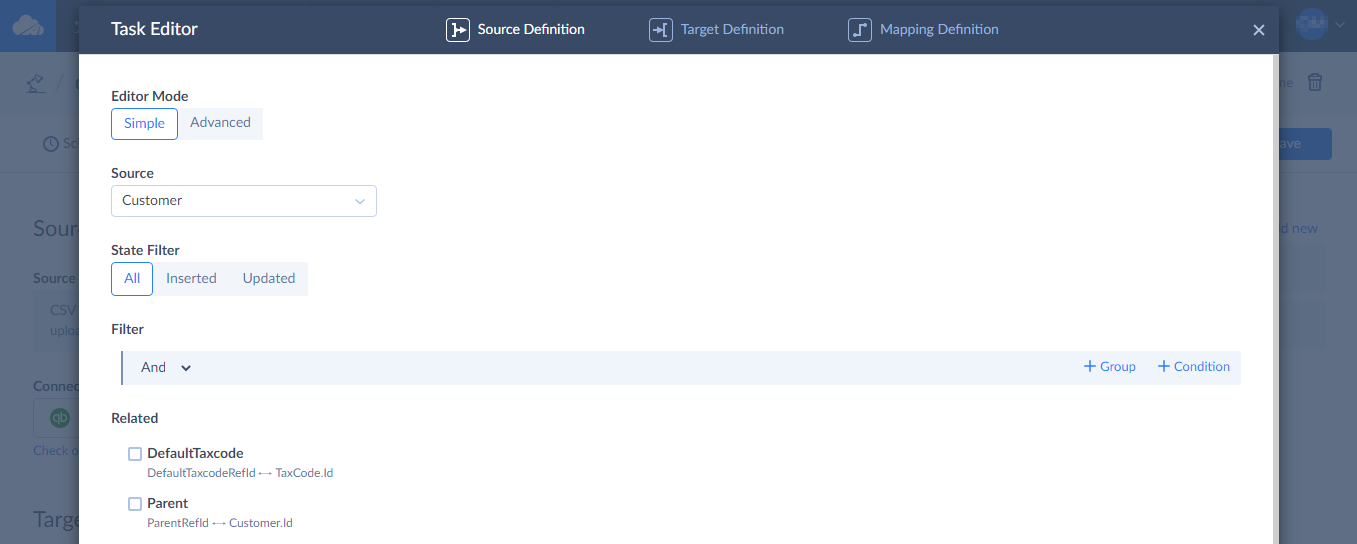
When the task editor opens, select the task editor mode you want to work with — Simple or Advanced. You can read more about task editor modes here.
-
Next select the Customer object from the Source drop-down list.
-
Click the Next step button at the bottom of the window to switch to the next editor tab.
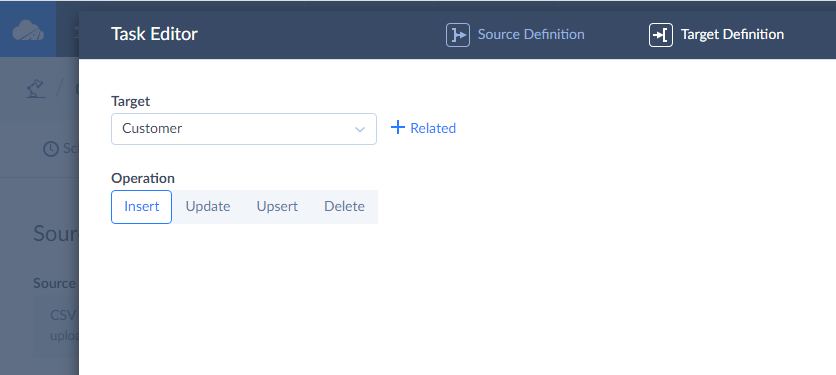
Target Definition Tab
-
On the Target Definition tab, select Customer from the Target drop-down list.
-
Select an operation type you want to use (for our scenario, we select Insert).
-
Click the Next step button to continue.
Mapping Definition Tab
Since we import Customers from one QuickBooks account to another one, most columns are identical and are mapped by Skyvia automatically.
The DisplayName column is a required one to run the integration successfully. Make sure it is mapped via Column mapping or use another type of mapping if need, for example Expression mapping as shown below.

After saving the first task, proceed with creating the second one.
Creating Task to Import Invoices into QuickBooks
Source Definition Tab
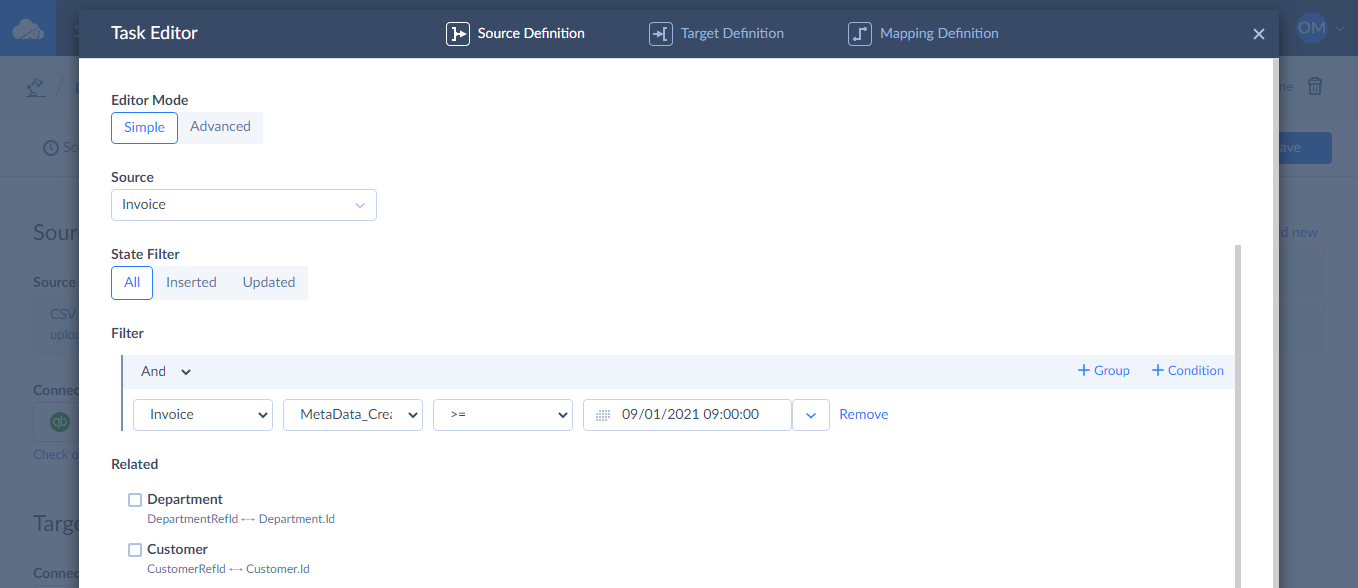
On this tab, repeat the same steps as for the Customer object. Select the source Invoice object to import and if needed specify filter settings to filter data being imported. Follow the steps as shown below:
-
When the task editor opens, select the task editor mode you want to work with — Simple or Advanced.
-
Next select the Invoice object from the Source drop-down list.
-
Specify one filter condition or multiple conditions to select records from the Invoice object by clicking the +Condition button.
Let us suppose we need to import all Invoices created from September 1, 2021 (inclusive) from one QuickBooks account to another one. We set the filter condition like this:
-
Click the Next step button at the bottom of the window to switch to the next editor tab.
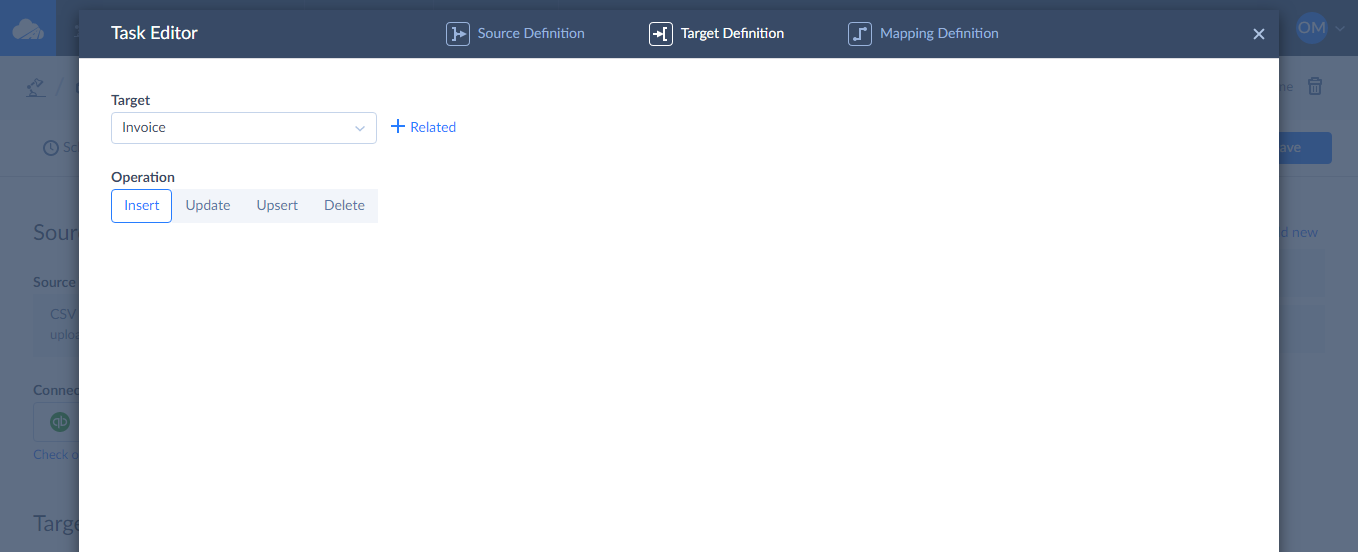
Target Definition Tab
-
On the Target Definition tab, select Invoice from the Target drop-down list.
-
Select an operation type you want to use (for our scenario, we select Insert).
-
Click the Next step button to continue.
Mapping Definition Tab
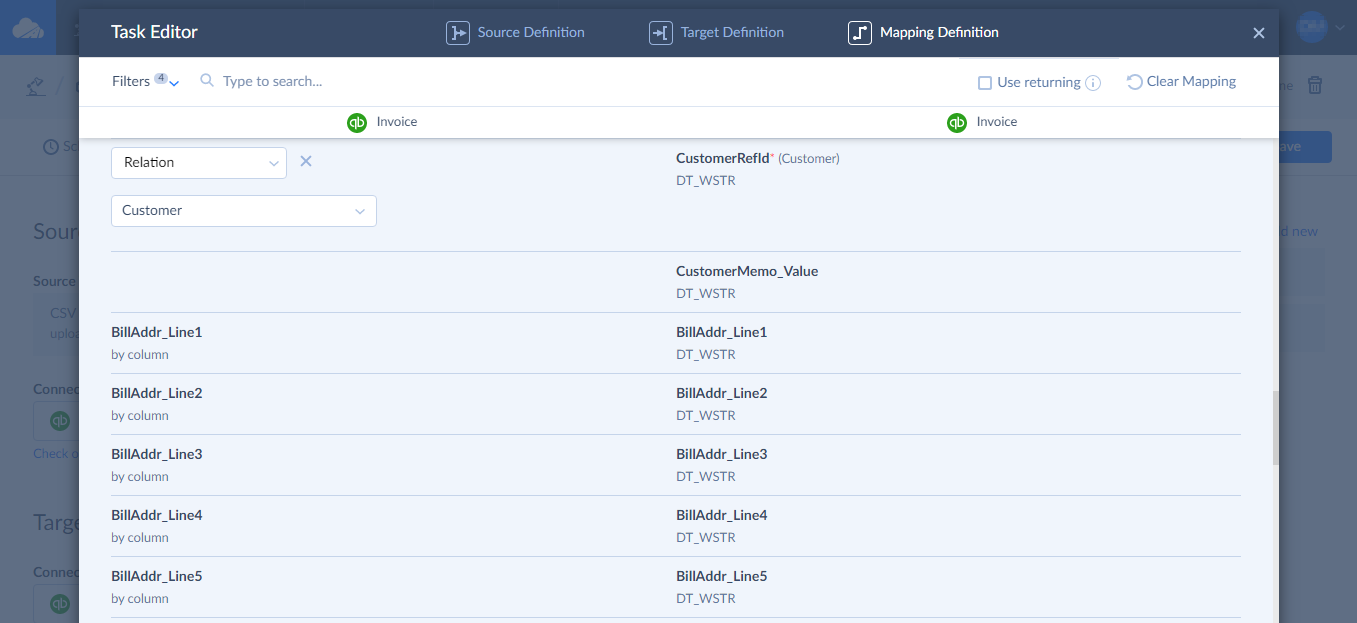
Since we import Invoices from one QuickBooks account to another one, most columns are identical and are mapped by Skyvia automatically. The mapping of the nested Line column and its collections should look correct as well. Make sure that everything fits your needs and change mapping for the listed fields if necessary.
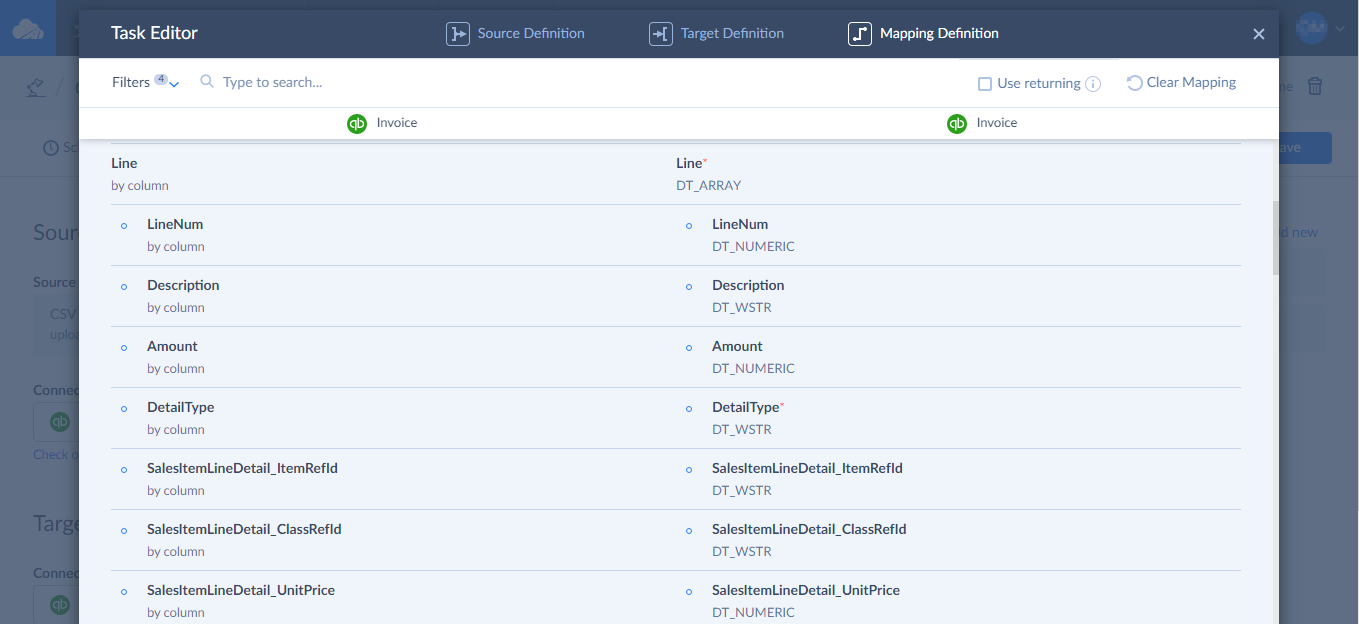
Please also note that there is a relation between Customer and Invoice objects. This relationship is actually determined by the CustomerRefId field of the Invoice object. To import these source objects with related data, you need to set the relation.
For this, click the CustomerRefId column, select Relation mapping and map by Customer.
Saving Import Task
When everything is ready, click Save to save the second task. You will see created tasks in your integration details page. If you selected the Preserve task order checkbox in your integration settings, tasks are executed in the same order they've been created in the integration.
Running Import
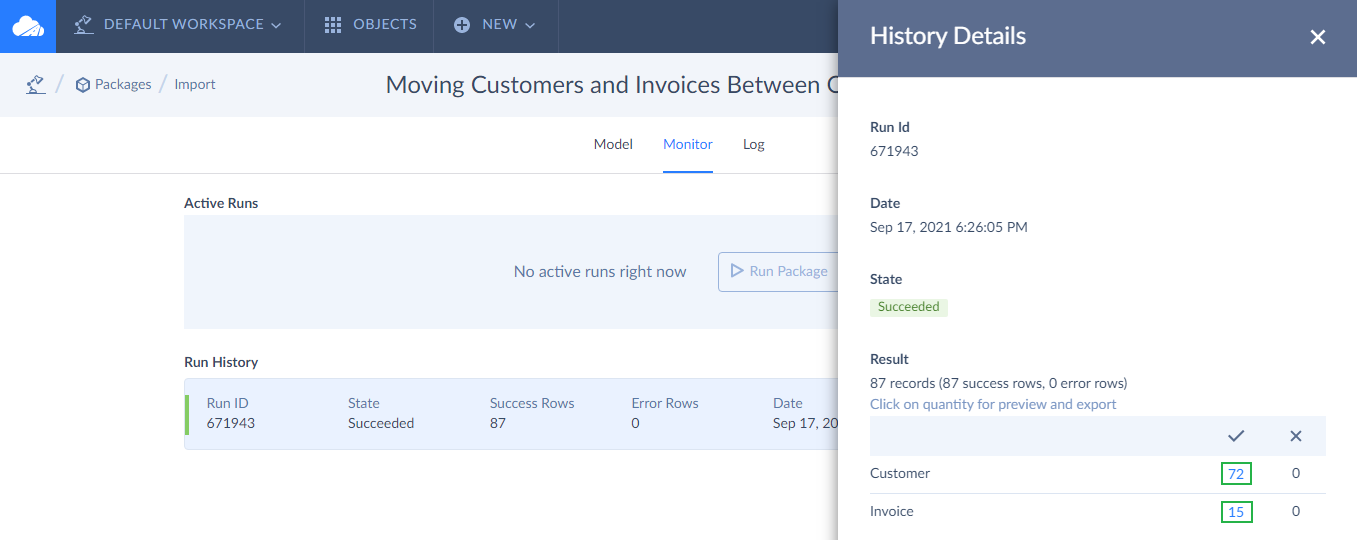
Сlick Create to create the integration and run the import process to import Invoices and Customers between QuickBooks accounts. You can check whether results are successful on the Monitor tab of your integration.
On the Monitor tab, click the Run ID to open the History Details window. You will see the Result table with two objects (Customers and Invoices) and the number of successful rows in each of them. The imported rows are displayed as links. You can click a link to download a CSV file with the result values of the mapped target columns.