Triggers
Trigger is the starting point of every automation. It looks for a specific event or a condition to happen, and launches the automation flow when it occurs. The automation can be run manually, based on the schedule or the event. There is a trigger type for each case.
Trigger Types
Skyvia provides Manual, Connection, Run on Schedule, and Webhook trigger types. Choose one of them to define what type of event triggers the automation.
Manual
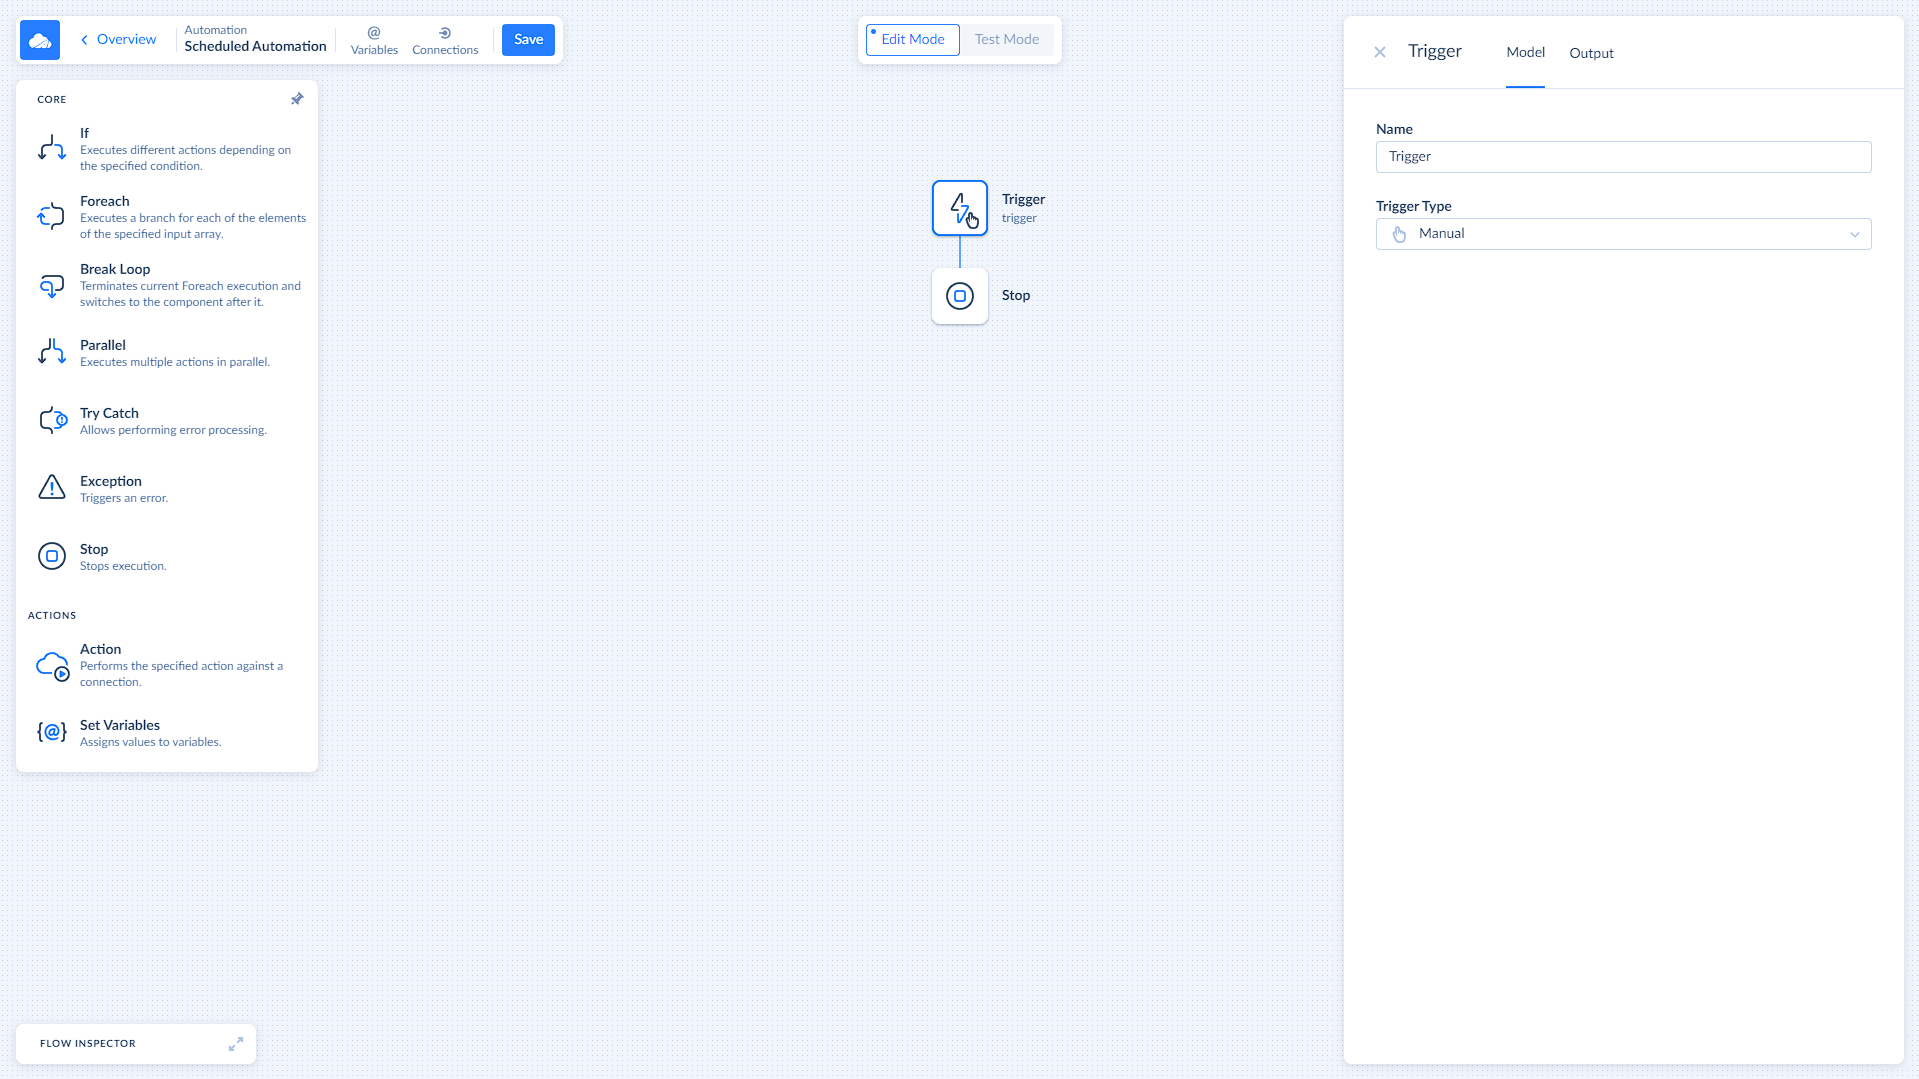
Choose Manual to start automation on demand by pressing Run on the automation management pane.
Run on Schedule
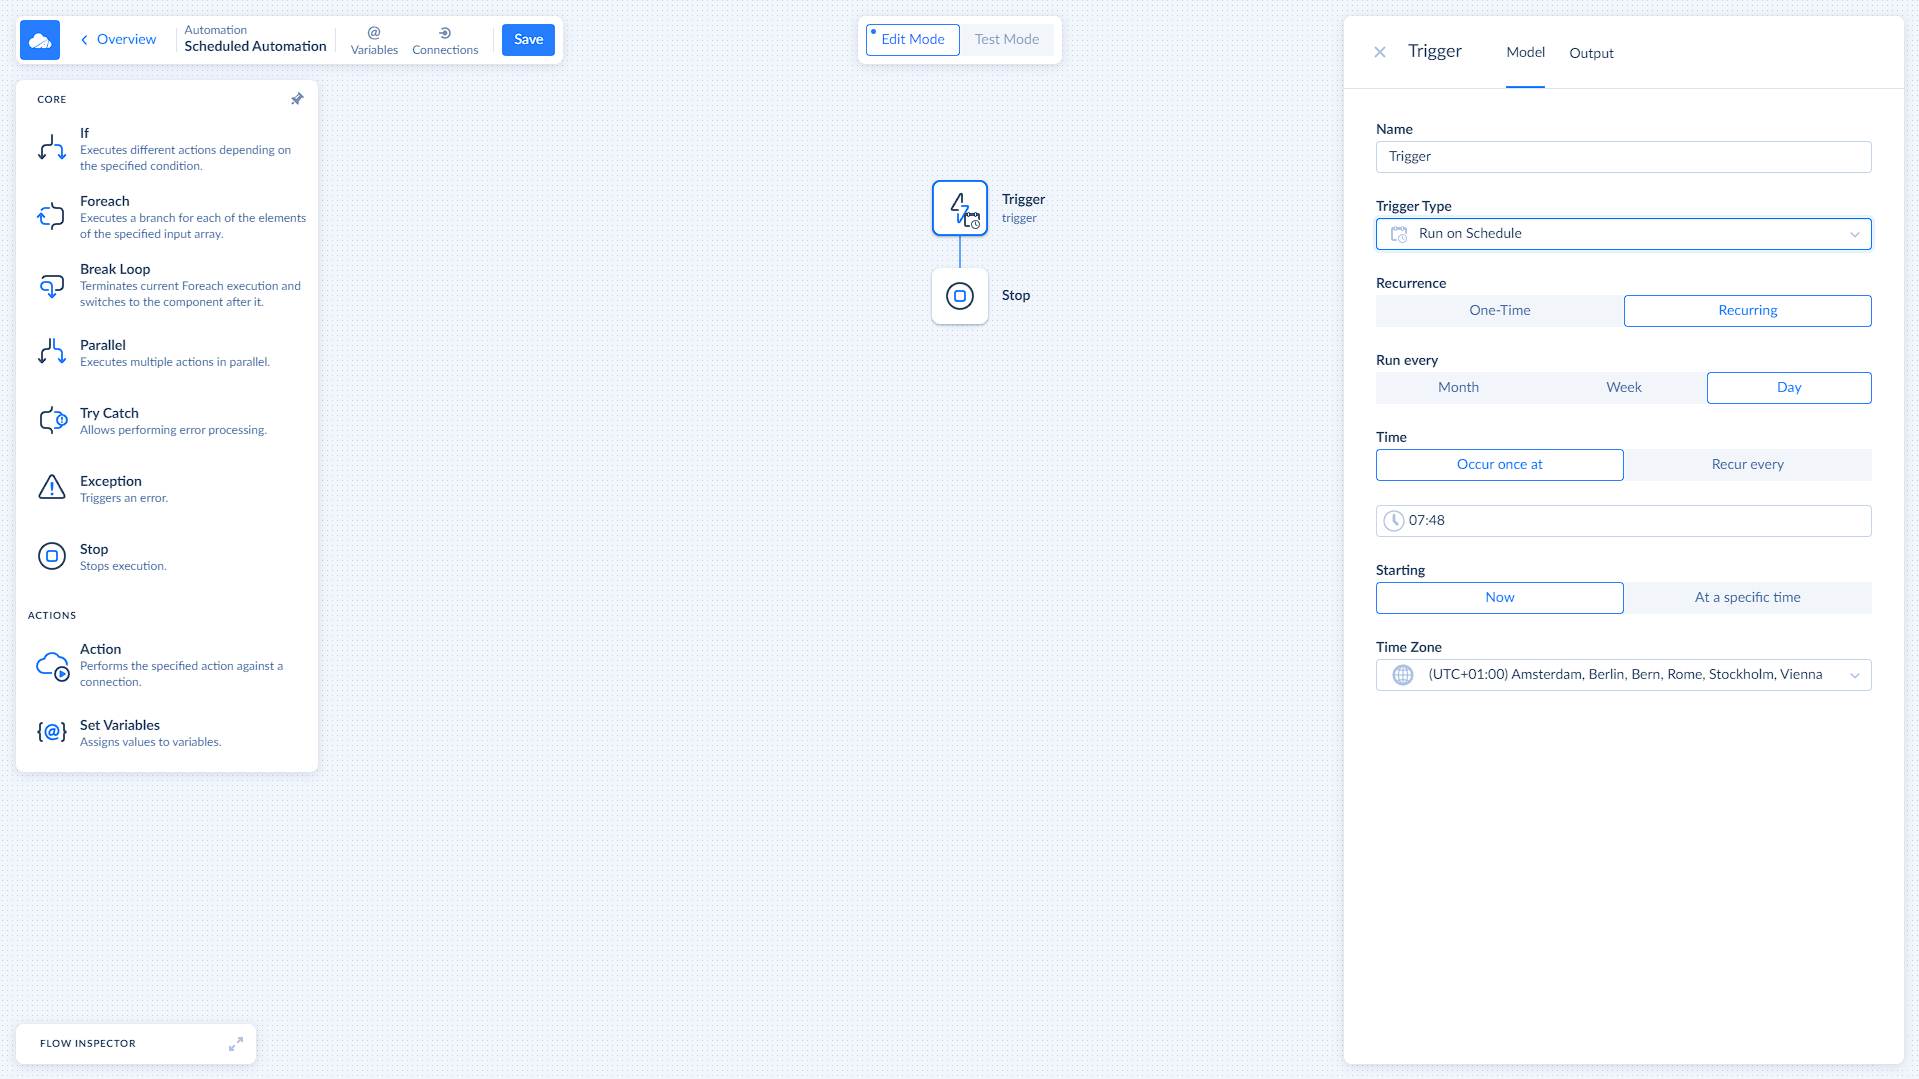
Сhoose Run on Schedule to set a schedule for the automation runs or create a delayed run.
Schedule Settings
| Setting | Description |
|---|---|
| Recurrence | Includes two options: One-Time and Recurring, to either set a delayed start or create a schedule |
| Run Every | Defines the frequency of the automation runs. |
| Time | Defines the time of the day to run the automation. |
| Starting | Defines the starting date of the schedule. |
| Time Zone | Required Parameter. Defines the time zone to line up with a schedule. |
Connection Triggers
Connection trigger is set up to monitor a specific event or condition in the chosen data source. When the event occurs, trigger detects it and creates a queued execution. If there is no active execution, it starts the automation. You can check and modify the queue and status of executions on the monitor tab.
Connection triggers are connector-specific, trigger availability depends on the chosen connection.
Connection Trigger Types
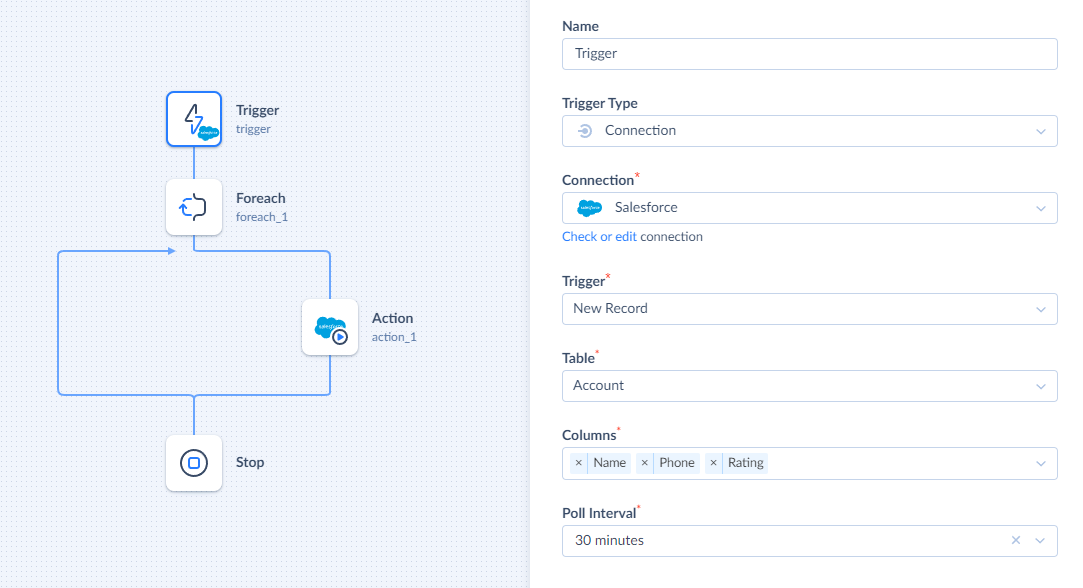
Currently, only the Polling Trigger type is available in Connection triggers. Polling triggers check the data source for events according to the time interval specified in the Polling Interval setting. For example, the New Record trigger below checks the Account object for new records every 30 minutes and compares the start date of the check with the record's CreatedDate value. If it finds a record that appeared since the last check, Skyvia creates a queued execution for each new record and adds it to the end of the queue. If there are no active executions, Skyvia runs the Automation. If there is an active execution, newly added executions will run according to their position in the queue. You will get the values of the selected columns in the Trigger payload.
When the check starts, Skyvia creates a current check timestamp, looks for the updates since the last check, and makes the current check timestamp a starting point for the future checks. When you disable the automation, polling trigger stops checking for the events. Next time you enable the automation it starts checking from either the last check date or the last event found depending on the Connector used in your automation.
Connection Trigger Settings
Trigger settings differ from trigger to trigger, while also depending on the chosen Connector. For example, New Record trigger will have a different set of settings for SQL Server and Salesforce connections.
Poll Interval
Each polling trigger has a poll interval setting that determines the time interval between the event checks. Note, that the less the interval is, the more API calls will be involved.
Trigger Condition
Each connection trigger has a Trigger condition setting. Use it to filter and validate your events before the automation execution. To set up a trigger condition, select Expression, and use Expression Editor. Columns that you choose in the trigger settings will be available as properties in the Expression Editor.
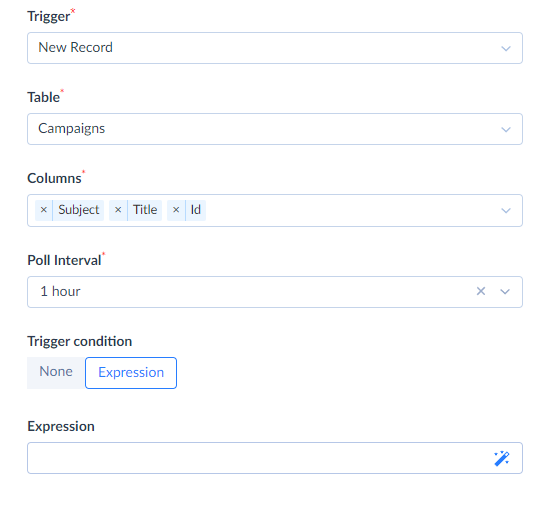
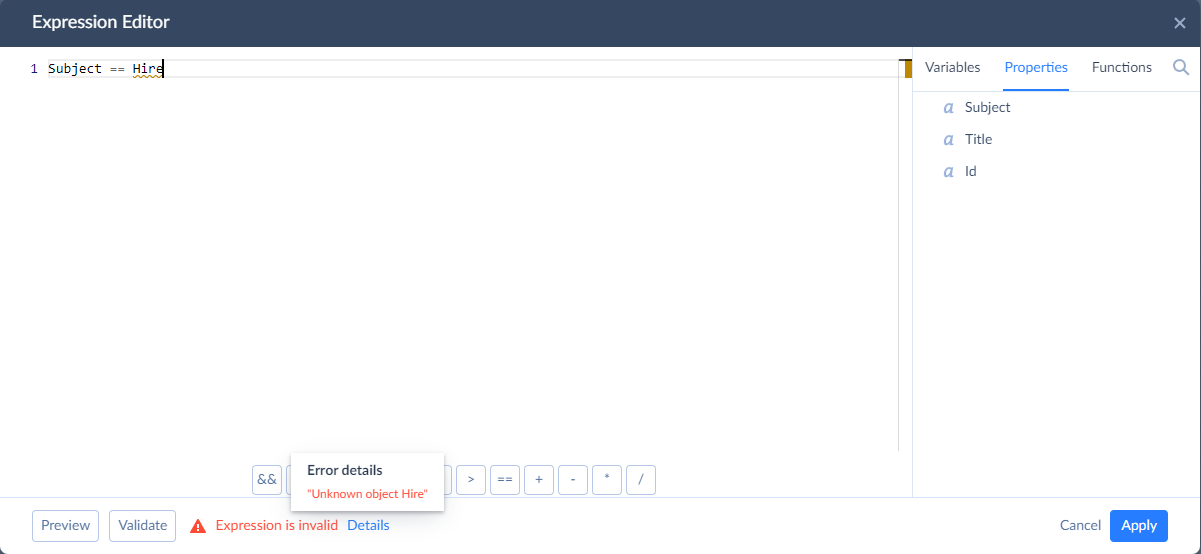
If the expression is not valid you will recieve an error message notification. For example, if you forget to cover your string value with quotes you will receive the following error, as Skyvia treats Hire as an object in this case:
You may face the case when the expression is valid, but the error appears during the processing of data by the expression. For example, the MyAge == int32(Age) expression is valid but if Age returns an invalid string, you will receive an error during the automation execution and it will be completed with a failed status. To track the failure reason, use the Debug page. In the case described above you will see a trigger-related error.
Webhook Triggers
Webhook trigger allows you to create a webhook URL and send data to it from any external app or service. Once Skyvia receives your request, it will trigger the automation. This approach enables real-time workflow automation.
Setting Up a Webhook Trigger
To start configuring a Webhook trigger, select it and click Start setup.
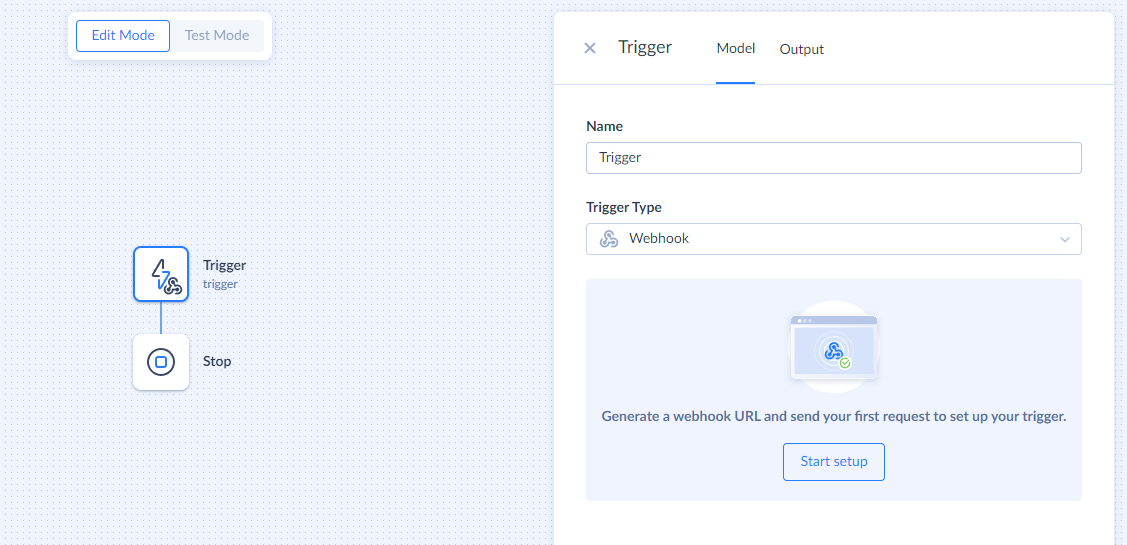
The setup process consists of a three steps: generating a webhook URL, receiving a webhook, and checking the results.
-
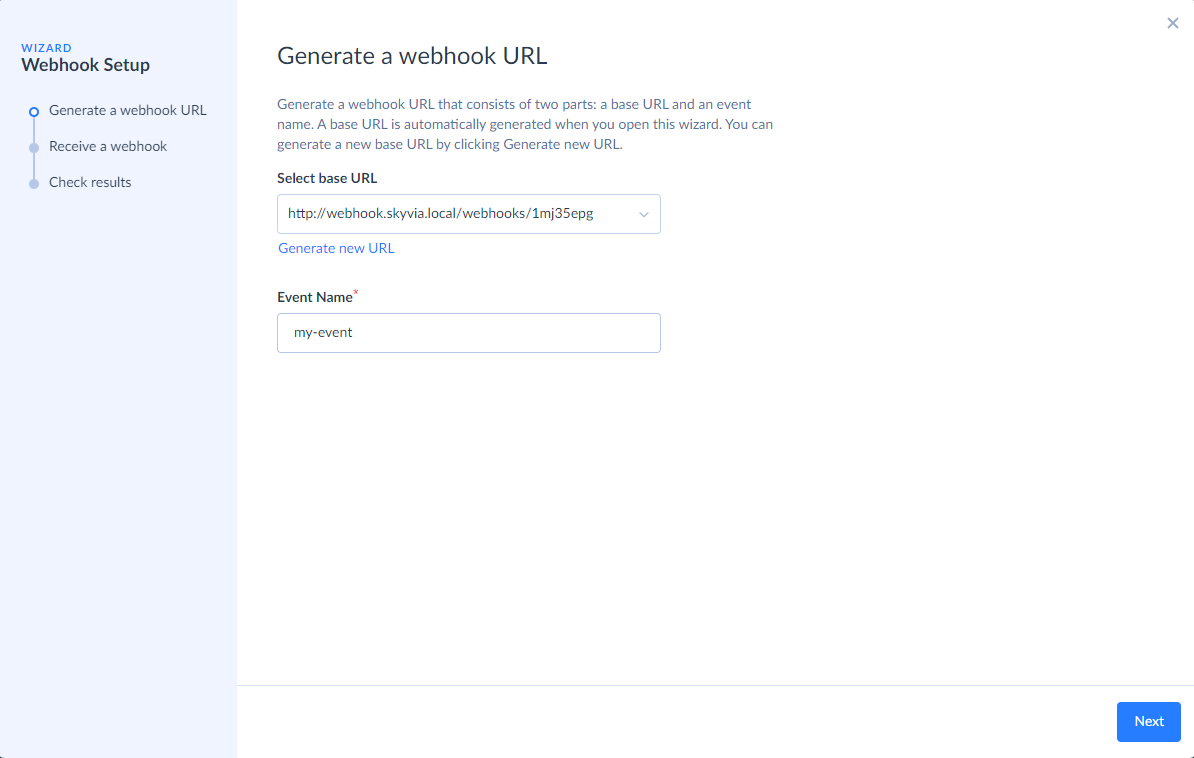
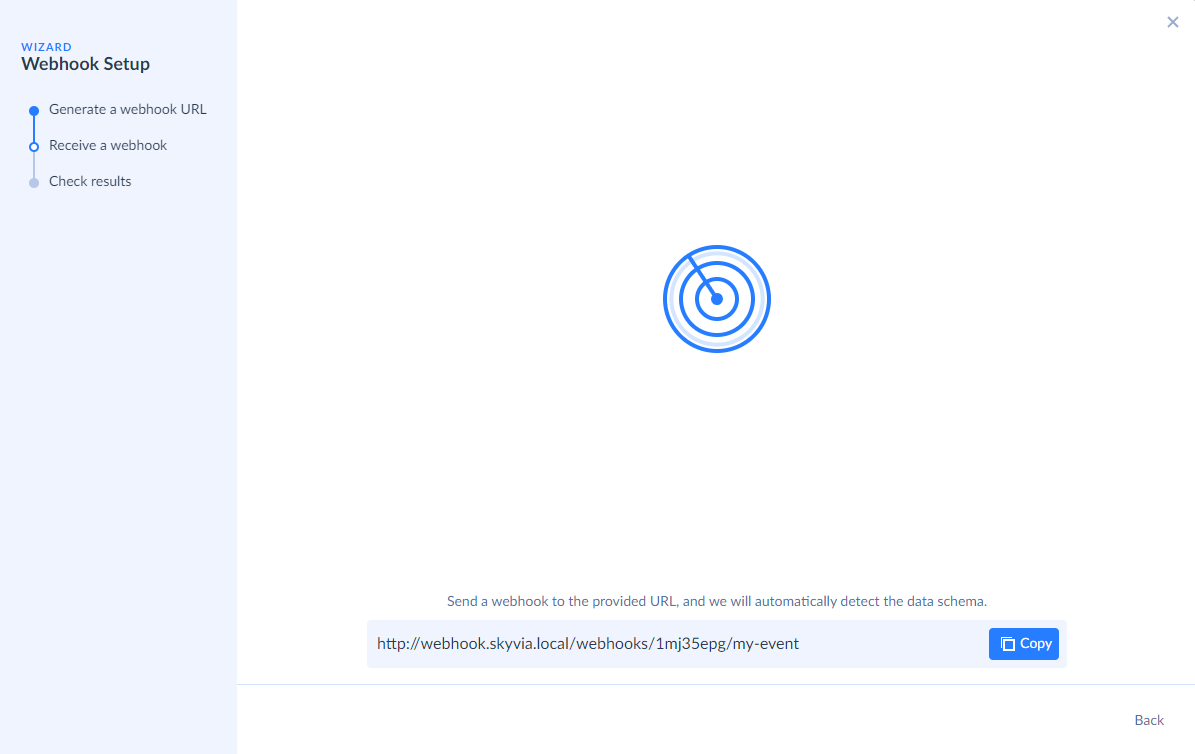
Firstly, generate a webhook URL that is used to receive requests from your apps. A webhook URL consists of two parts: a Base URL, and an event name. A Base URL is created automatically by Skyvia. You can recreate the URL manually at any time by clicking Generate new URL. The second part is an Event name and it is set by you manually. Make sure you do not use special symbols or spaces in the event's name as it will become the part of the URL.
-
Now when the webhook URL is generated you can start receiving requests to that address. Click Copy to copy the webhook URL and paste it to your app. Once Skyvia receives a webhook to the specified URL it will automatically detect the data schema and you will be transfered to the third step.
-
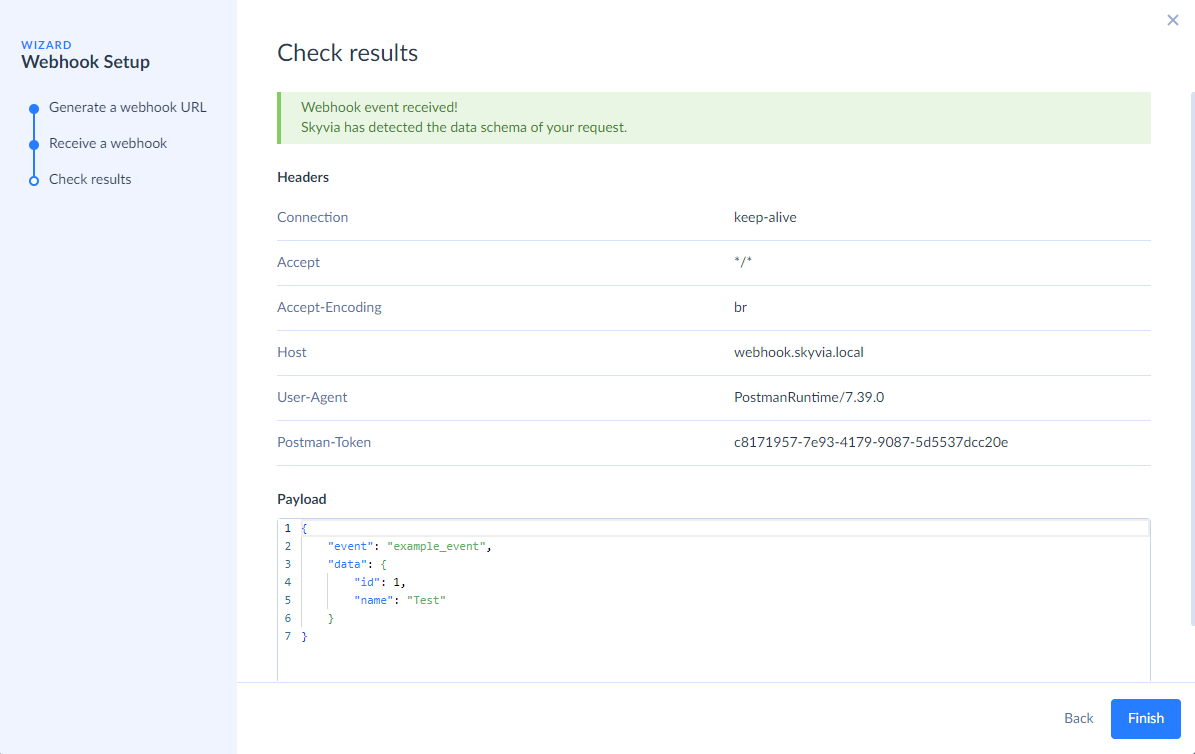
Here you can check the data schema. Note that if one of the parameters is null, Skyvia will determine its data type as string. Once ready, click Finish.
Once the setup is done you can check and configure your trigger settings.
Webhook Trigger Settings
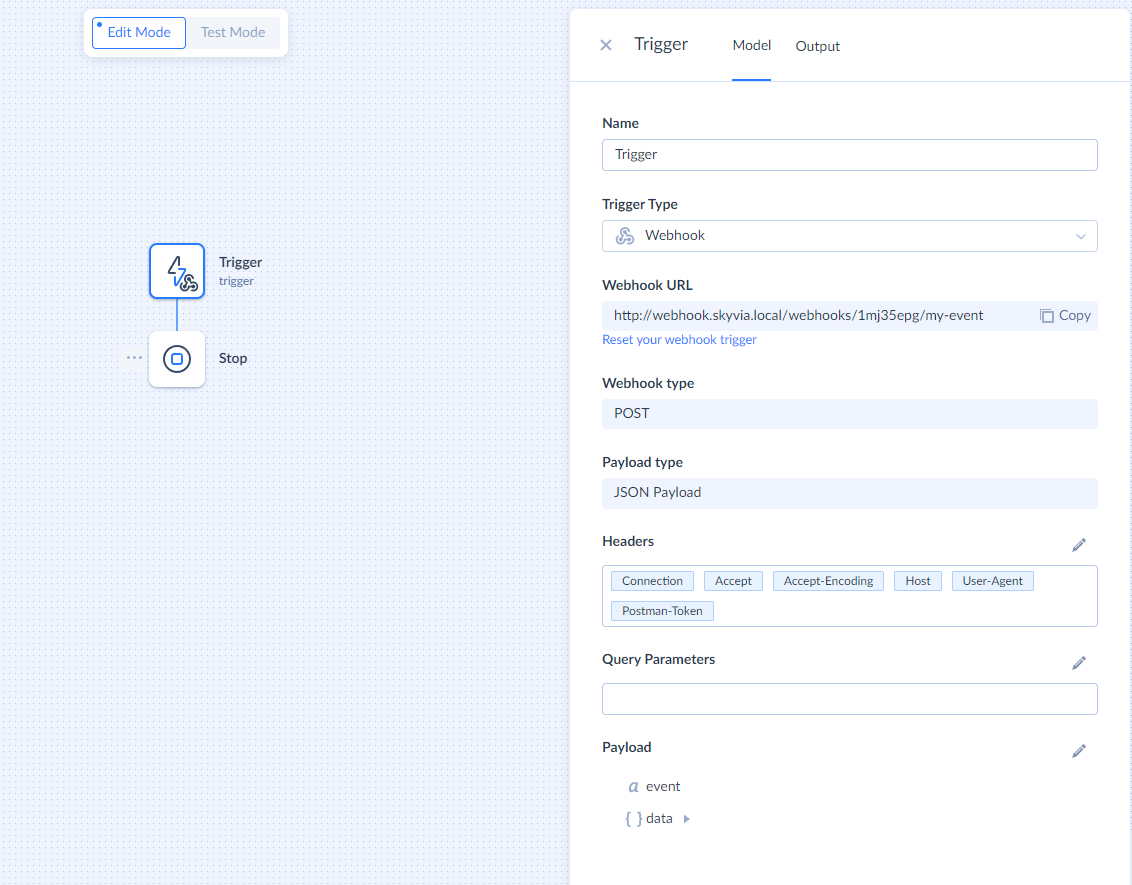
You can edit your request's headers, query parameters, and payload in the webhook trigger settings. After editing, check the results using output tab. You will be able to access all parameters displayed on the output tab while building your automation flow.
SHA256 HMAC Signature Validation
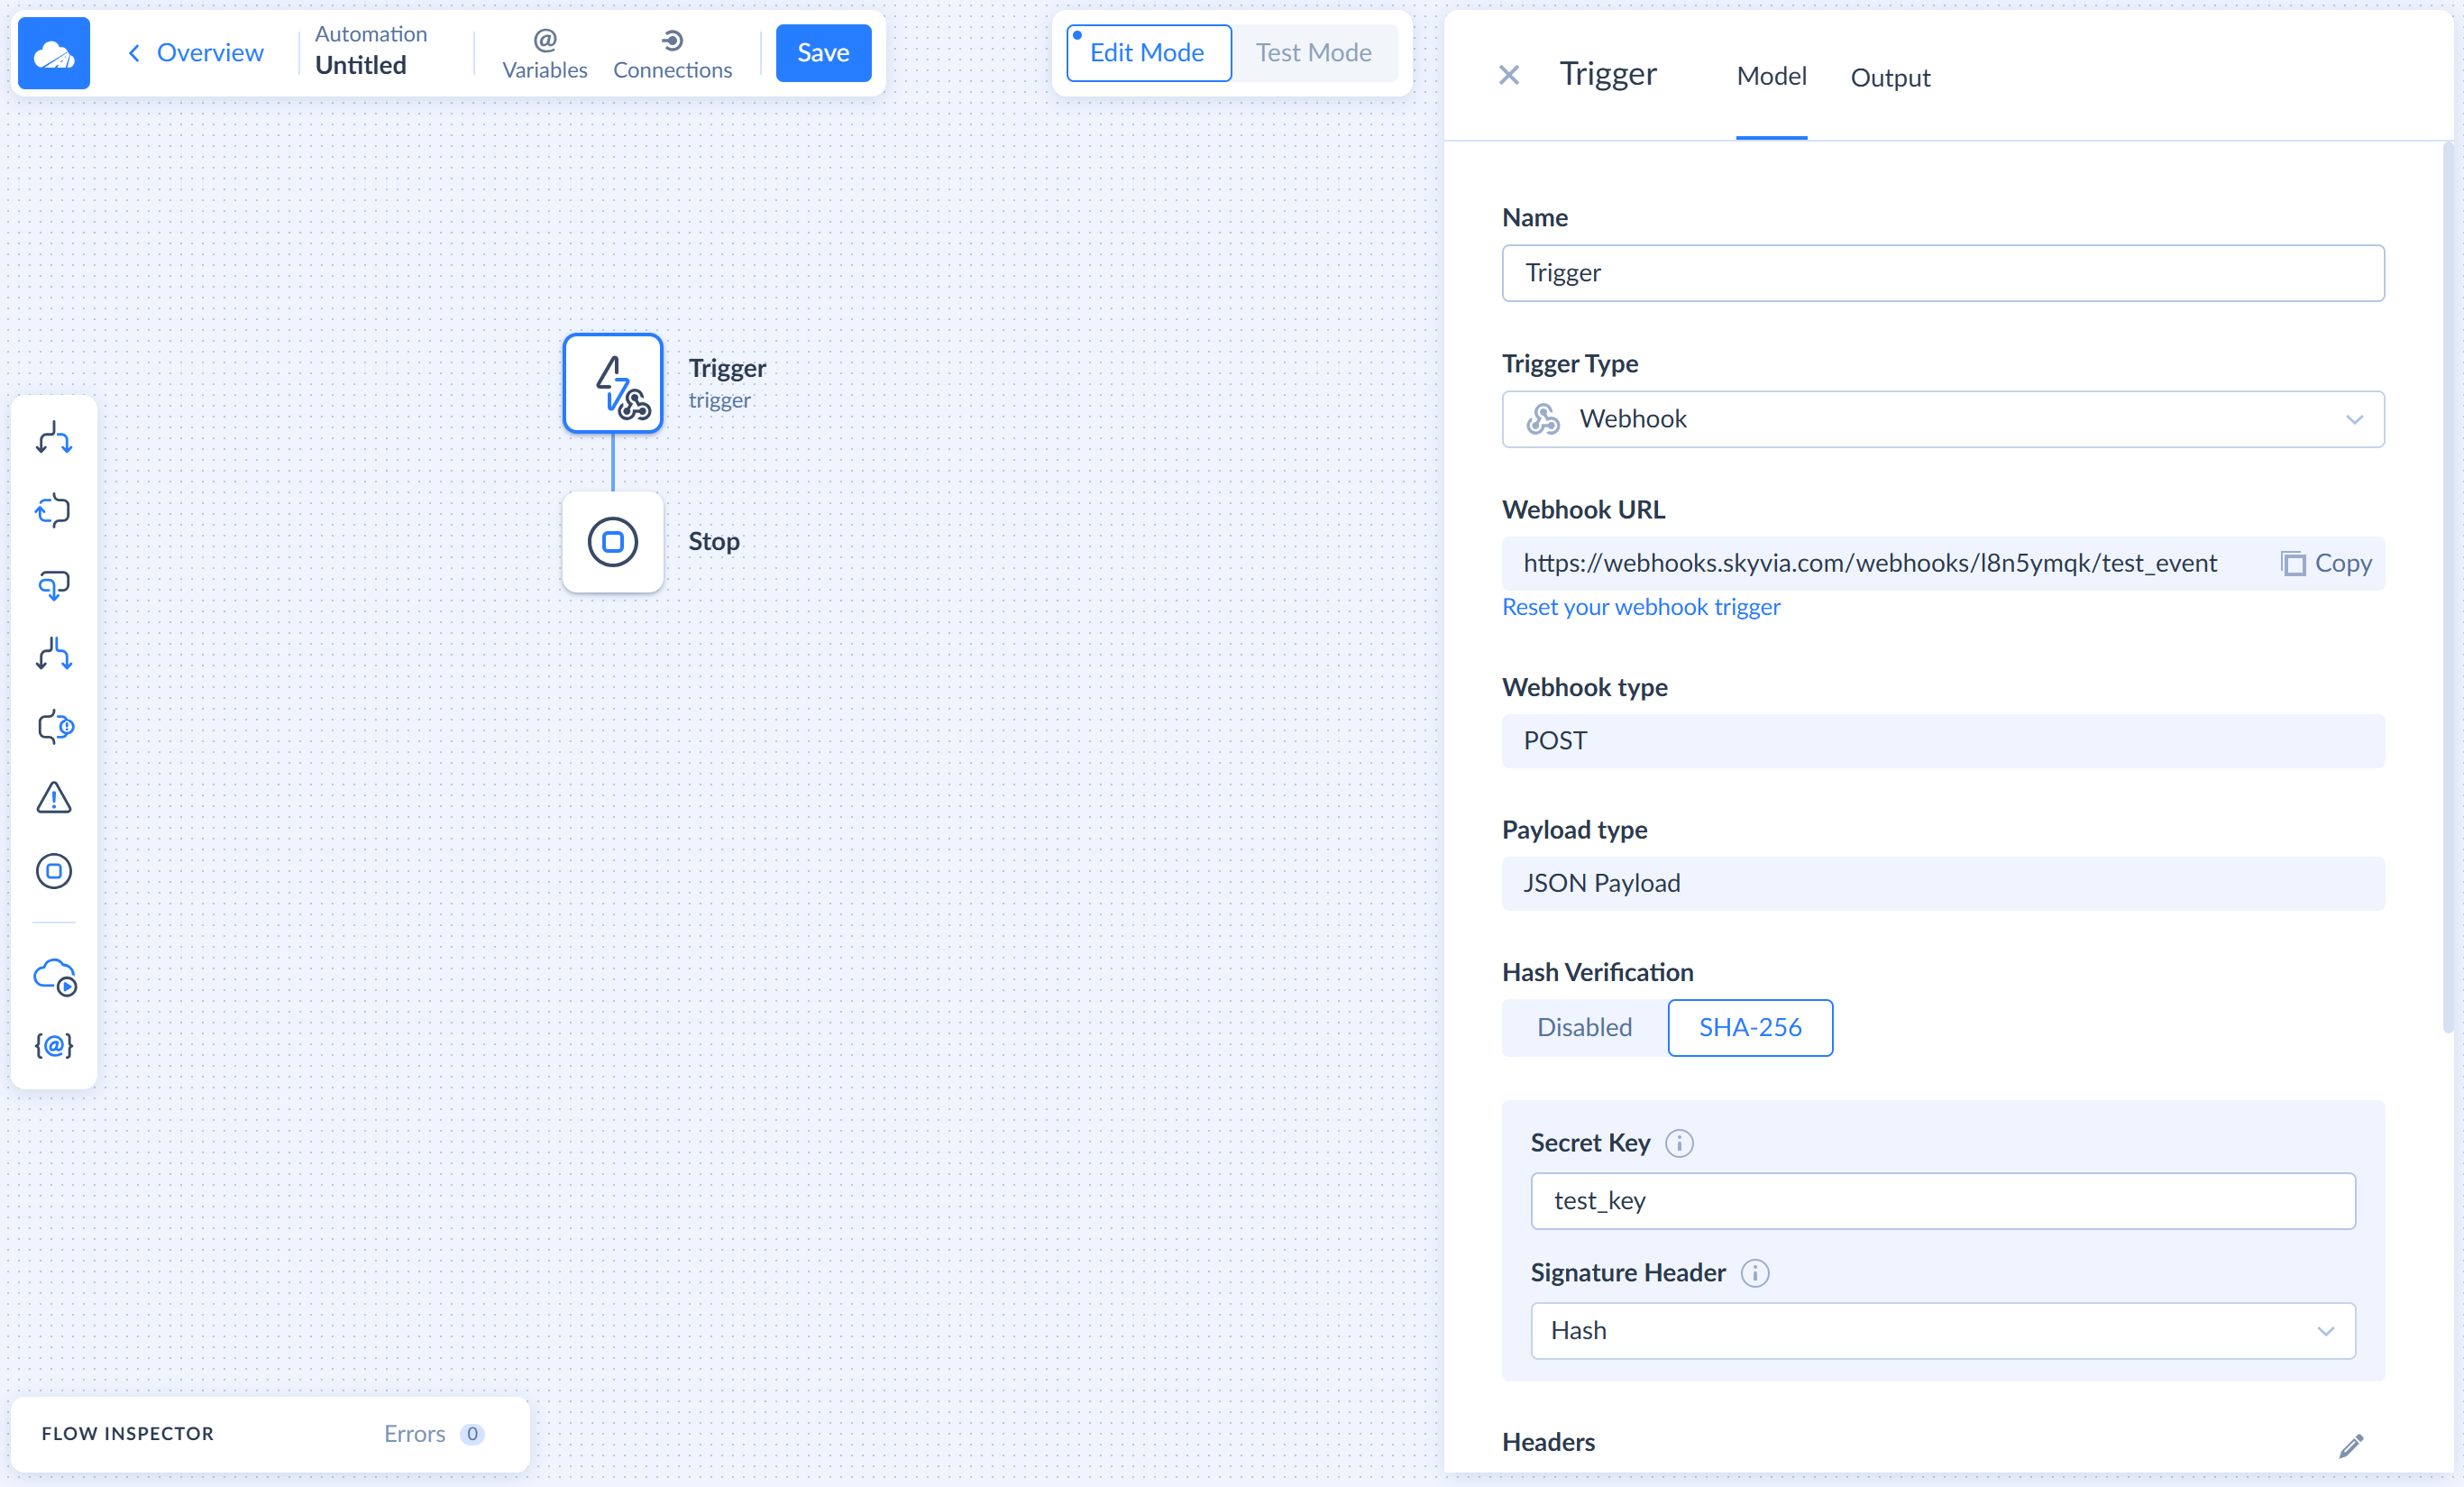
Skyvia allows you to use SHA256 HMAC signature validation for your webhooks. If you enable this validation, events with invalid signature are ignored, and sends the response with the message: "Invalid HMAC header value".
To validate the signature, after setting up your webhook trigger, perform the following steps:
- Select the trigger on the diagram.
- In the trigger settings, select SHA256 under the Hash Verification.
- Specify the Secret Key.
- Select the HTTP header containing the HMAC signature in the Signature Header list.
Signature validation works with the original payload of the webhook, so it correctly compares the provided hash with the hash of the payload. Note that the payload, available within the automation itself via
trigger.payloadexpression, may differ from the original one in formatting and spaces, and thus, its hash may be different from the hash of the original payload.
Trigger Payload
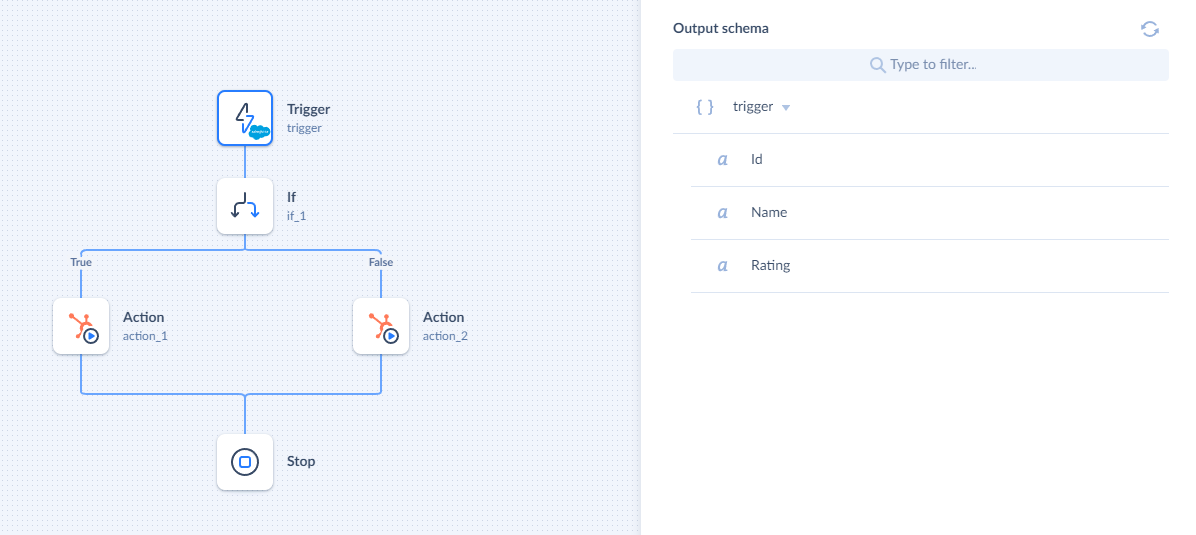
Each trigger can have its payload generated by the event. To return field values to the automation scope, select them from the columns dropdown. In the example below ID, Name, and Rating values will be added to the automation scope. You can check the payload in the Tigger’s output.
