Results
Data Flow can be complex and can load data into multiple destinations. Rows failed in one of the components may be rerouted to other components and succeed there. That's why it is impossible to determine data flow execution outcome automatically. This means that you need to determine the data flow execution results yourself within your data flow and define which rows are error rows, and which rows are succeeded ones.
Skyvia displays the results for data flow runs in the same way as for other integration runs. The difference is that you calculate the numbers of success and failed records and determine the data to write to the logs in the data flow itself.
Counting Success and Failed Records
To determine the number of success and error records, you need to use the Row Count component in the necessary places of your data flow. These components count the processed records and place the result into a variable. Just create the necessary variables and specify them in the corresponding Row Count component.
For counting success records, you can add a Row Count component after each of your Target components, loading data to a data source, and connect them to Targets' regular outputs. To get the number of error records, you probably need to add Row Count components to Error outputs of components, where records may fail.
Then click Result on the toolbar. The Result sidebar opens, and there you can specify how the numbers of success and error rows are calculated.
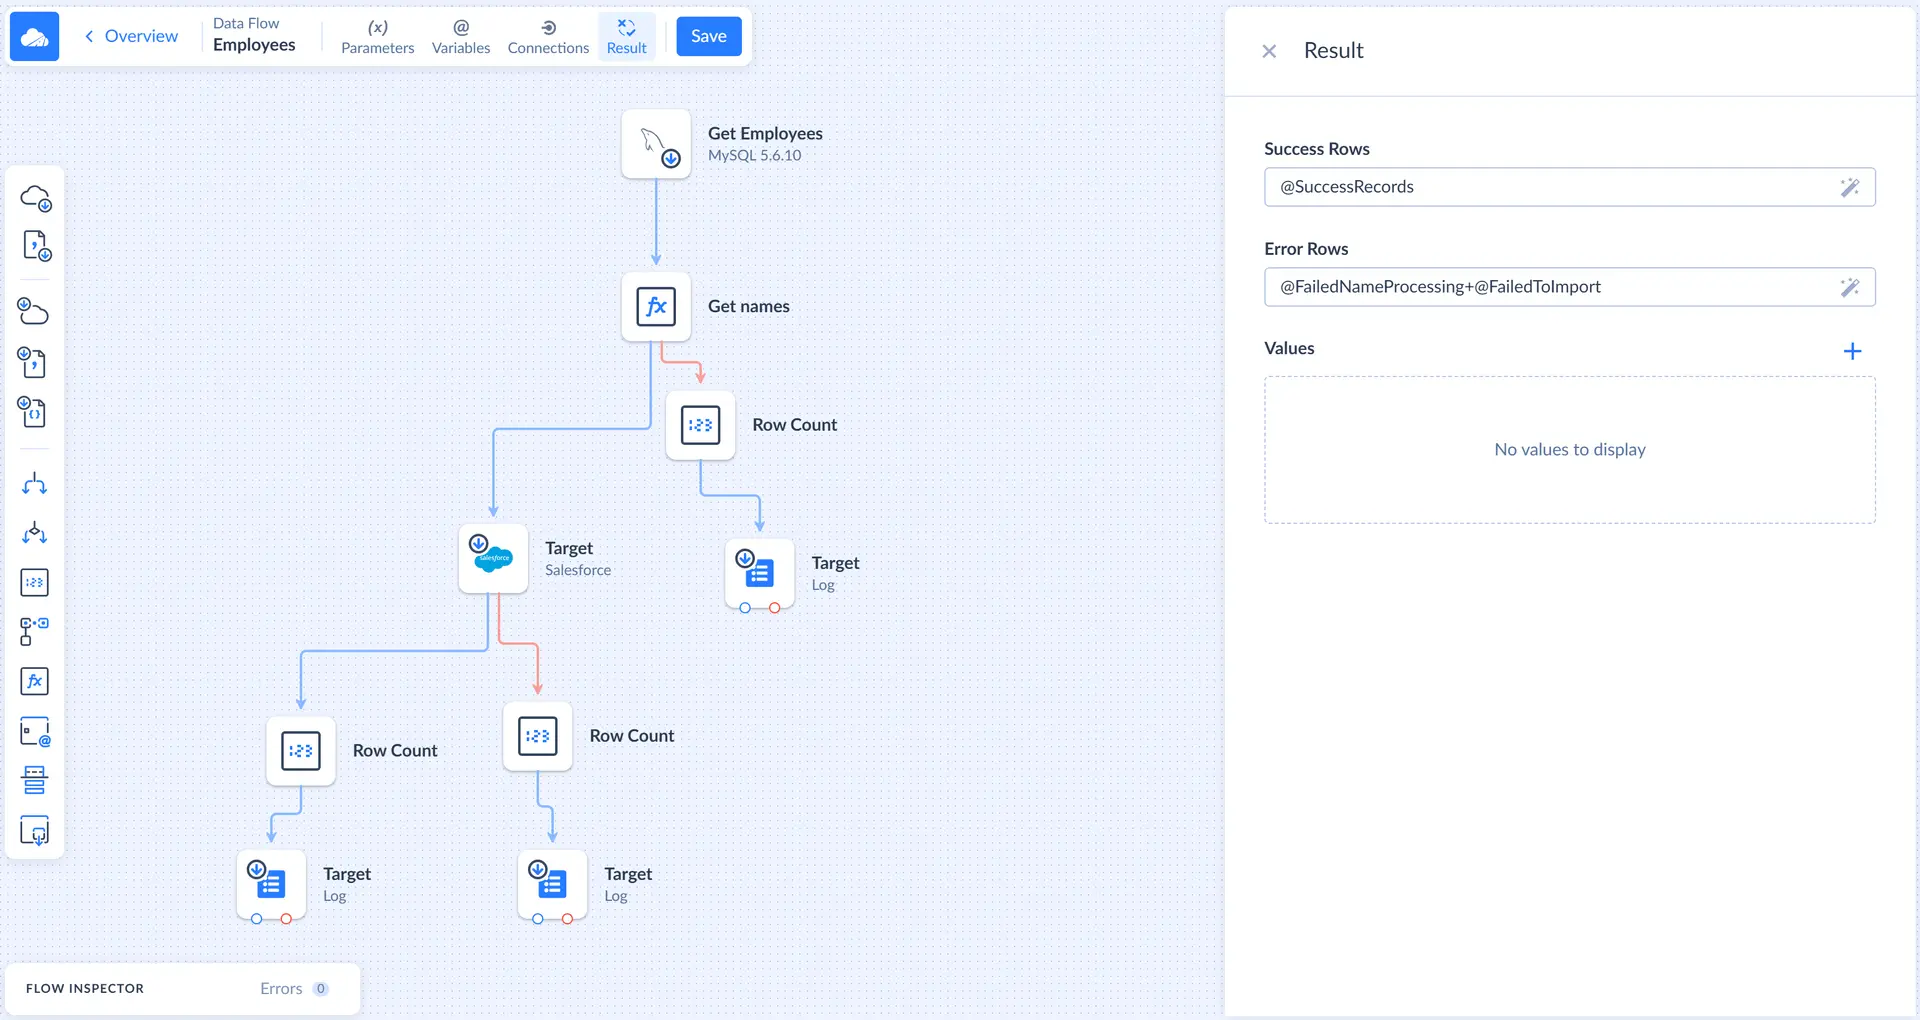
Here you can specify expressions for calculating the numbers of successful and error rows. Usually, you can just sum up the necessary variables used in the Row Count components, but you may specify more complex expressions if needed. You may also click the  button and edit the expression in a convenient editor with code completion, validation, and result preview.
Log
Having only numbers of successfully loaded and failed records is usually not enough. If your data flow fails to load records, you usually need a more detailed error information in order to determine the error reasons. That's why every data flow component that may fail processing a record, has an error output, to which it sends all the failed records with the Error column, containing error messages.
In order to obtain these error messages, you may create logs and write data into them. Log is basically a table that you can fill with data within your data flow. After data flow execution, all the created logs can be downloaded as CSV files.
The logs can also be used not only to get error messages. You can use them to obtain all the necessary data. For example, you can use them to obtain autogenerated field values of successfully inserted records or even write records to the log in the middle of data flow in order to determine which records actually go where and debug your data flows.
Creating and Editing Logs
You can manage logs of a data flow in the Connections sidebar. On this sidebar you can see log tables you created, edit or delete them, or create new ones. You can open it by clicking Connections on the toolbar.
You can create a new log in the following way:
- Click the plus sign in the Log header. Object editor opens.
- In the object editor, specify the log table name.
- Create the necessary log columns by clicking the plus sign in the Schema header and specifying column name and type.
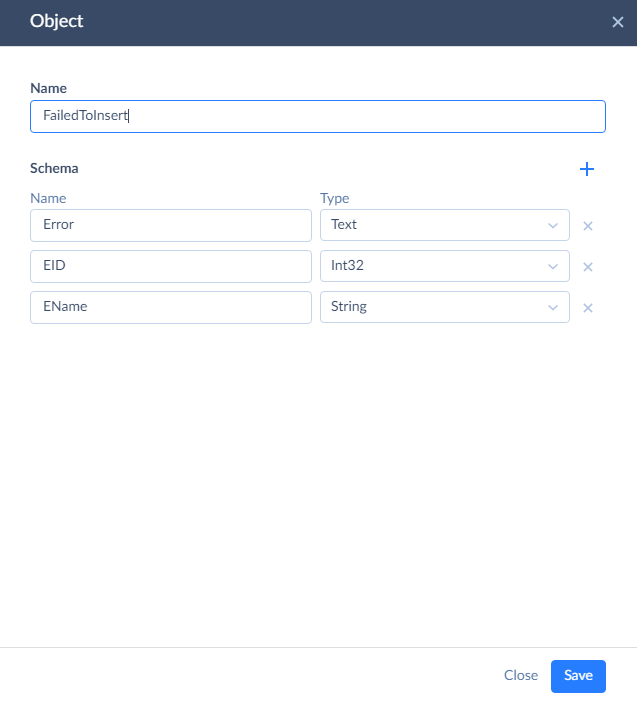
After this, save the newly created log.
Whenever necessary you can add or remove log columns, change their name or type, rename the log table. If you want to edit or delete a log, just point it and click the corresponding button. Note, however, that if you edit or rename an existing log that is used in a data flow component, you also need to reconfigure that component — select the correct log name, map correct log columns, etc.
Writing to a Log
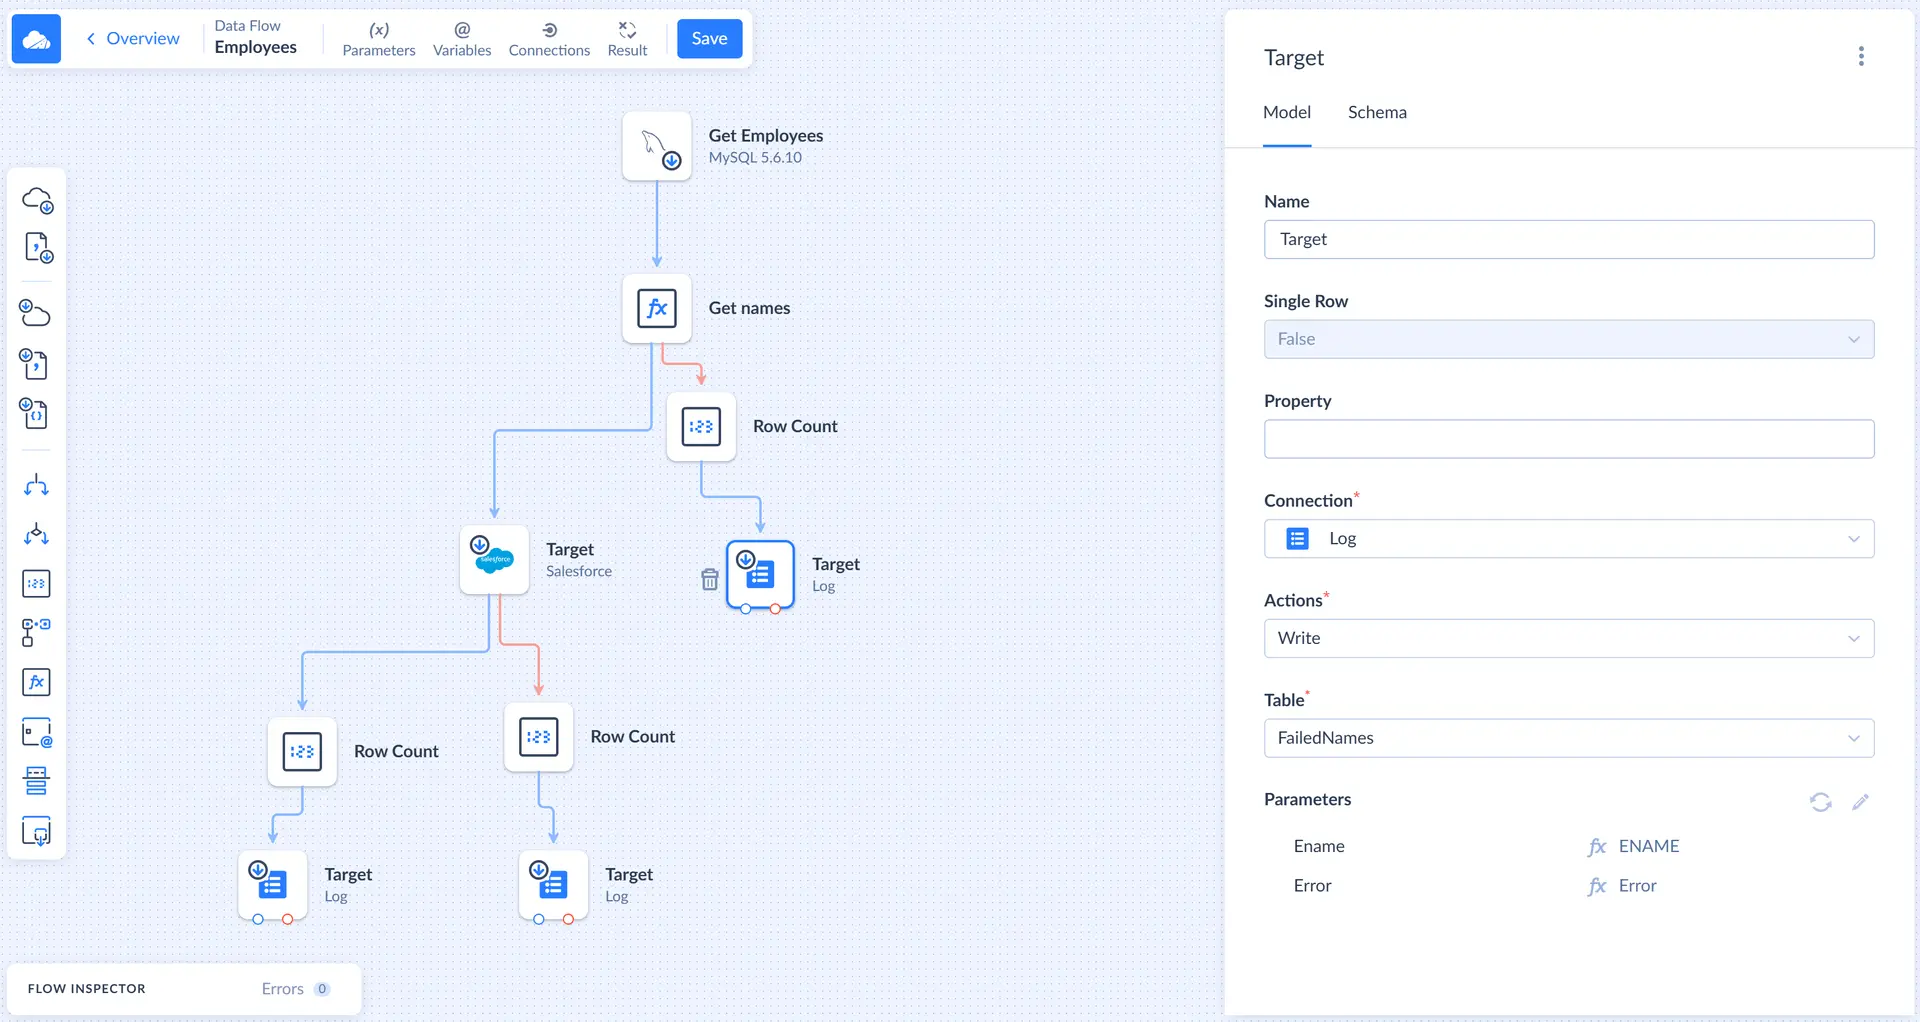
To write data to a log, you need to use the Target component. You need to add it to the diagram, connect the necessary component output to it and select Log as its Connection. The only action available for the Log connection is Write, so select it in the Action list.
For the Write action, you need to select the log Table to write data to and map its columns to the input columns using the Mapping Editor.
Obtaining Logs
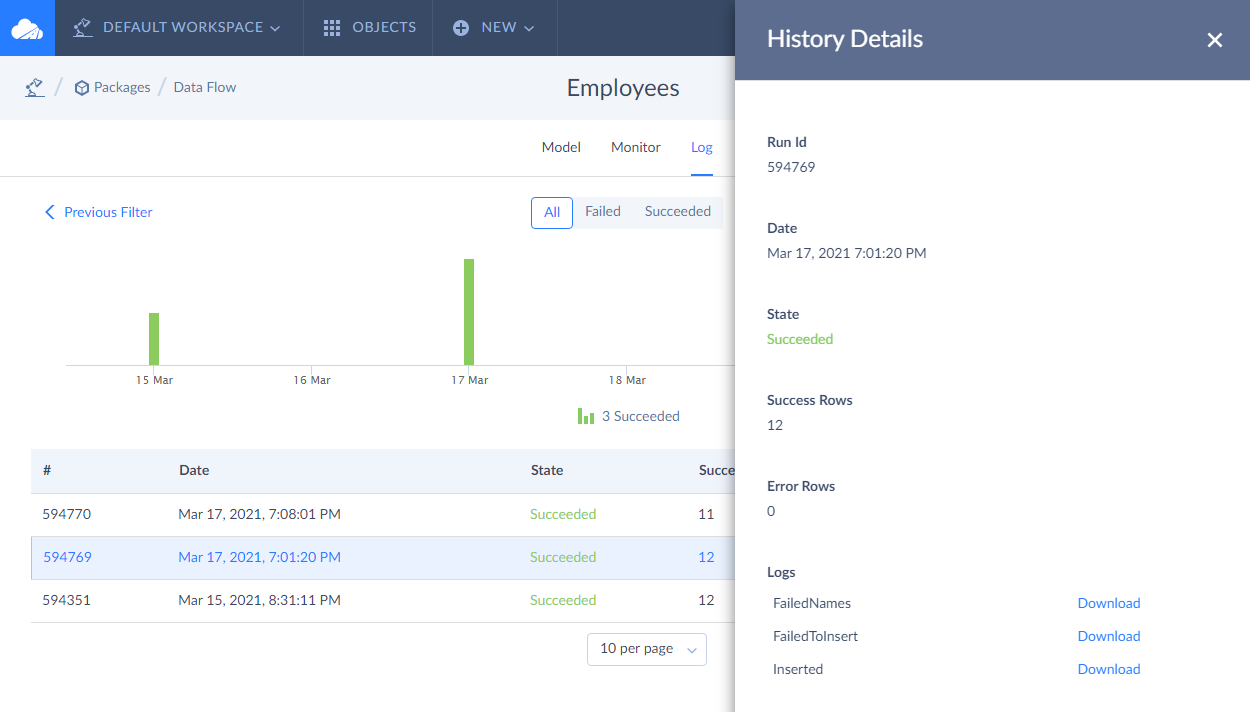
After data flow execution, all the logs, created on the Connections are available for download. You can download the logs by opening the run details on the data flow Monitor or Log tab, selecting the necessary run, and using the Download link near the corresponding log name in History Details.