How to Configure Cloud Data Synchronization with Empty Database
This tutorial shows how to make a copy of cloud data in an empty database and configure a bi-directional synchronization between this copy and the original cloud application. For this tutorial, we select Salesforce cloud source as an example and its Account and Contact objects.
In Skyvia, Replication is used to create a copy of cloud data in a database. It can create tables for data automatically and then keep the database up-to-date performing one-way synchronization periodically from the cloud source. If such synchronization in one direction is enough for you, you can take a look on our Replication Tutorials.
Synchronizations, on the other hand, perform bi-directional data synchronization. However, they are not intended for creating an exact data copy and cannot create tables for the data automatically. They are intended for synchronization of existing tables, and they support synchronization of data having different structure.
So, if you have just an empty database and want to create a copy of cloud data in it and then sync changes between this copy and original cloud source in both direction, you have two options. One is to manually create tables in the database, which is not always convenient. Another way is to use a replication for creating the necessary database tables, then manually modify these tables so that they meet Skyvia's synchronization requirements, and finally, configure a synchronization.
Synchronization Requirements to Consider
Note that Skyvia has certain requirements to consider for synchronization. Skyvia supports synchronization not for every object in every cloud source. It requires that these cloud objects have fields, storing the record creation and modification time. You can find the information about these limitations in the corresponding Cloud Sources topics. Some cloud sources, like Salesforce, support synchronization for most objects, and some — only for a few objects.
As for databases, Skyvia requires synchronized tables to have auto-generated primary keys. This is the reason why we should manually modify database tables after creating them via a replication, because replication creates primary keys that are not auto-generated.
Connections
For our integration we need to create a connection to our cloud source and database. You can find the information about connecting Skyvia to various cloud sources in the Cloud Sources section. In this tutorial, we create a Salesforce connection. To create a connection to Salesforce, perform the following steps:
-
Click +NEW in the top menu.
-
Click the Connection button in the menu on the left.
-
In the opened Select Connector page, select Salesforce. To quickly find it, you can either use the Type to filter box or filter connectors by categories using the All list (for Salesforce, select the CRM category).
-
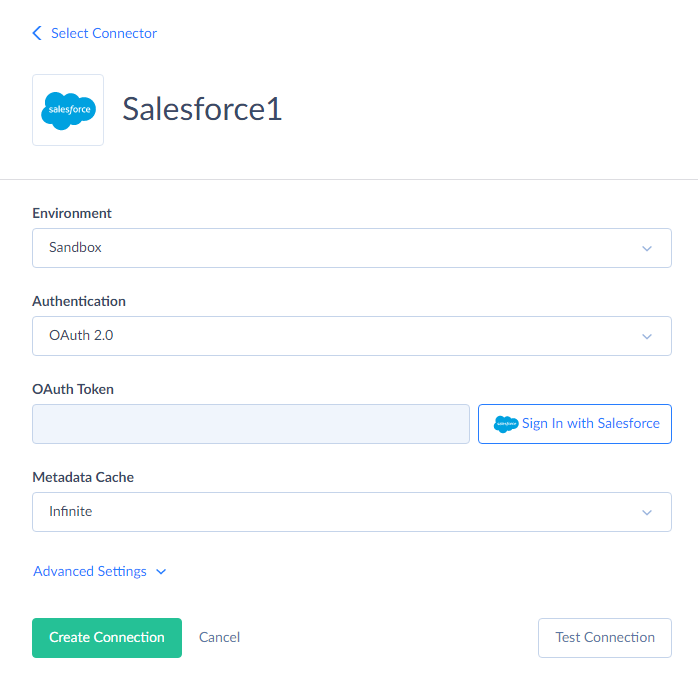
The default name of new connection is Untitled. Just click it to rename the connection, for example, to Salesforce1.
-
From the Environment drop-down list, select the Salesforce environment type to import data to. Since this is just a sample walkthrough, the Sandbox environment is recommended.
-
From the Authentication drop-down list, select the authentication method for connecting to Salesforce. If you don't mind storing your Salesforce credentials on Skyvia server, select User Name & Password. If you prefer not to store your credentials, select OAuth 2.0.
-
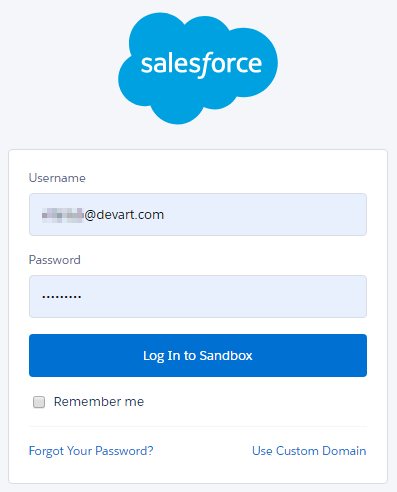
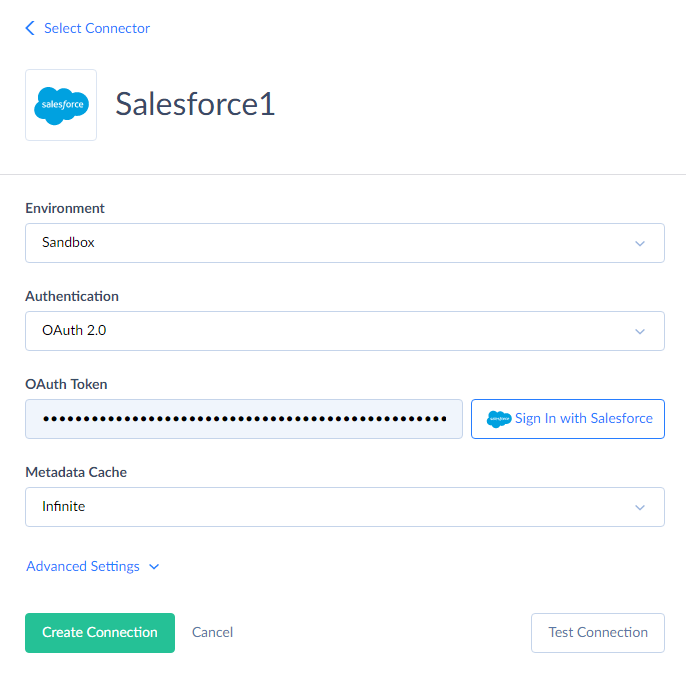
If you have selected User Name & Password, on the previous step, specify your Salesforce account e-mail, password, and security token. Otherwise, if you have selected OAuth 2.0 authentication, click the Log In with Salesforce button and login via the Salesforce website on the opened page. The result OAuth token will be stored in the connection data. Your Salesforce credentials will not be stored on our website.
-
Click the Save button to save the connection.
As for connecting to databases, see the information about database connections in the Databases section. Please note that Skyvia does not support synchronization for cloud data warehouse services — Azure Synapse Analytics, Amazon Redshift, and Google BigQuery.
Replication
To create a replication, perform the following actions:
-
Click +NEW in the top menu.
-
In the Integration column, click Replication. The replication details page will open.
-
Rename your integration by clicking and editing the integration name. The default integration name is Untitled. Please note, if you omit this step, the integration name will remain Untitled in the list of created integrations.
-
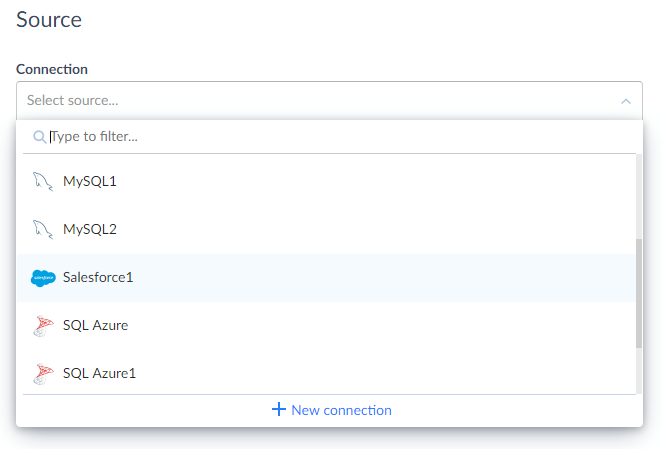
Under Source, in the Connection drop-down list, select the Salesforce connection.
-
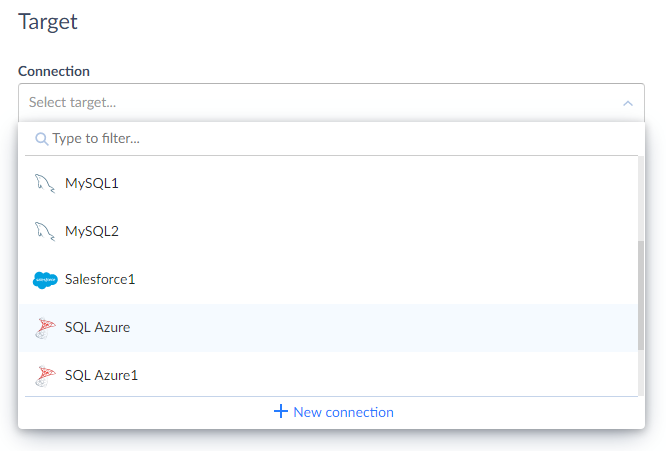
Under Target, in the Connection drop-down list, select the corresponding connection.
-
Important! Clear the Create Foreign Keys checkbox. If you need a bi-directional synchronization, you should not have foreign keys created by replication. If you don't clear this checkbox, you will need to drop the foreign keys manually later.
-
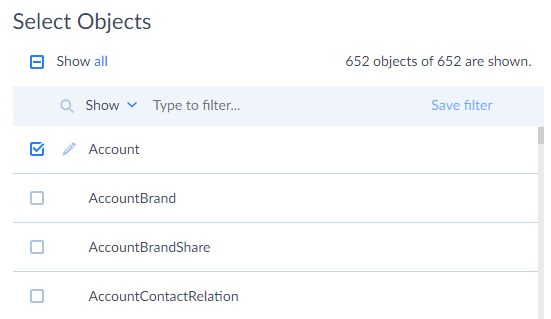
In the grid under Select Objects, select checkboxes for objects you want to synchronize. In our example, these are Account and Contact objects.
-
The first run of the synchronization will re-load all the records from Salesforce to the target database anyway. So it's not necessary that replication actually load records. We need it only to create the tables.
If you don't want to spend time on additional configuration, you may omit the steps and allow replication to load data. In this case, it may take quite some time for replication to load all the data, and you will need to delete data from the database tables before running the synchronization anyway. Besides, these extra records are added to your subscription counter.
But if you don't want to unnecessarily load data, you can avoid this by configuring filters for replication:
-
Click Edit icon next to the selected object. The task editor window will open.
-
In the replication task editor window, click +Condition.
-
In the added boxes, specify a filter condition that is never true for any record. In the first box, select a field; in the second — comparison operator, and in the third — specify some value for comparison.
For example, for Salesforce I can use a condition Id equals 0. It cannot be true in Salesforce for any record. Thus, all the records will be filtered out by this filter, and the replication will create a table, but won't load any records.

-
Repeat the steps a-с for all the objects you want to synchronize. {: type='a'}
-
-
Click the Create button to create the integration.
-
Run the integration by clicking Run.
Editing Database Tables
After replication creates the tables, we need to edit them. We need to delete their primary key constraint and add a new autogenerated one. You can either use some visual database tools to make these changes or run SQL scripts against your database, for example, with Skyvia Query.
If you want to use a database tool, you need to perform the following actions:
- If you didn't add filters so that no data were replicated, truncate your database tables, which were created after the replication.
- Delete the tables' primary key constraints.
- You may optionally delete their primary key columns as well. Their values are automatically generated on the cloud side and cannot be synchronized when loading data from the database to the cloud source. They will only be synced when loading data from the cloud source to database.
- Add a new autogenerated column for the primary key. For example, you may call it sync_id:
- In PostgreSQL you may use the serial data type to make a column autogenerated.
- In MySQL you may use a BIGINT data type with the AUTOINCREMENT option.
- For SQL Server, you may use a BIGINT data type with the IDENTITY option.
- For Oracle 12c and higher, you may use a NUMBER data type with the GENERATED ALWAYS AS IDENTITY option.
- For lower Oracle versions, you will need to create a sequence and a trigger to assign values from this sequence to the primary key column when inserting records.
Alternatively, you may do the same, using DDL scripts.
-
Click +NEW in the top menu.
-
In the Query column, click SQL.
-
Click Select connection on the left and select the connection to your database, where you replicate data, in the list.
-
Enter your script to the query editor box. Here we provide scripts with Account and Contact objects as an example. You can create your own scripts based on this example by replacing Account and Contact with your object names:
-
For SQL Server:
ALTER TABLE Contact DROP CONSTRAINT PK_Contact;
ALTER TABLE Contact ADD Sync_id BIGINT IDENTITY PRIMARY KEY;
ALTER TABLE Account DROP CONSTRAINT PK_Account;
ALTER TABLE Account ADD Sync_id BIGINT IDENTITY PRIMARY KEY;
-
For MySQL:
ALTER TABLE contact DROP PRIMARY KEY;
ALTER TABLE contact ADD sync_id BIGINT AUTO_INCREMENT PRIMARY KEY;
ALTER TABLE account DROP PRIMARY KEY;
ALTER TABLE account ADD sync_id BIGINT AUTO_INCREMENT PRIMARY KEY;
-
For PostgreSQL:
ALTER TABLE "Contact" DROP CONSTRAINT "PK_Contact";
ALTER TABLE "Contact" ADD Sync_id SERIAL PRIMARY KEY;
ALTER TABLE "Account" DROP CONSTRAINT "PK_Account";
ALTER TABLE "Account" ADD Sync_id SERIAL PRIMARY KEY
-
For Oracle (12c or higher):
ALTER TABLE "Contact" DROP CONSTRAINT "PK_Contact";
ALTER TABLE "Contact" ADD Sync_id NUMBER GENERATED ALWAYS AS IDENTITY PRIMARY KEY;
ALTER TABLE "Account" DROP CONSTRAINT "PK_Account";
ALTER TABLE "Account" ADD Sync_id NUMBER GENERATED ALWAYS AS IDENTITY PRIMARY KEY;
-
-
Click Execute or press F9.
Synchronization
To create a synchronization, perform the following steps:
-
Click +NEW in the top menu.
-
In the Integration column, click Synchronization. The sync integration details page will open.
-
Rename your integration by clicking and editing the integration name. The default integration name is Untitled. Please note, if you omit this step, the integration name will remain Untitled in the list of created integrations.
-
Now it's necessary to specify source and target connections. Note that synchronization is bi-directional, and the only difference between the source and target is that source changes have a priority when solving change conflicts (when a record was changed both in source and target between synchronizations). Let Salesforce be the source in our example.
-
Under Source, in the Connection drop-down list, select the Salesforce connection.
-
Under Target, in the Connection drop-down list, select the SQL Azure connection.
-
Click the Add new link.
-
In the Source list, select Account.
-
In the Target list, select the Account table and click Next step.
-
Since all the columns in source and target have the same names and types, they are mapped automatically. Click Target to Source in order for columns to be also mapped for the opposite direction.
-
Click Save.
-
Repeat steps 7-11 for all other objects that you want to sync.
Scheduling Integration Execution
After we have created the synchronization, we want to keep the data in sync automatically. For this, we will configure the integration to run every hour during workdays.
Skyvia uses LastModifiedData and CreatedDate fields to track changes in Salesforce, and it creates its own tracking tables and triggers to track changes in the database.
Note that since we used Salesforce connection as the source, its changes have a priority, and if a record was changed both in Salesforce and in the database, Salesforce changes are applied.
Perform the following actions to set the schedule:
-
Click Schedule on the left side of the toolbar.
-
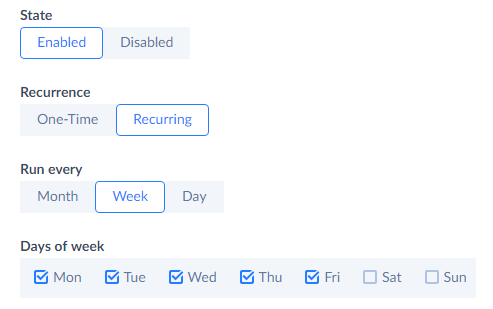
Under Run every, select Week.
-
Under Days of week, select checkboxes with all the workdays.
-
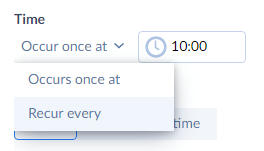
Click Occur once at and select Recur every.
-
Enter "1" (without quotes) into the Recur every box and click the Set time restrictions link.

-
Enter 09:00 and 18:00 to the corresponding boxes.

-
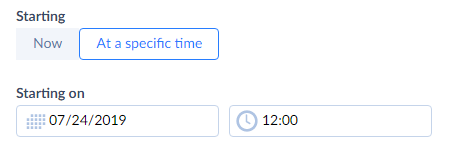
Click Now to put the schedule into action immediately or select At a specific time in the Starting list and specify the necessary date and time you want the schedule to be enabled from.
-
Click Save to schedule integration execution.
After this our integration will run automatically every hour between 09:00 and 18:00 of every workday.
You can also visit Scheduling Integrations to get more detailed information on setting an integration schedule.