Creating Your First Automation
In this chapter, we provide a step-by-step guide to a simple automation example — adding Mailchimp subscribers as leads from a certain Mailchimp audience to a Salesforce campaign.
Establishing Connections
To create this automation, you need the connections to Salesforce and Mailchimp.
To create a Salesforce connection, сlick Create New, select Connection, and look for Salesforce. Then select the environment and sign in to Salesforce. For more detailed instructions, see Salesforce connector topic.
To create a Mailchimp connection, сlick Create New, select Connection, and look for Mailchimp, then sign in with your Mailchimp credentials. For more detailed instructions, see Mailchimp connector topic.
After creating connections, click Create New and select Automation.
Setting Up a Trigger
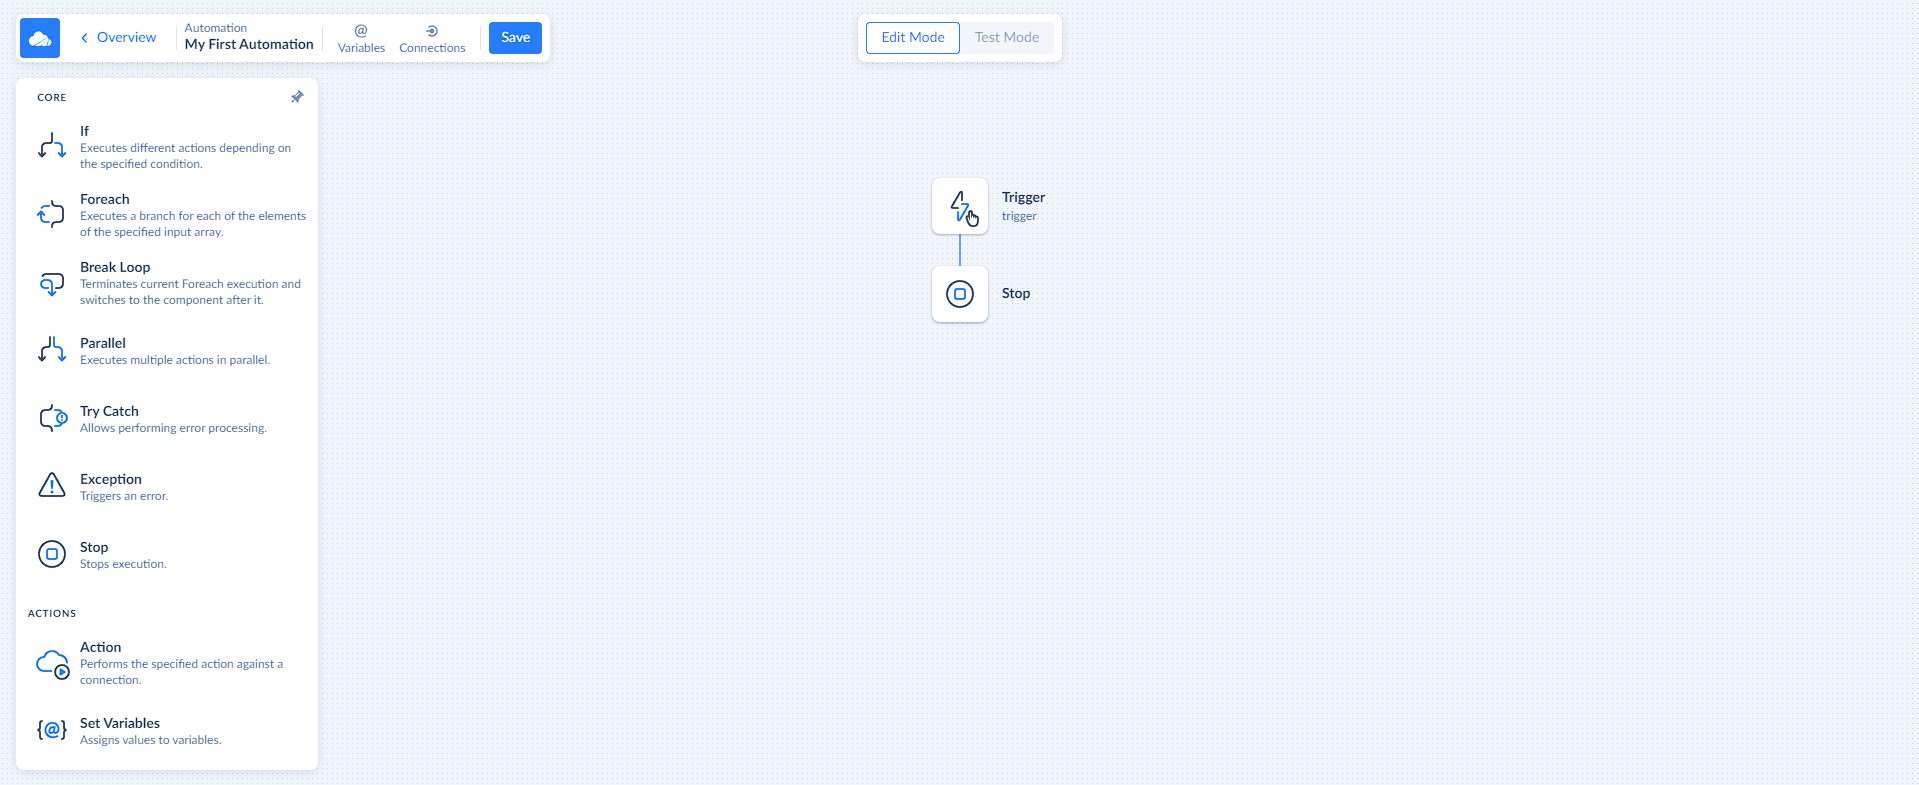
Each automation starts with Trigger and ends with Stop. They appear on the diagram once you create a new automation.
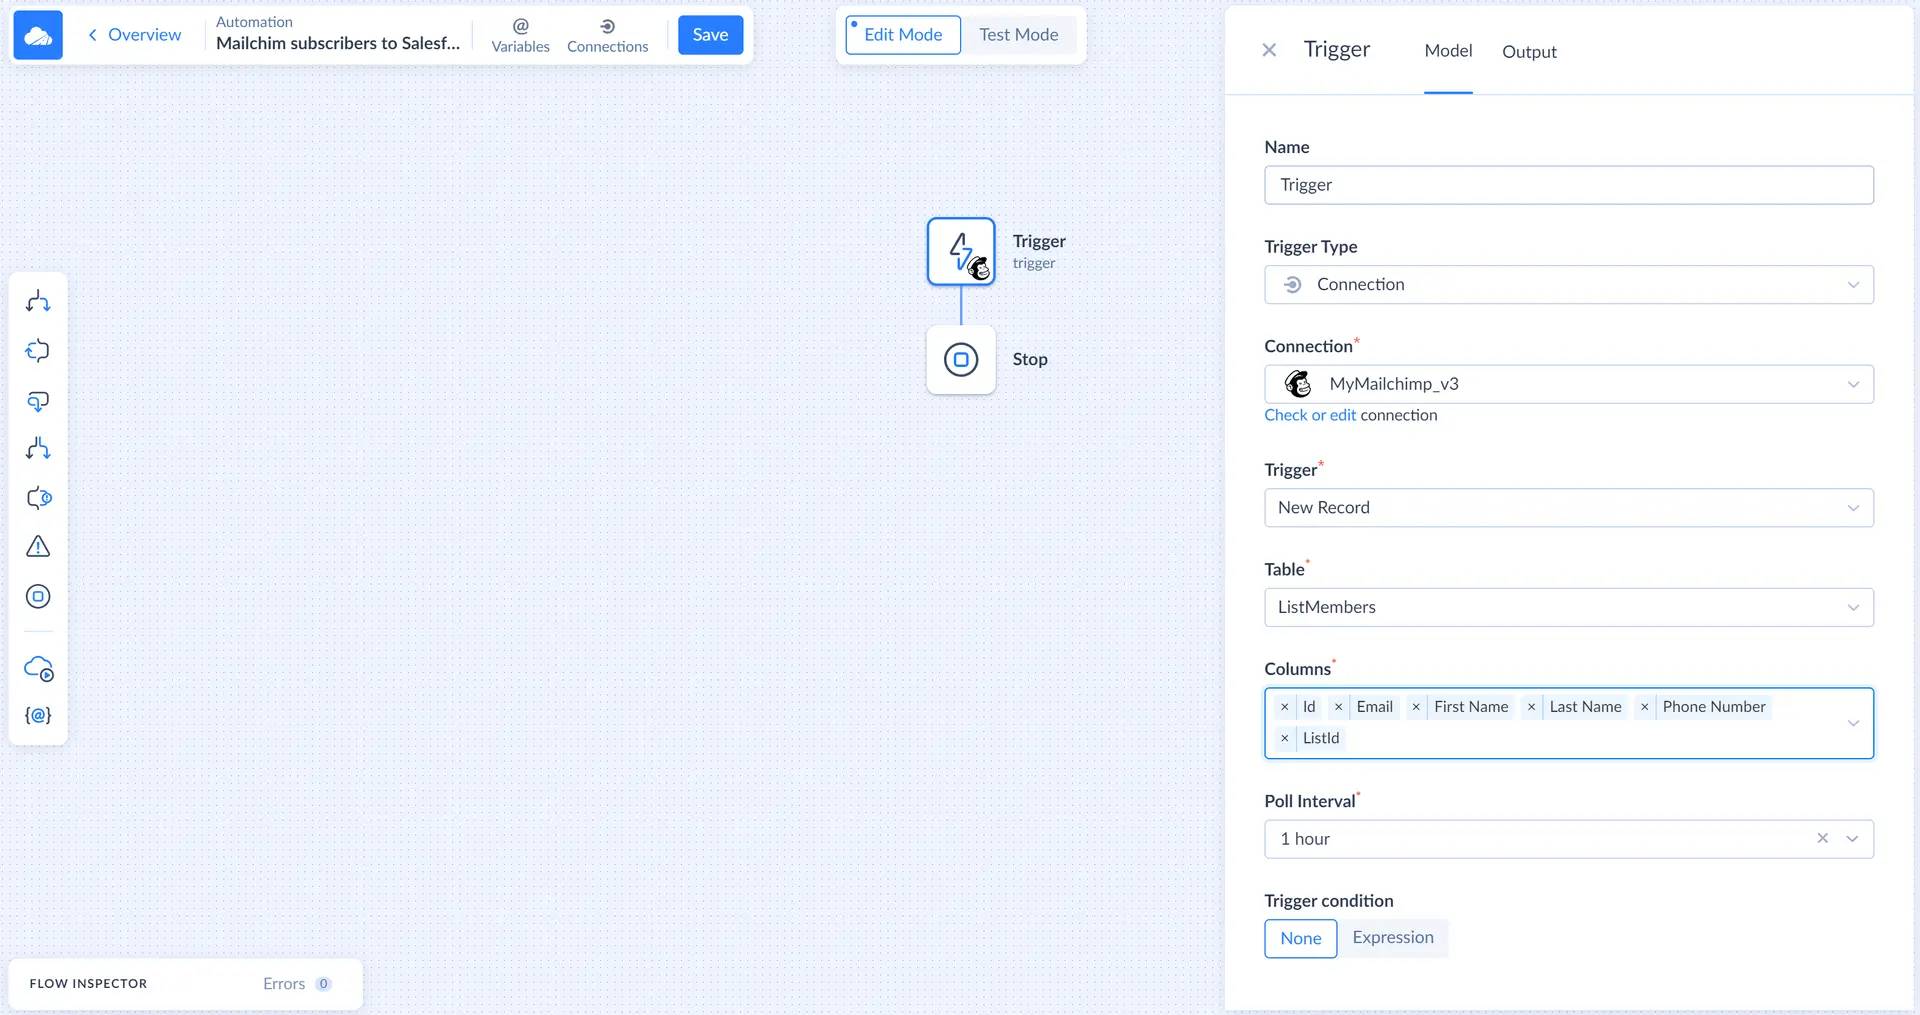
Let's configure our trigger to get new Mailchimp subscribers.
- Select the Trigger on the diagram.
- In the Trigger type, select Connection.
- In the Connection list, select your Mailchimp connection.
- In the Trigger list, select New Record.
- In the Table list, select the ListMembers object.
- In the Columns list, we need to select the fields to obtain for new subscribers. This list allows you to select multiple fields one by one. For the purpose of our tutorial, select the following fields: Id, Email, First Name, Last Name, Phone Number, ListId.
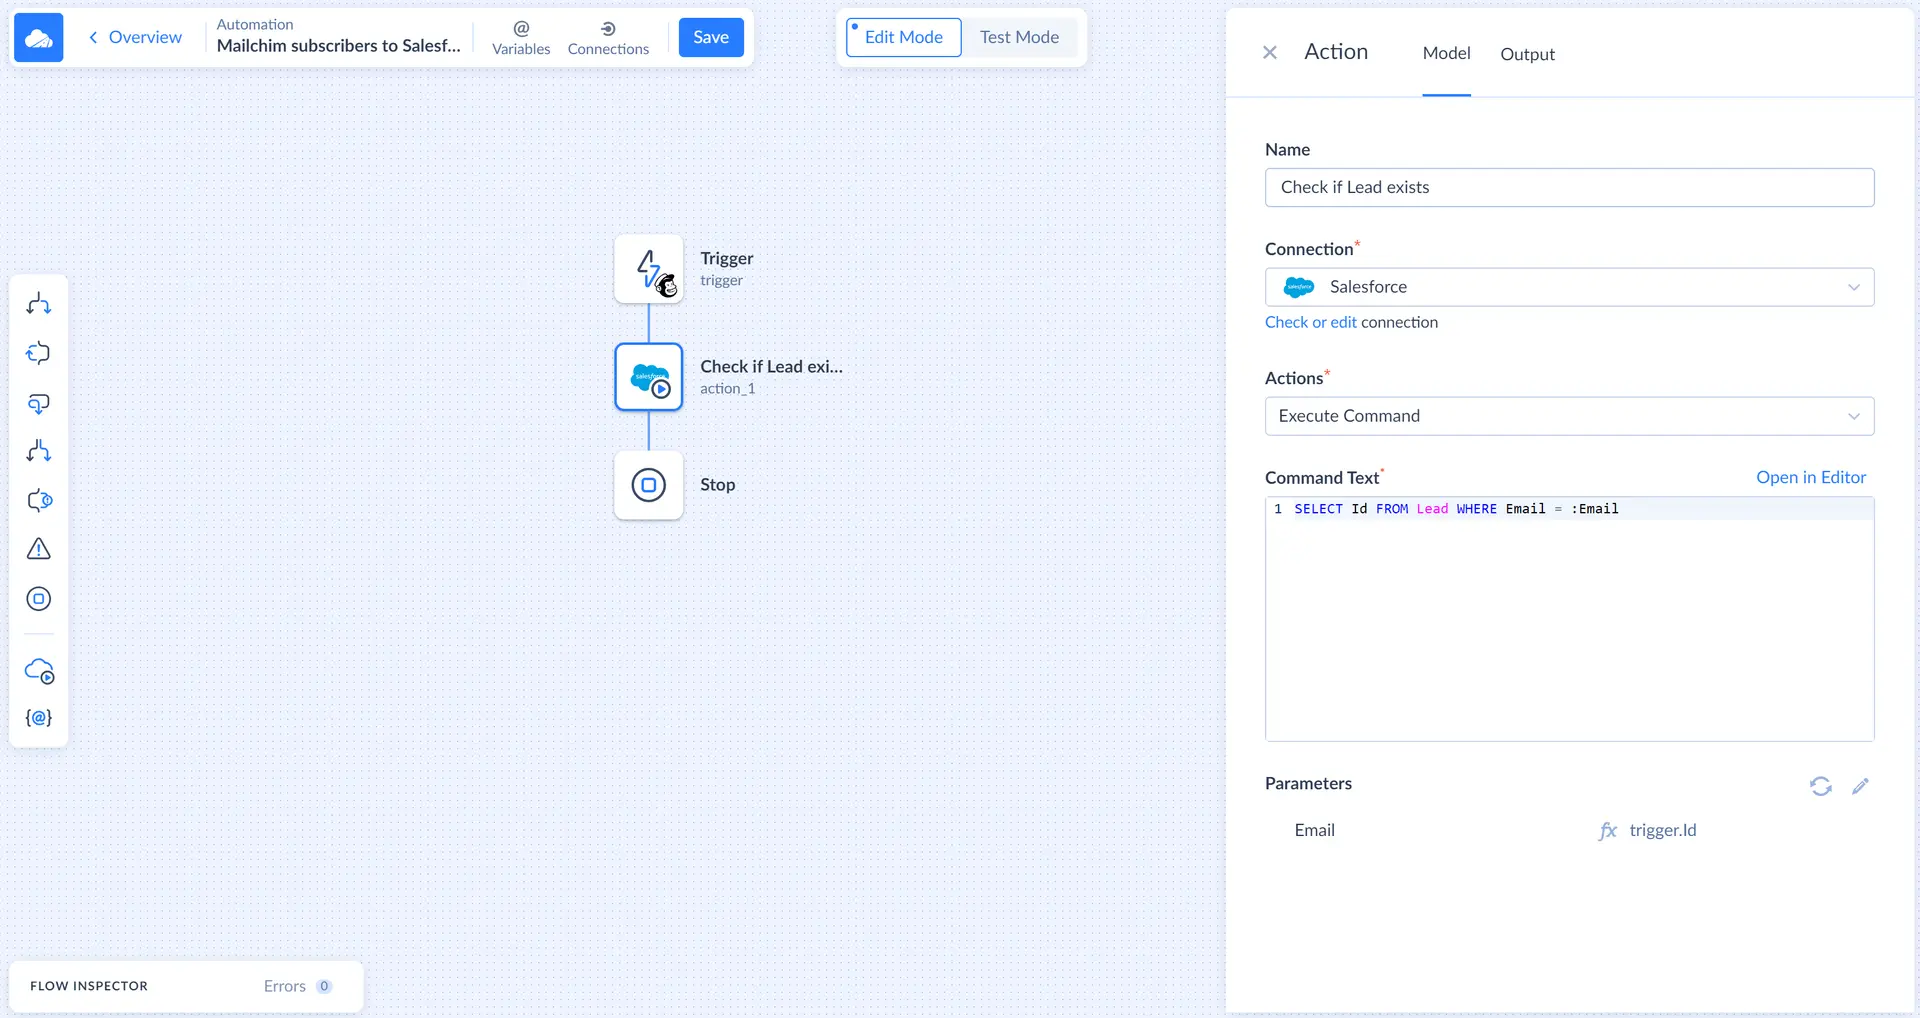
Checking If Lead Exists
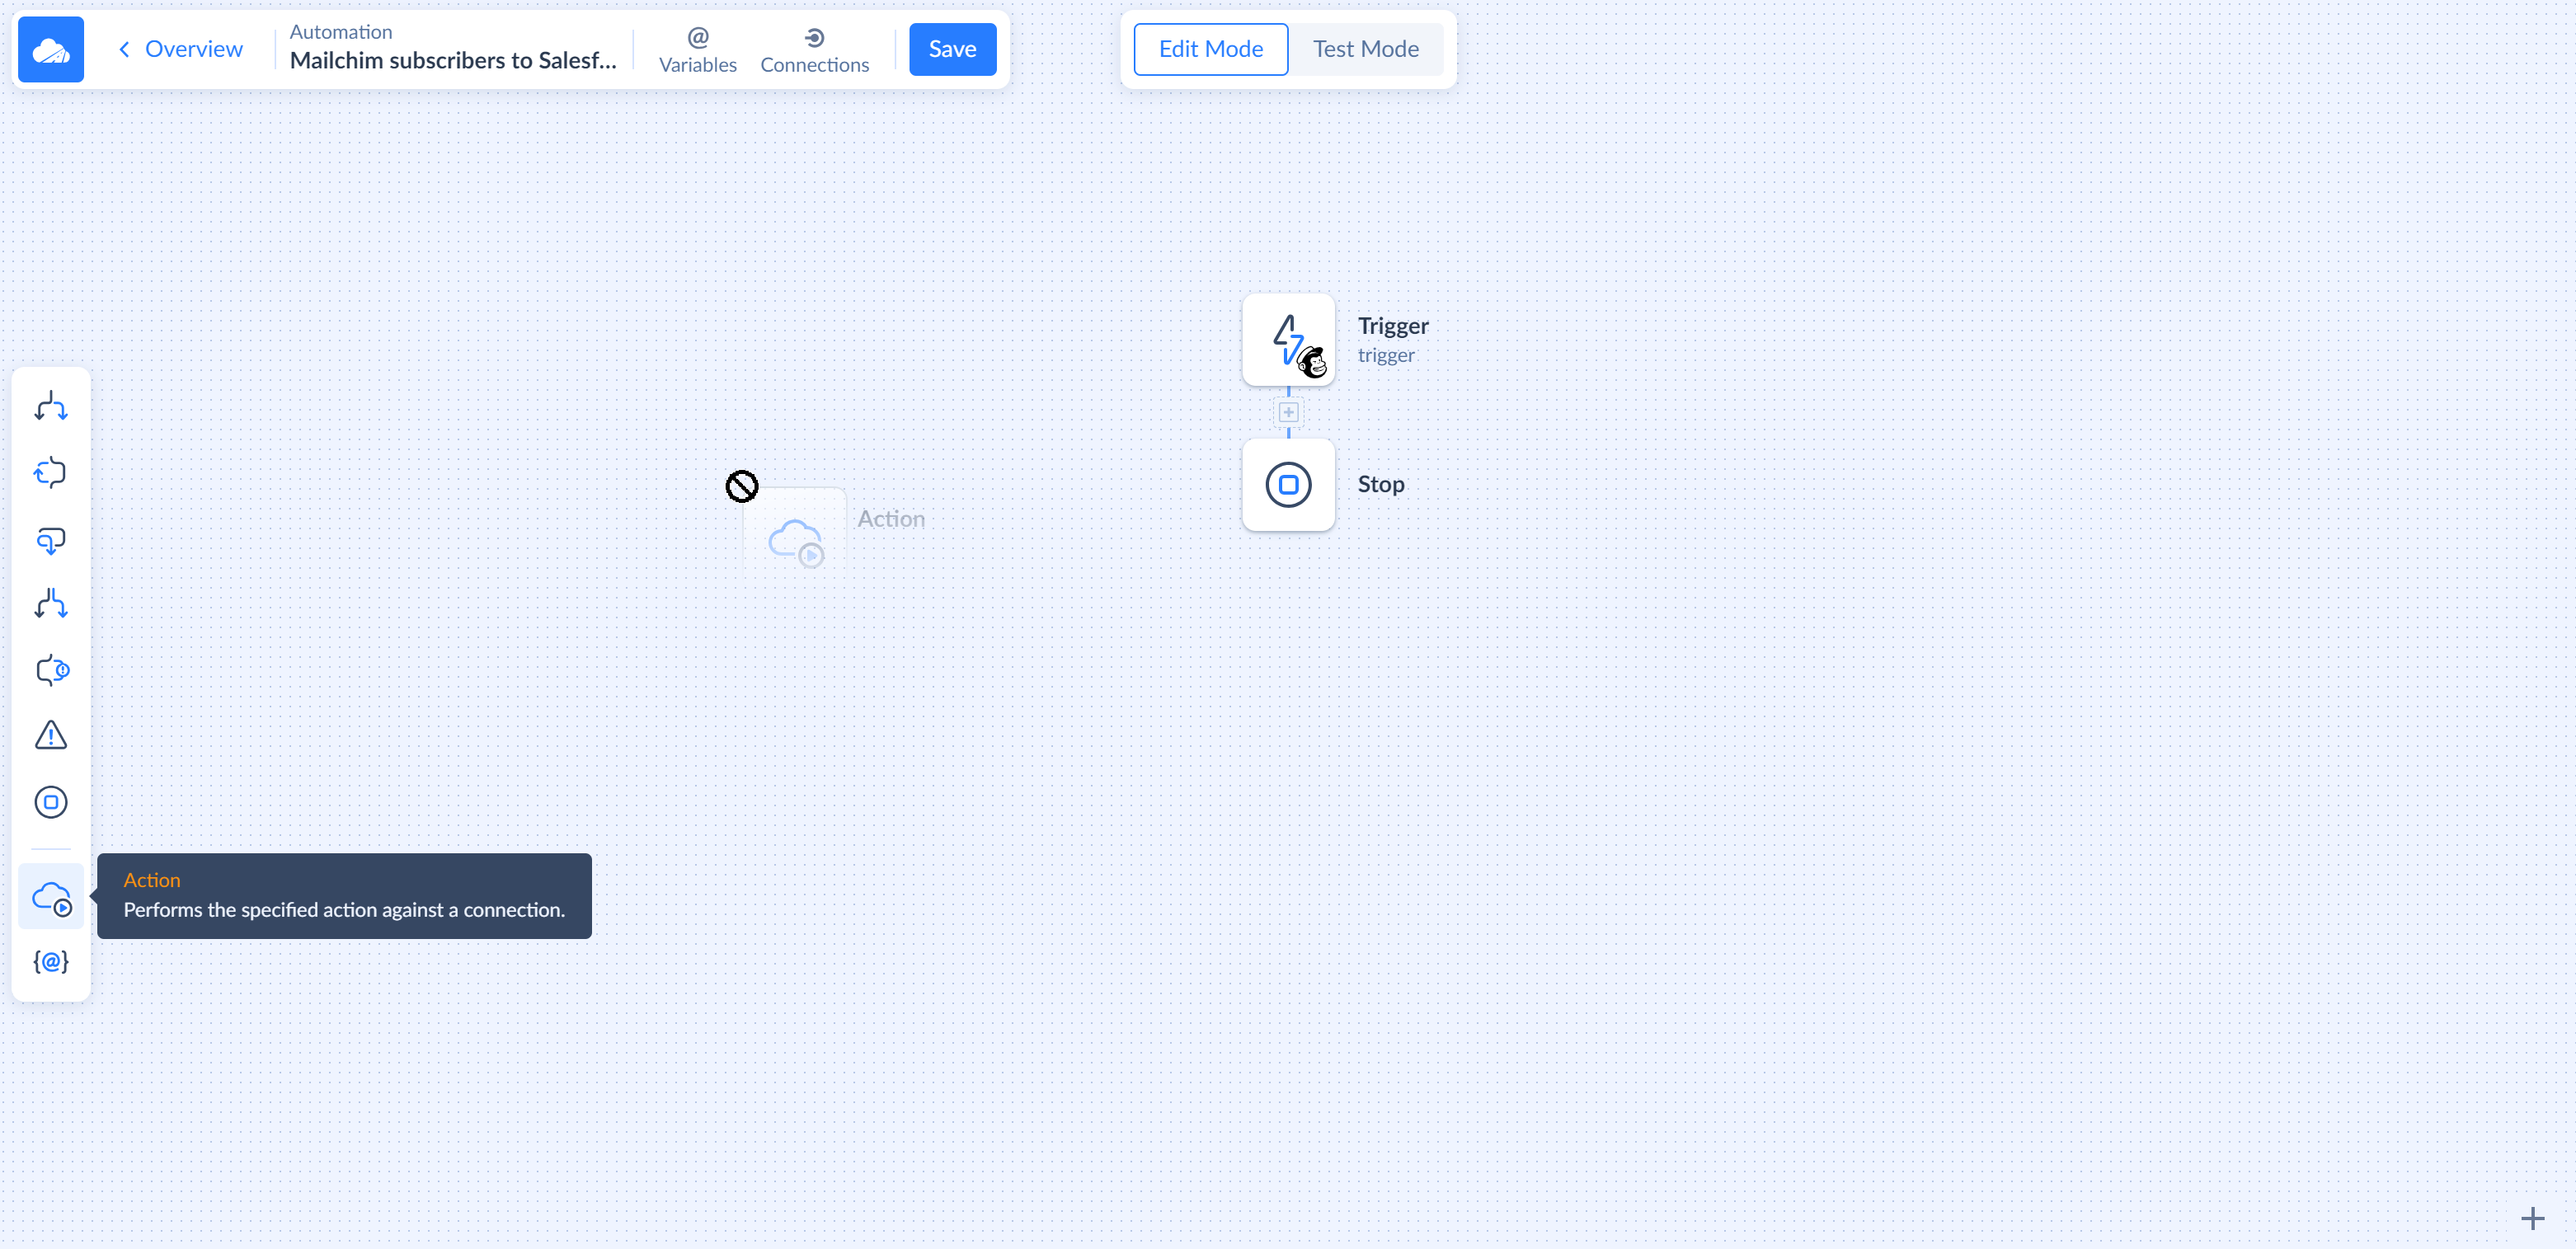
Let's set up this automation to add new Mailchimp subscribers to Salesforce leads. The first step is to check if a lead with such email already exists in Salesforce. Add the first Action component by dragging it to the plus sign between Trigger and Stop.
To configure this Action, perform the following steps:
-
Click the Action on the diagram.
-
In the Connection list, select your Salesforce connection.
-
Set Action to Execute Command.
-
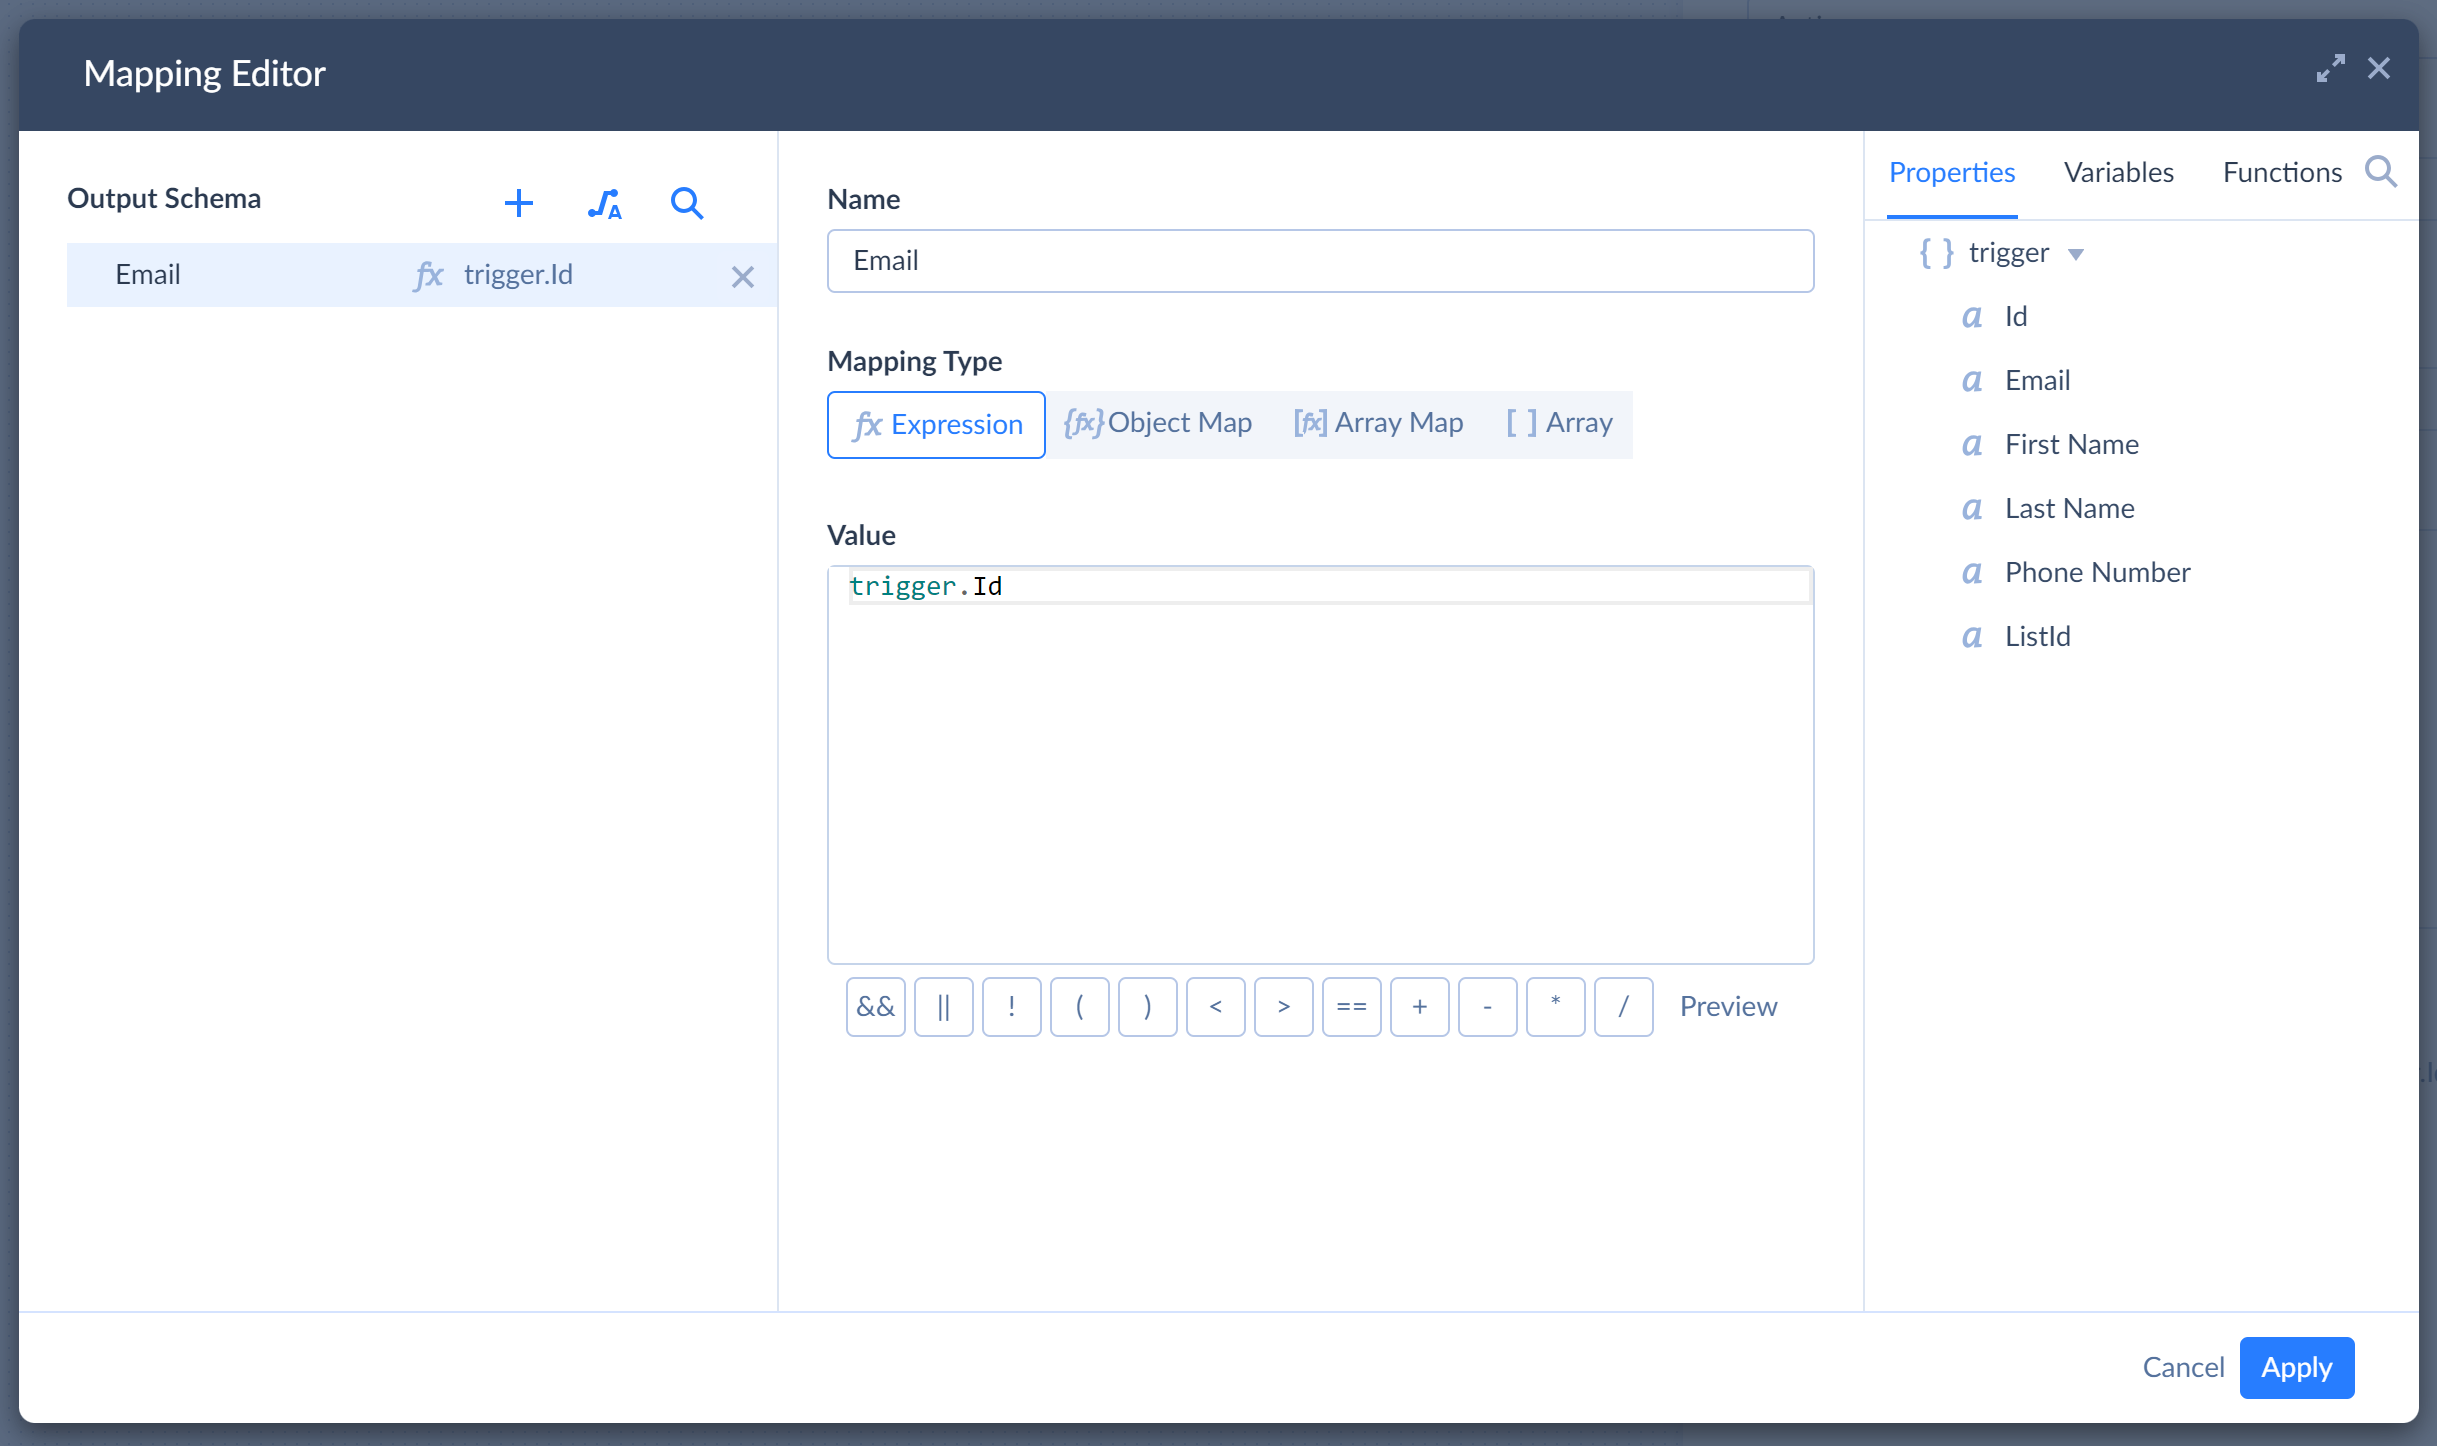
Enter this statement into the Command Text field: SELECT Id FROM Lead WHERE Email = :Email.
-
Click the Email parameter in the Parameters list.
-
Under Properties expand { } trigger and click Id to map the parameter to input Email property.
You can also specify the action name to make the automation diagram more understandable. Here is the result:
Adding Condition
Now let's configure a condition to only process subscribers who are not already present in Salesforce. Add an If component after the Action. To configure it, enter isnull(action_1.Id) in its Condition box.
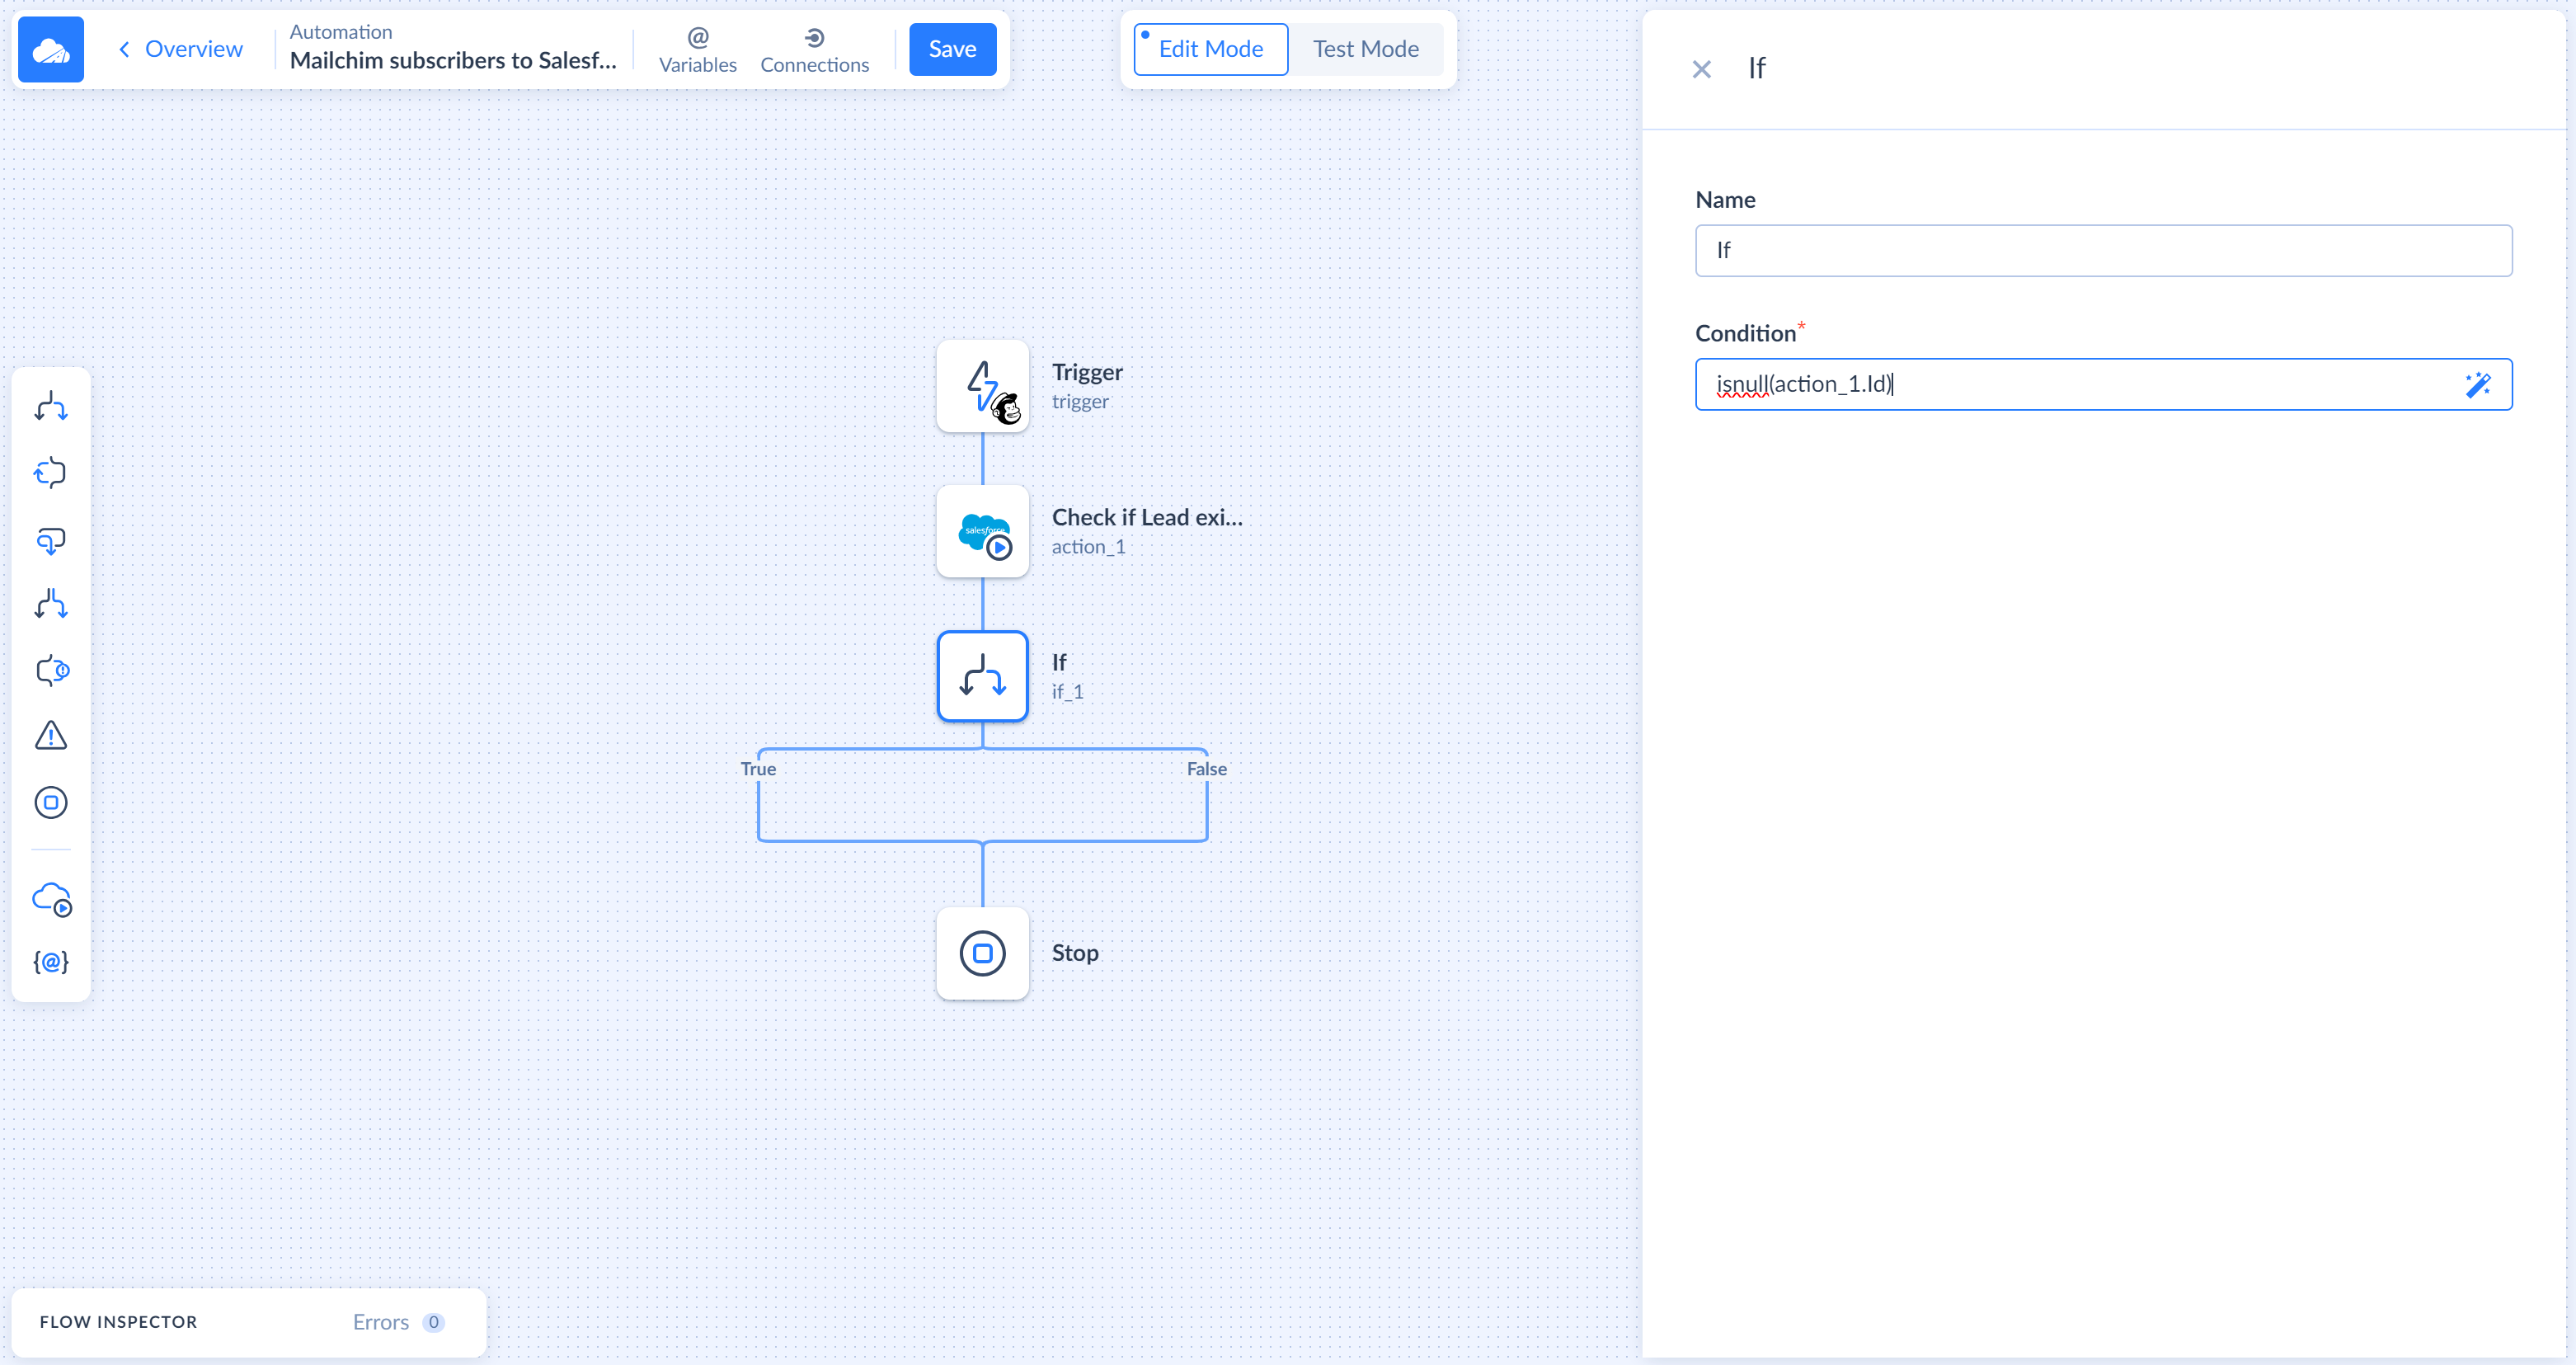
You can also rename the If component.
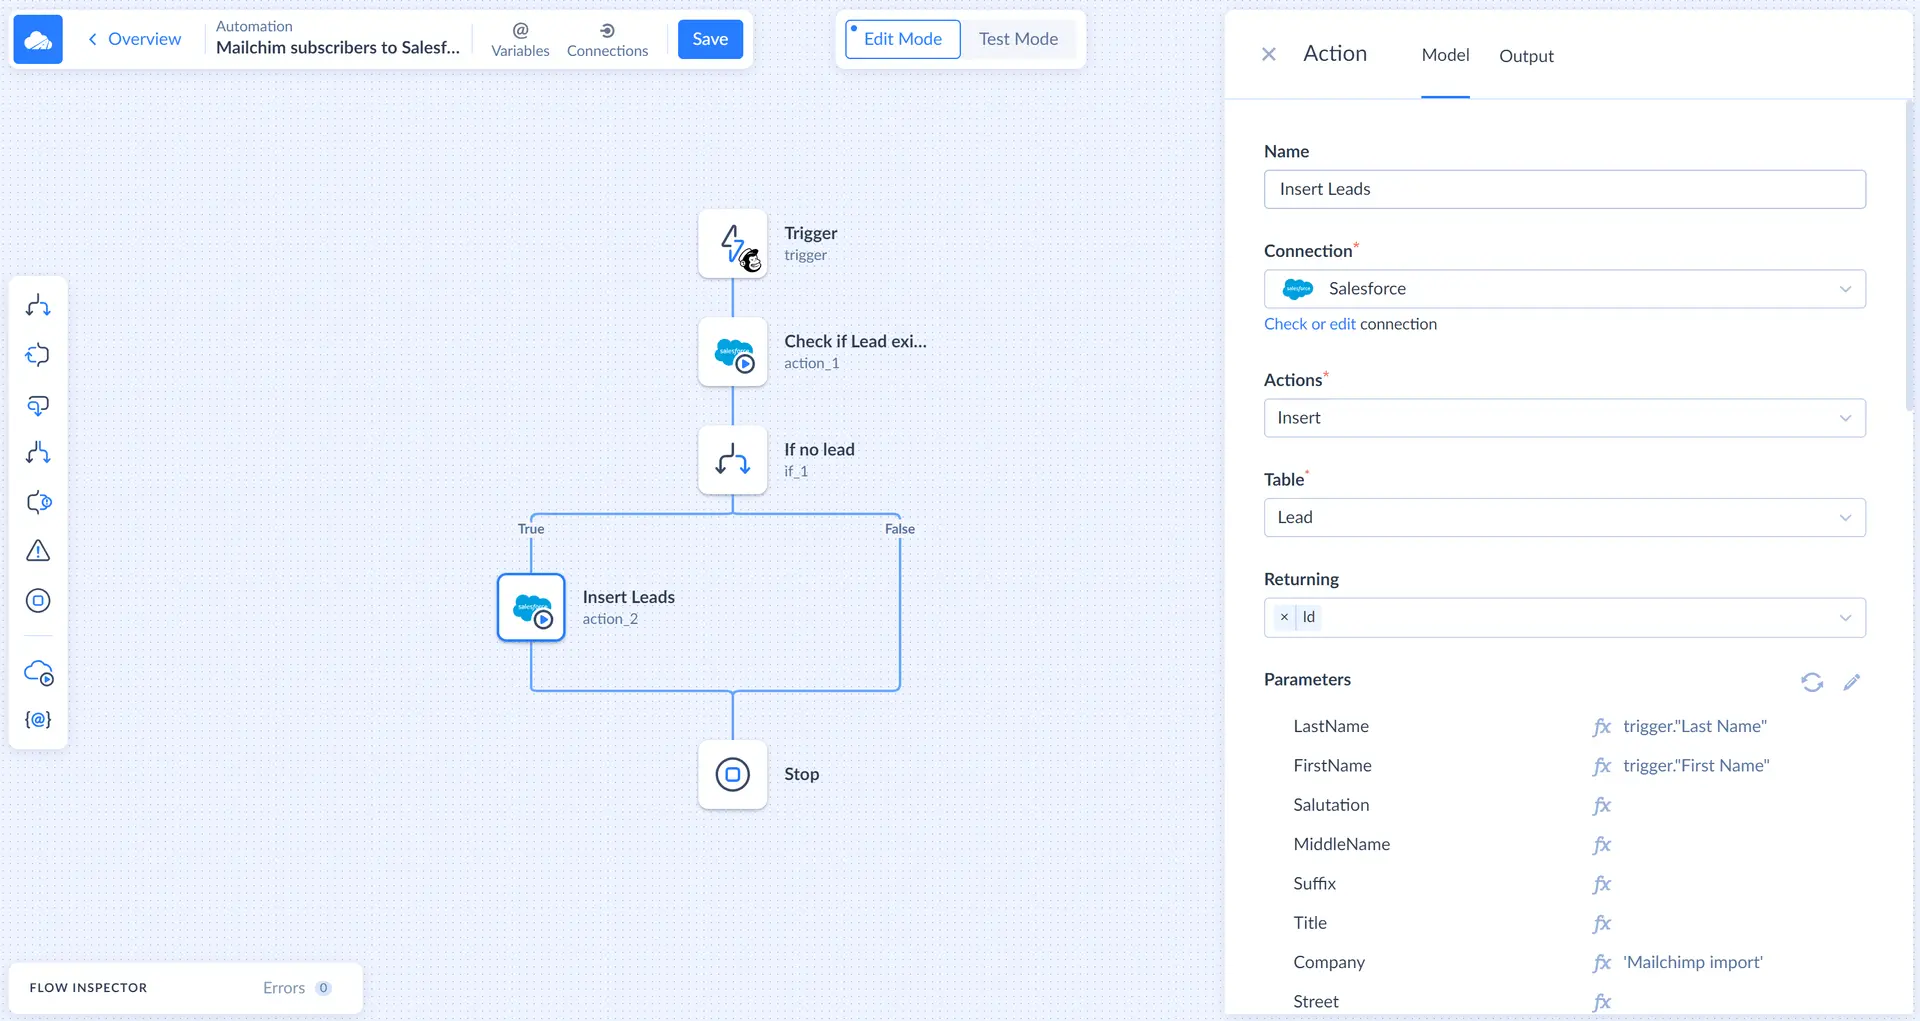
Inserting Leads to Salesforce
Add another Action component to the True branch of the If component. This Action will insert leads to Salesforce. Perform the following steps to configure it:
-
In the Connection list, select your Salesforce connection.
-
Set Action to Insert.
-
In the Table list, select Lead.
-
In the Returning list, select Id.
-
Click any parameter in the Parameters list and map the parameters like this:
Parameter Mapped Value FirstName trigger."First Name" LastName trigger."Last Name" Email trigger."Email" Phone trigger."Phone Number" -
Salesforce requires the Company field to be filled for a lead. However, depending on Mailchimp settings, the subscribers object may not have the corresponding data. For the Company parameter you can specify some constant value, for example, 'Mailchimp import'.
-
Finally, let's name the Action component. Here is the result:
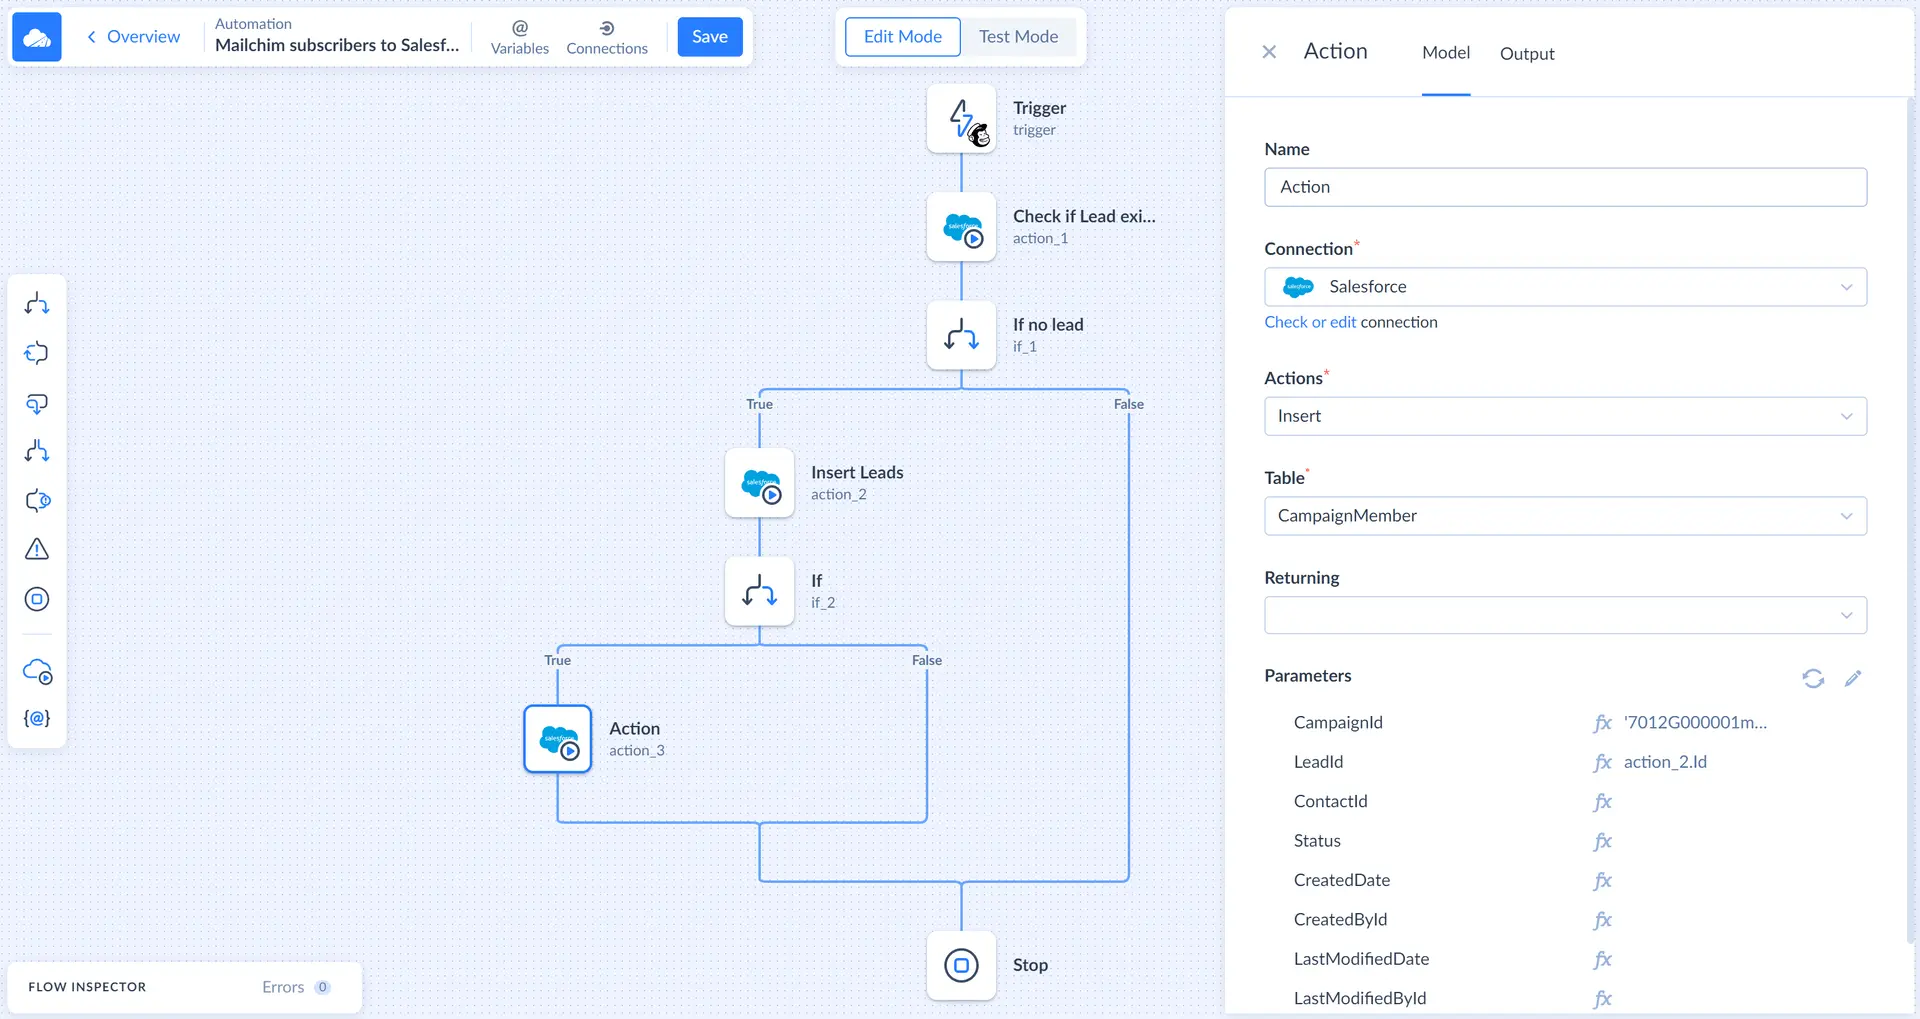
Adding Leads to Campaign
Finally, let's add components, that add subscribers from a specific Mailchimp list to a Campaign. For this, we need to add another If component to check whether a subscriber belongs to the selected list and Action component to insert the corresponding records to the CampaignMember Salesforce object.
Specify the following condition in the If component: _trigger.ListId=='<List ID>', where you should replace <List ID> with the actual ID of your Mailchimp list. You can get an ID of your Mailchimp audience in the audience settings in Mailchimp or using our Query tool.
To configure the newly added Action component, perform the following steps:
- In the Connection list, select your Salesforce connection.
- Set Action to Insert.
- In the Table list, select CampaignMember.
- Click any parameter in the Parameters list and map the parameters like this:
- CampaignId to ID of your Salesforce campaign to add subscribers to. Quote the value with single quotation marks, for example, '7012G000001mDZzQAM'
- LeadId to trigger.Id
Here is the result:
Click Save to save it.
Testing Automation
Now you can check how the new automation works. Click Test Mode. Then, in the Execution pane on the left, click Start test. Skyvia will wait for the connection event to trigger execution.
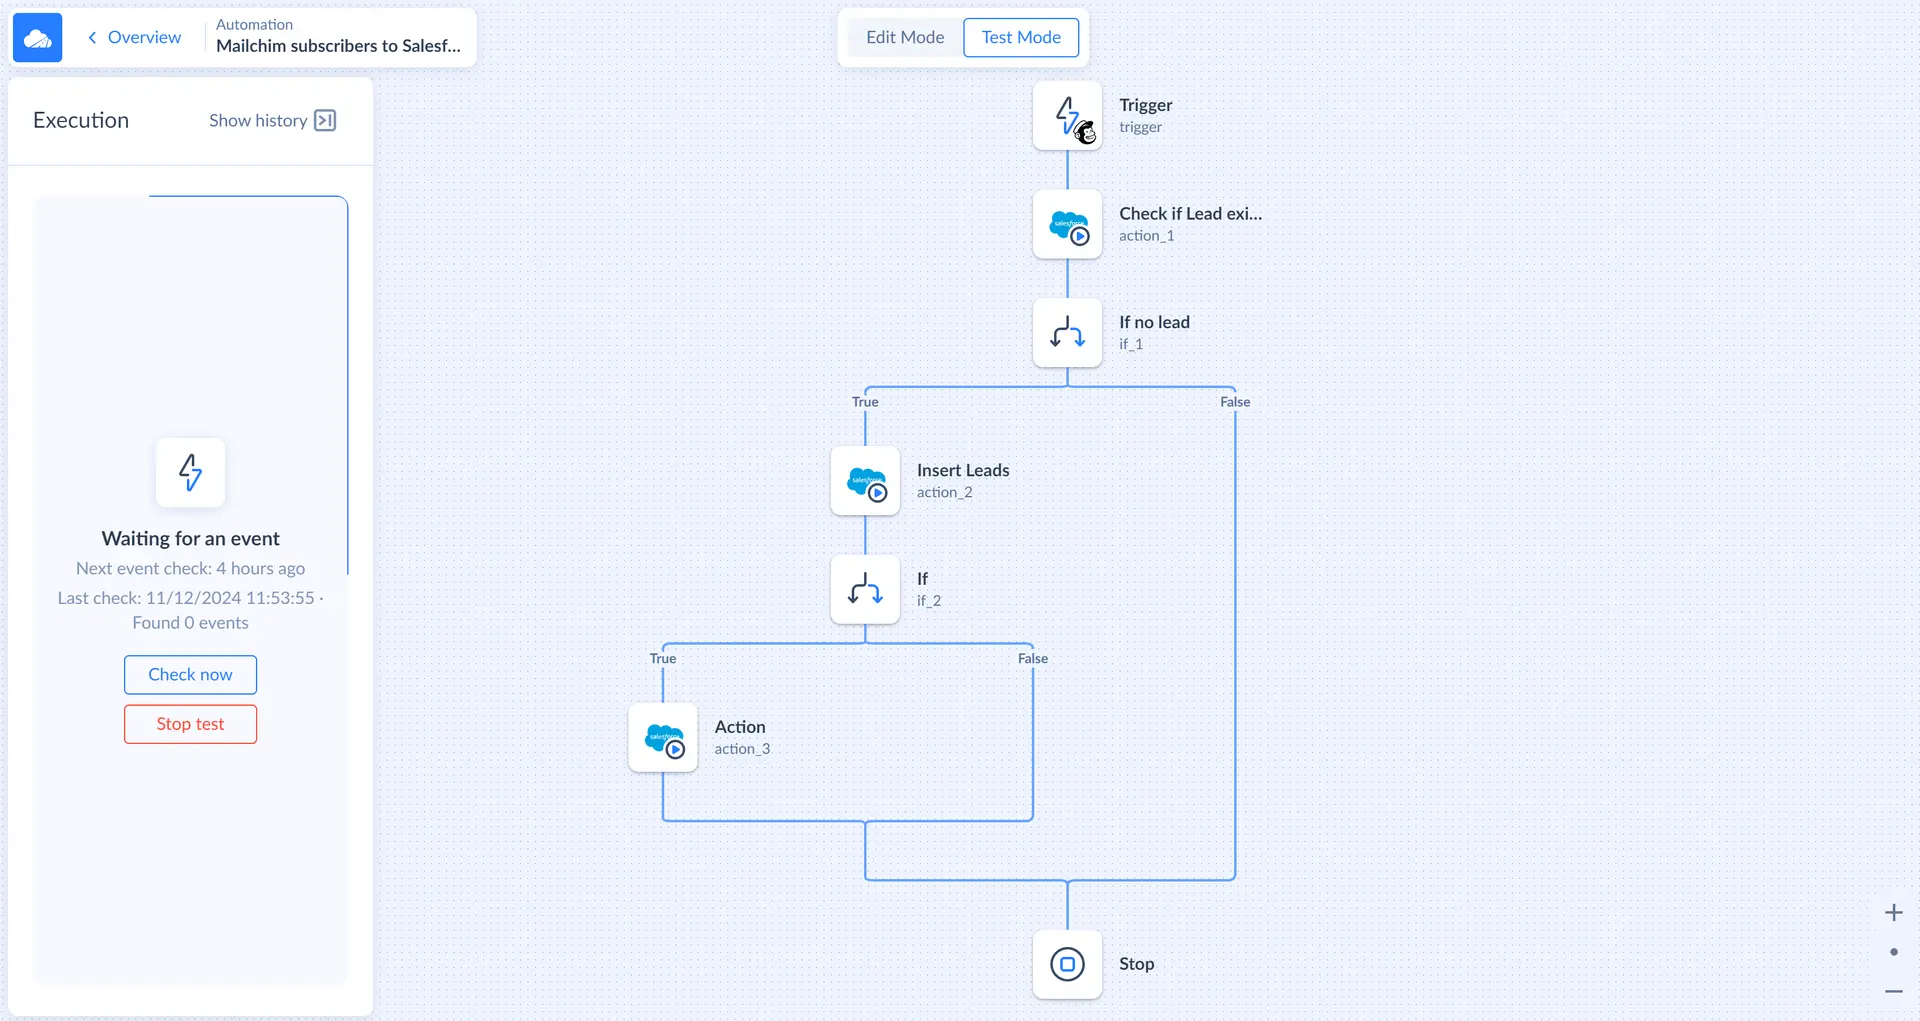
Add a subscriber to Mailchimp to trigger automation in the test mode and wait for the automation to check for the events (new Mailchimp subscribers) or click Check now.
Let's assume our test failed.
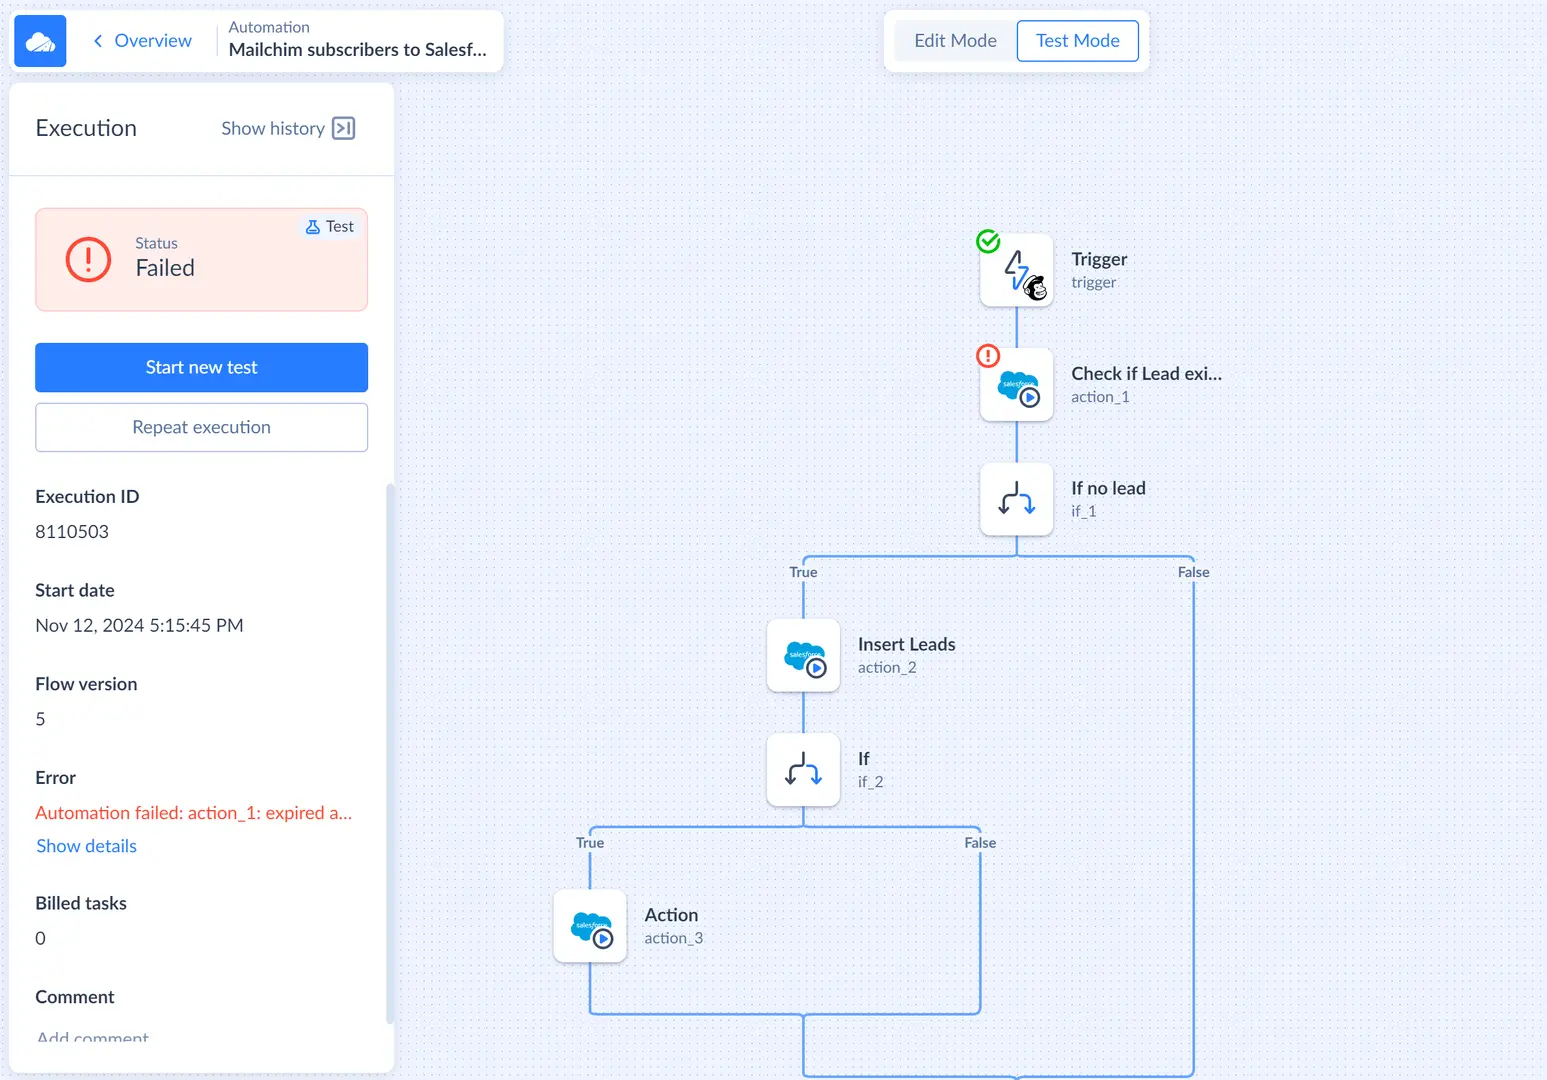
You can immediately see, which components executed successfully, where the error occurred, and which components didn't trigger at all on the diagram. Click Show details in the Execution pane to see the details of the error. In this case, the first Action component failed, and the error is caused by an expired token in the Salesforce connection.
After fixing errors, you can immediately rerun the test with the same data by clicking Repeat execution.
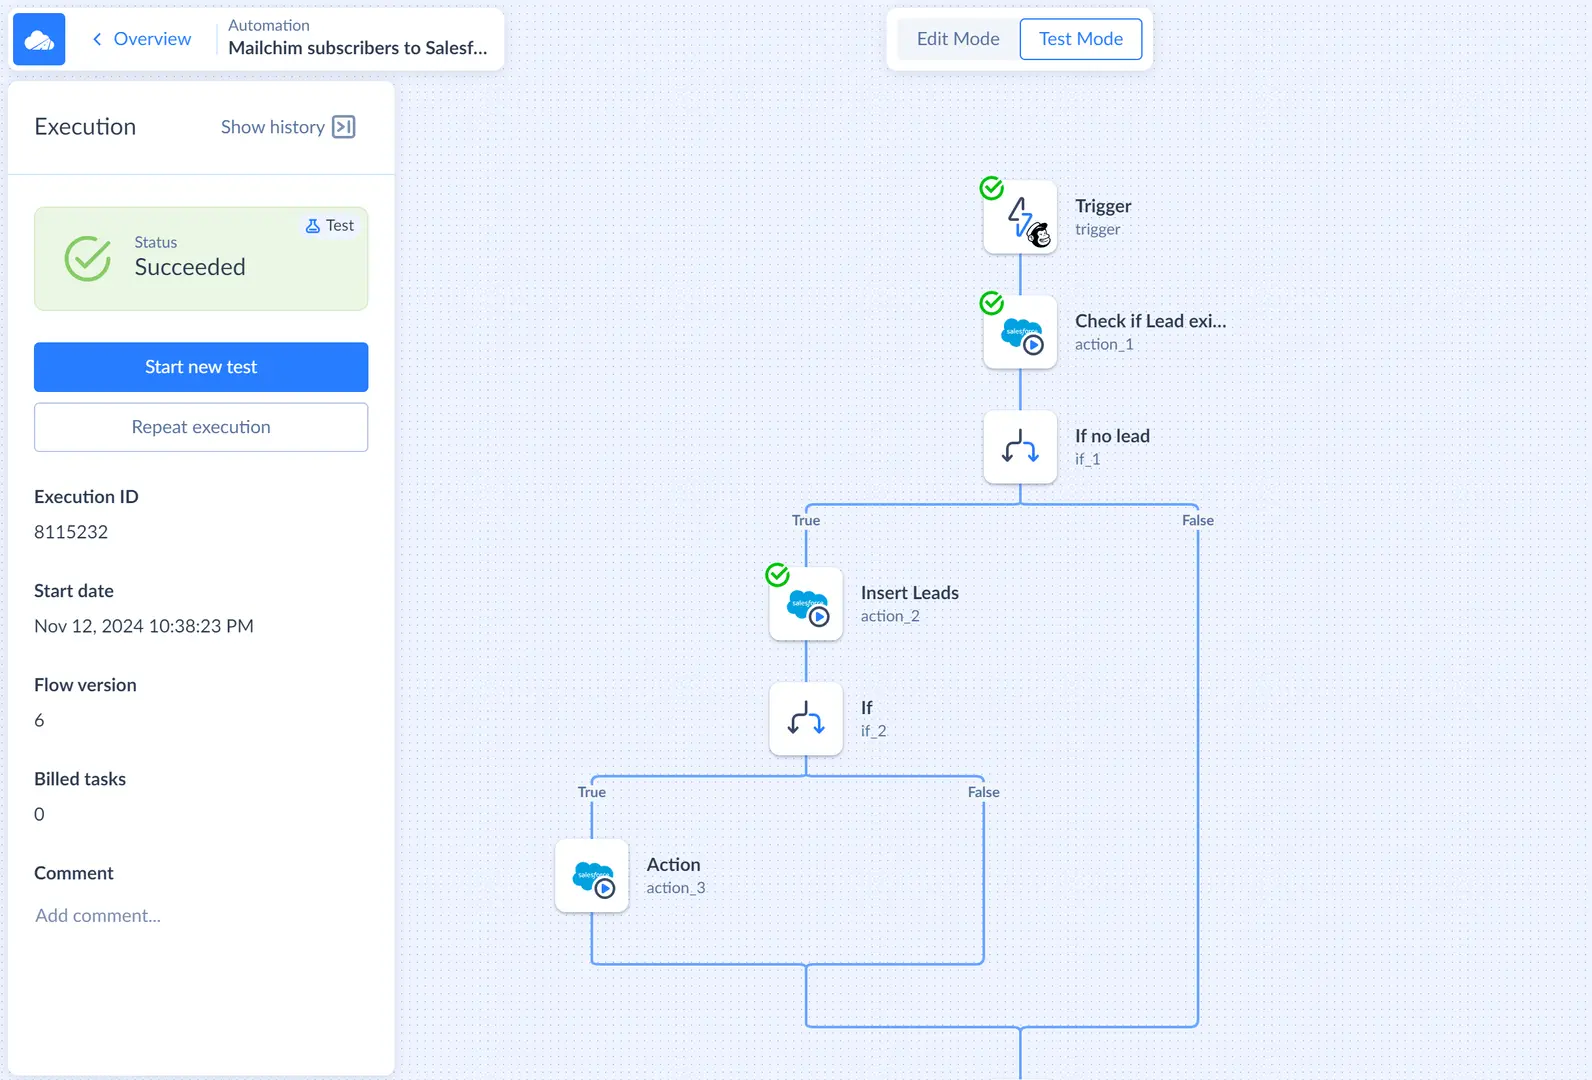
This time we can see that the automation succeeded.