How to Configure OData Endpoint in Advanced Mode
To create an OData endpoint, click + Create New > OData Endpoint. With Skyvia's OData Endpoint Wizard, you can create an OData endpoint for your data source in just a few simple steps:
- Select Advanced mode to design the endpoint model.
- Select a connection to your data source.
- Define the endpoint model: select the data to publish, optionally adjust OData entities and associations between them.
- Configure endpoint security settings.
- Specify the endpoint name and OData settings and click Continue.
Endpoint Connection
On the Set up connection step, select a connection or create a new one to publish data from.
You can create OData endpoints for all supported cloud applications, databases and cloud data warehouses.
Selecting Data to Publish
On the Set up model step, define which data to publish via the endpoint.
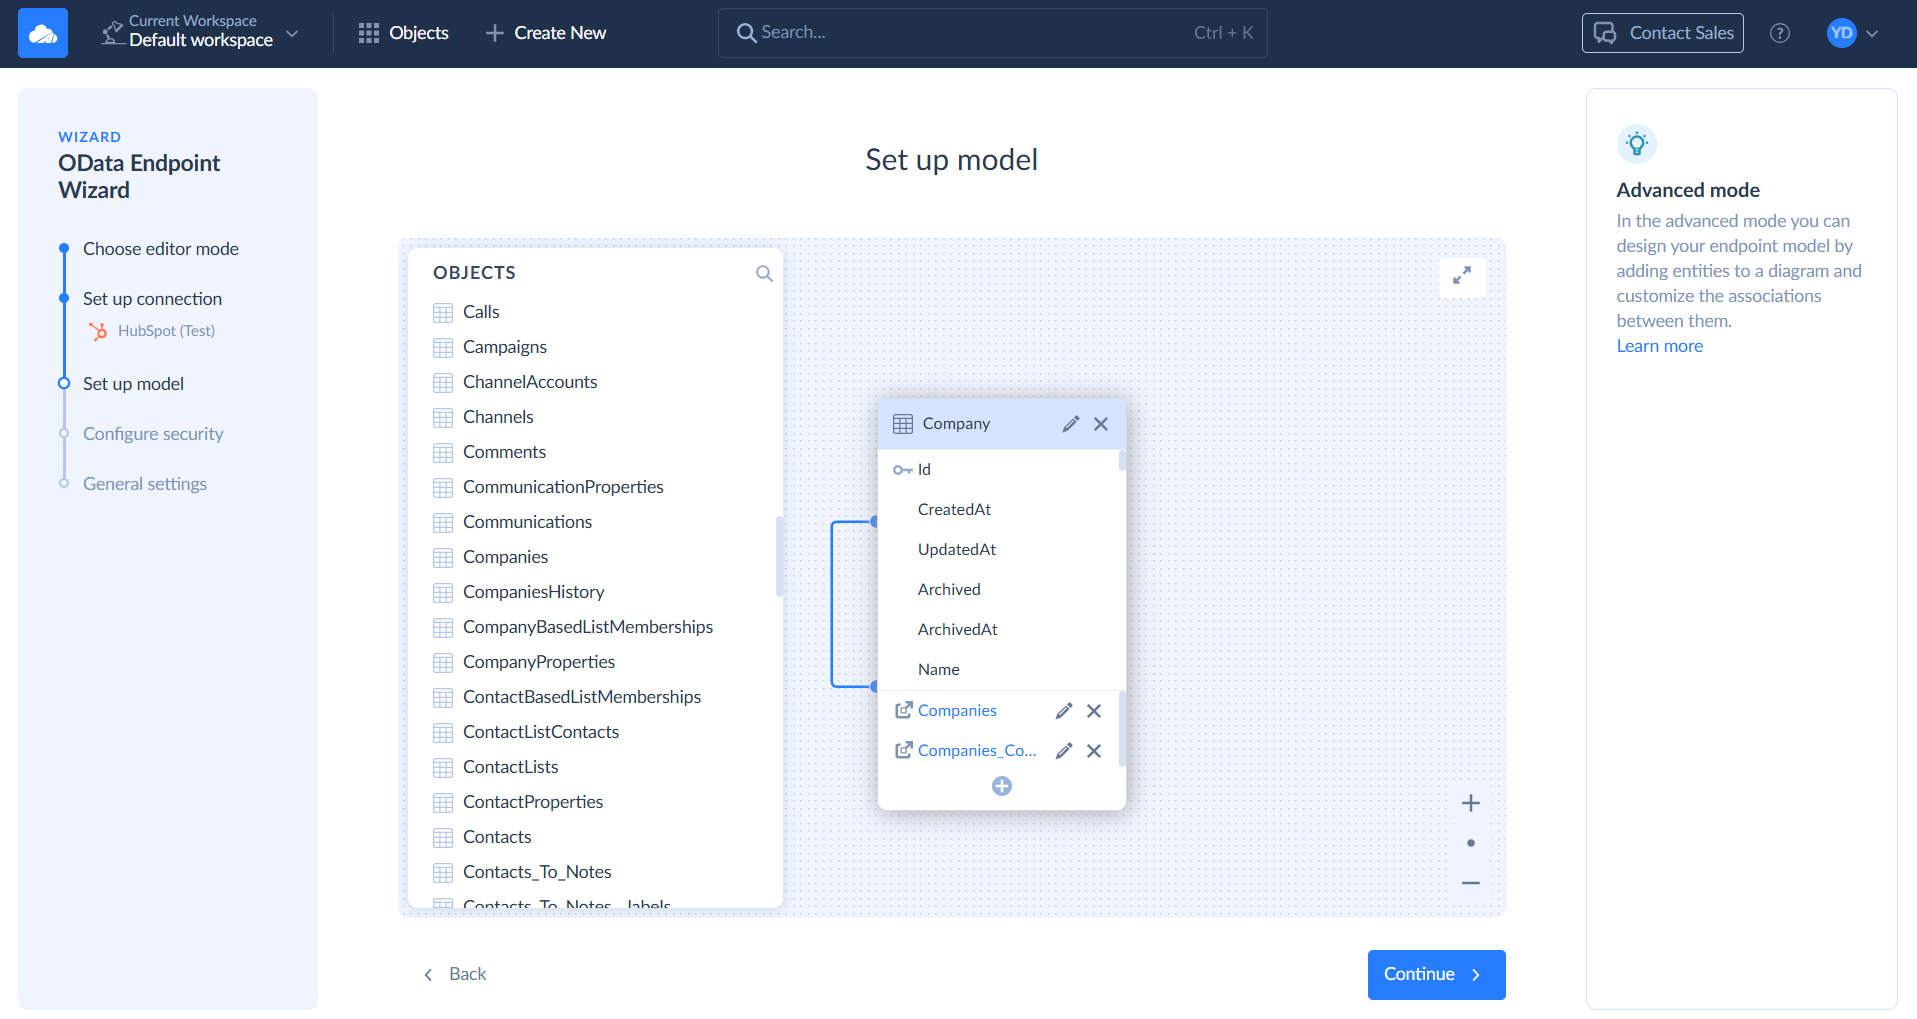
This step contains the Objects list and the diagram where you add objects to the endpoint model. OData entities on the diagram are shown as rounded rectangles with a header, a list of entity fields, and a list of navigation properties. A key icon indicates that a property is an entity key.
To add an object to endpoint, drag it from the list to the diagram. Skyvia automatically creates:
- Entity set and entity type for the table
- Relationships (associations) with other entity types on the diagram, corresponding to tables, with which there are relationships in the data source
- Self-referencing association if a table references itself in the data source
By default, Skyvia exposes all the table fields via the OData protocol. However, you can double-click entities on the diagram and tweak them in more details, if necessary.
Customizing Associations
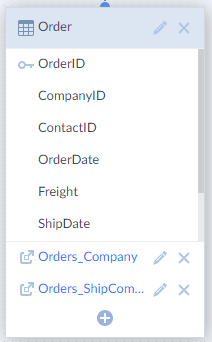
When dragging tables to an endpoint diagram, Skyvia automatically generates the corresponding OData entities and relationships (associations) between them, based on the data source metadata. They are displayed as dark blue lines on the diagram. Skyvia supports self-referencing relationships, when an entity references itself.
For each relation, a navigation property is generated on each side of the relation. Navigation property names are either generated from a foreign key or foreign key field name in the data source, if possible, or from the related entity name. These names are then used in OData request URLs when selecting entities by relations.
If necessary, you can edit or delete the generated relationships or even create your own custom ones.
Editing Associations
To edit an association, in an entity on any end of the association click ![]() Edit Association. The Edit Association dialog box opens.
Edit Association. The Edit Association dialog box opens.
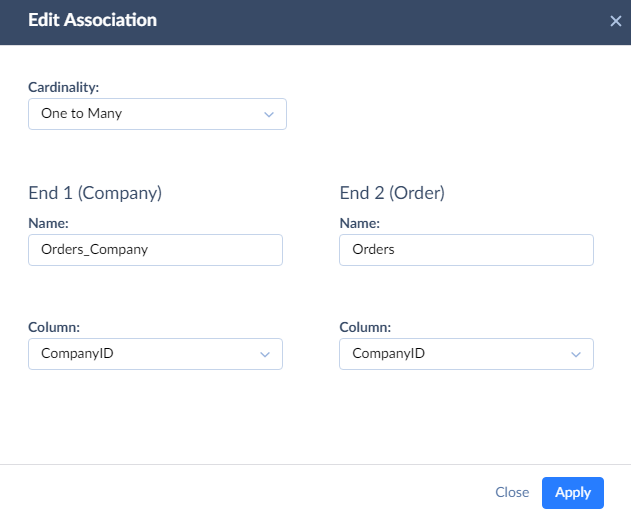
In this dialog box you can set Names for the corresponding navigation properties on both ends of the association. If needed, you can also select entity columns, on which the association is built, and specify the relation Cardinality — One to Many, One to One, One or Zero to One.
Adding Custom Associations
In addition to associations, automatically generated based on data source metadata, Skyvia allows adding custom associations to OData endpoints.
To add a custom association, find the plus icon ![]() at the bottom of the entity that should become the parent in the new association. Drag this icon to the entity, that should become the child in this association. This opens the Edit Association dialog box.
at the bottom of the entity that should become the parent in the new association. Drag this icon to the entity, that should become the child in this association. This opens the Edit Association dialog box.
In this dialog box, select the association Cardinality, specify the Names of the corresponding navigation properties, and select the data source Columns, based on which the association will be built.
Please note that in case of custom or modified relationships, you should care about the relation integrity of the data in your data source yourself.
Endpoint Security
On the Configure security step, you can protect your endpoint. You can allow access to your endpoint only for specific IP addresses, and add user accounts with passwords to make your endpoint data available only for authenticated users. Check Security Settings for more information.
General Settings: OData Version, Access Mode
On the General settings step, you can specify the new endpoint name and configure additional settings: default OData protocol version and endpoint access mode.
The following OData versions are available:
- oData Last — the latest supported version is used. Currently this is OData v4.
- oData v4 — OData v4 is used. It uses JSON format for returned data and metadata.
- oData v1-v3 — OData v3 (backward compatible with OData v1) is used. By default, it uses ATOM format for returned data and metadata.
The selected version is the default and can be accessed through the base endpoint URL. Regardless of the selected version, Skyvia creates both OData v1-v3 and OData v4 endpoints, which are available by adding odata3/ or odata4/ to the endpoint URL.
By default, Skyvia creates an endpoint with read and write access. Write operations are available only if the source supports updates for the tables or objects. To prevent data modifications, switch to the Read Only mode.