Relation Mapping
Relation mapping allows keeping relations between two or more related objects when inserting records from Source to Target. Relation mapping is available for one-to-one or one-to-many relations.
Find out general information about data relations, primary and foreign keys, relation types, and common use cases in the How to Import Related Data topic.
How it Works
When you run the integration with Relation Mapping enabled, Skyvia performs the following actions.
- Skyvia imports the parent object. It maps Source primary key values to new Target primary key values and caches this mapping.
- When Skyvia imports child objects, it looks for Source foreign key values in the cache.
- When Skyvia finds the matching values among Source primary keys, it takes a corresponding Target primary key from the cache and uses it as a foreign key for the child object in Target.
Use relation mapping for loading all related objects in the same integration and by the same run.
Relation mapping suits the most for massive loads or data migrations, when you load all related data at once. If you need to import new or changed data, or implement other scenarios of loading related data, see cases described in the How to Import Related Data topic.
How to Enable the Relation Mapping
Relation Mapping for Cloud Apps and Databases
To enable the Relation mapping for a cloud or a database source, do the following.
- Create an import and add an import task for the parent object.
- Add an import task for the child object.
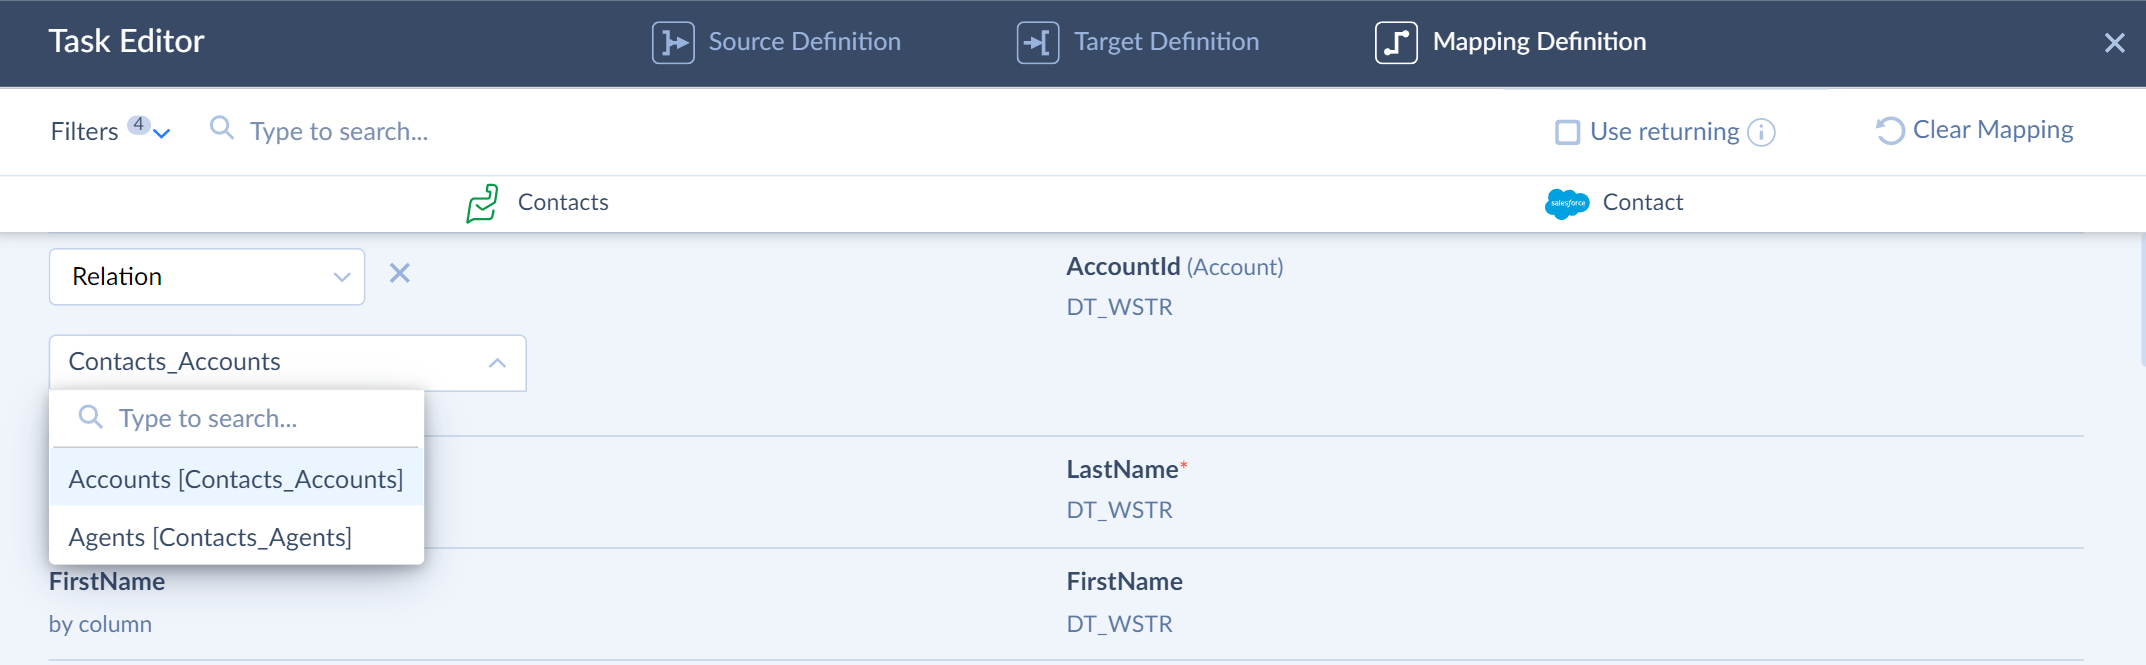
- Go to the child object task's Mapping Definition tab.
- Select the Relation mapping type for the foreign key field.
- Pick the needed relation from the drop-down list.
Relation Mapping for CSV files
To enable the Relation mapping for a CSV file, do the following.
- Create an import and add an import task for the first file.
- Add an import task for the second file.
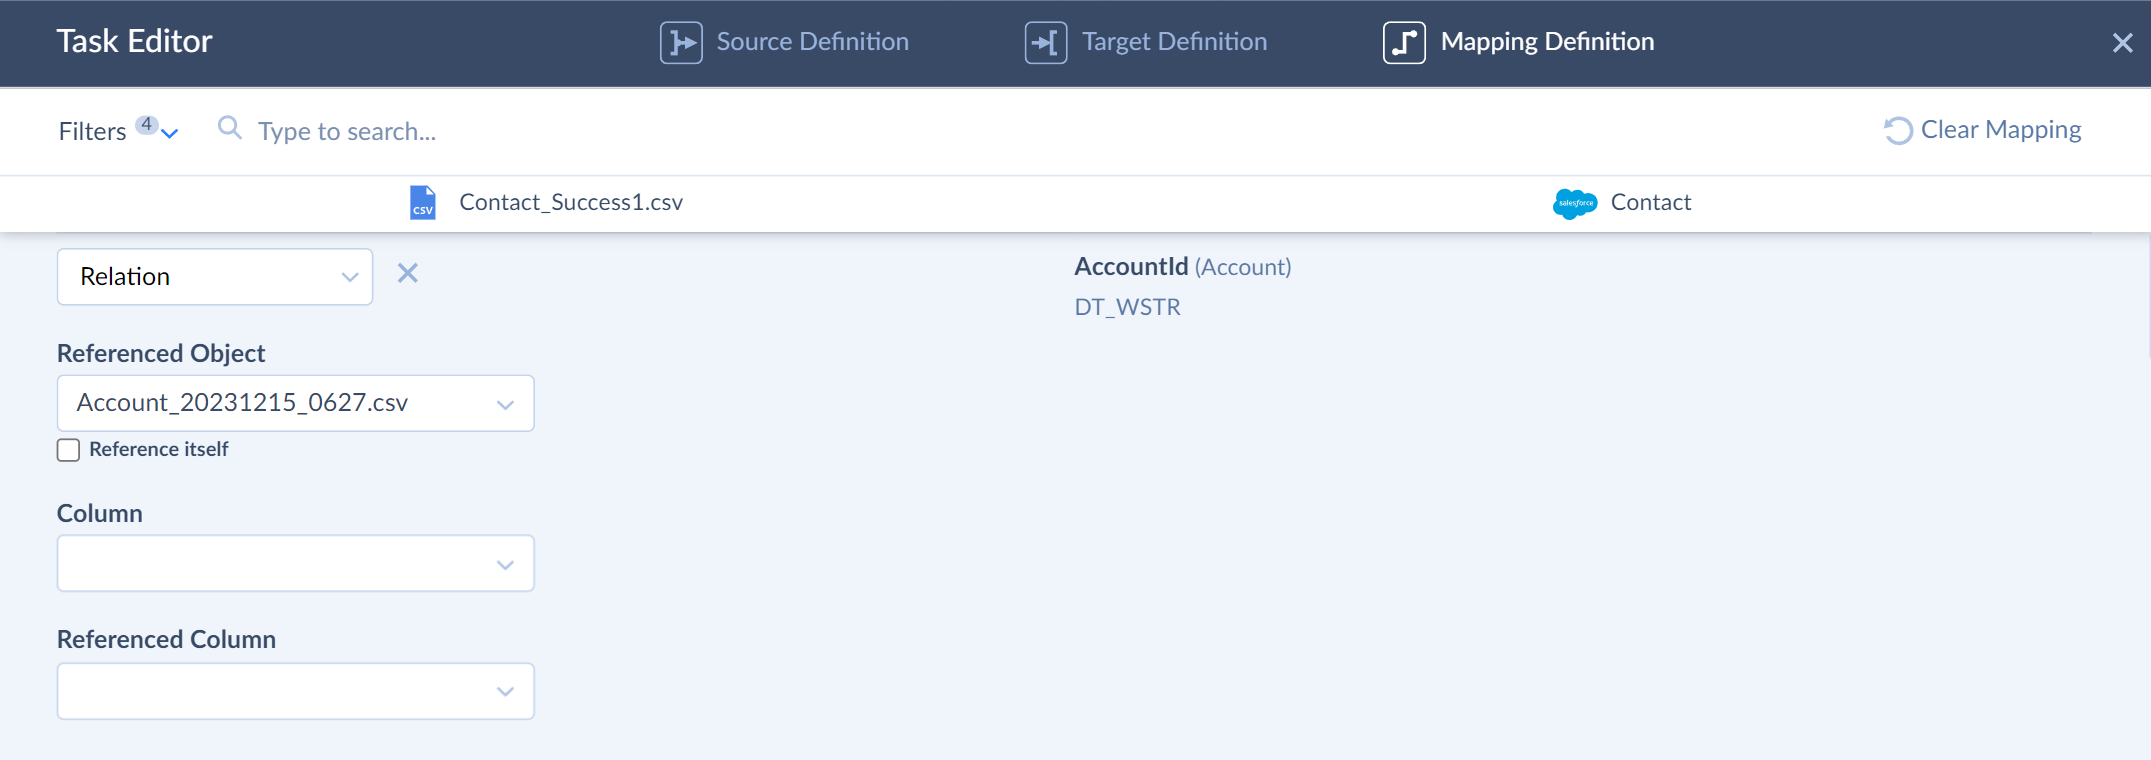
- Go to the second file task's Mapping Definition tab.
- Select the Relation mapping type for the foreign key column.
- Select the first file from the Referenced Object drop-down list.
- Select the columns by which you build the relation from the Column and the Referenced Column drop-down lists.
Self-referencing Relations
Skyvia supports self-referencing relations if the records refer to the same Source file.
For example, a Salesforce account belongs to another account whose ID is present in the same file. To refer to the same file, map the ParentId field using the Relation mapping and select the Reference itself checkbox.
It takes more API calls to keep self-referencing relations, because Skyvia queries the same records twice. It inserts records into Target and updates the same records to add foreign key values.
Specifics
- Relation mapping works within a single integration run.
- Each related object or file must have a separate task.
- Only the INSERT operation supports the Relation mapping. You can use Relation mapping for UPSERT operation, but it will affect the inserted records only, and won't affect the updated ones.
Relation Mapping Examples
Importing Zoho Desk Accounts and Contacts to Salesforce Accounts and Contacts
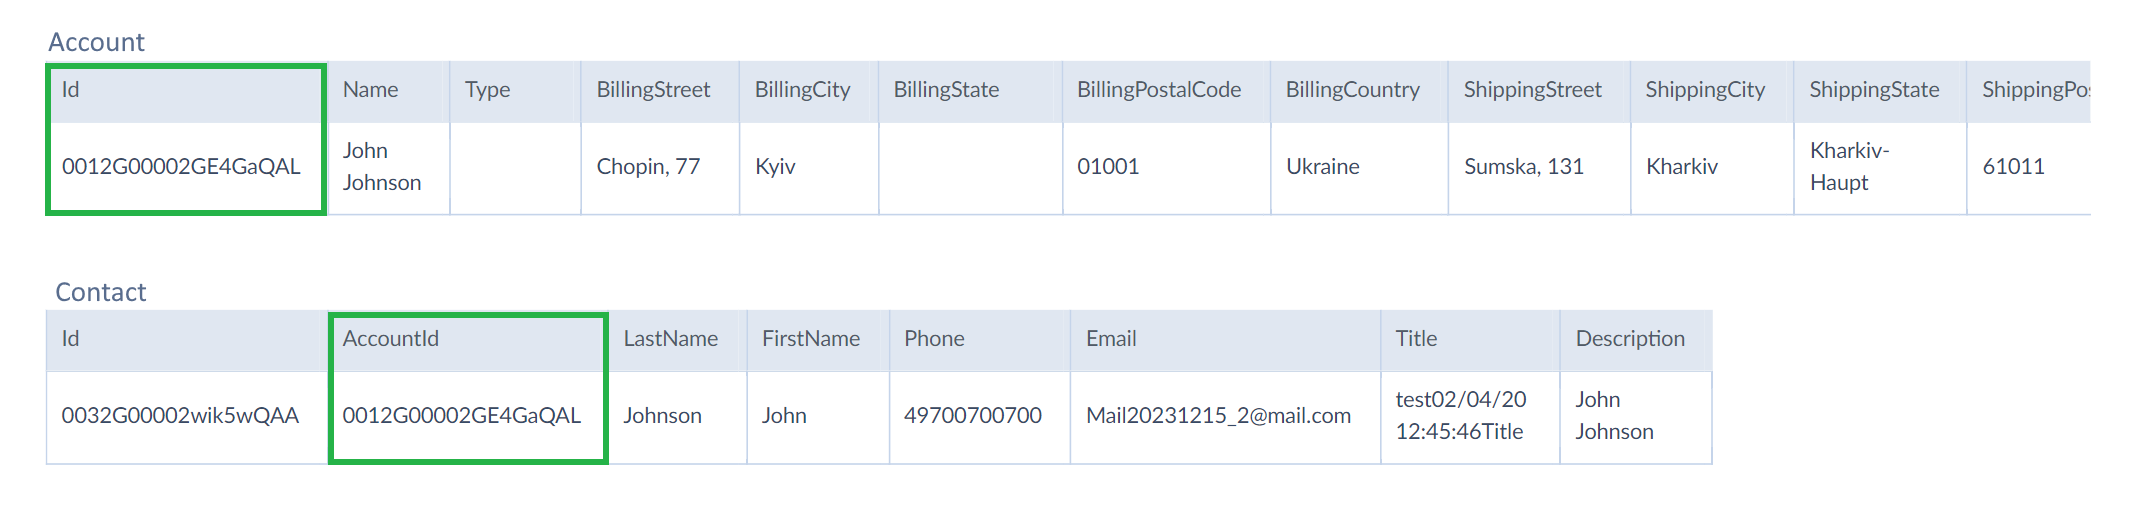
Zoho Desk Accounts is the parent object. Its Id field is the primary key.
Zoho Desk Contacts object relates to the Accounts object by the AccountId foreign key field.

To import Zoho Desk accounts and their related contacts to Salesforce, perform the following steps.
- Create an import with Zoho Desk as a Source and Salesforce as a Target.
- Add an import task for the parent object Accounts.
- Add another import task for the child Contacts object to the same integration.
- On the Mapping Definition tab, select Relation mapping for the foreign key AccountId field and pick the Contacts_Accounts relation.

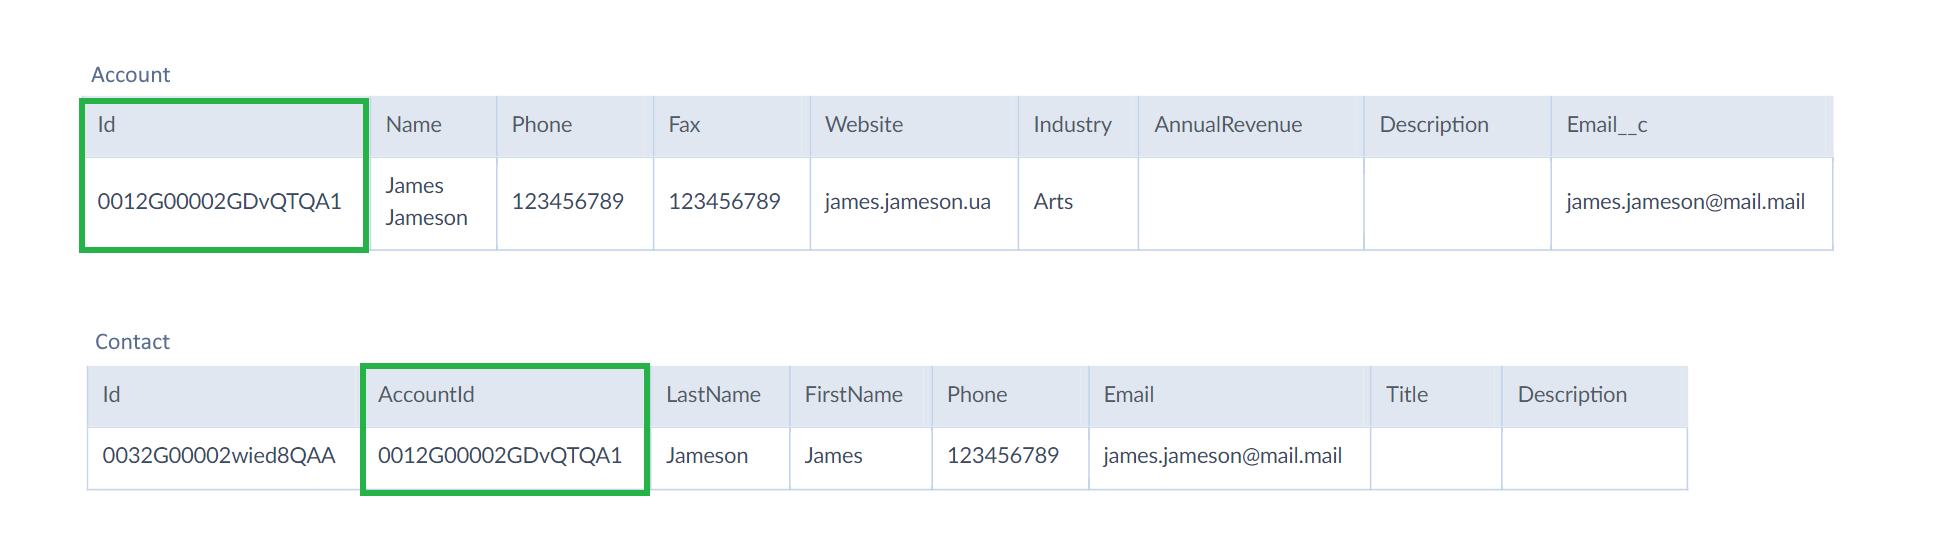
After the integration run, you get a new Account record and a new related Contact record.
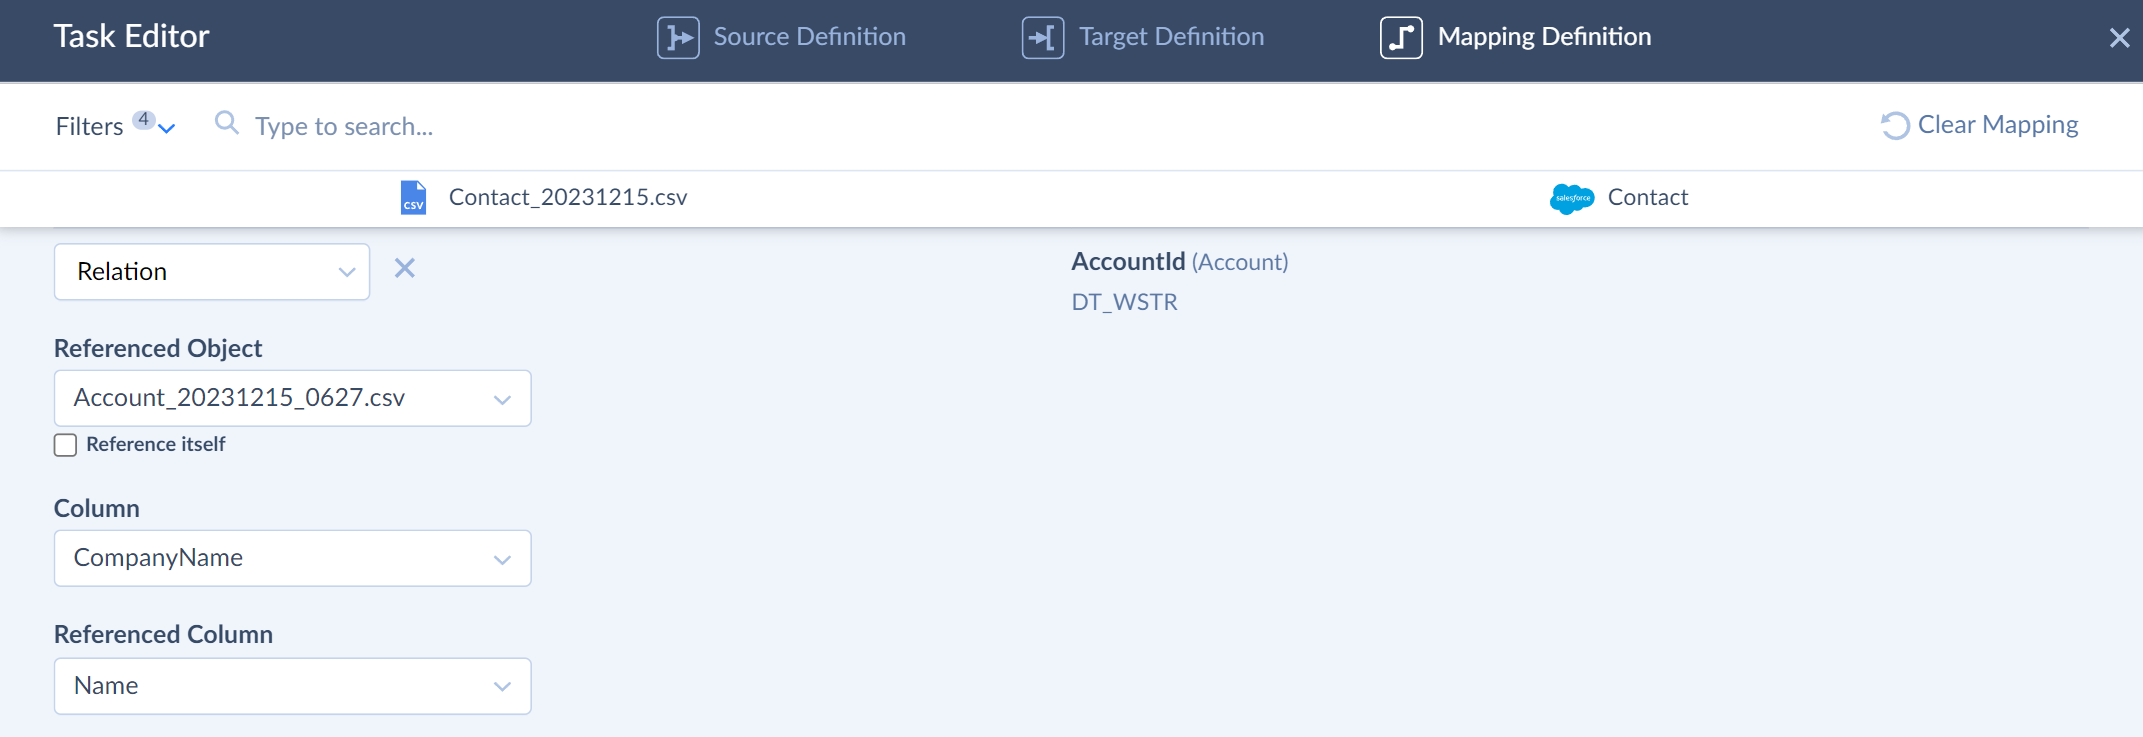
Importing Accounts and Contacts from CSV File
You import Salesforce Account and Contact objects from two separate CSV files. One file stores accounts, and another file stores contacts. This file has the CompanyName column, which refers to the parent file Name column.
To import data from these files to Salesforce, do the following.
- Create an import with a CSV file as a Source and Salesforce as a Target.
- Add a task for importing accounts from the parent file.
- Add another import task for the child file to the same integration.
- On the Mapping Definition tab, use the Relation mapping for the AccountId column.
- As the Reference Object, select the file, storing accounts.
- From the Column drop-down list select the CompanyName.
- From the Referenced Column drop down list, select the Name column.
After the run, you get a new Account record and a new related Contact record in Salesforce.