Uploading Files to HubSpot
In this tutorial, we will learn how you can setup Skyvia to get files from the source and add them to HubSpot as a contact attachment.
Prerequisites
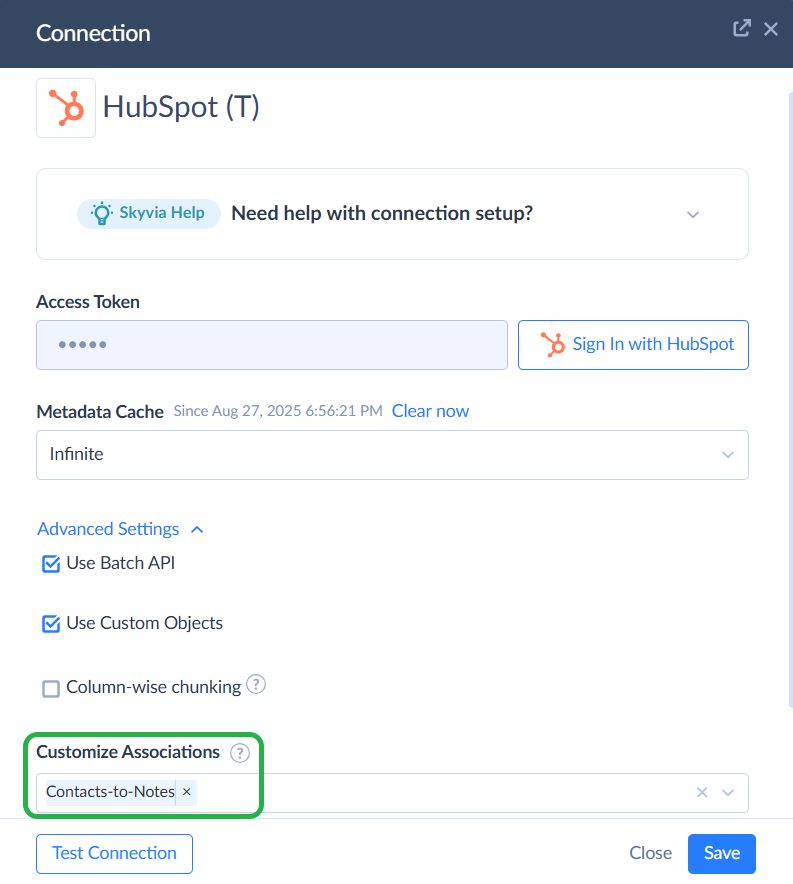
Before starting, create connections to the data sources. Refer to the HubSpot and SQL Server topics for detailed instructions.
For the HubSpot connection, select Contact-to-Notes association. Then, clear the metadata cache.
After creating connections, click + Create New and select Data Flow.
Setting up Data Flow
This Data Flow will add files to HubSpot from the selected source and then create relations with the contact. In this example, we will use SQL Server and HubSpot.
-
Drag the Source component onto the diagram. In Result Fields, add the fields that contain the contact email, file content, name, and extension.

-
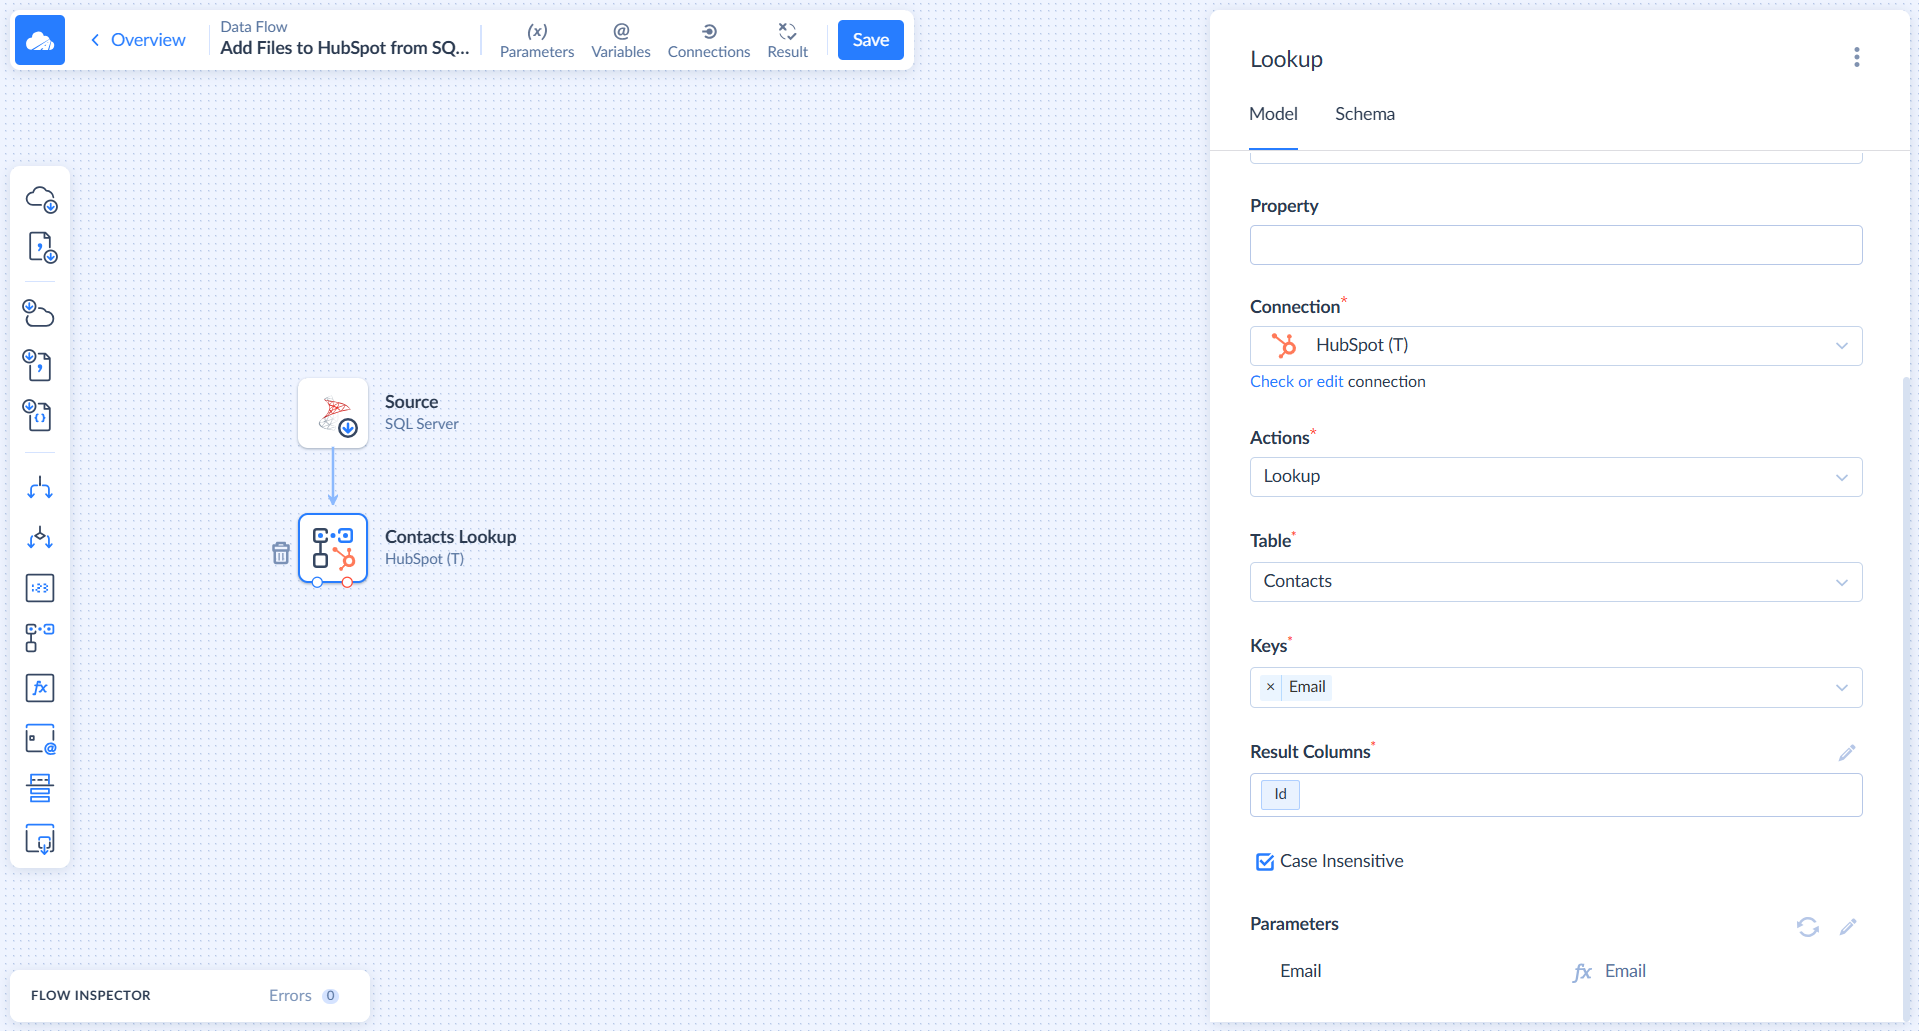
Drag and drop the Lookup component onto the diagram. In the Actions, select Lookup. In the Table, select Contacts. In the Keys, choose Email. In the Result Columns, choose Id.
-
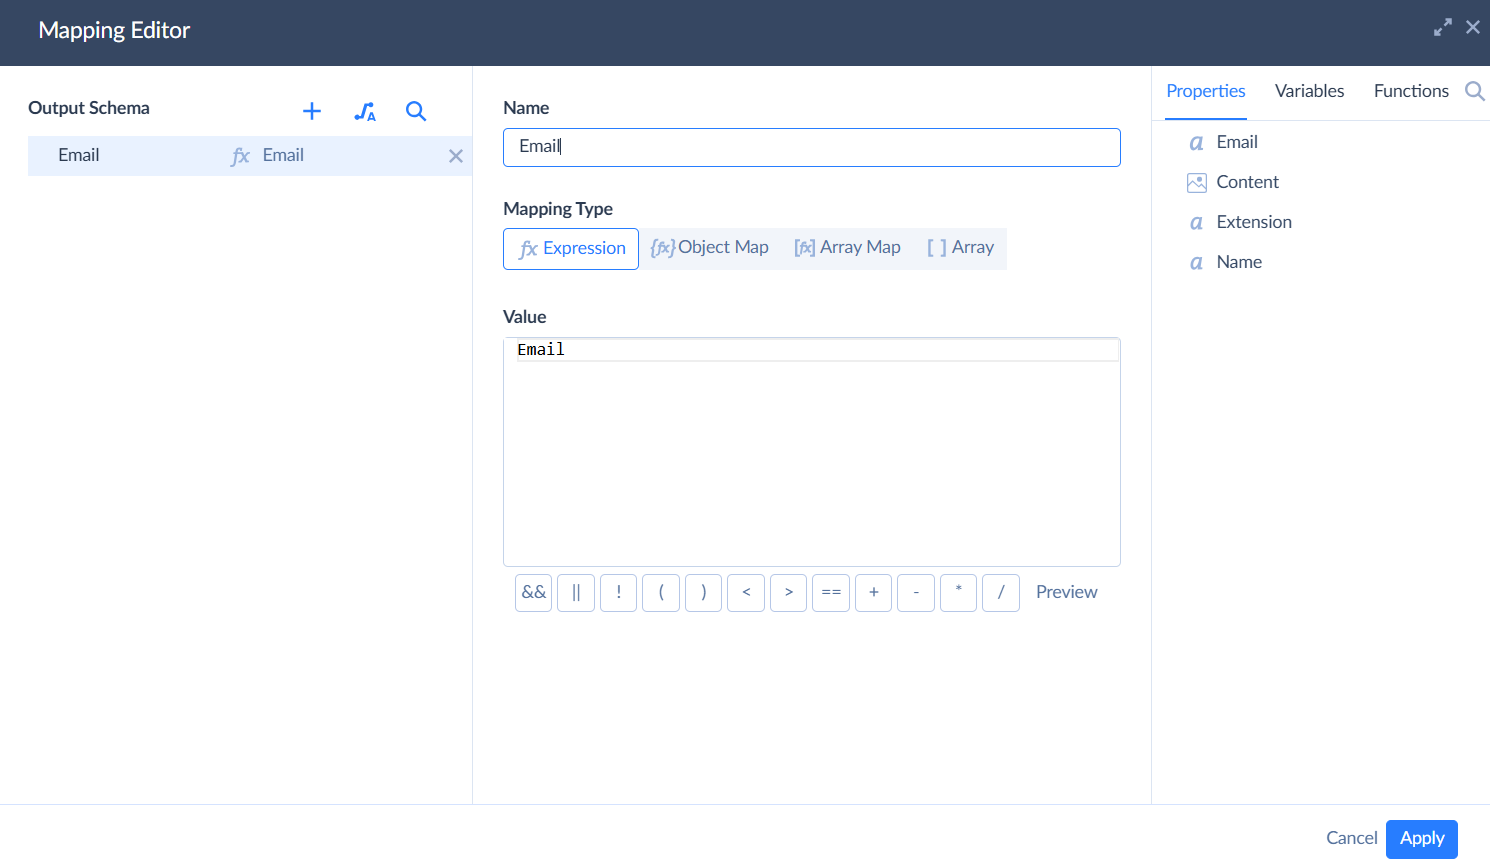
Map the email fields by clicking the pencil icon.
-
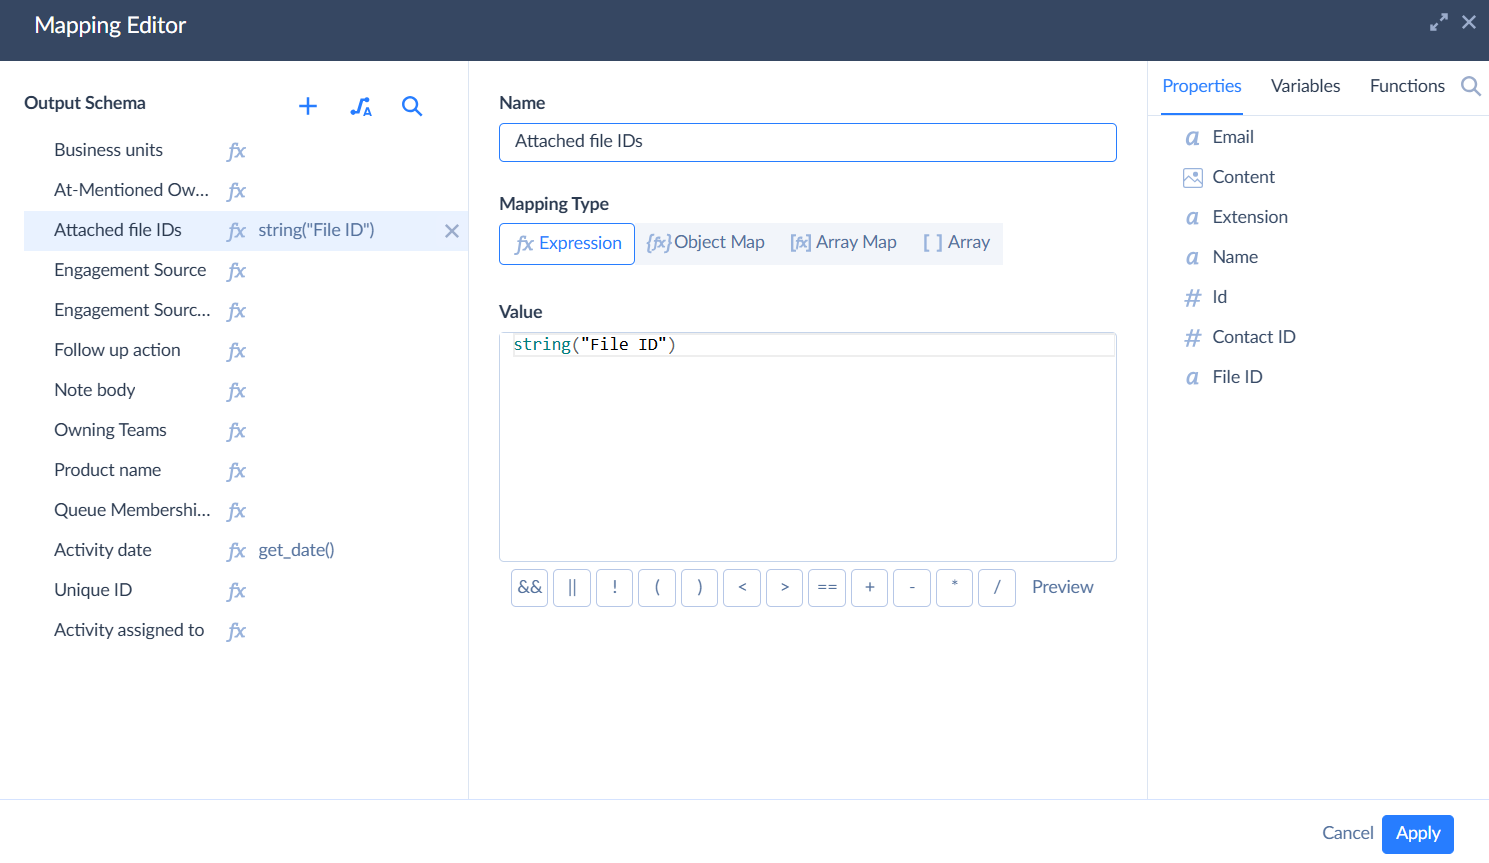
Drag and drop the Extend component. Click the pencil icon to edit the Output Schema.
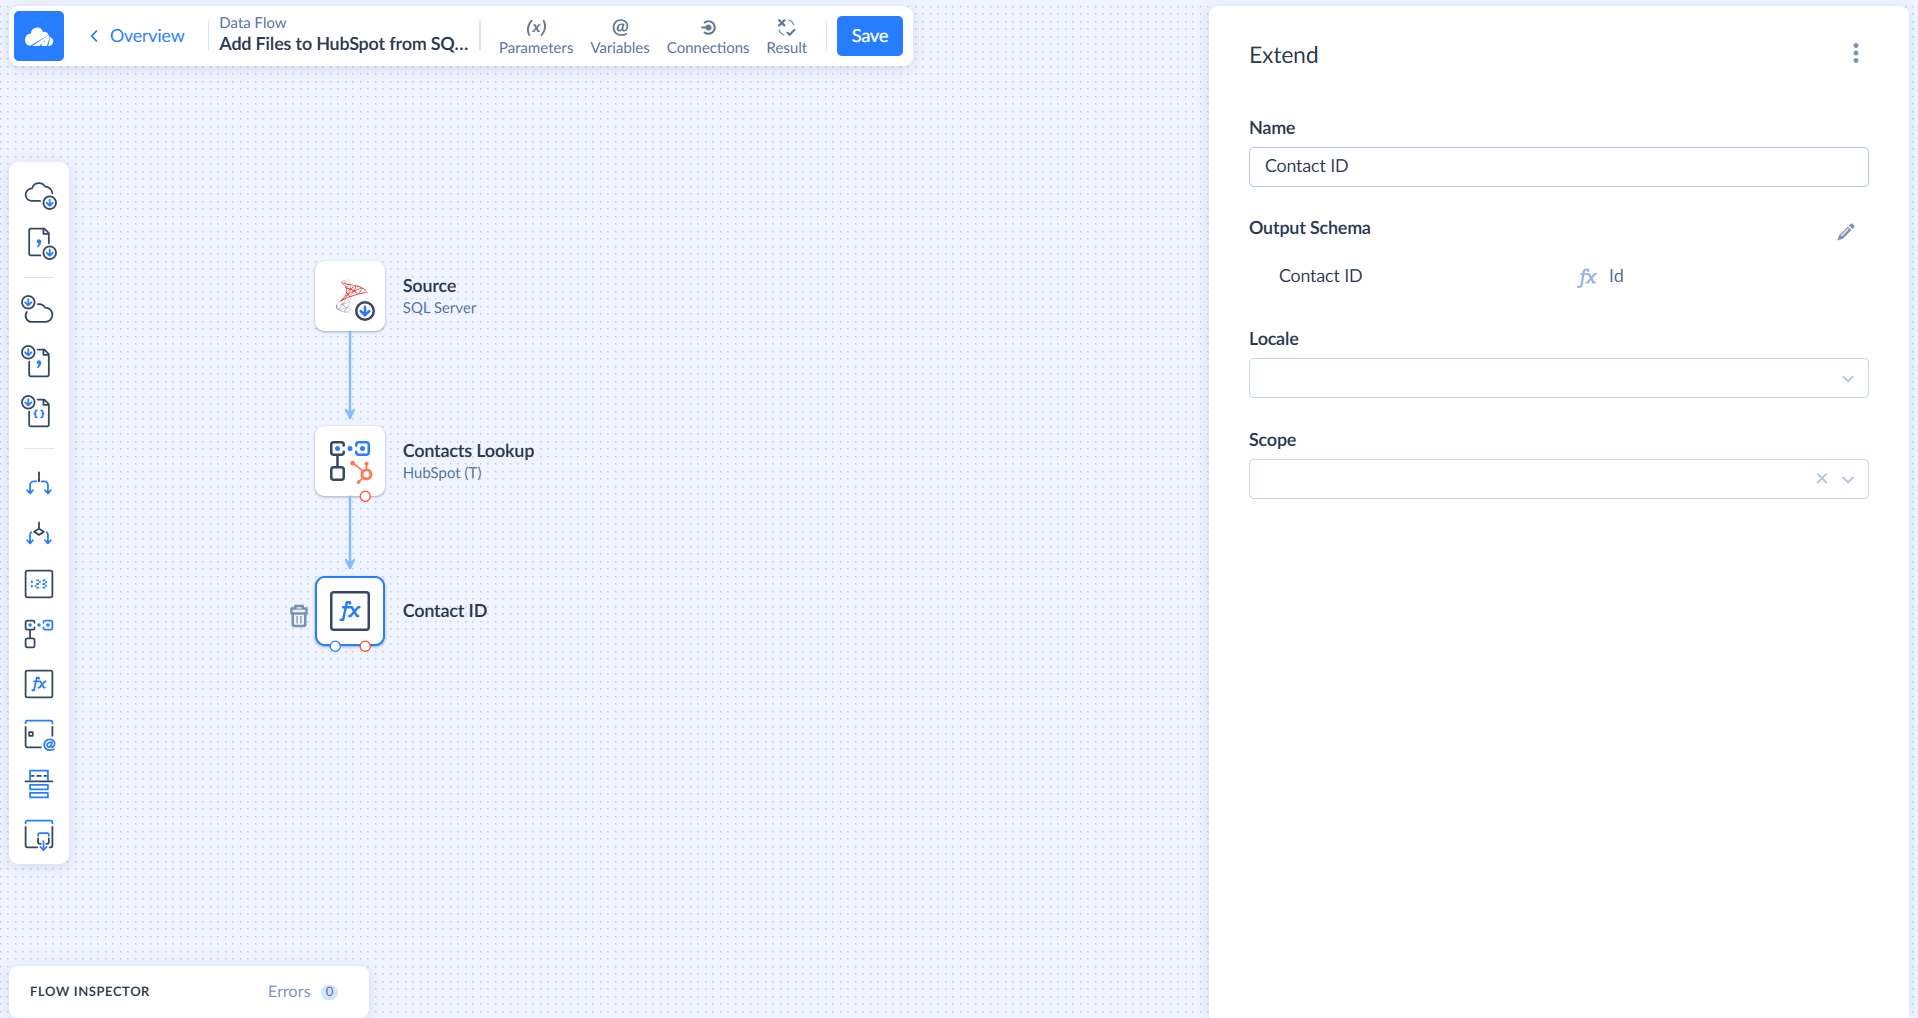
-
In Mapping Editor, add a new row by clicking the plus icon. Name it and map it to the ID.

-
Drag and drop the Lookup component onto the diagram. In the Actions, select Lookup. In Table, select Files. In Keys, choose Name and Extension. In the Result Columns, choose ID.
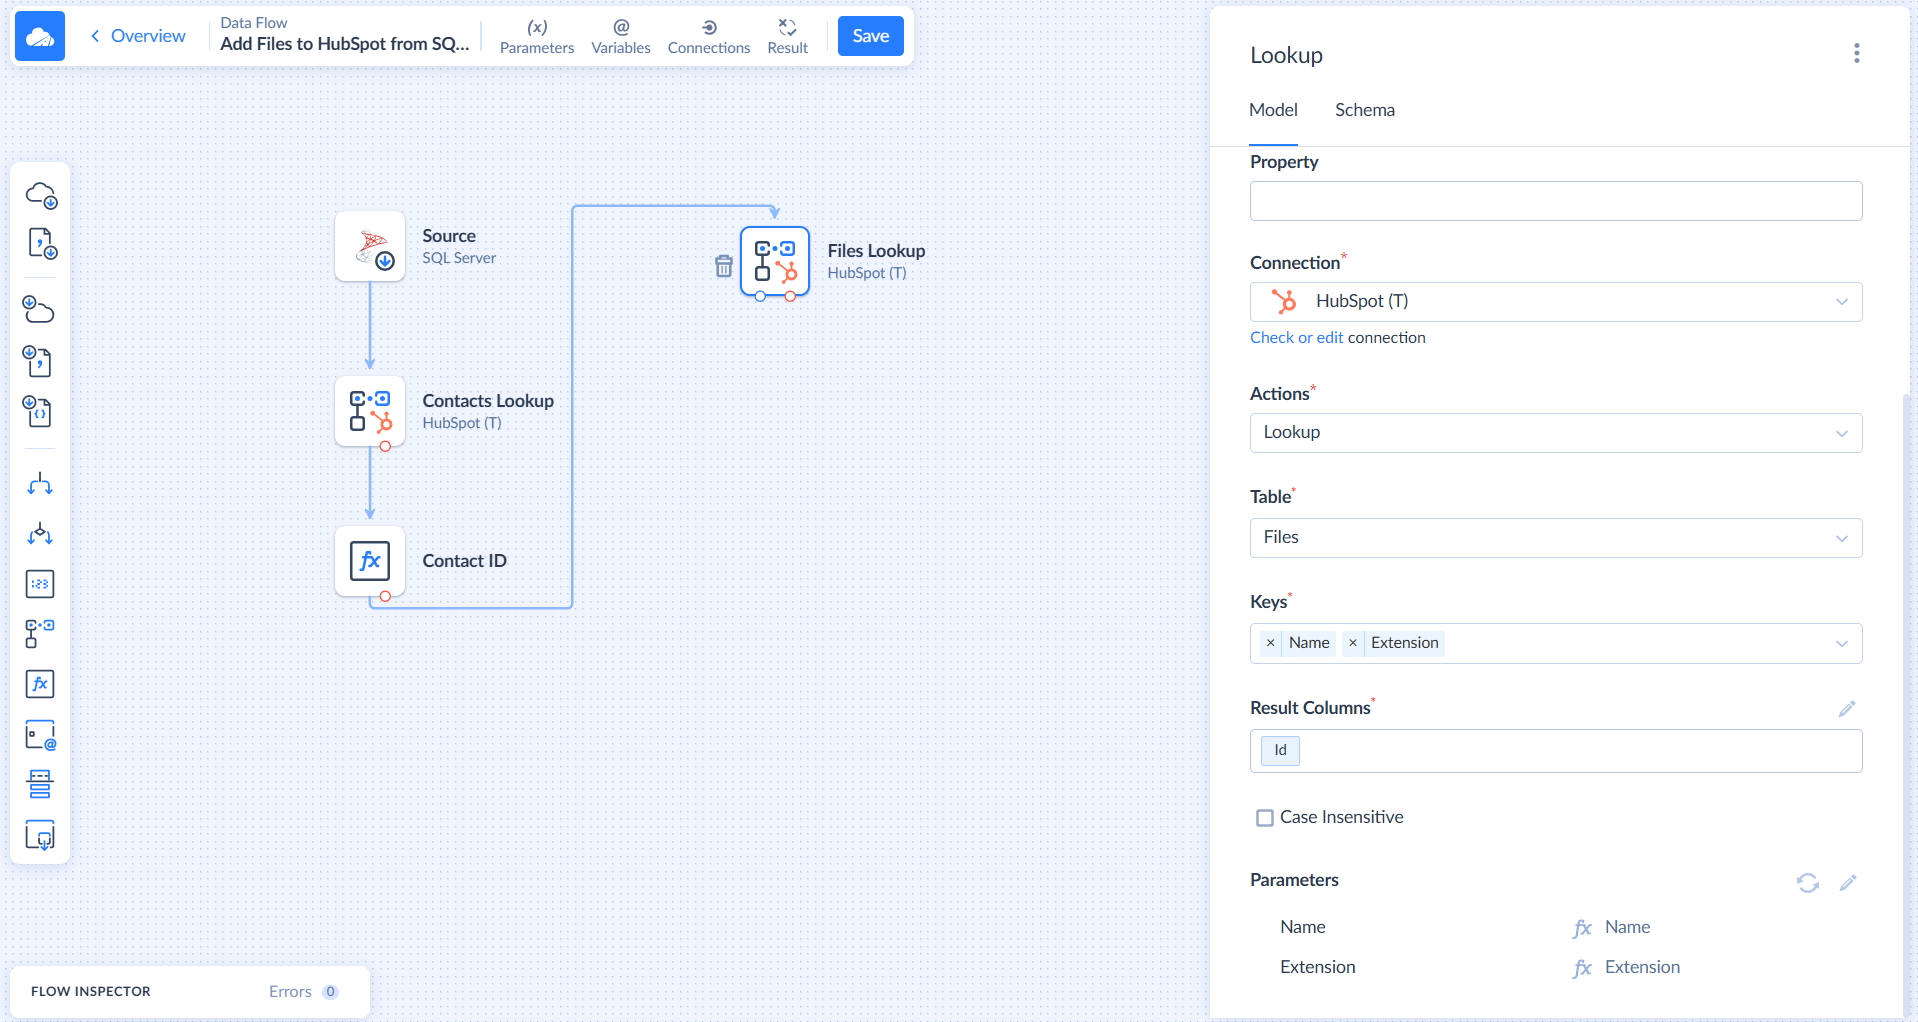
- Map the fields by clicking the pencil icon.
-
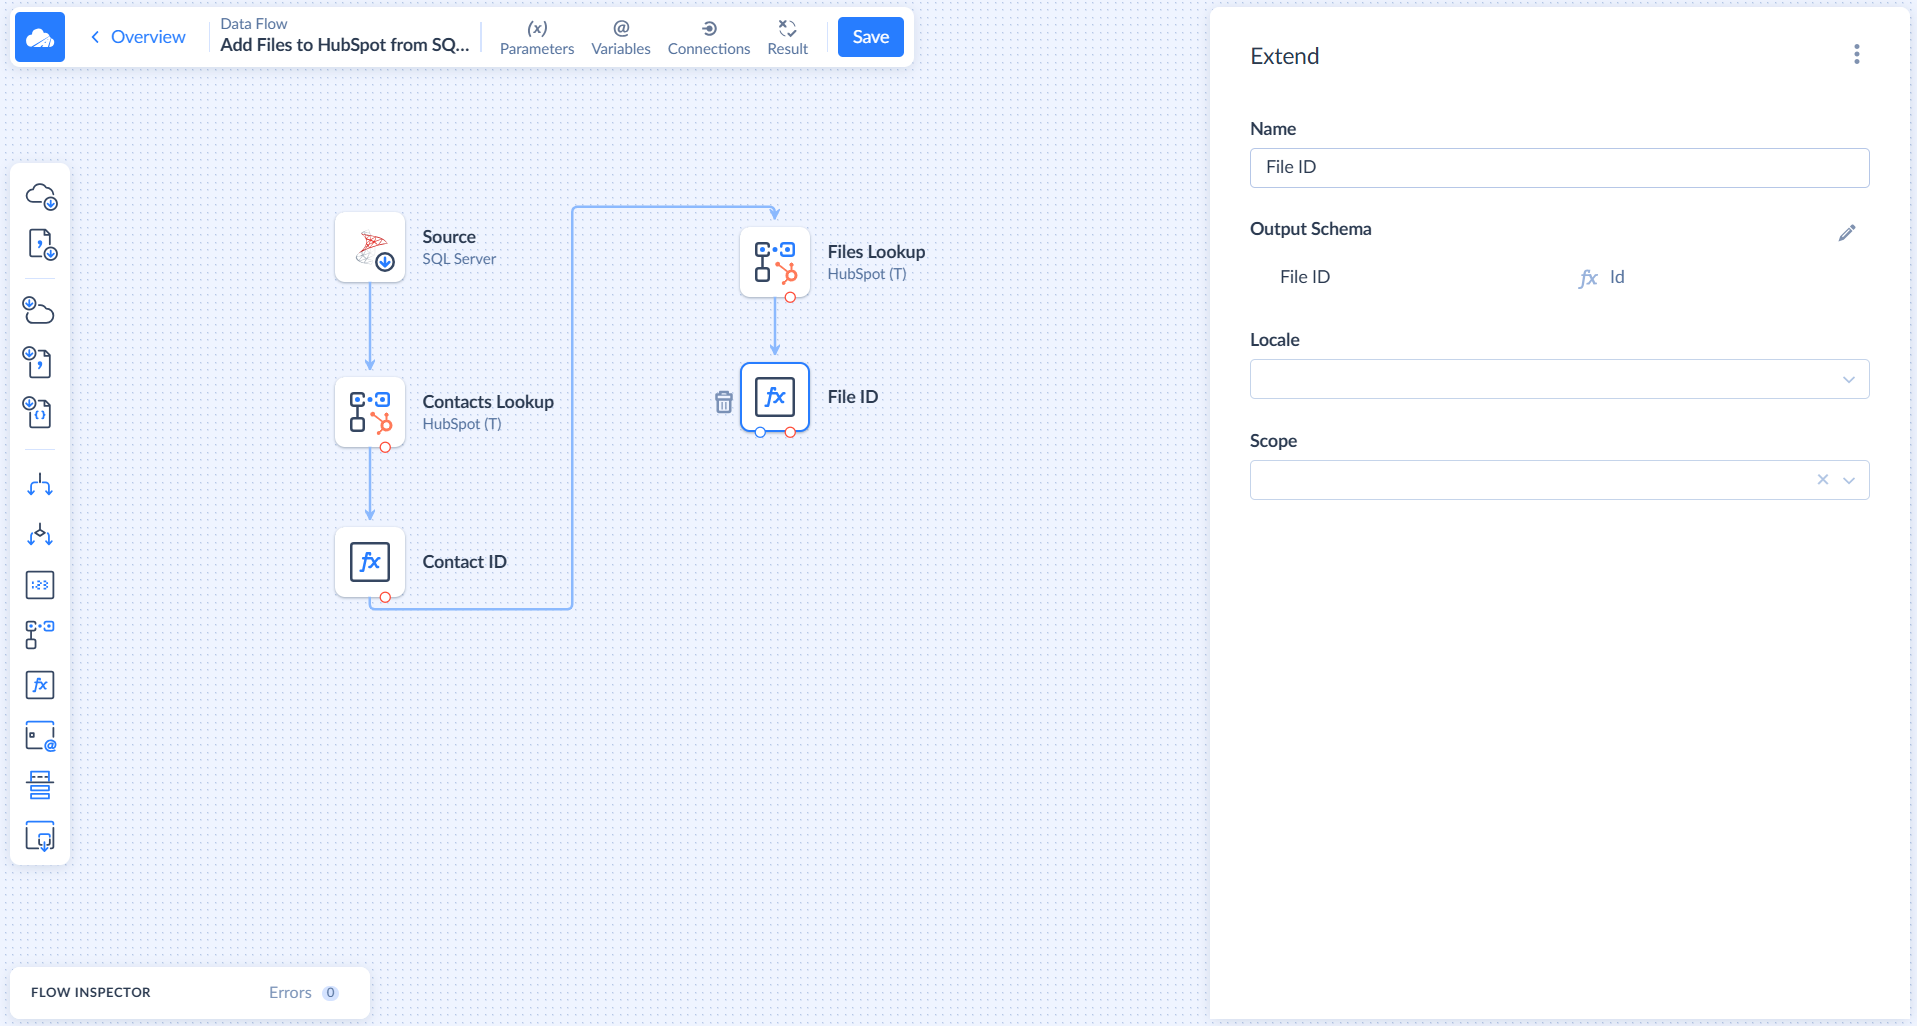
Drag and drop the Extend component. In the Output Schema, create a new File ID row and map it to the ID.
-
Drag and drop the Target component. In Connection, select HubSpot. In Actions, select Insert. In Table, choose Notes. In Returning, select ID.
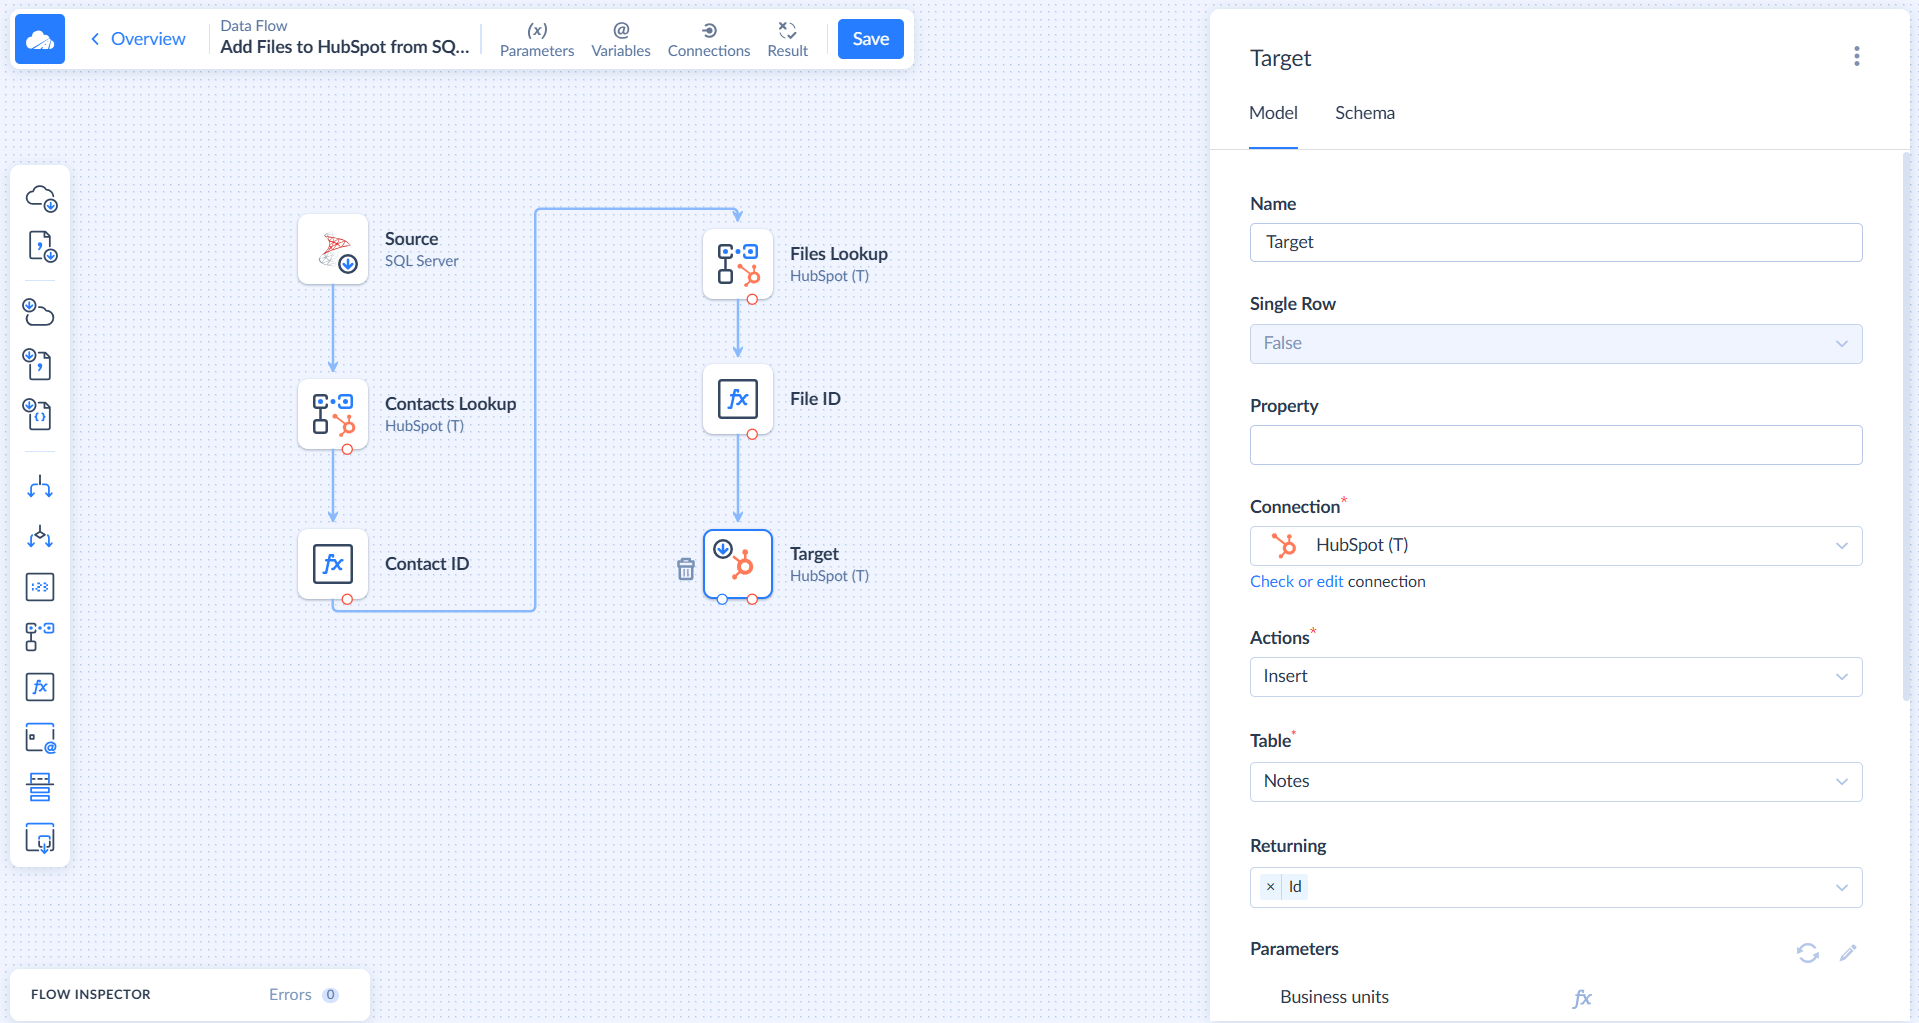
-
Map the Attached File IDs and Activity date fields in Parameters.
-
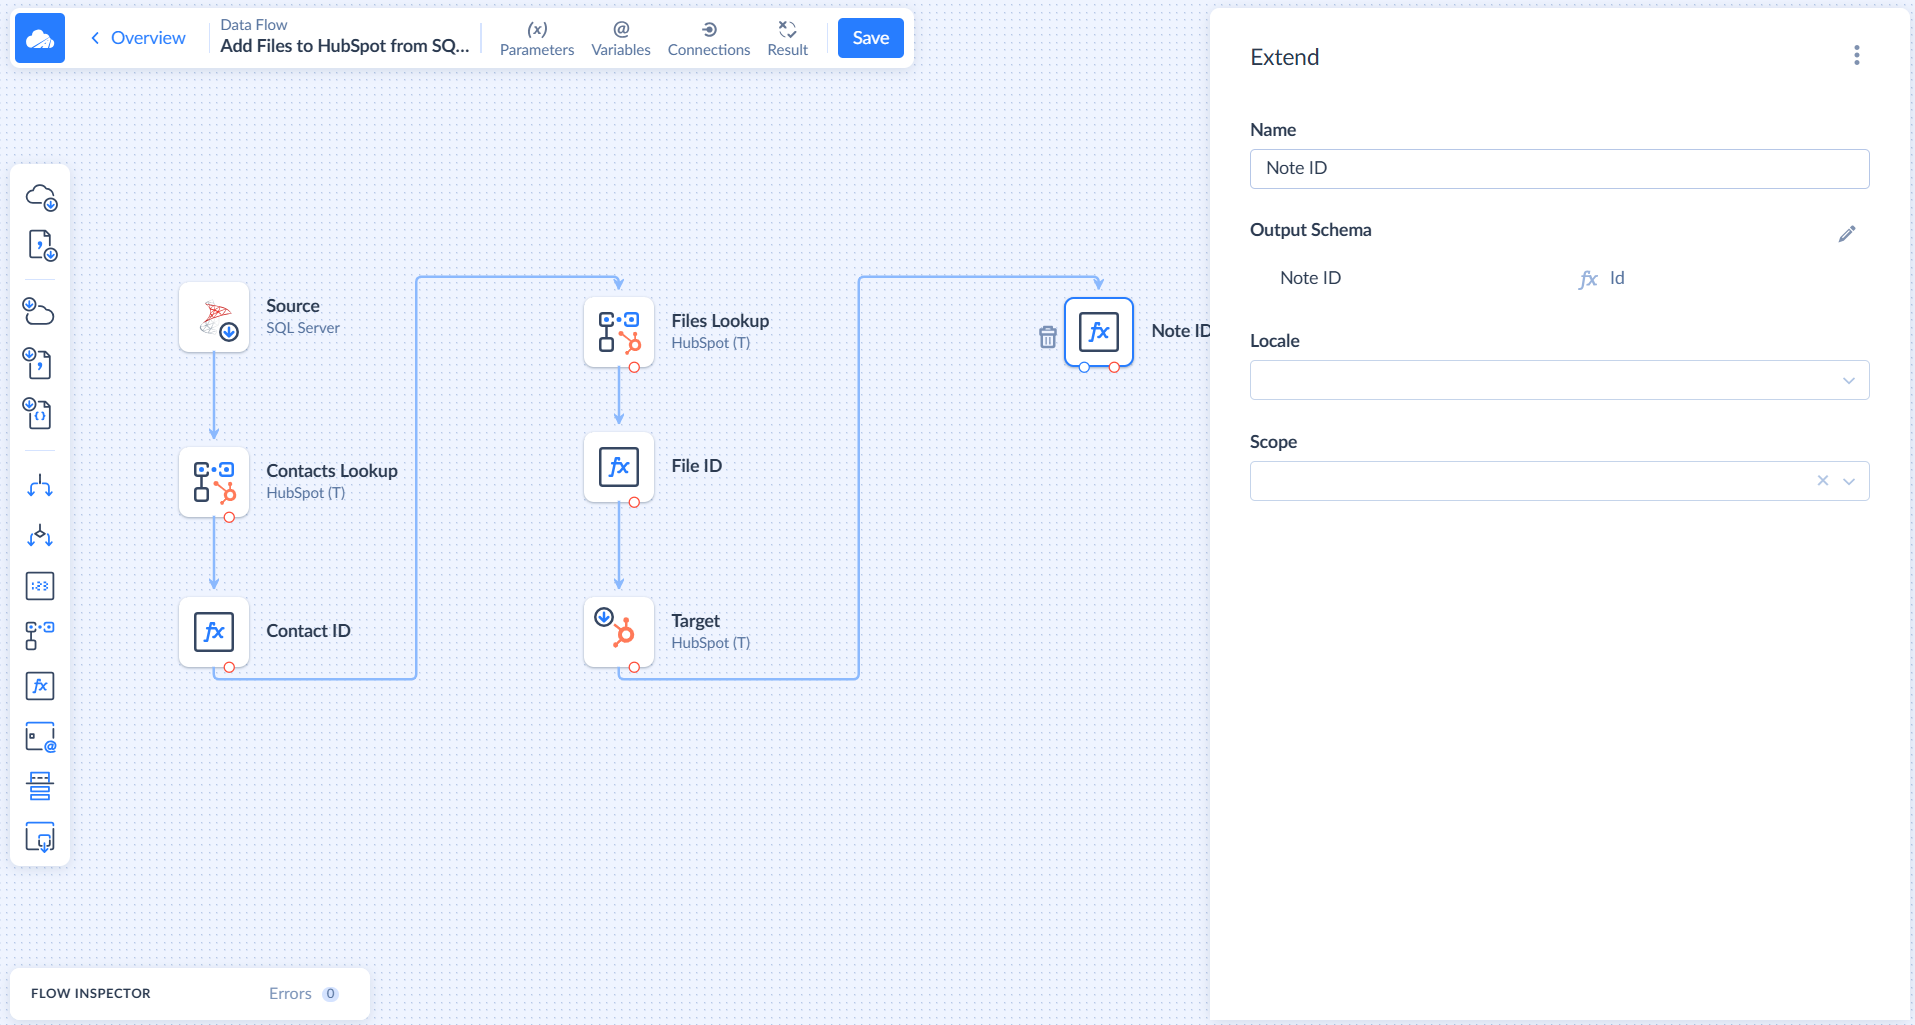
Drag and drop the Extend component. In the Output Schema, create a new Note ID row and map it to the ID.
-
Drag and drop the Target component. In Connection, select HubSpot. In Actions, select Insert. In Table, choose Contacts_To_Notes.
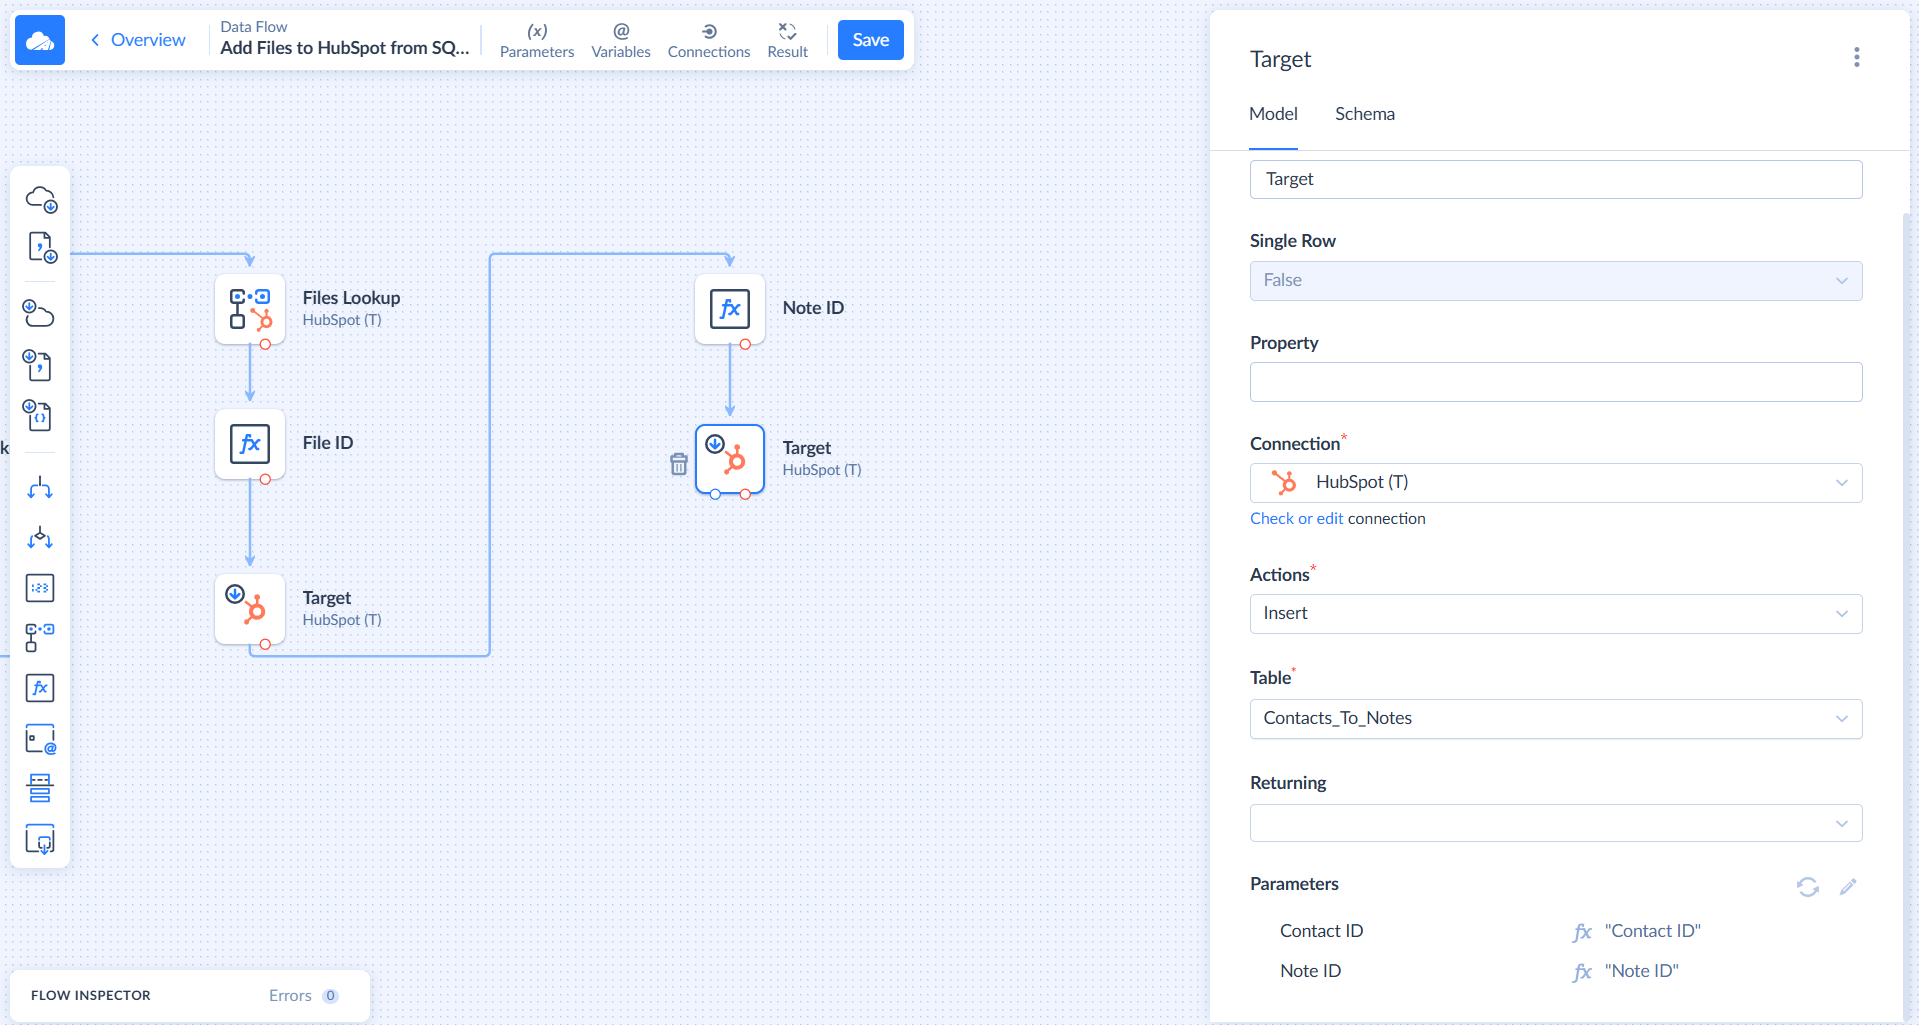
- Map the parameters.
Your Data Flow is now ready!
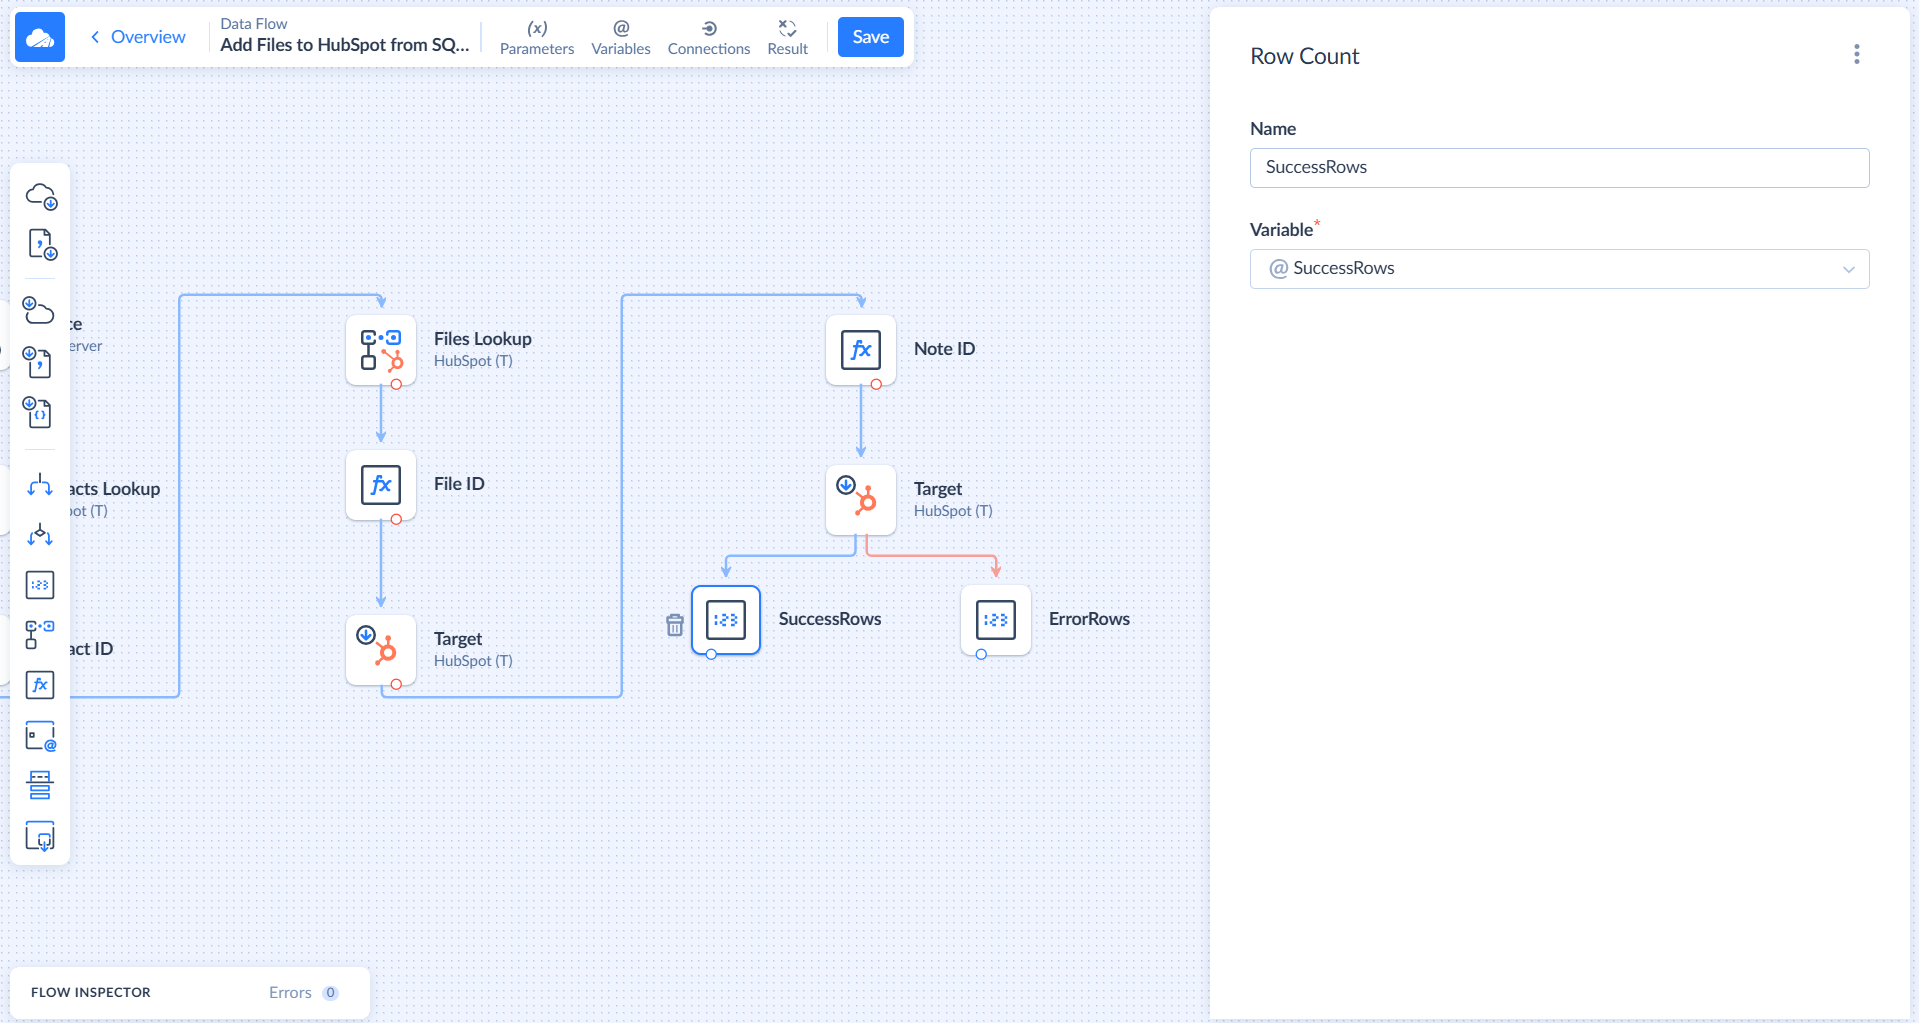
To correctly display the results of integration runs, you can use the Result feature. You can read more about it in the How to Build or Edit Data Flow topic. To use it, add Row Count components: