NetSuite V2 (REST)
NetSuite is a unified cloud business management solution, including ERP/financials, CRM, and ecommerce.
This connector uses REST API to work with NetSuite. It provides support for NetSuite fields, storing array data, but does not support backup. See NetSuite (SOAP) for an alternative connector.
Data integration: Skyvia supports importing data to and from NetSuite, exporting NetSuite data to CSV files, replicating NetSuite data to relational databases, and synchronizing NetSuite data with other cloud apps and relational databases.
Backup: Skyvia Backup does not support NetSuite backup. You can use our NetSuite (SOAP) connector.
Query: Skyvia Query supports NetSuite.
Establishing Connection
To create a connection to NetSuite, select one of the following authentication types:
- OAuth 2.0 lets a NetSuite user sign in and grant Skyvia access.
- Machine-to-Machine uses the certificate-based authentication, and does not require an interactive sign-in.
- Token-Based uses a consumer key, consumer secret, token ID, and token secret.
Starting with NetSuite 2027.1, you cannot create new integrations that use token-based authentication. NetSuite plans to end support for existing integrations with NetSuite 2028.1. For new connections, use OAuth 2.0 or Machine-to-Machine. See Preparing for Token-based Authentication (TBA) End of Support.
Getting Credentials
Before you create the connection, find the required NetSuite account settings and configure your authentication method.
Obtaining Account ID
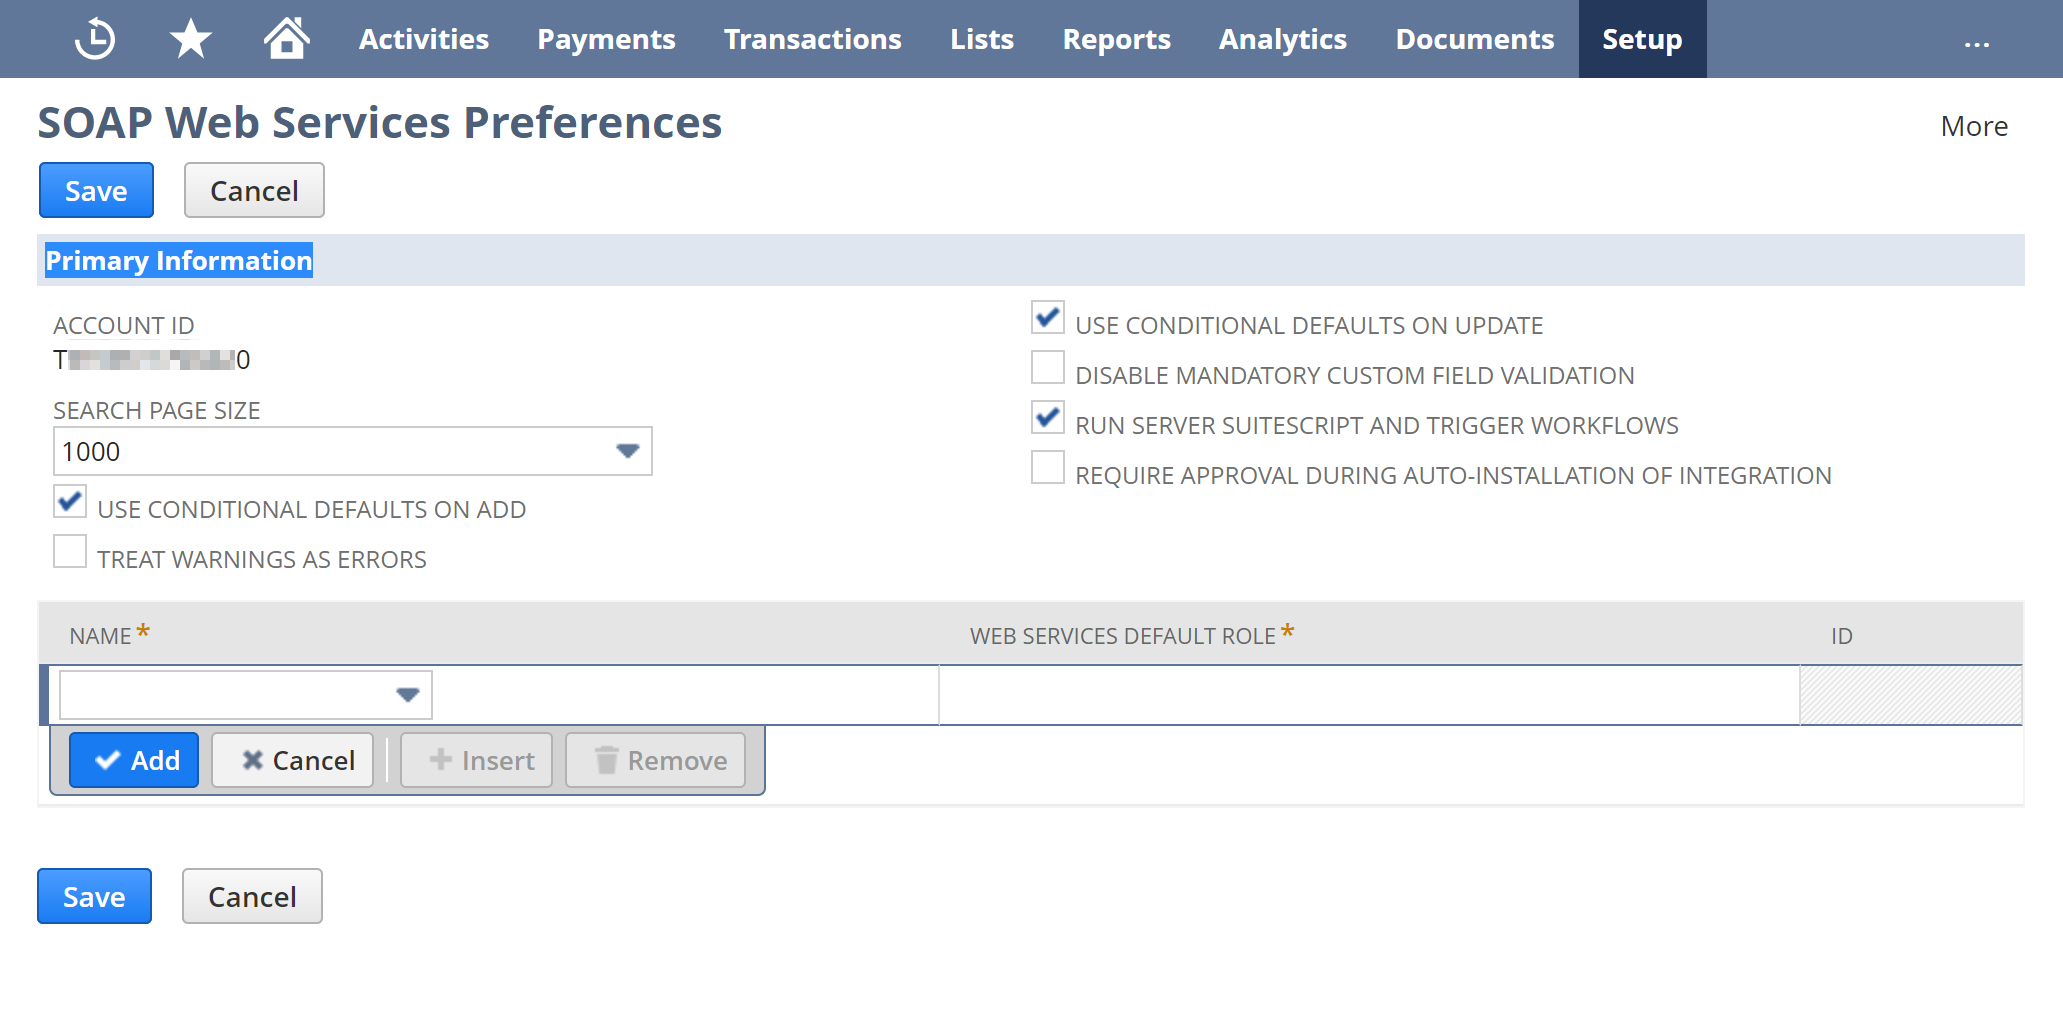
Go to Setup > Integration > SOAP Web Services Preferences. Under Primary Information, copy the Account ID.
Obtaining Time Zone
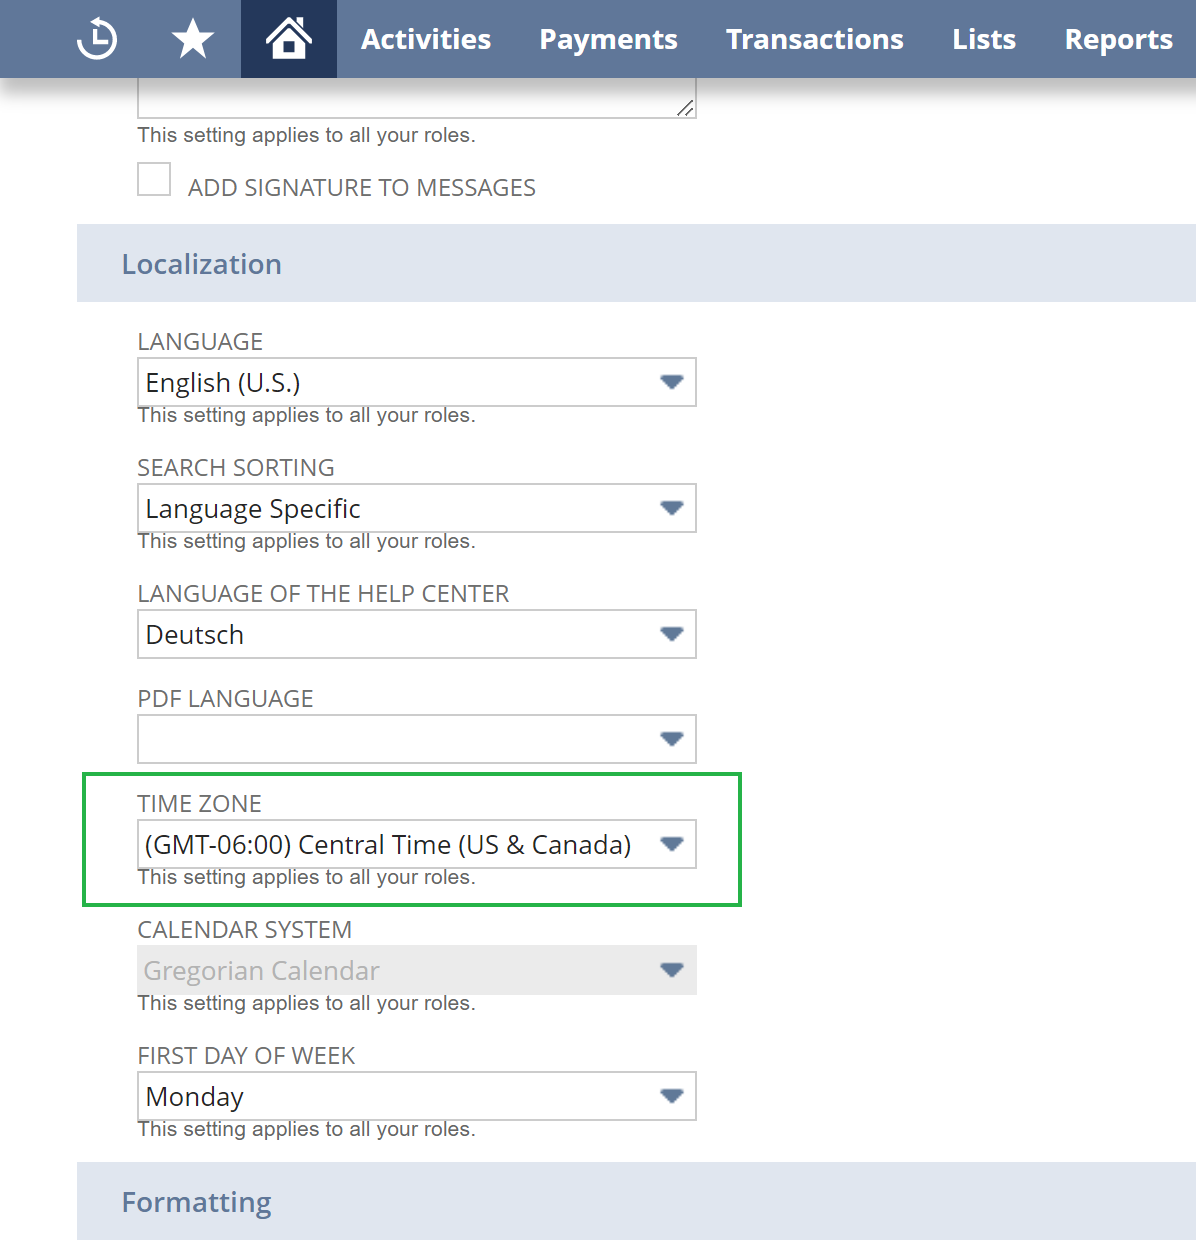
Hover onto the home icon in the upper-left corner and click Set Preferences. Under Localization, find the Time Zone value.
Obtaining Date Format
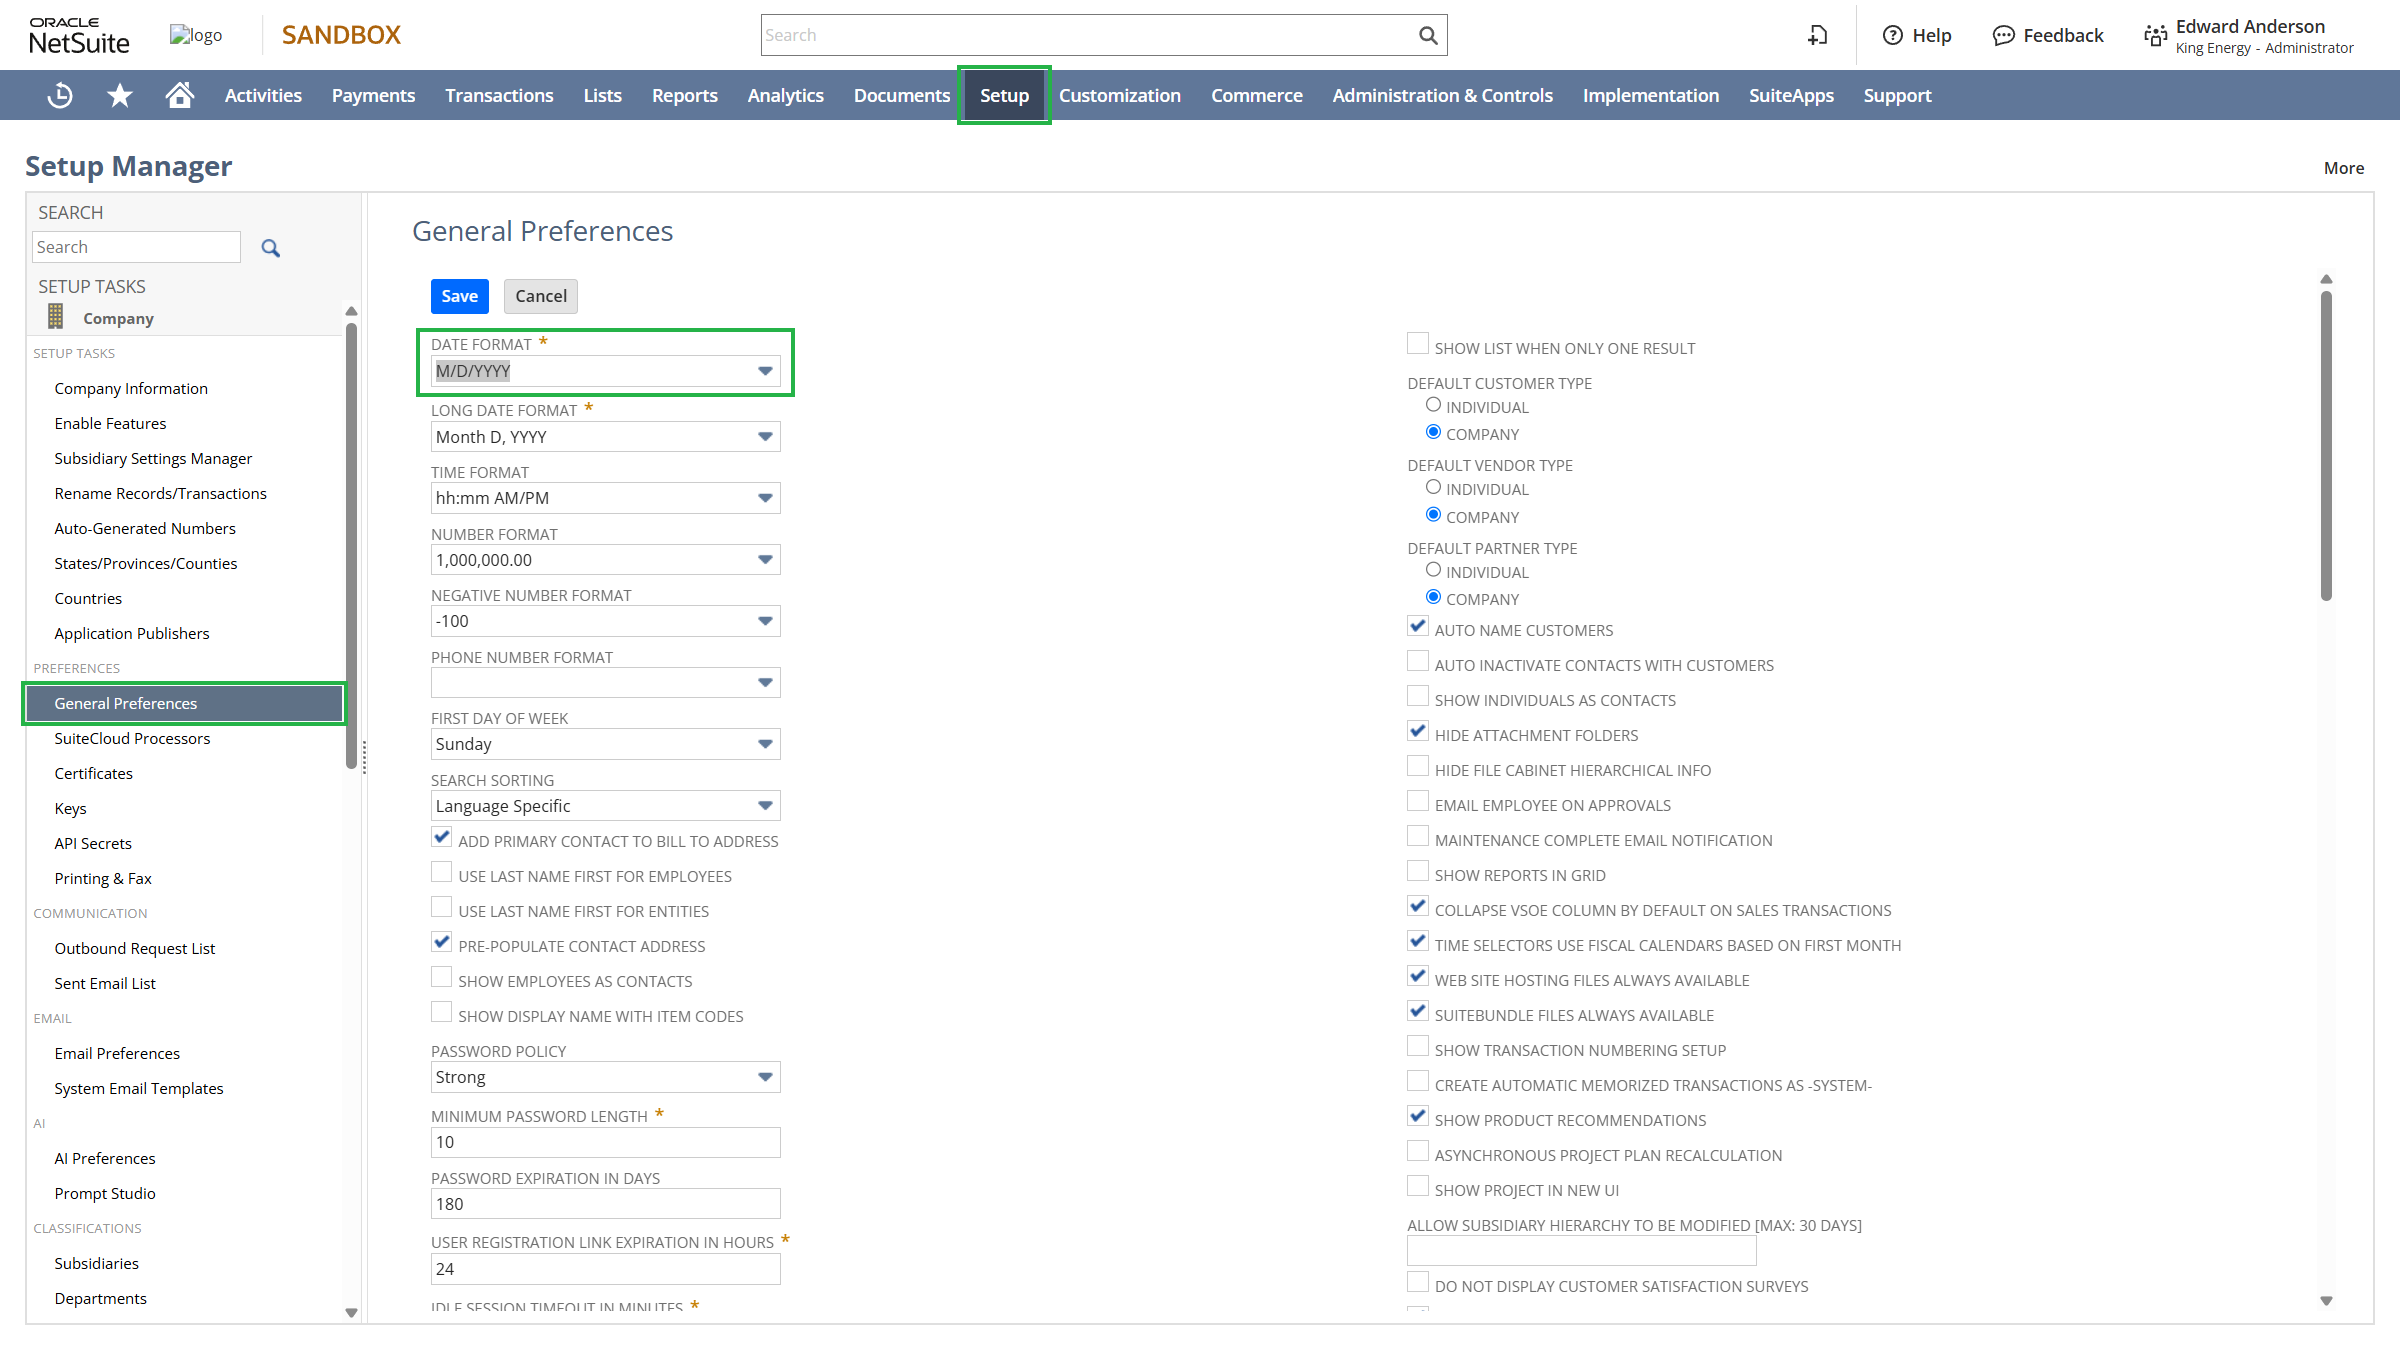
Go to Setup > Company > General Preferences and find the Date Format value.
Obtaining Company Language
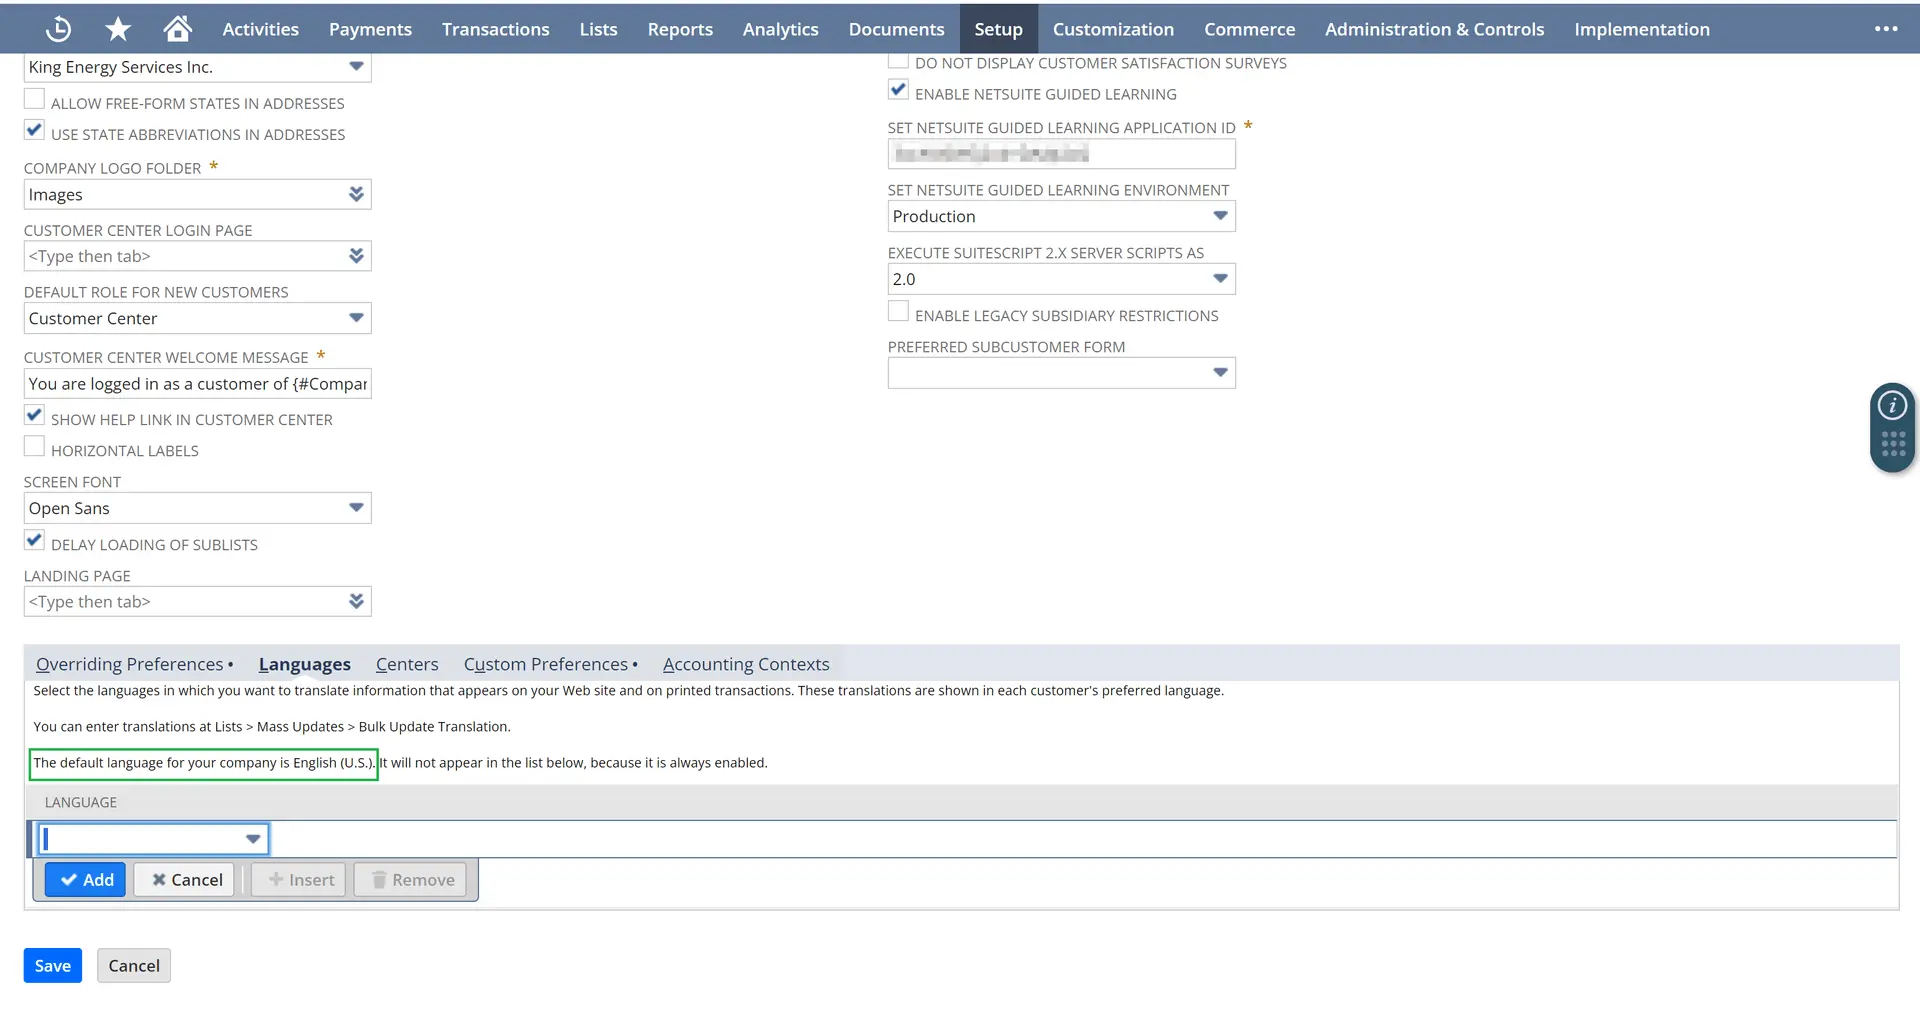
If the Multiple Languages feature is enabled, go to Setup > Company > General Preferences and click the Languages tab to find the company language.
Enabling Authentication
Enable the NetSuite feature required by your authentication type:
-
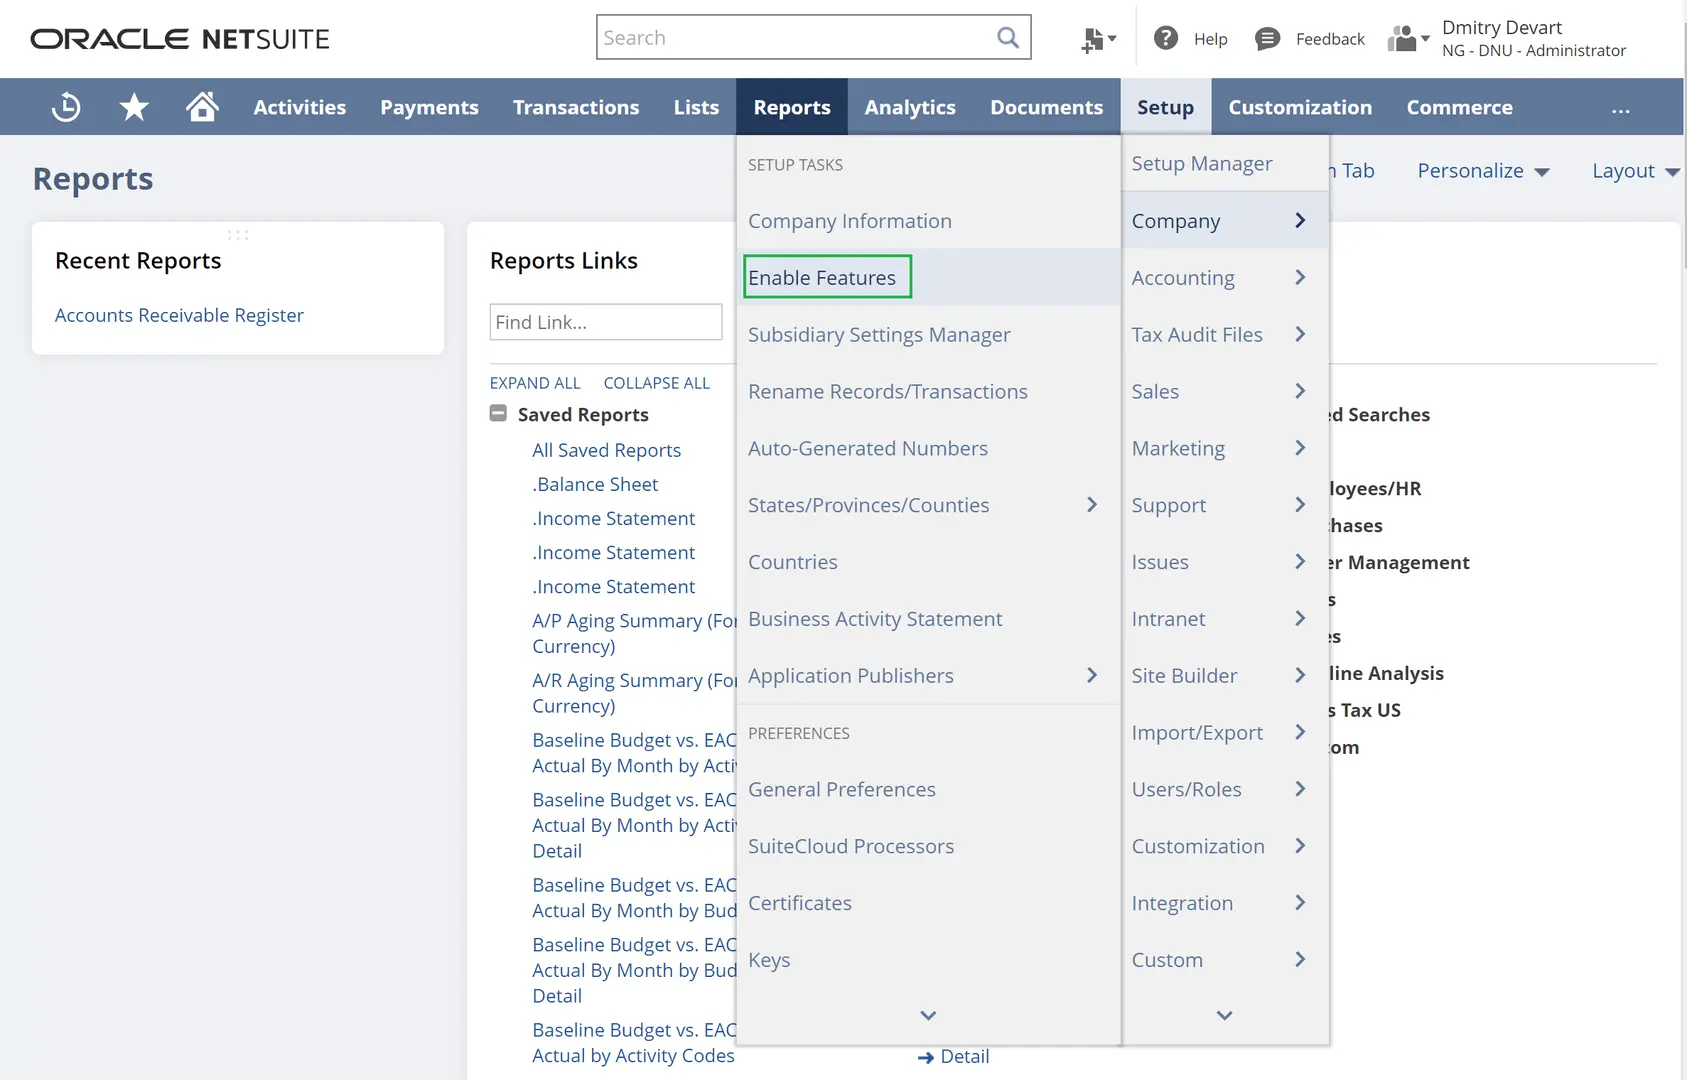
Go to Setup > Company > Enable Features.
-
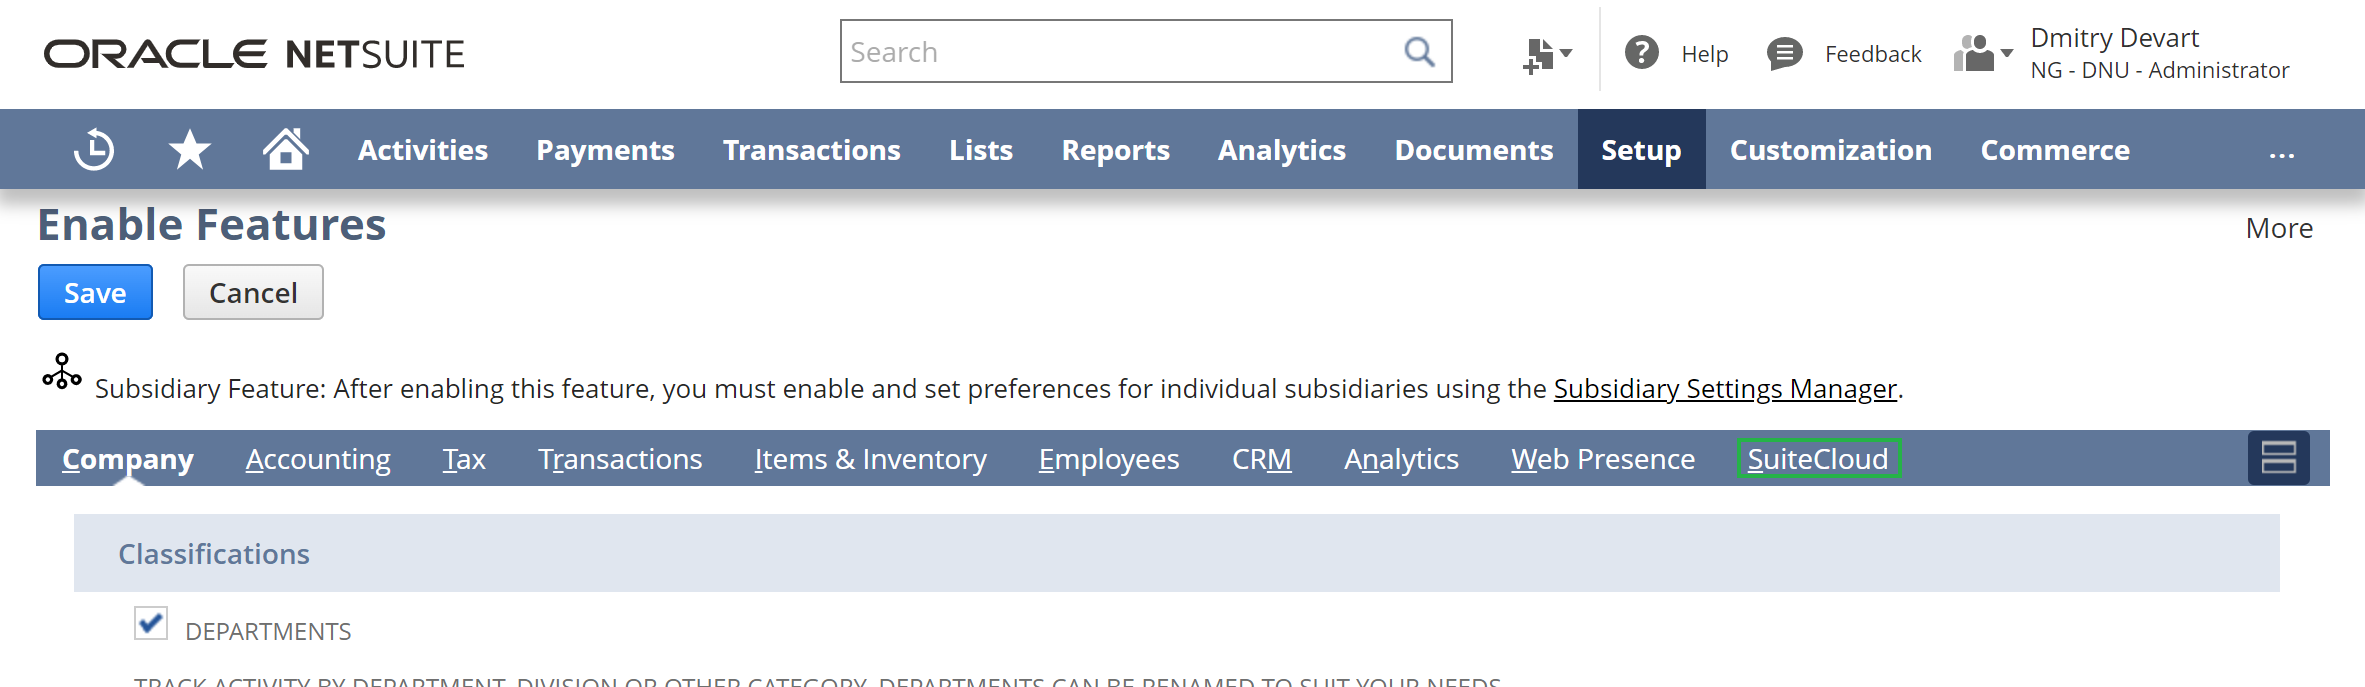
Find the SuiteCloud tab.
-
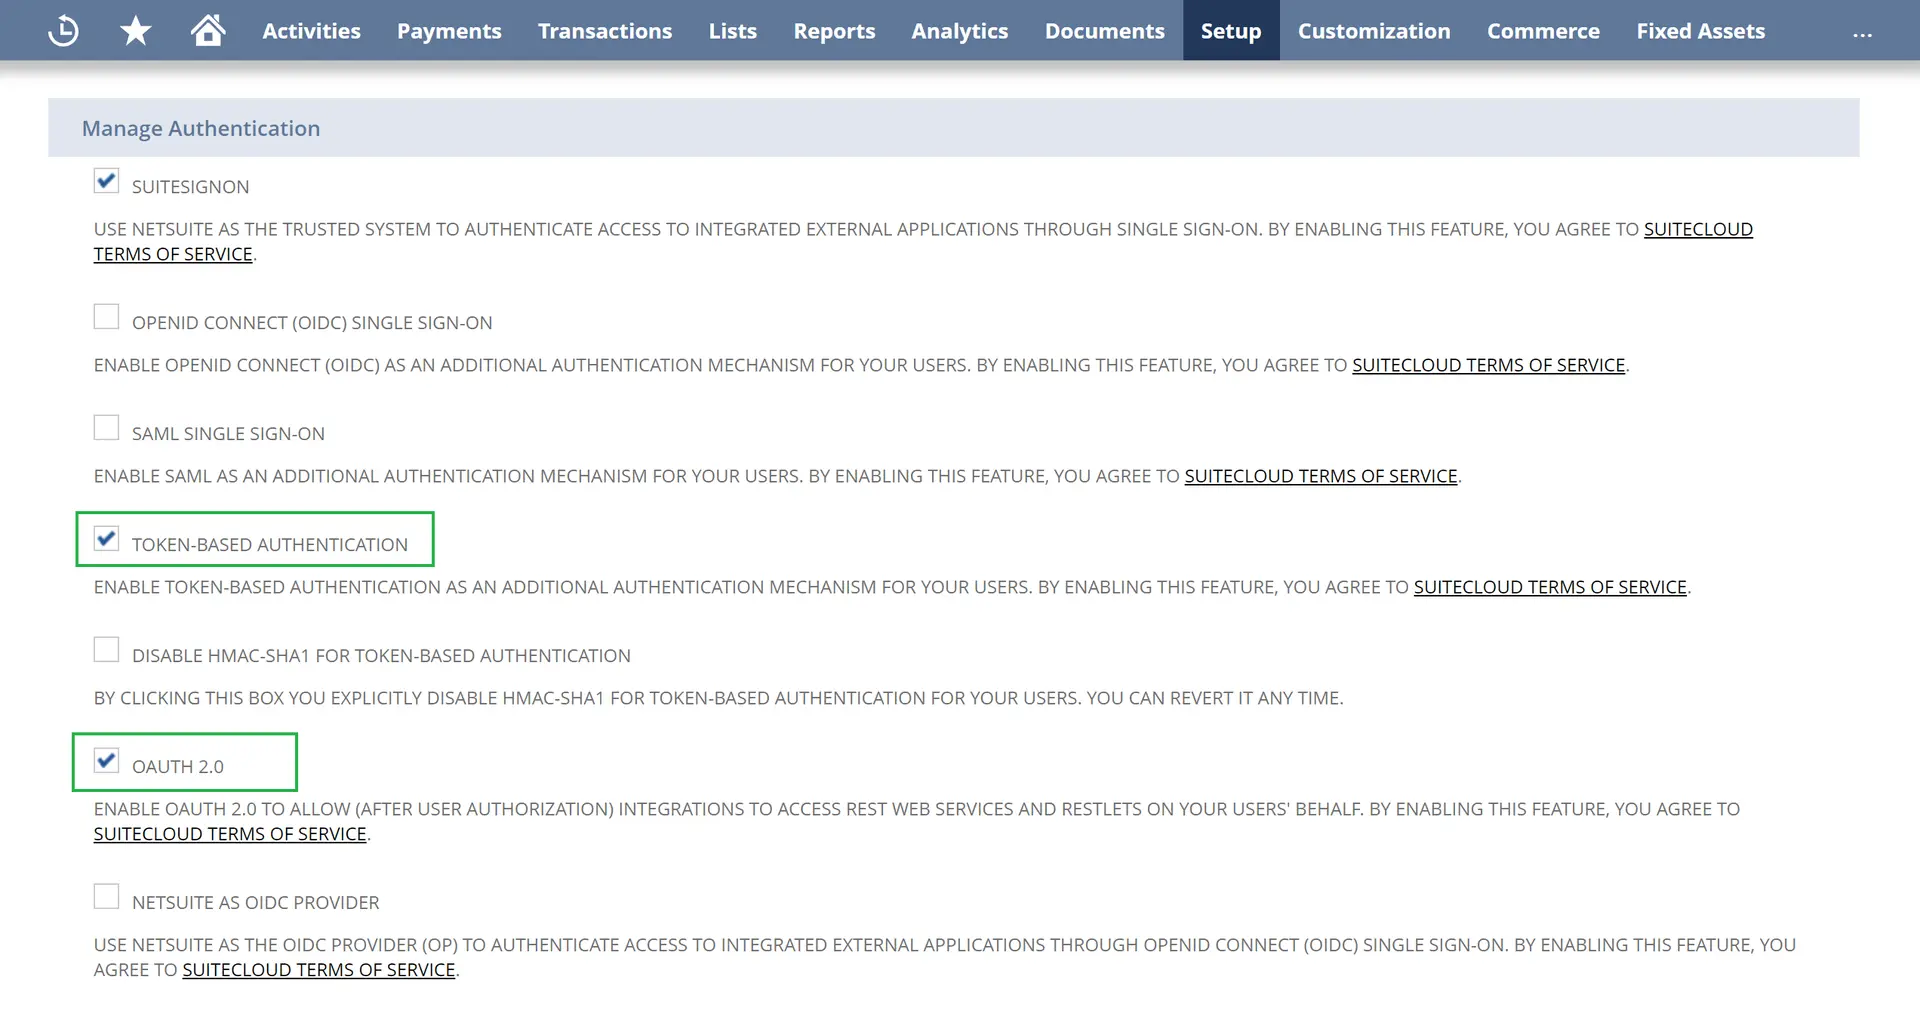
Select the check box for your authentication method under Manage Authentication:
- For OAuth 2.0 and Machine-to-Machine, select OAuth 2.0.
- For Token-Based, select Token-based Authentication.
Creating a Role
Go to Setup > Users/Roles > User Management > Manage Roles. Create a role with permissions for the NetSuite objects you want to use. You can find the object permissions on the Transactions and Lists subtabs.
Grant the following permissions on the Setup subtab for all authentication types:
- REST Web Services
- Custom Record Types
- Custom Lists
- Custom Fields
Grant an additional permission depending on your authentication method:
- For OAuth 2.0 and Machine-to-Machine, grant Log in using OAuth 2.0 Access Tokens.
- For Token-Based, grant User Access Tokens.
Grant the SuiteAnalytics Workbook permission on the Reports subtab. Assign the role to the NetSuite user for the connection.
Creating an Integration Record
-
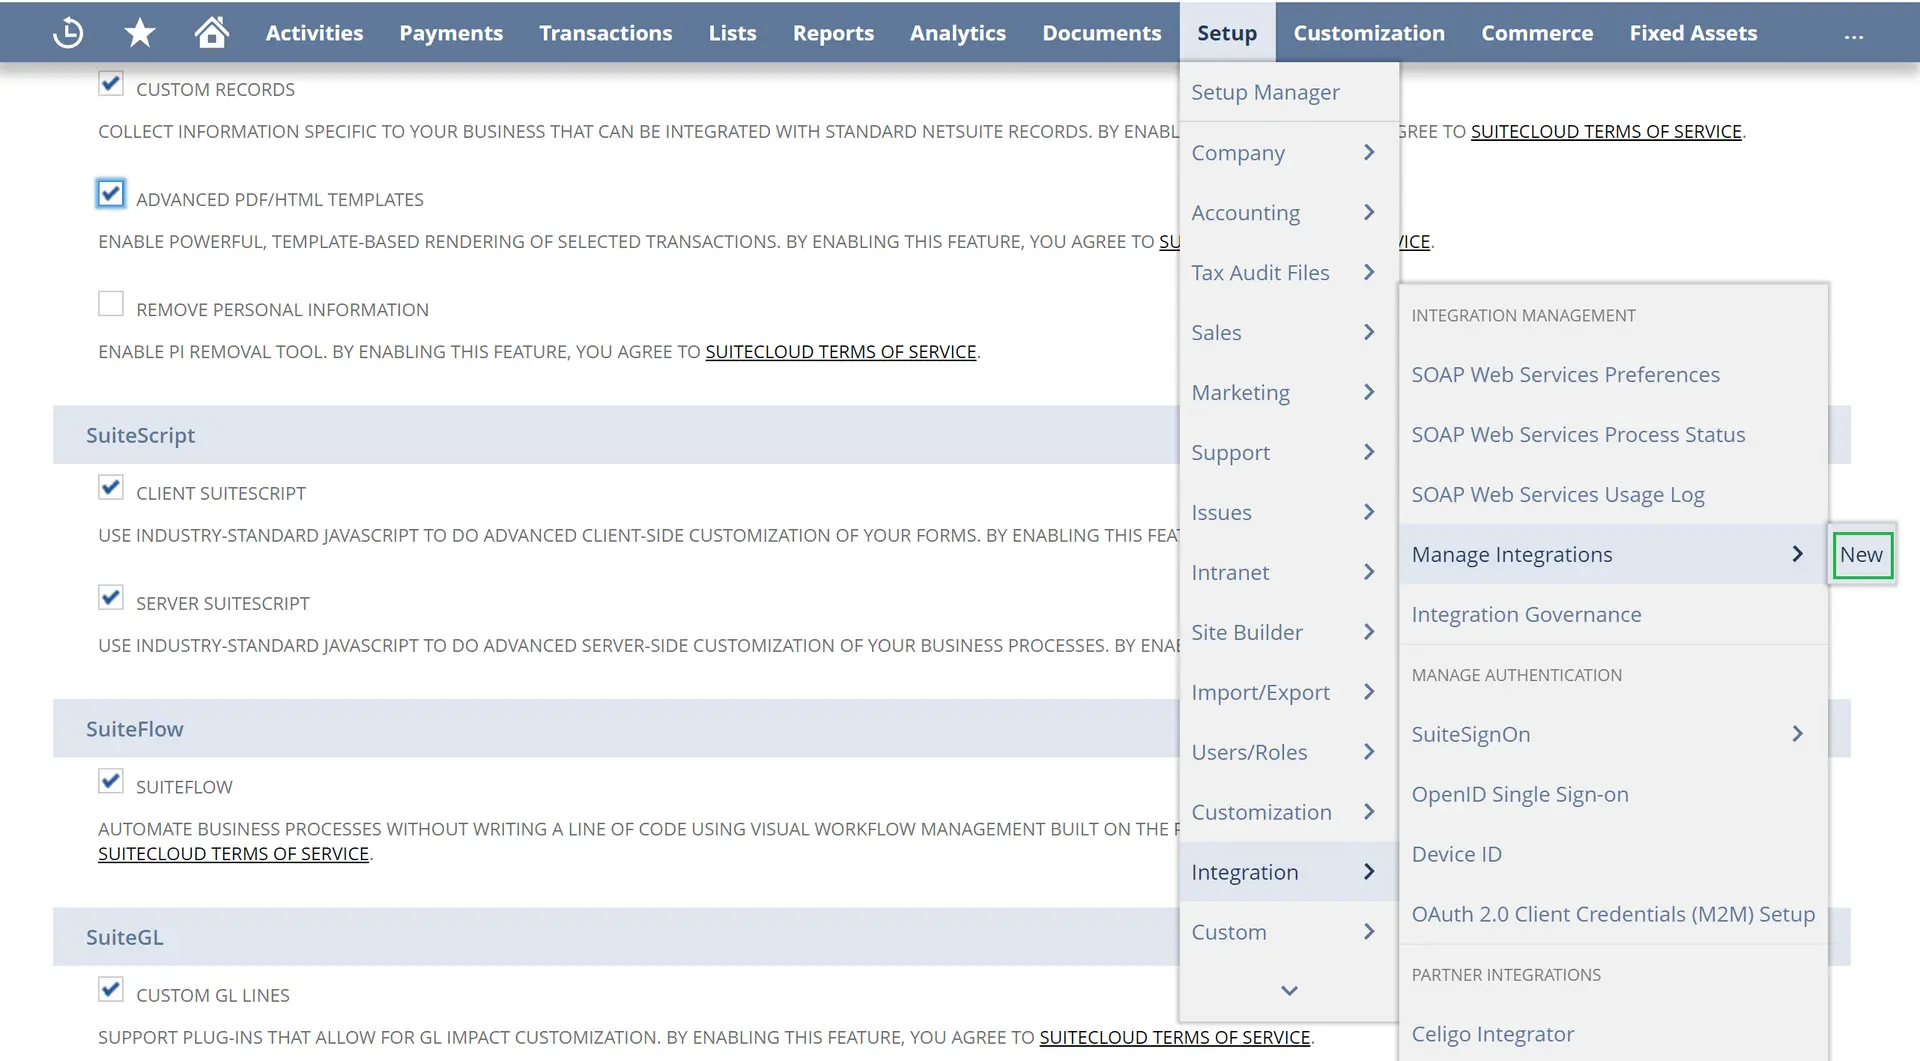
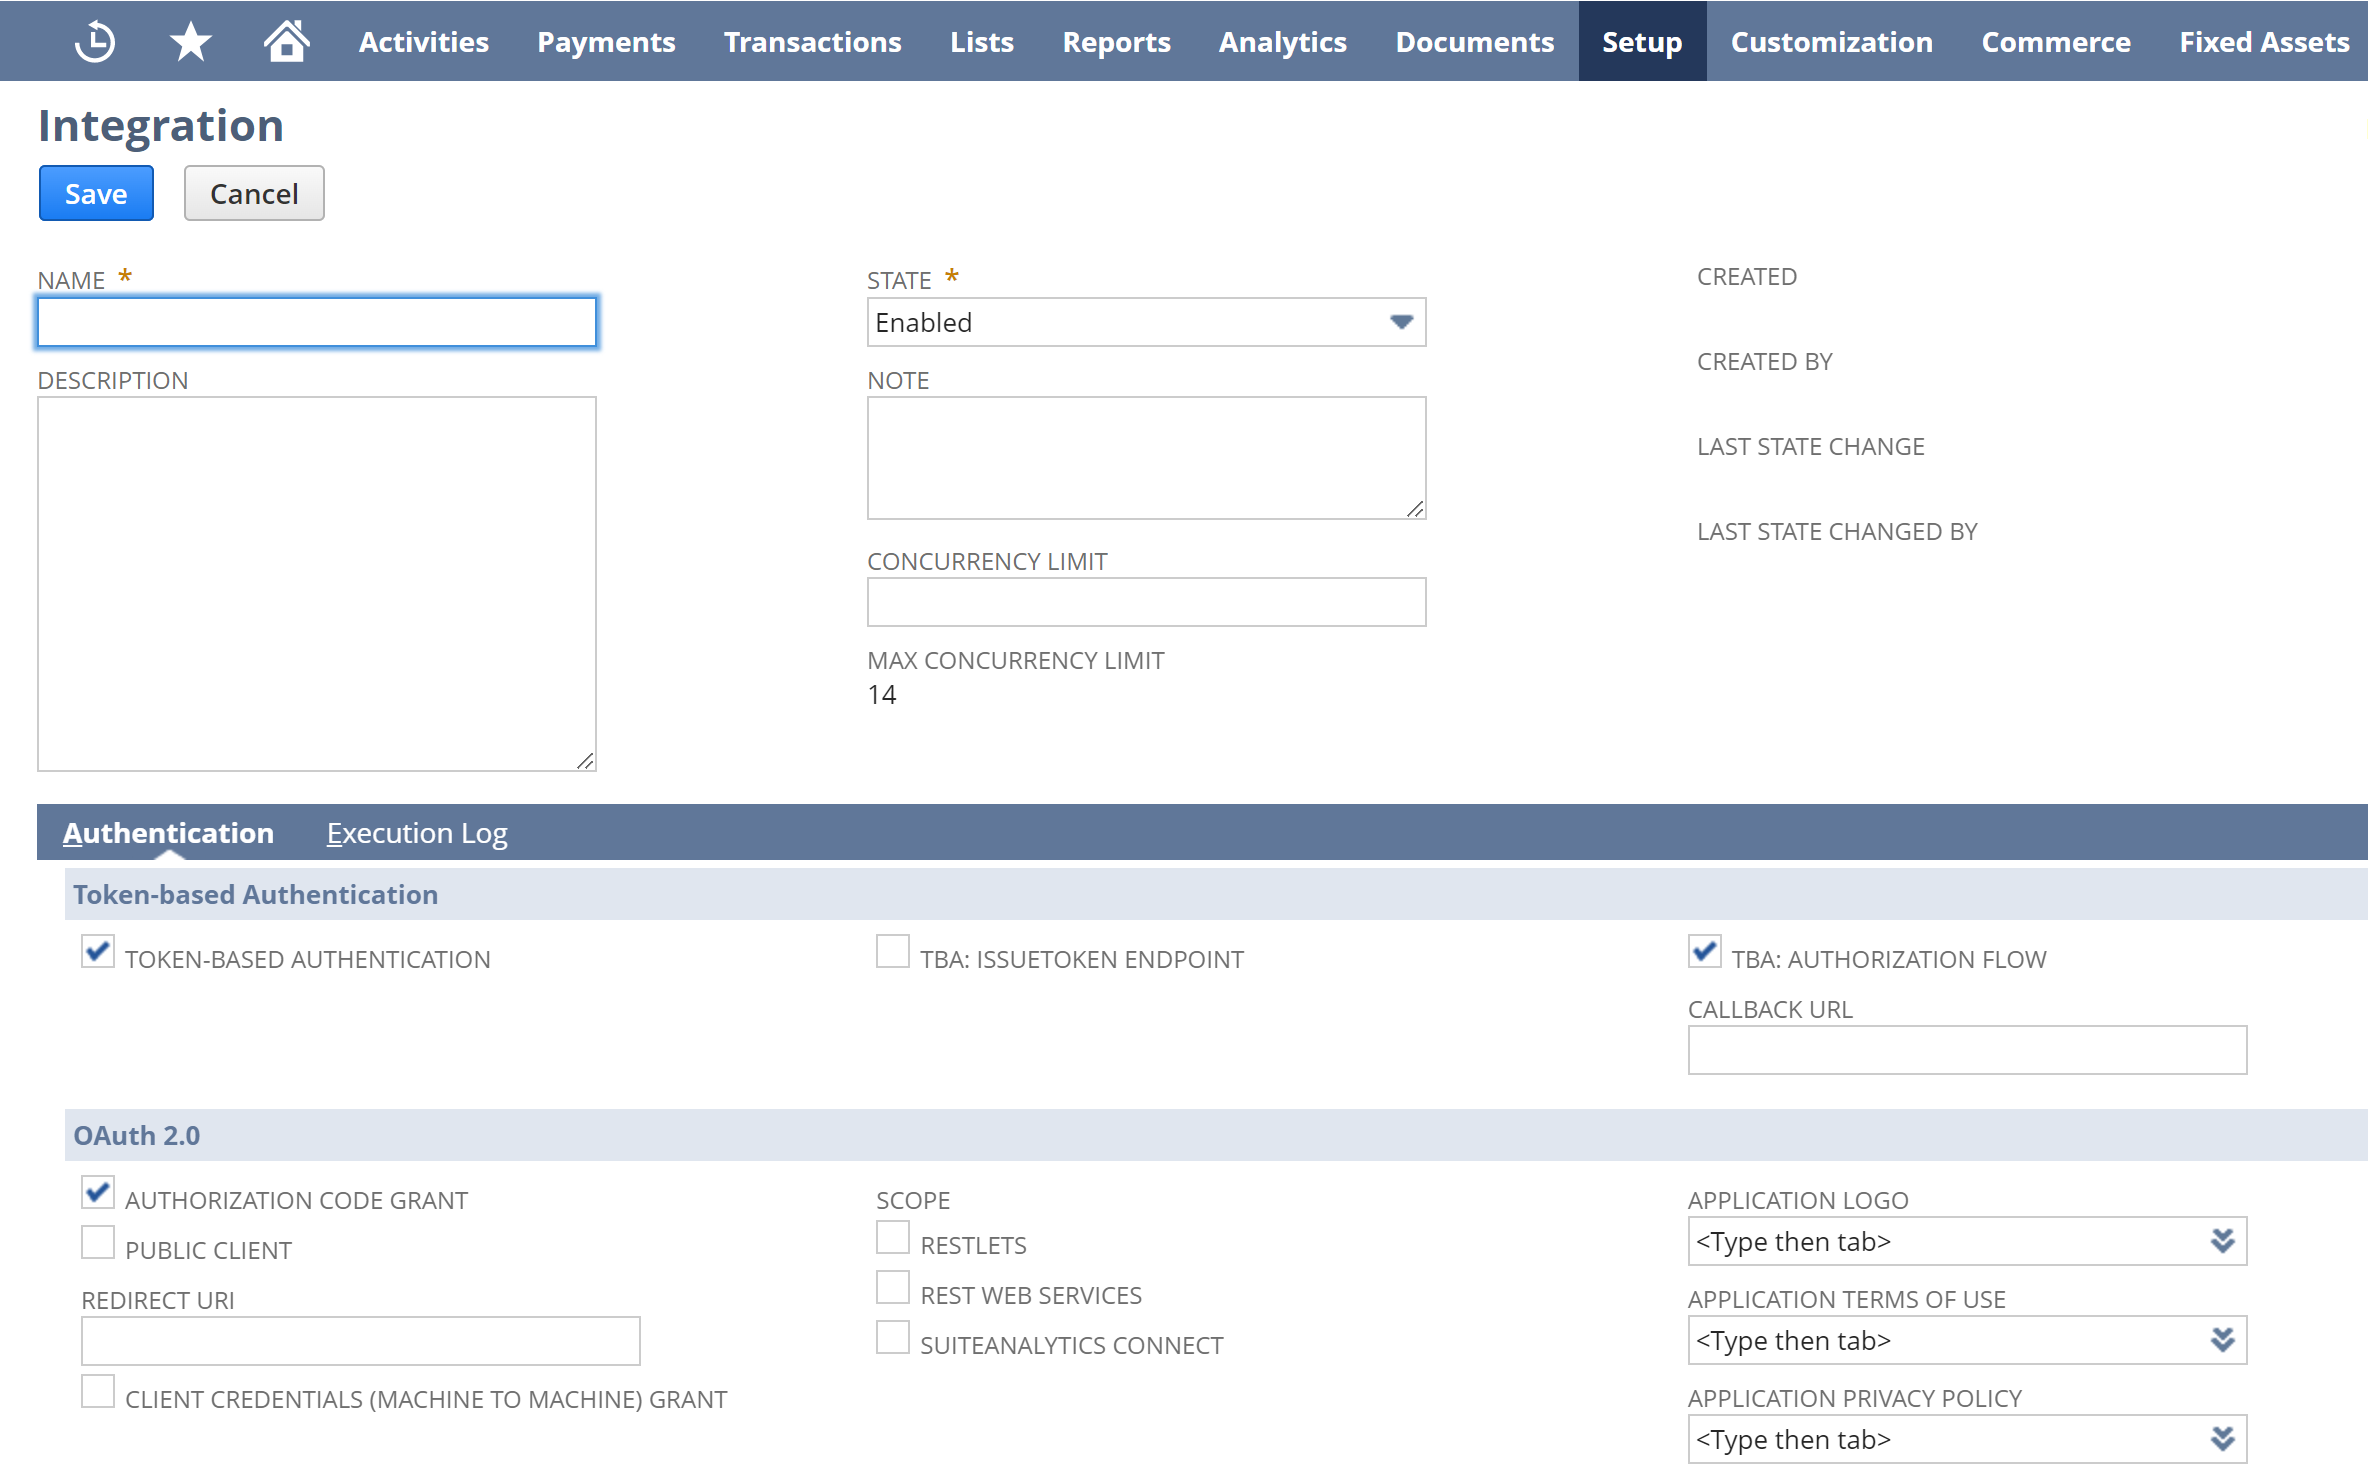
Go to Setup > Integration > Manage Integrations > New.
-
Enter an application Name, for example, Skyvia.
-
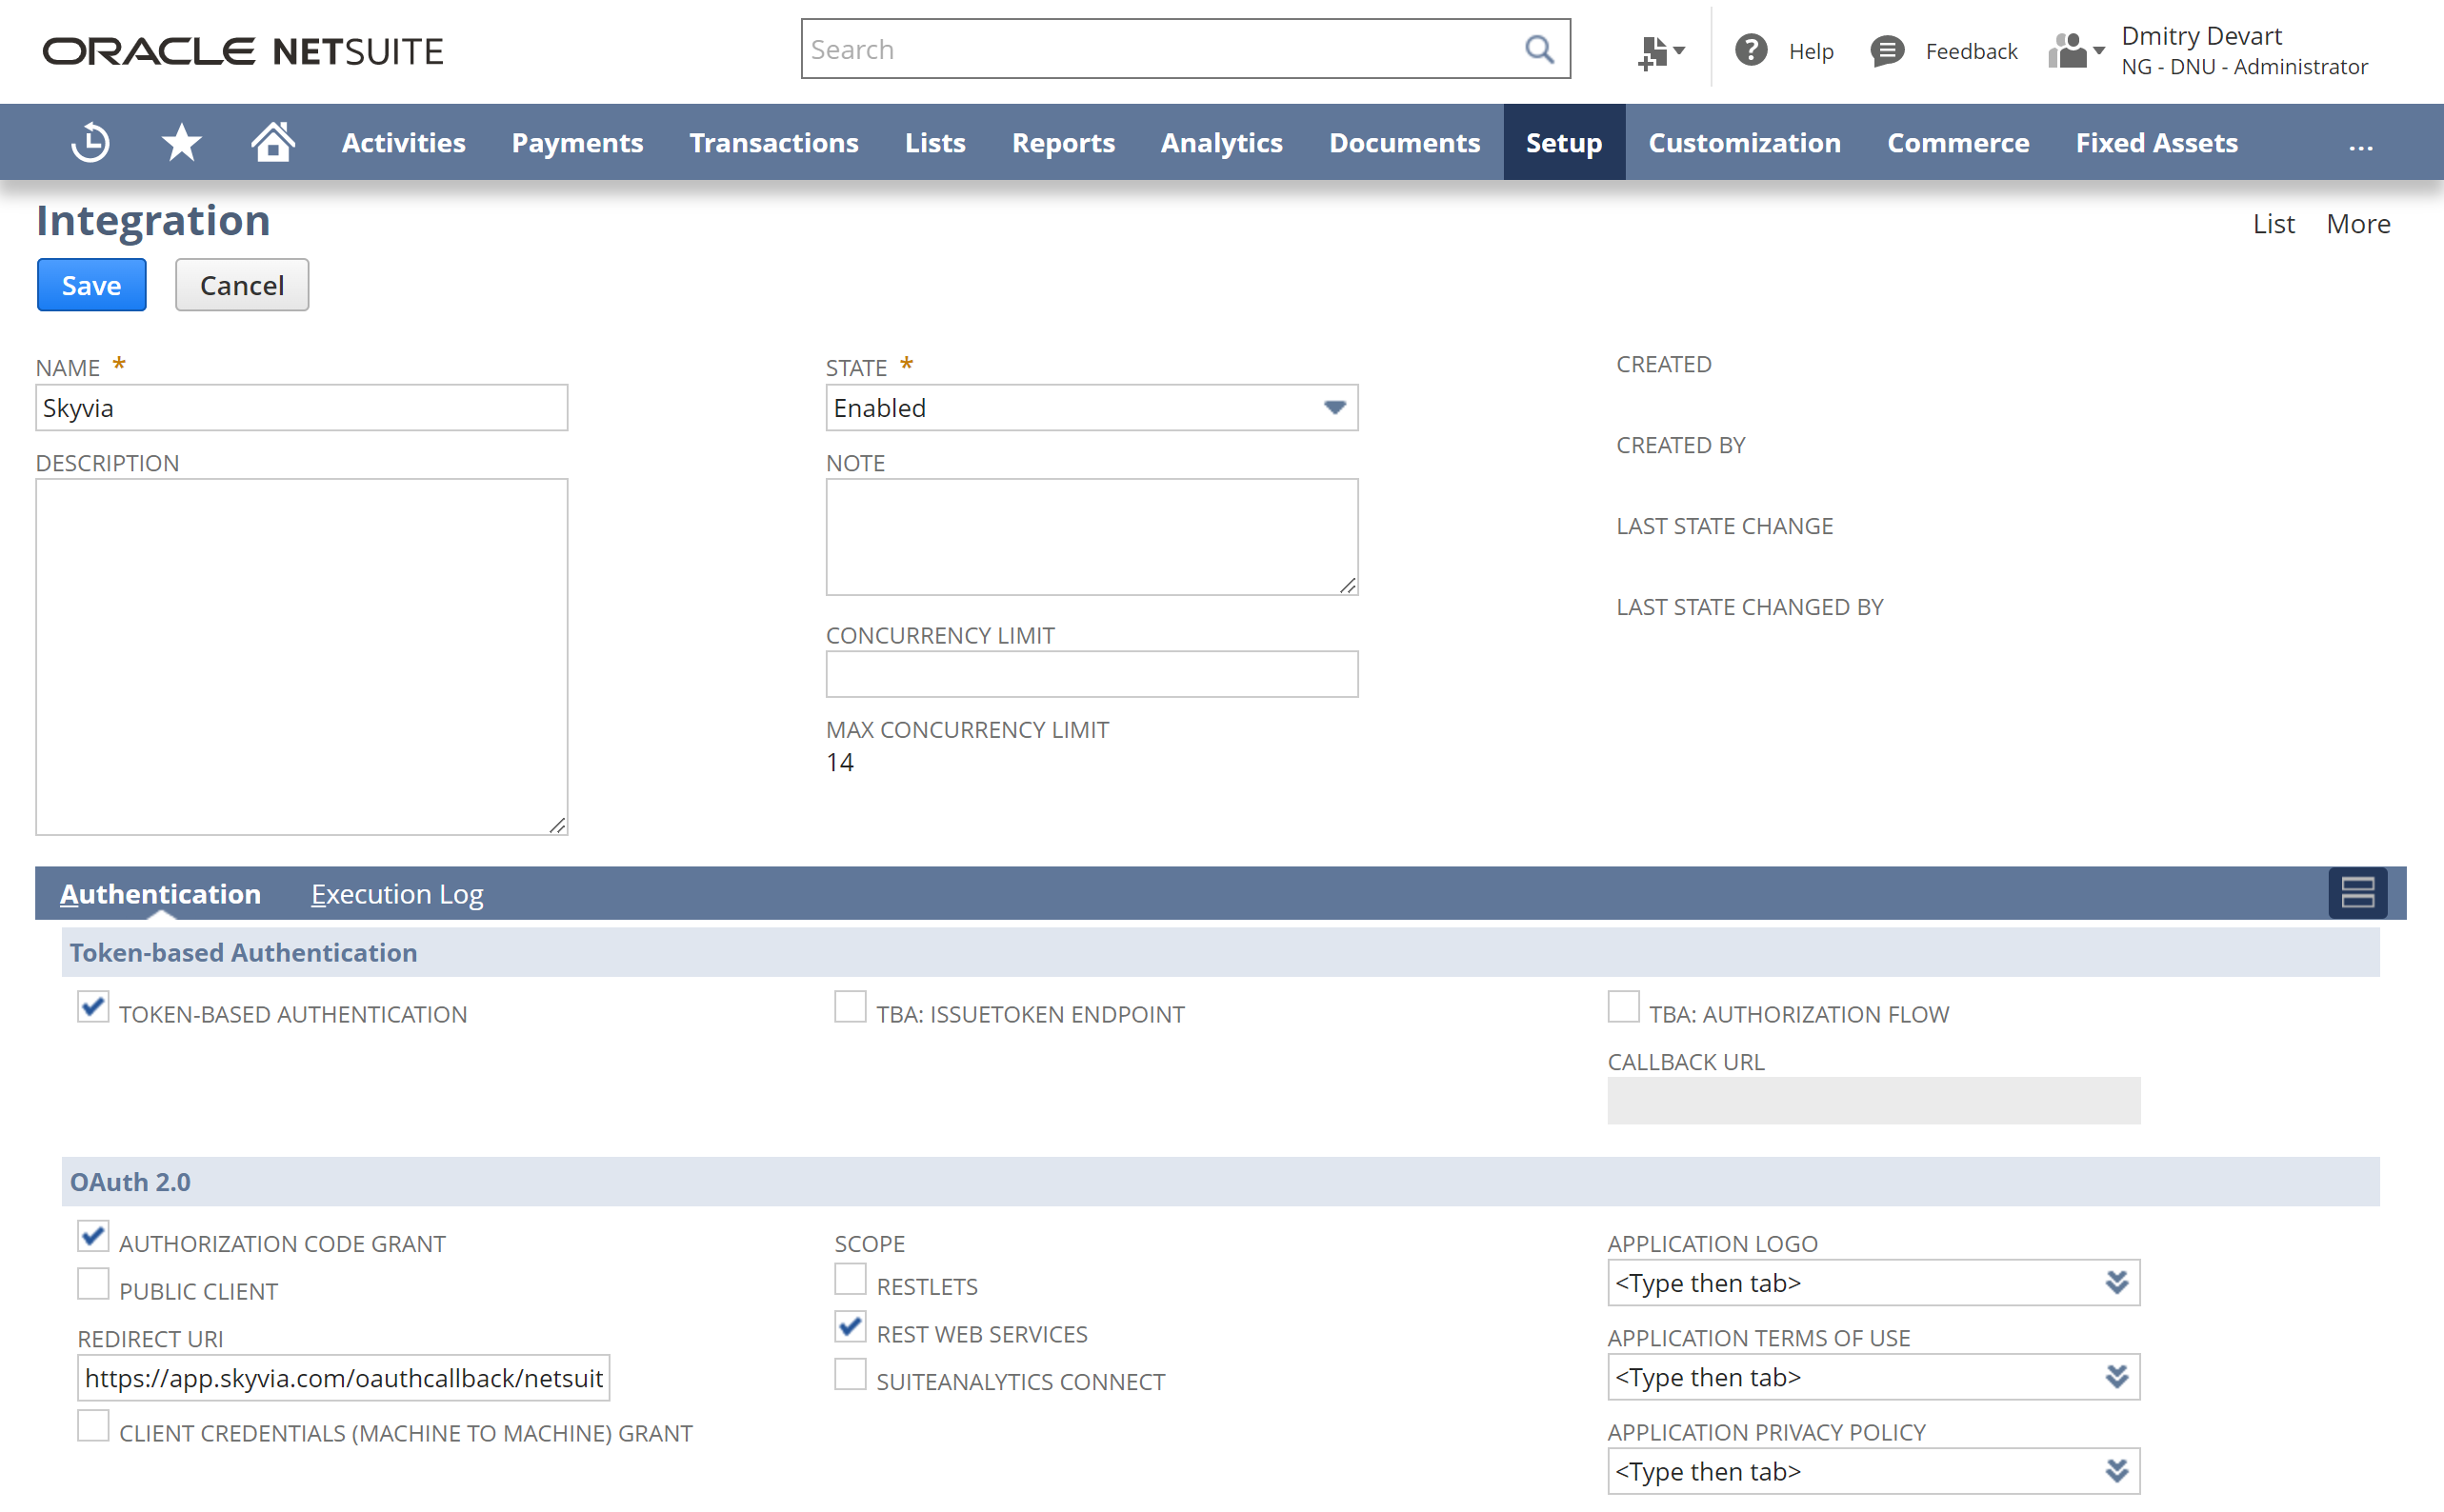
Configure the integration record according to the authentication method:
- For OAuth 2.0, under OAuth 2.0, select Authorization Code Grant and REST Web Services, enter https://app.skyvia.com/oauthcallback/netsuite in Redirect URI, and clear Public Client.
- For Machine-to-Machine, under OAuth 2.0, select Client Credentials (Machine to Machine) Grant and REST Web Services.
- For Token-Based, under Token-based Authentication, select Token Based Authentication and clear TBA: Authorization Flow.
-
Click Save.
-
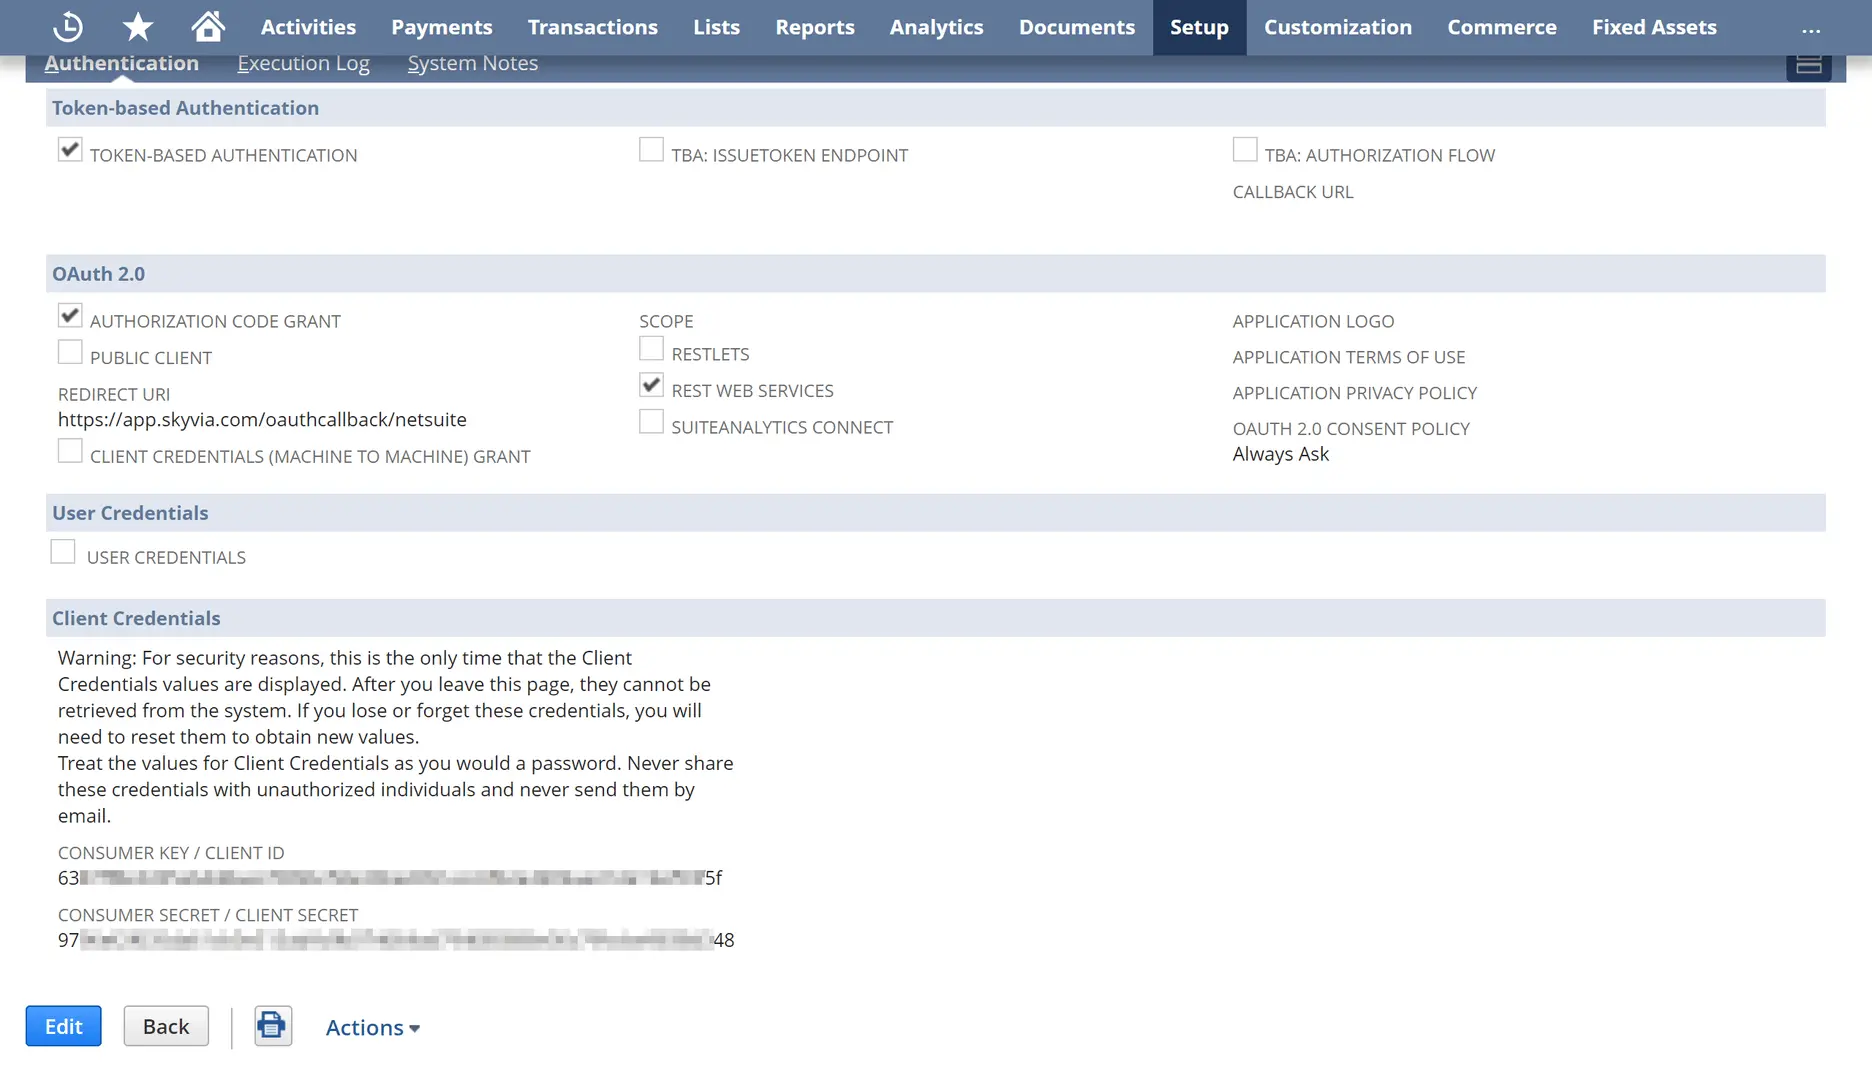
Copy the credentials required for your authentication method:
- For OAuth 2.0 and Token-Based, copy Consumer Key / Client ID and Consumer Secret / Client Secret.
- For Machine-to-Machine, copy Consumer Key / Client ID.
NetSuite displays these credentials only once. Generating new credentials invalidates the previous ones.
Creating a Certificate Mapping
For Machine-to-Machine authentication, generate an X.509 certificate and private key that meet the NetSuite certificate requirements. Map the public certificate to the NetSuite user and role.
You need the Administrator role or the OAuth 2.0 Authorized Applications Management permission to perform the following steps.
-
Go to Setup > Integration > Manage Authentication > OAuth 2.0 Client Credentials (M2M) Setup.
-
Click Create New.
-
Specify the parameters in the Create a New Client Credentials Mapping dialog:
- Entity: the user on whose behalf Skyvia sends requests.
- Role: the role prepared for the connection.
- Application: the Machine-to-Machine integration record.
- Certificate: the public part of the certificate. Click Choose a file to upload it.
-
Click Save.
-
Copy the Certificate ID value that appears for the saved mapping. The connection requires this value, not the certificate file name or serial number.

NetSuite limits certificate validity to two years and allows up to five active certificates per integration record.
Creating an Access Token
For Token-Based authentication, create an access token and obtain its ID and secret:
-
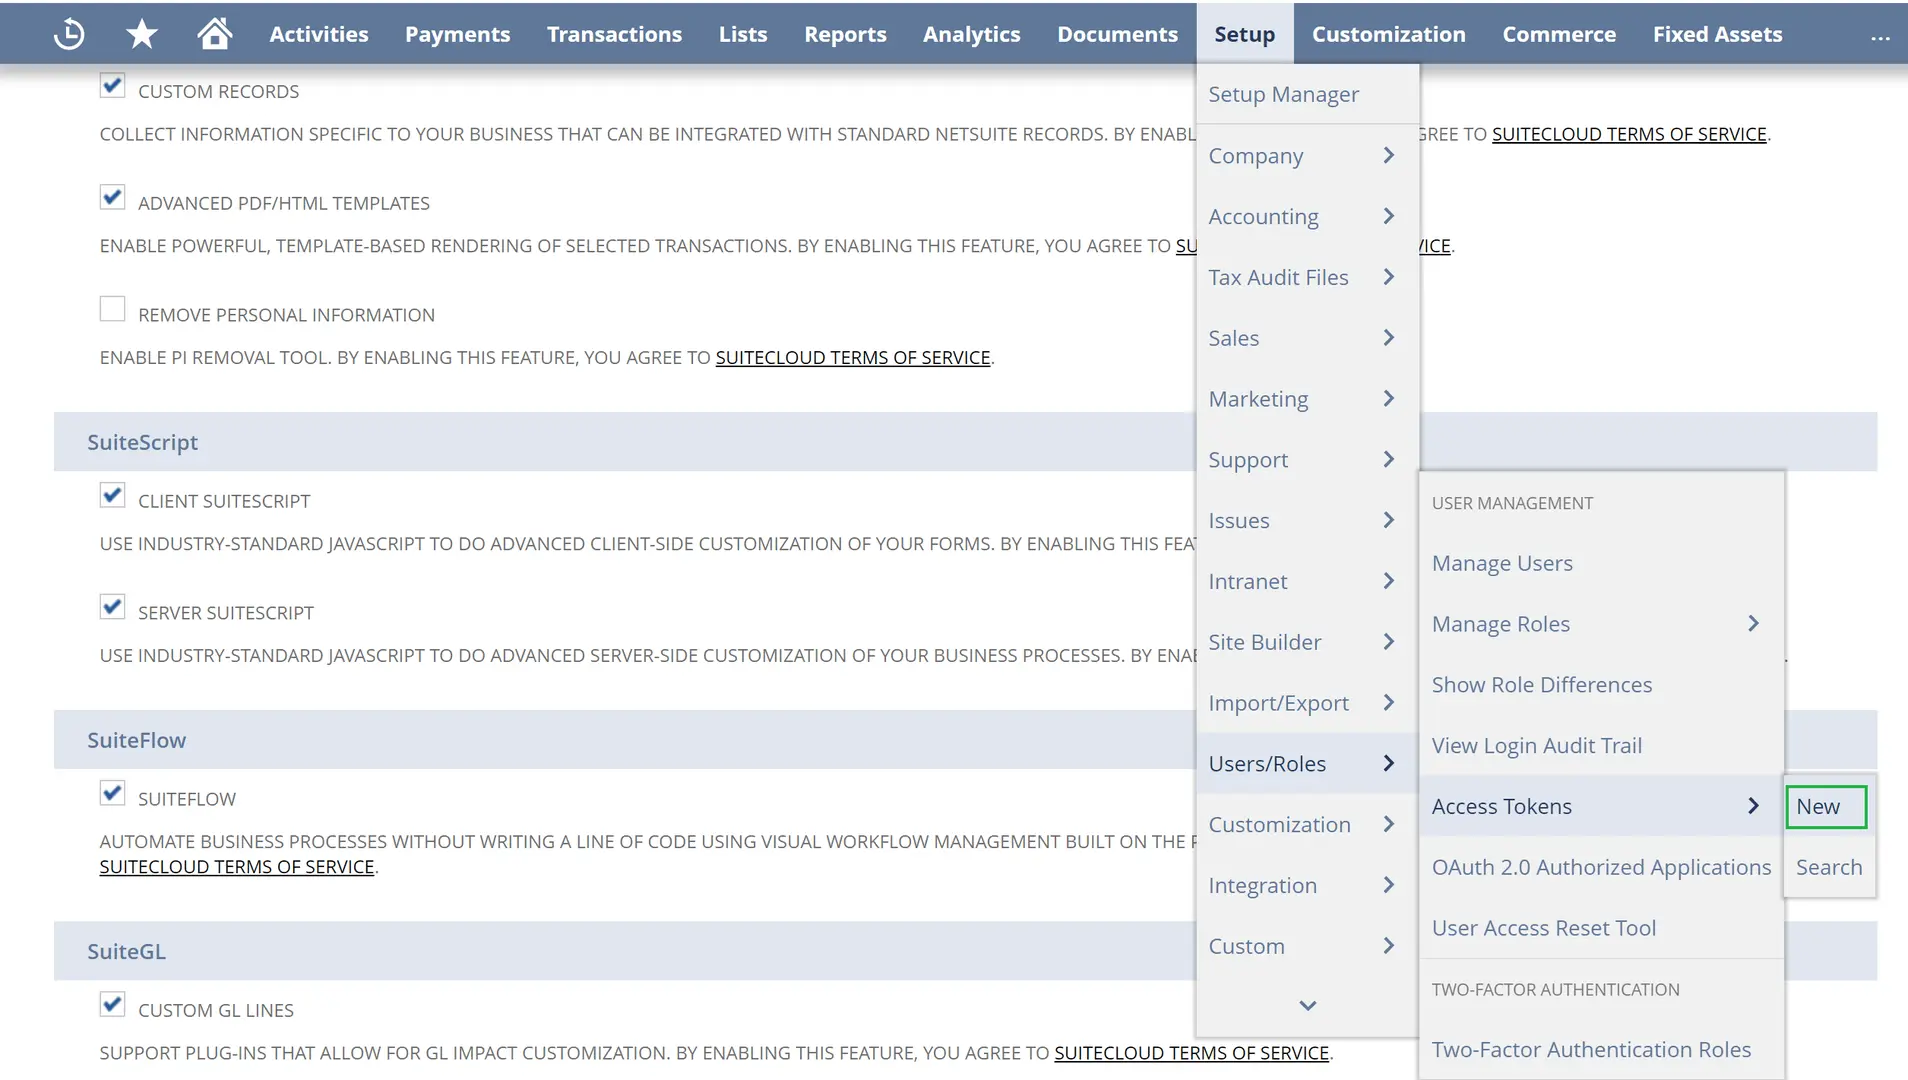
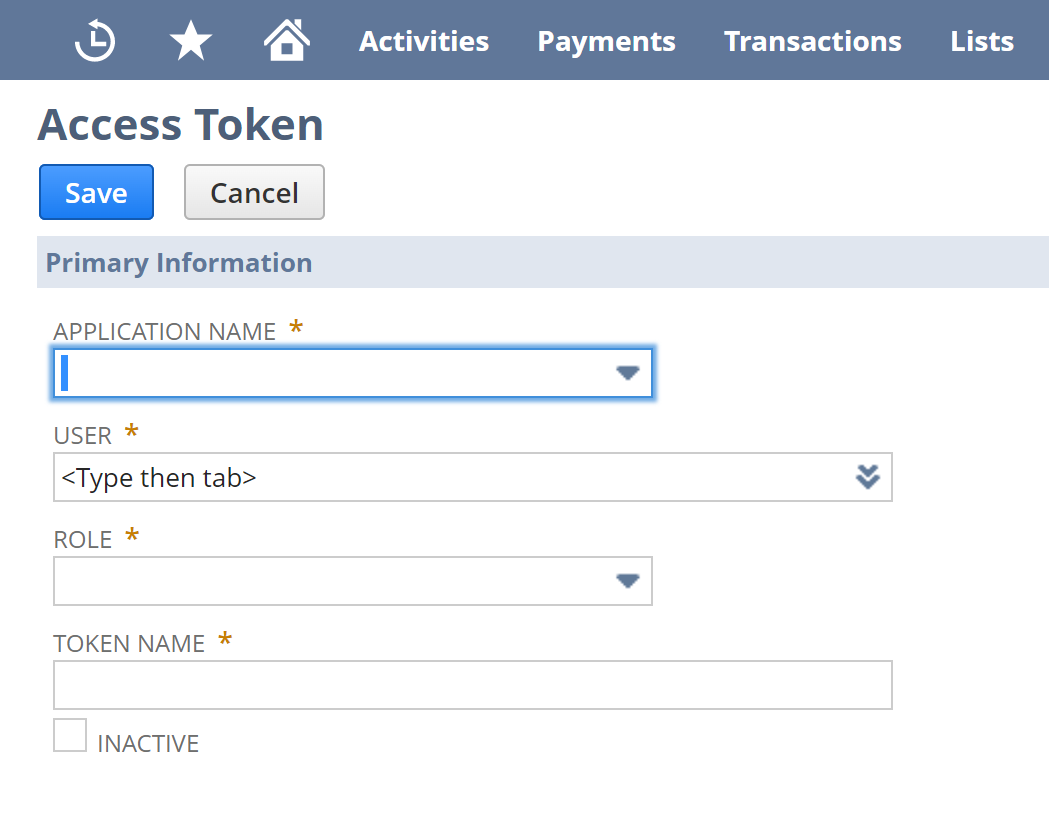
Go to Setup > Users/Roles > Access Tokens > New.
-
Click the integration record, user, and role prepared for the connection in the corresponding lists.
-
Click Save.
-
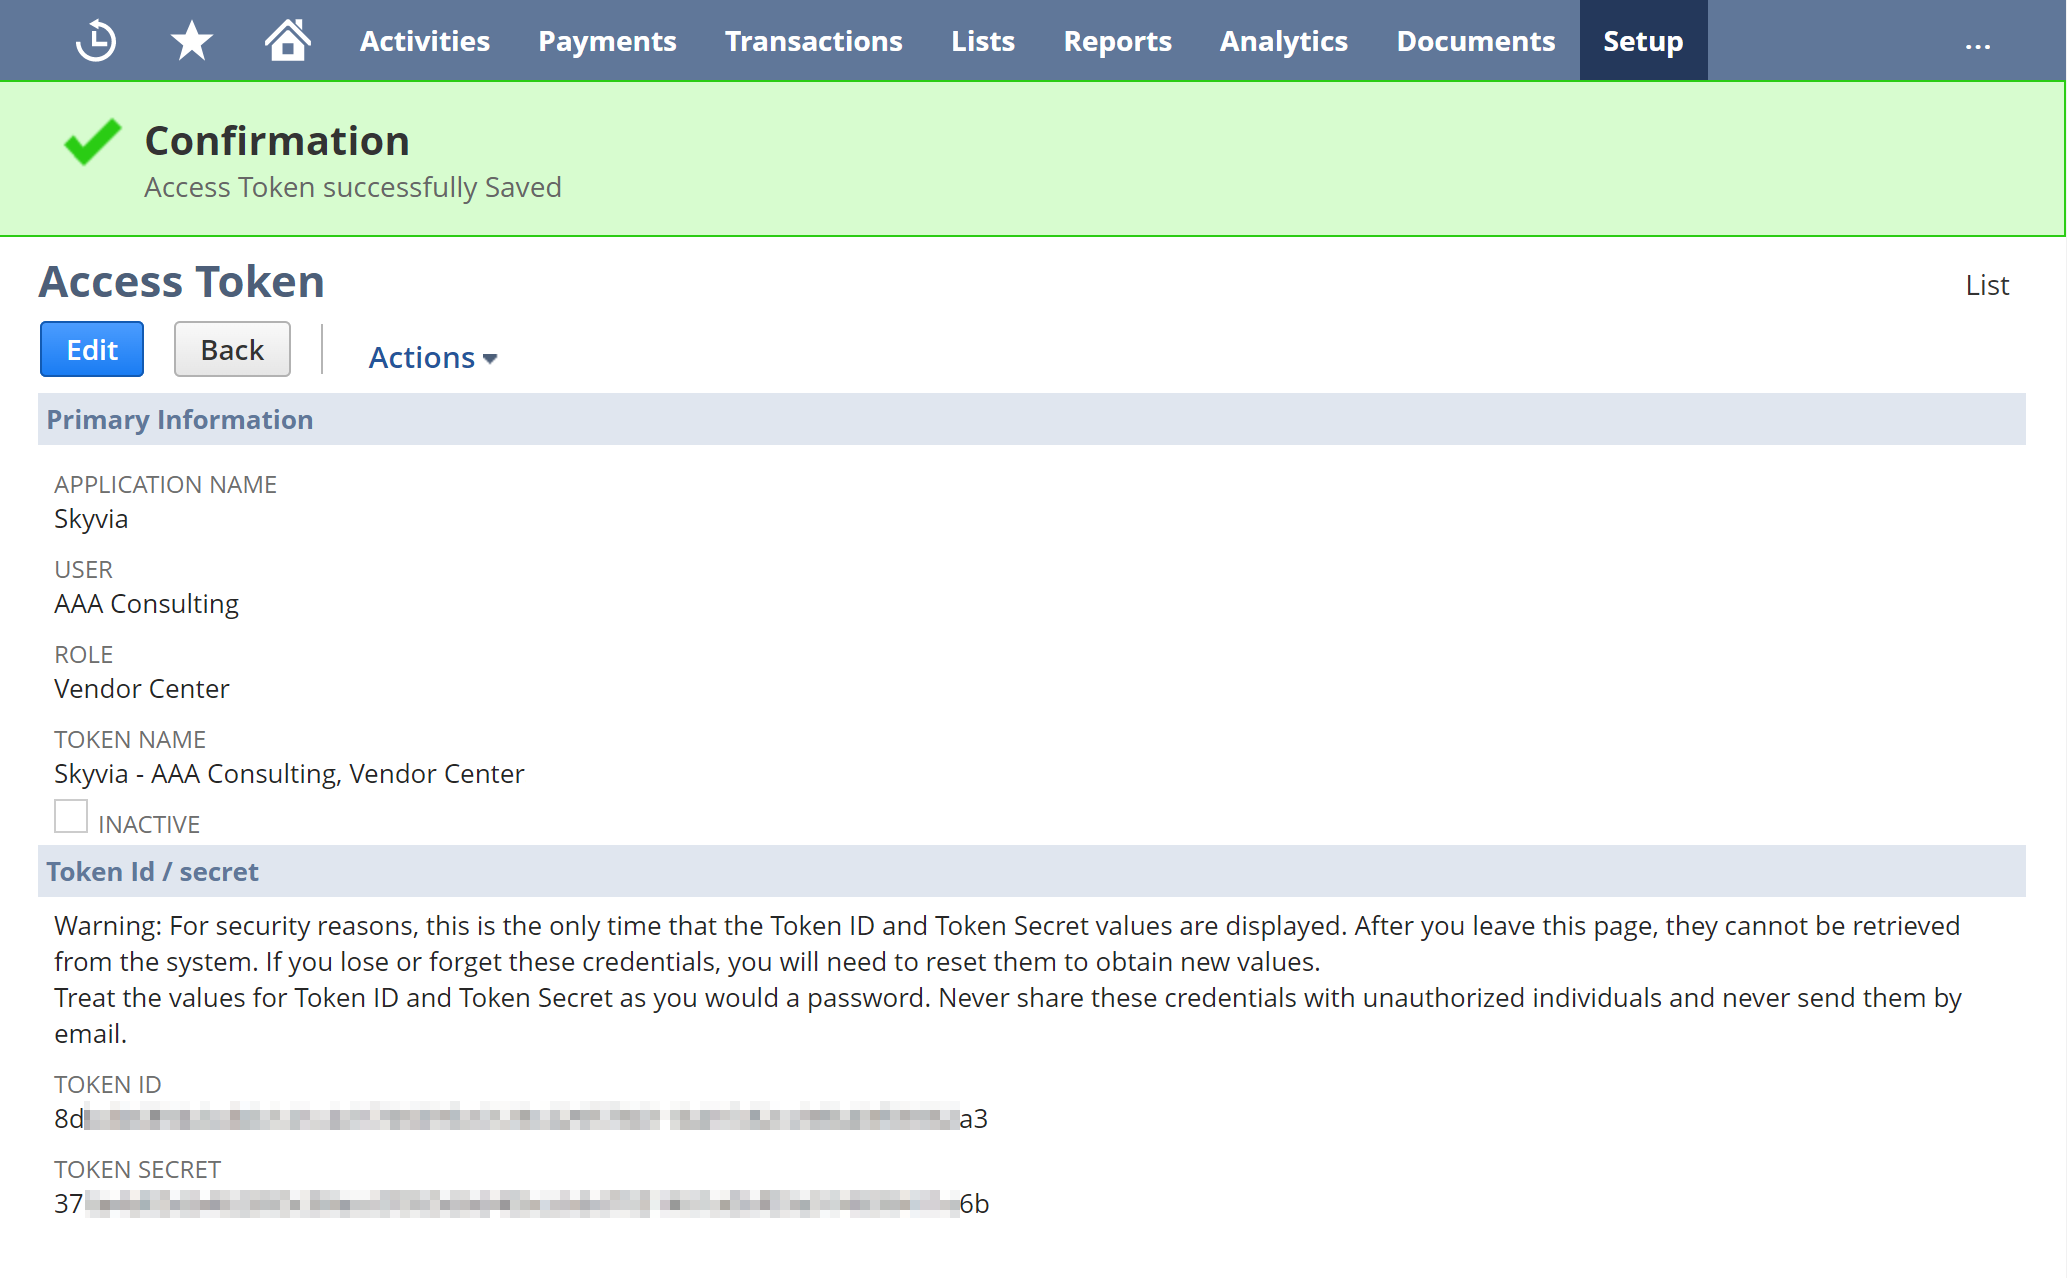
Copy the Token ID and Token Secret from the confirmation page. NetSuite displays these values only once. If you lose them, create a new token.
Creating Connection
Enter the connection parameters required for the selected authentication method.
OAuth 2.0 Authentication
-
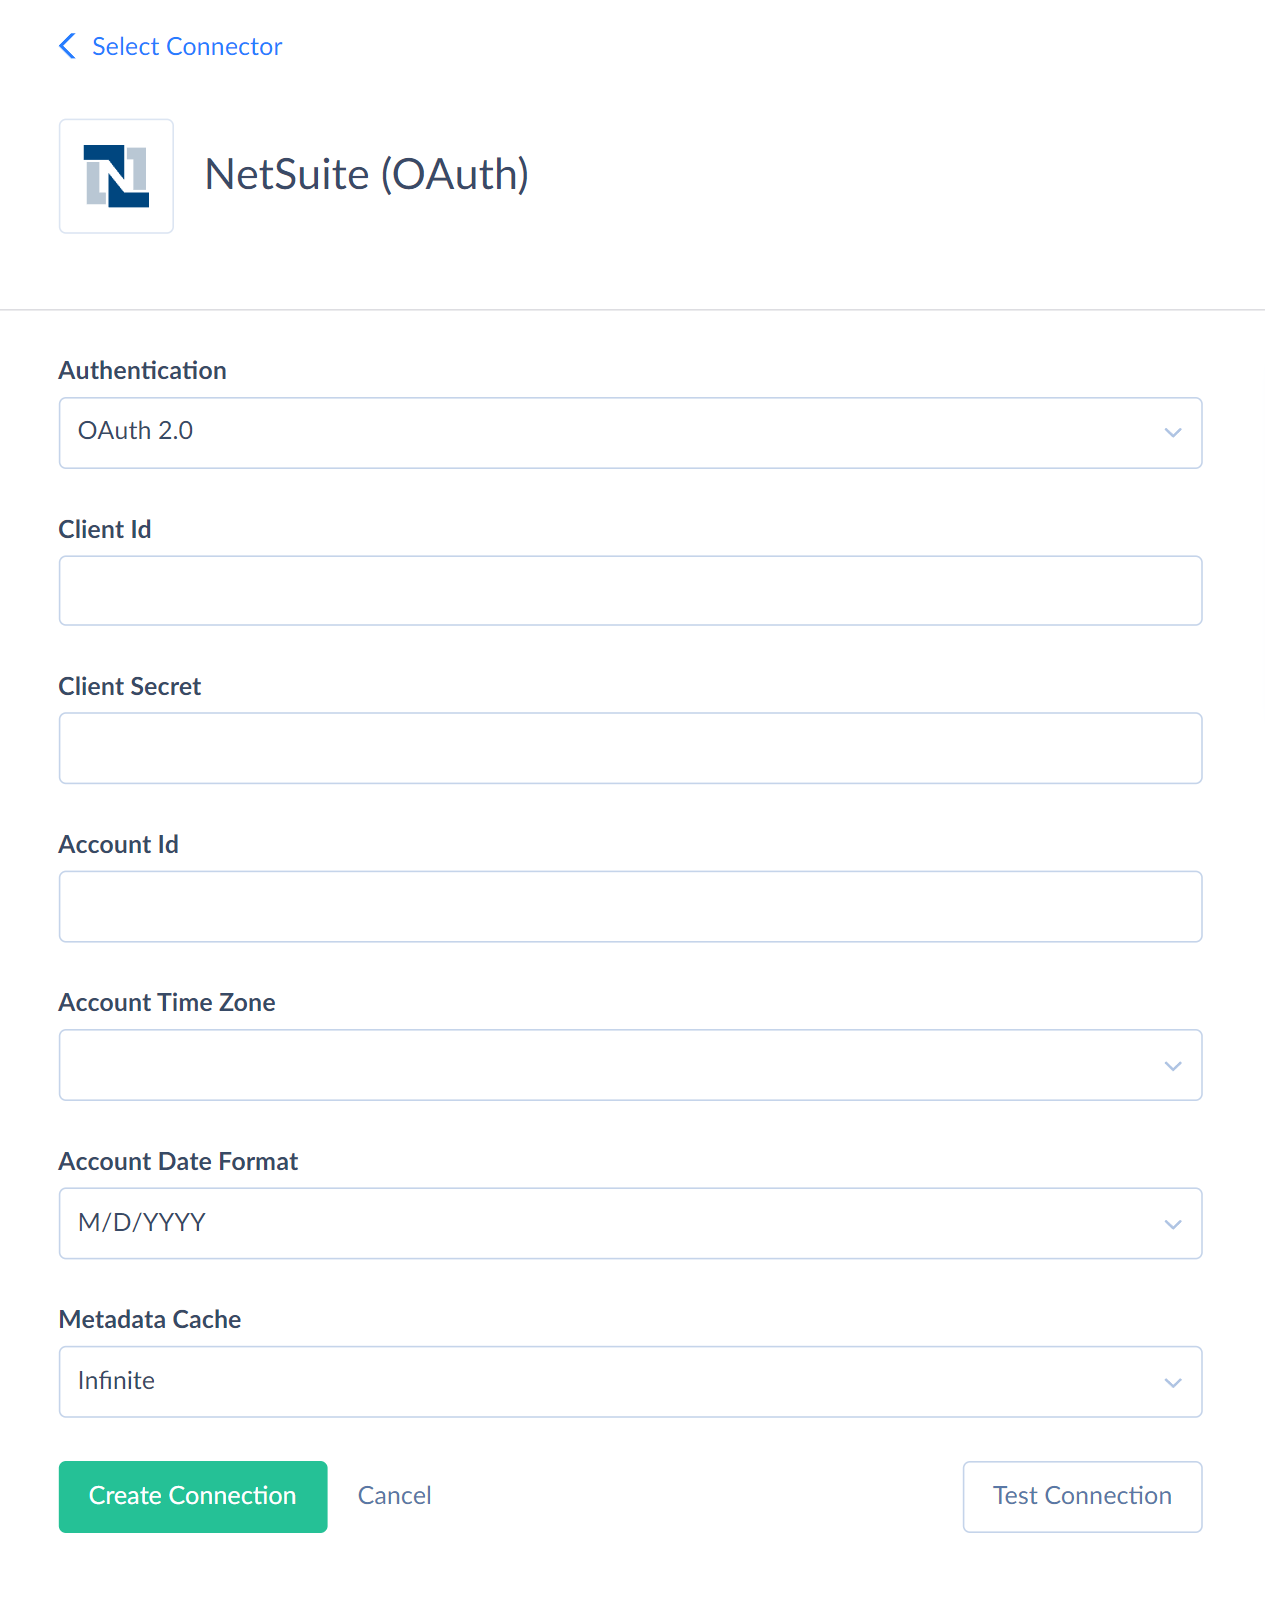
Specify the NetSuite Account ID.
-
Select OAuth 2.0 in the Authentication list.
-
Paste the Consumer Key / Client ID in the Client Id box.
-
Paste the Consumer Secret / Client Secret in the Client Secret box.
-
Click Sign In with NetSuite.
-
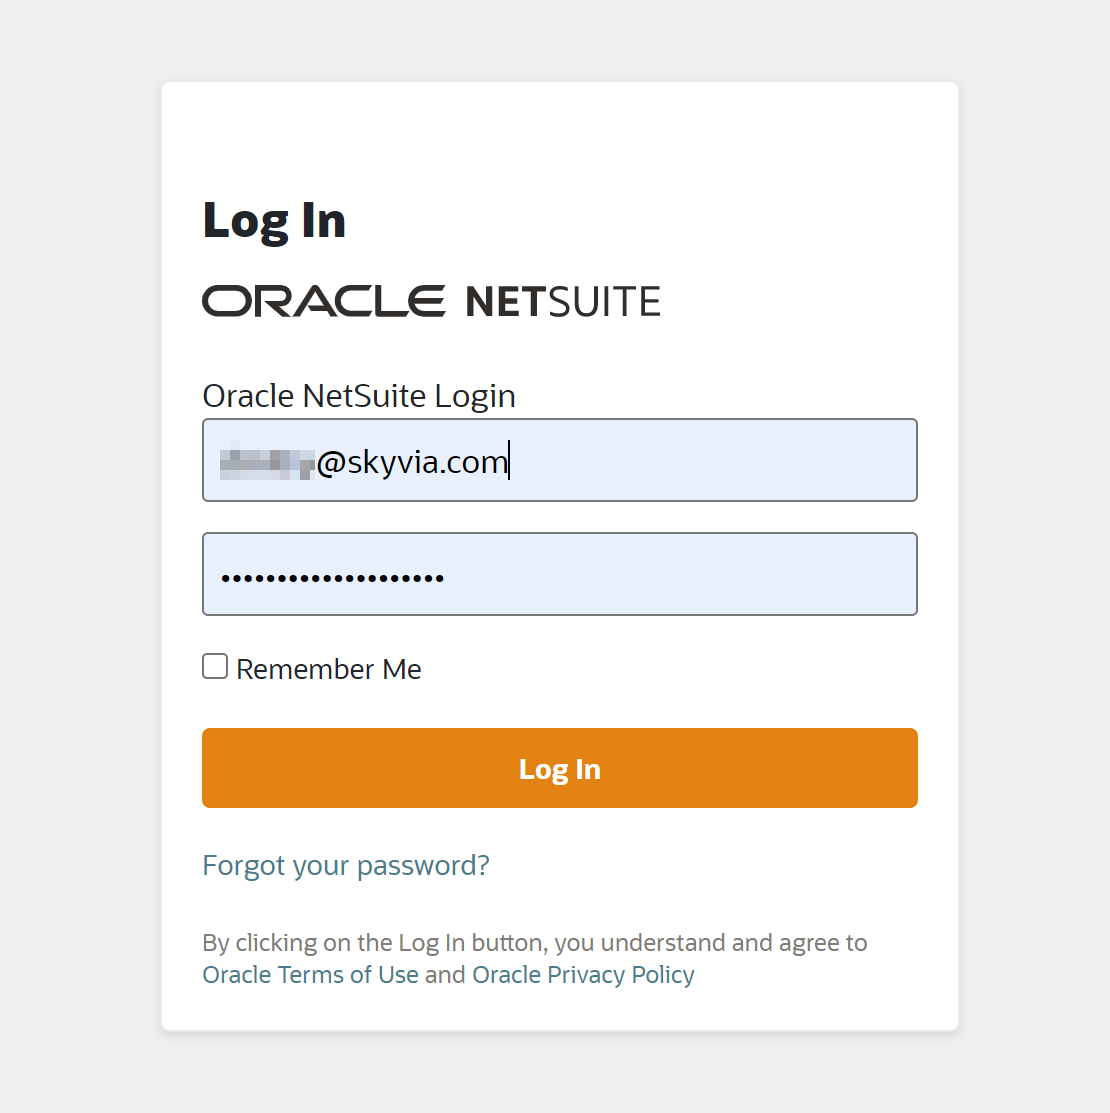
Enter your NetSuite credentials and click Log In.
-
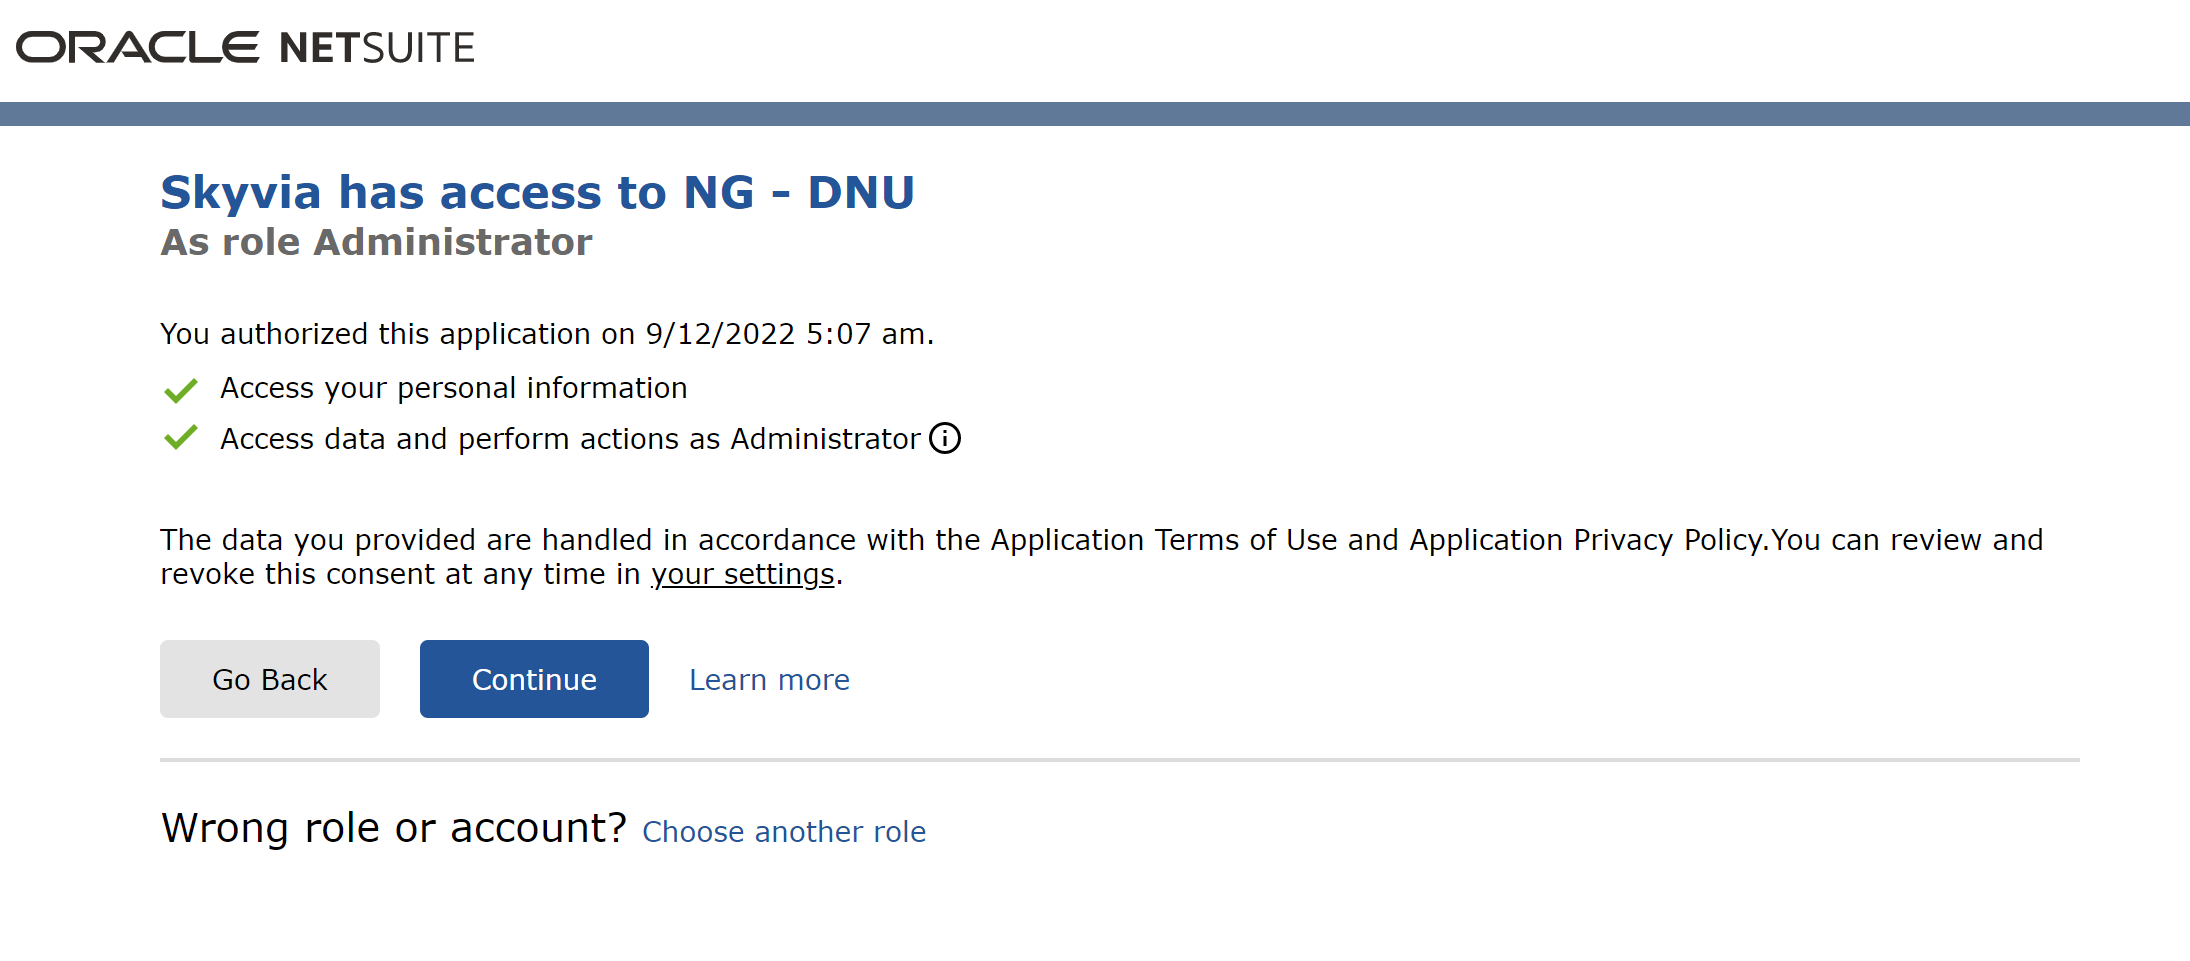
Click Continue to grant Skyvia access to NetSuite.
-
Specify the Account Date Format and Account Time Zone.
Machine-to-Machine Authentication

- Specify the NetSuite Account ID.
- Select Machine to Machine in the Authentication list.
- Paste the Consumer Key / Client ID in the Client Id box.
- Paste the Certificate ID in the Certificate Id box.
- Click the three dots in the Private Key box. In the editor, paste the private key, including the
BEGINandENDlines. - Specify Private Key Passphrase if necessary.
- Specify the Account Date Format and Account Time Zone.
Token-Based Authentication
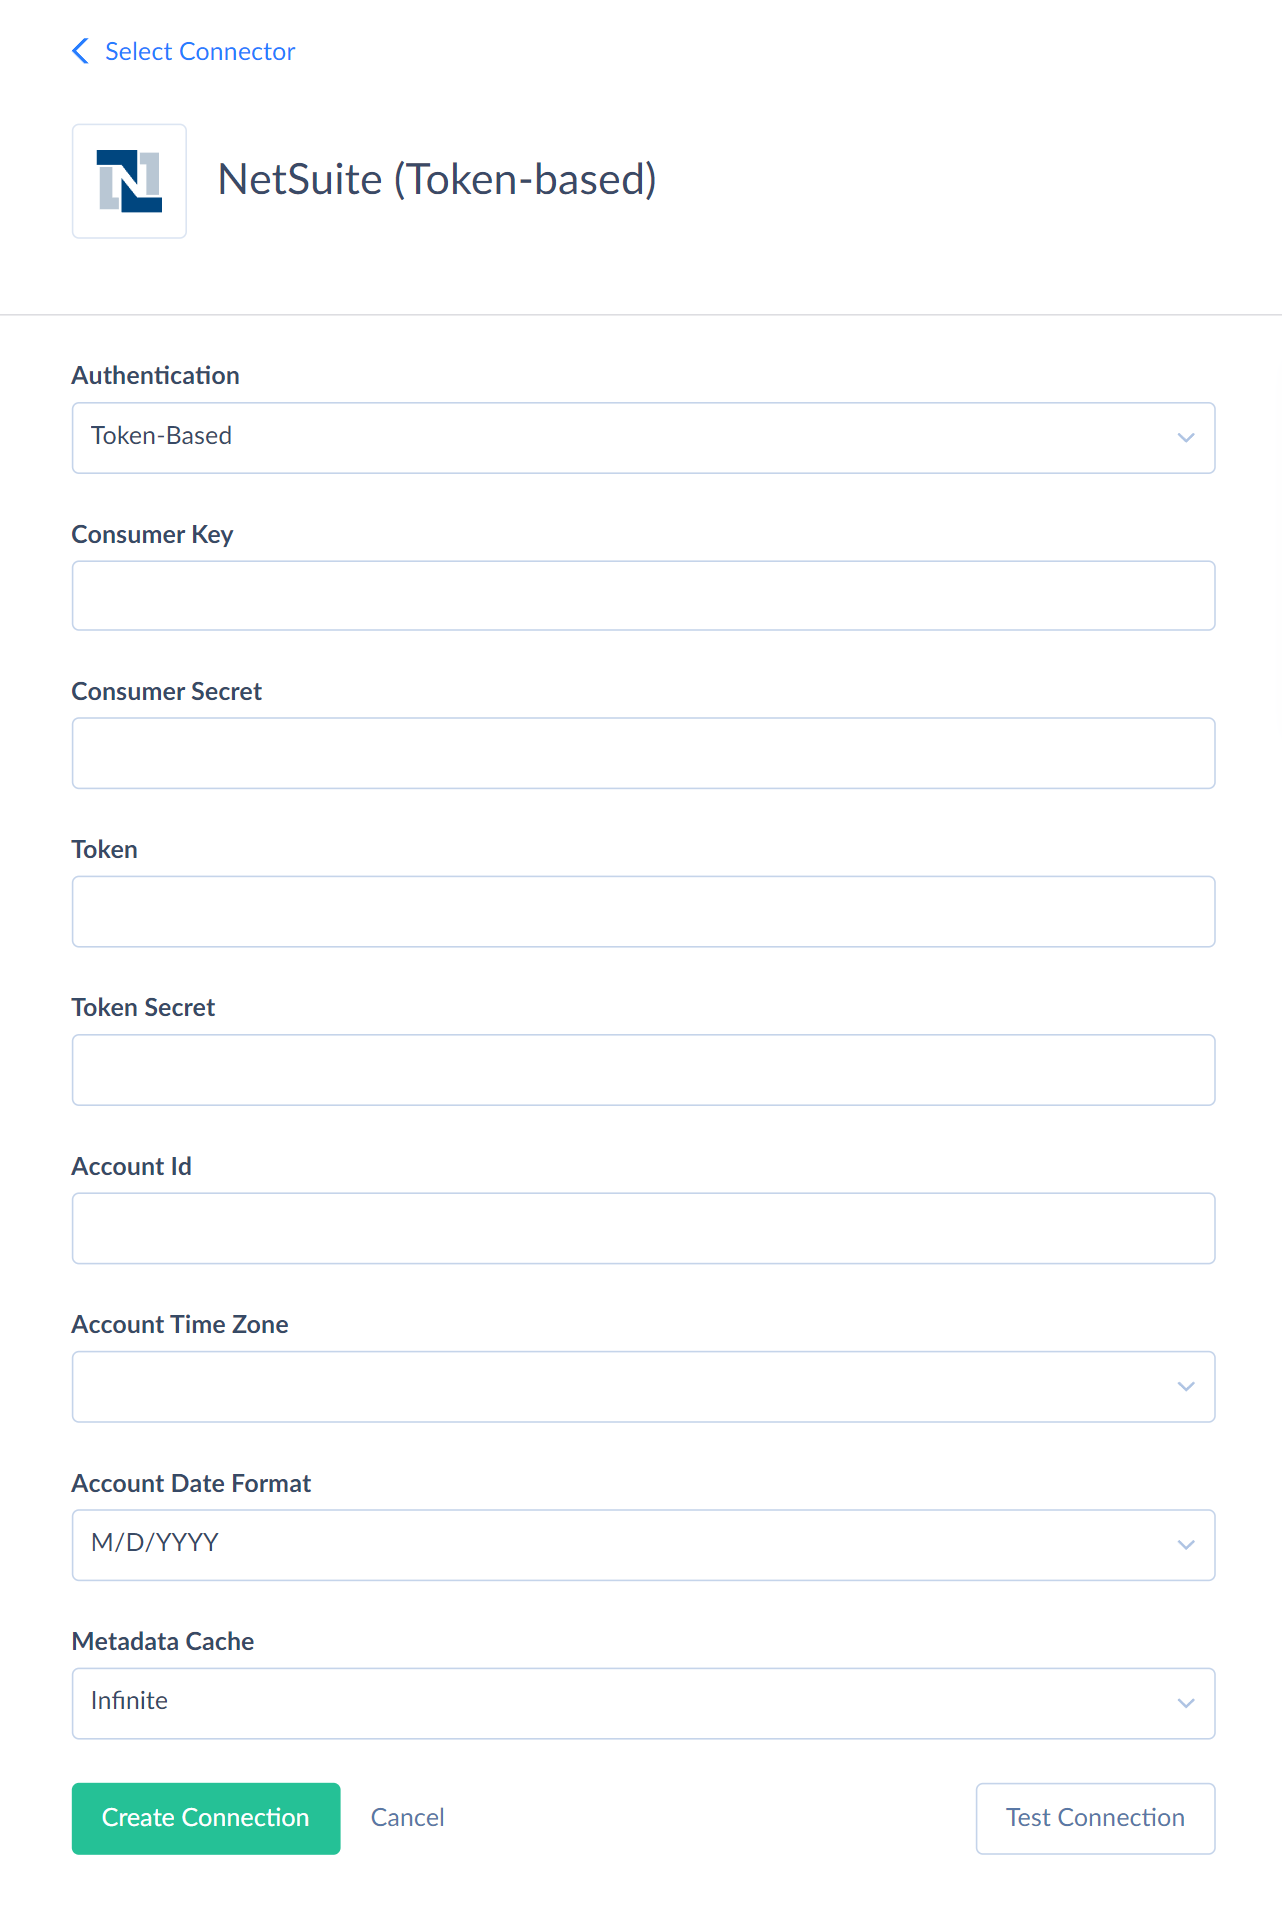
- Select Token-Based in the Authentication list.
- Paste the Consumer Key / Client ID in the Consumer Key box.
- Paste the Consumer Secret / Client Secret in the Consumer Secret box.
- Paste the Token ID in the Token box.
- Paste the Token Secret in the Token Secret box.
- Specify the NetSuite Account ID.
- Specify the Account Date Format and Account Time Zone.
Additional Connection Parameters
Metadata Cache
You can specify the period of time, after which Metadata cache is considered expired. The first metadata read can take a while. Disabling the cache or setting a short lifetime can slow down querying metadata from NetSuite.
Company Language
If the Multiple Languages feature is enabled and the connection user's language differs from the company language, select it in the Company Language list. Skyvia uses the connection user's language by default.
Analytics Custom Field Definitions
Use this parameter to define custom fields configuration for Transactions, TransactionLines, RevenueElements, SystemNotes, and SystemNotesV2 objects. For more details, see Custom Fields Definitions Config section.
After adding or changing this parameter, reset the Metadata Cache.
Connector Specifics
Custom Fields Definitions Config
To define custom fields, you need the following values:
-
TableName: The name of the object where the custom fields are located. For example, TransactionLines.
-
Name: A user-friendly name for the custom field.
-
DbType: The data type of the custom field. Supported data types: Boolean, Double, Decimal, Date, DateTime, Int32, Int64, String.
-
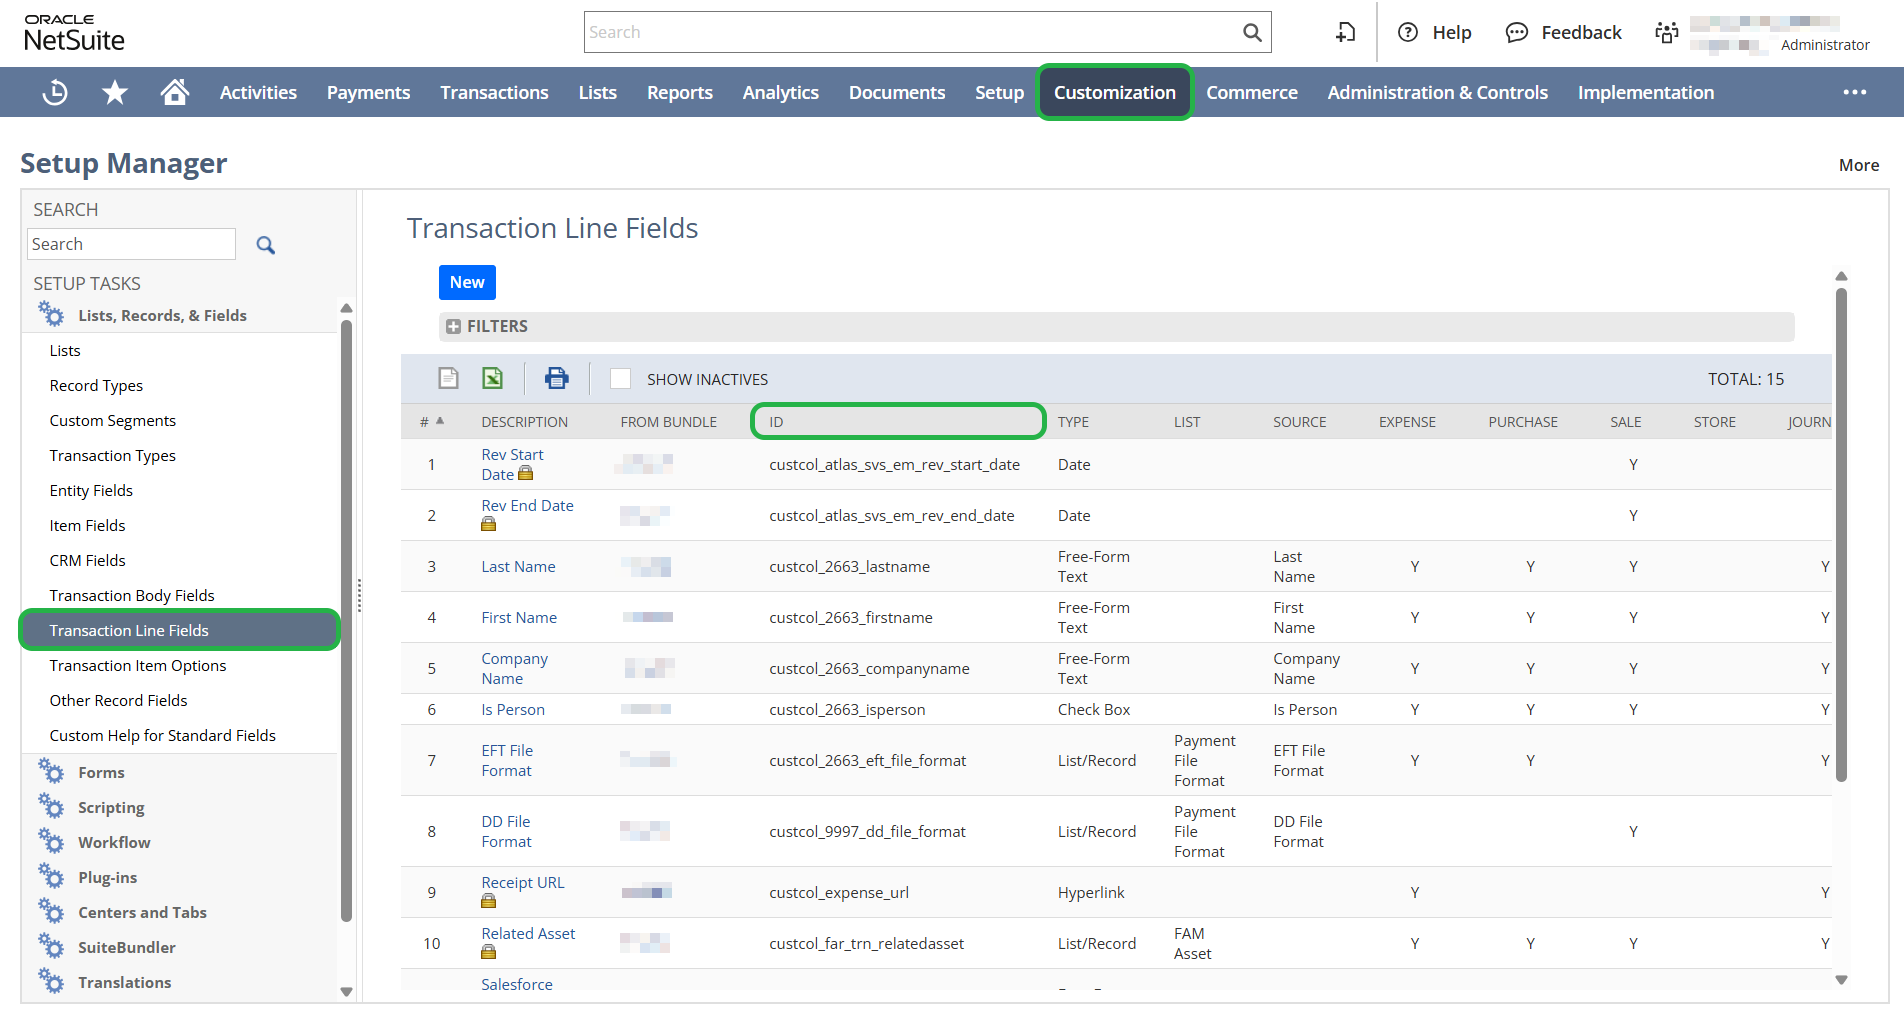
APIName: The ID of your custom field. For example, to find field ID for TransactionLines, see the screenshot below:
Custom Fields Definition Example
We created the Rev Rec Start and Rev Rec End custom fields in NetSuite.
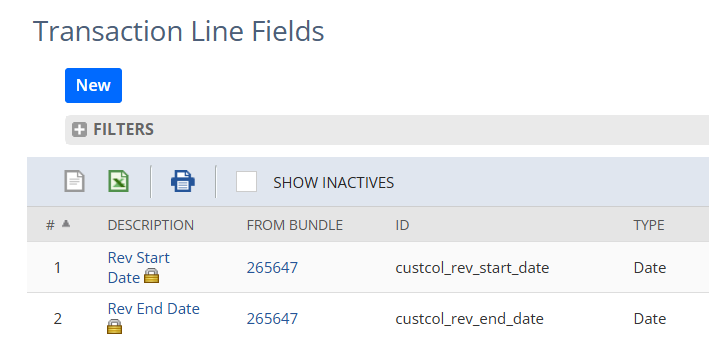
To let Skyvia parse them, we use this config:
[
  {
    "TableName": "TransactionLines",
    "CustomFields": [
      {
        "Name": "Rev Start Date",
        "APIName": "custcol_rev_start_date",
        "DbType": "Date"
      },
      {
        "Name": "Rev End Date",
        "APIName": "custcol_rev_end_date",
        "DbType": "Date"
      }
    ]
  }
]
You can use this example to write your own config. Replace example values with your own.
Nested Array Fields
Many NetSuite objects have fields, storing array data. Such fields fully support Nested object mapping in Import. You can see our tutorials on QuickBooks and Salesforce, demonstrating how to use nested object mapping:
- How to Import Data from Salesforce Opportunities to QuickBooks Invoices
- How to Import QuickBooks Invoices to Salesforce Opportunities
- Easy Importing Invoices and Customers Between QuickBooks Online Accounts
- How to Import Products with Variants from the relational Database into Shopify
When selecting data from these fields, they return their contents as JSON arrays.
Not Supported Objects
Skyvia does not support the following NetSuite objects: billingaccount, priceplan, subscriptionchangeorder, subscription, subscriptionline, usage.
Supported Actions
Skyvia supports all the common actions for NetSuite.